Walkthrough for Baldur's Gate 3 (BG 3) features a comprehensive guide that focuses on helping players get past all the locations and areas, as well as guides on enemies, bosses, NPCs, and items that are encountered in the game. This page will mainly focus on providing a detailed walkthrough for the main campaign or story of Baldur's Gate 3. For guides on quests, click Here, if you want to check an overview for a recommended progress path, you may visit our Game Progress Route page.
NOTE: The Walkthrough page for Baldur's Gate 3 (BG3) will mainly focus on the Main Questline and some other important quests that take place in a recommended order of locations. For a full guide on the different events, dialogues, and encounters you can find in a location, please visit the Locations page or the Quests page to find a specific quest walkthrough.
Is BG3 a sequel to Baldur's Gate 1 and 2?
Yes. The story takes place 100 years after the events in Baldur’s Gate 2 and shortly after the events of Descent into Avernus (a 5e Tabletop campaign.)
How is the BG3 storyline linked to D&D?
Baldur's Gate 3 takes place right after the events of Descent into Avernus. The holy city of Elturel disappeared from the Forgotten Realms and descended into Avernus, the first layer of the Nine Hells. In our canon, it was saved by a party of heroes. The game is based on the 5th edition ruleset of D&D and was created closely together with Wizards of the Coast.
Understanding the Opening Cinematic
When you first begin Baldur's Gate 3, you will be treated to an intense cinematic depicting a Mindflayer and its ship, and their assault on the city. You will then see a group of Dragon Riders teleport into this space to attack the ship, which triggers a chase scene across realms. Those new to D&D lore will be confused by the events, so this is an "executive summary" of the key points you must understand:
1) Mindflayers "reproduce" by infecting other races with "tadpoles" - after a certain time, the creature will take control of the host and convert it into a Mindflayer. They are also known for their great psionic power that allows them to control and enslave other creatures - whose brains they consume.
2) The "Dragon Riders" that appear are the Githyanki, a tribe within a race that used to be enslaved by the Mindflayers. After successfully emancipating themselves from the Mindflayer mind control, they set up in the "Astral Plane" and created a pact with deity Tiamat that a small group of Red Dragons would be their mounts. The Githyanki despise and wish to annihilate all Mind Flayers.
Baldur's Gate 3 Main Quests
BG3 Prologue Main Quests
BG3 Act 1 Main Quests
BG3 Act 2 Main Quests
Baldur's Gate 3 Walkthrough
Baldur's Gate 3 Act 1 Walkthrough Quick Navigation
Click to jump to a specific section of the page
BG3 Act 1
- Previous: n/a
- Next: Ravaged Beach
- Recommended Levels: 1
Act 1 Main Quests
BG3 Nautiloid Main Quest/s
BG3 Nautiloid All Quests
Nautiloid Walkthrough
Escape the Nautiloid
- Find a Way off the Nautiloid
- Reach the Helm
- Connect the Nerves of the Transponder
Find a way off the Nautiloid
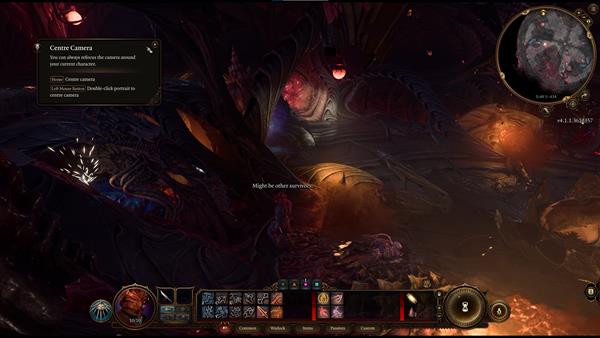
This quest will also serve as the "Tutorial" section of the game. Upon starting the quest, you'll begin with escaping your pod amidst the commotion. Check the other Mind Flayer Pod (X:48 Y:-434) and you'll realize that there might be other survivors.
As you explore further, you'll see an unstable Nursery in the middle(X:51 Y:-422). Once you get close enough, the Narrator explains that this is where the parasite that's writhing behind your eye came from.
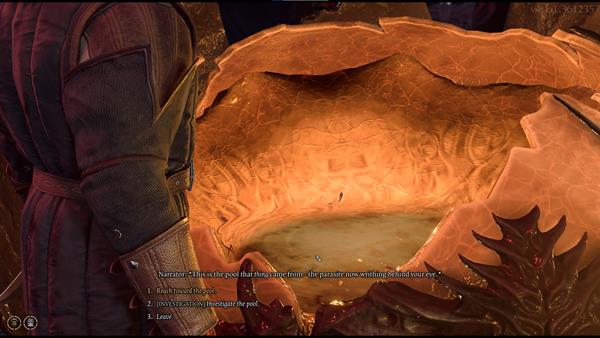
You will have three options:
- Reach toward the pool.
- [INVESTIGATION] Investigate the pool.
- Leave.
If you choose the second option, a prompt will pop up explaining how Skill Checks work. In certain dialogue situations, you will need to roll a die and meet or exceed the target number (which is the Difficulty Class (DC) number you'll see on the screen) required in order to successfully initiate the dialogue option you've chosen.
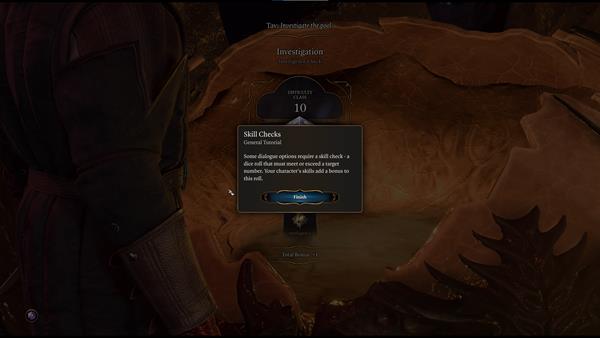
Some characters will already have skills that can give them an advantage in certain dice rolls. For this instance, this character has a +1 Intelligence bonus, so whatever number it gets, it will add a +1 to the number. The DC for this is 10 and if you fail the skill check, you will have two options:
- Reach toward the pool.
- Leave.
If you choose the first option after failing the skill check, the Nursery will explode. On the second level, there are several cartilaginous chests (X:47 Y:-436) that contain some Potions and other misc items. When you navigate this region, you can use the jump Action to cross gaps and fires to loot bodies on the other side. If you get damaged by the fire, you can interact with the Restoration to recover your health.
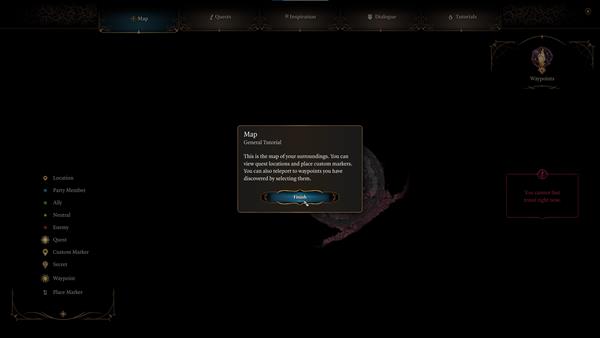
Now move on to the next room by interacting with the Sphincter (X:28 Y:-424). Once you proceed to the next area, the game will explain about the Map and show the different markers on the left side of the screen.
In this next area, you will find more potions and scrolls on dead Imps. Now get on top of the platform in the middle (X:0 Y:-427) where you'll see one of the Neural Apparatus it will then lift you to reach the higher ground. You'll then notice a victim you can interact with named Myrnath (X:0 Y:-430). The first few dialogue options won't affect anything regardless of what you choose.
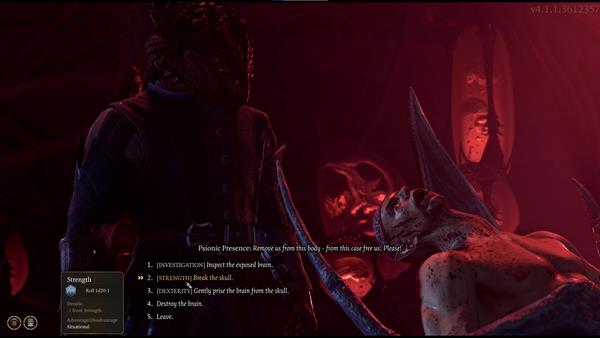
If you have an Intelligence (Arcana) Bonus, the narrator will say that you've realized you're currently talking to an Intellect Devourer, a minion of the Mind Flayers that abducted you. Once the Intellect Devourer begs for your help, you will then have to choose among 4 options:
- [INVESTIGATION] Inspect the exposed brain.
- [STRENGTH] Break the skull.
- [DEXTERITY] Gently prise the brain from the skull.
- Destroy the brain.
- Leave.
If you choose the first option and you succeeded in the skill check with DC 10, your character will notice a swelling of the brain causing pressure where it strains against the shell of the skull. You will have another 5 options to choose from:
- [STRENGTH] Break the skull.
- [DEXTERITY] Gently prise the brain from the skull.
- [MEDICINE] Attempt a cerebral extraction, staying mindful of the swelling.
- Destroy the brain.
- Leave.
Depending on your character, some dialogue options will turn out better than others. In this case, this character has a 2d20 Advantage when choosing the third dialogue option, which is attempting a cerebral extraction You would need to pass a skill check with DC 10 for this.
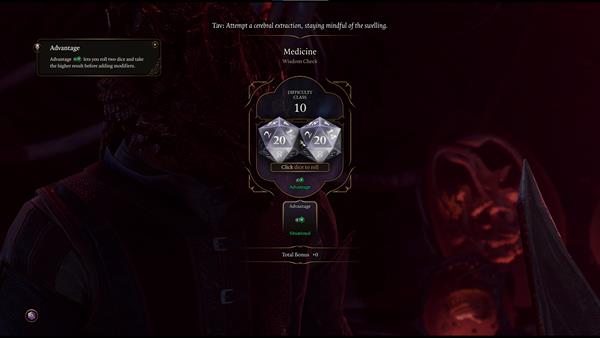
An Advantage lets you roll two dice and take the higher result before adding modifiers. Once you've successfully met or succeeded the target number, you can choose to let it accompany you and aid you in your adventures by sparing the brain. This newborn Intellect Devourer could provide valuable information.
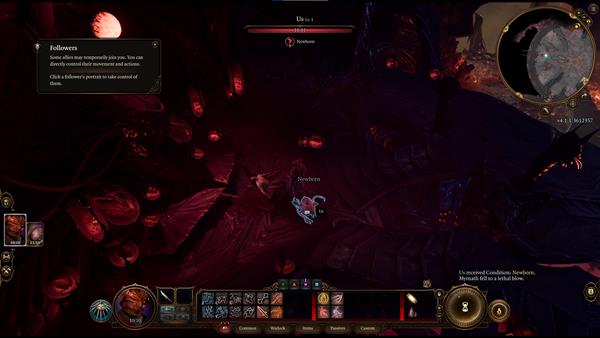
If you choose to spare the brain, it will tell you that you must go to the helm. There are multiple dialogue options during this conversation but in the end, it all leads you to where the brain wants you to go. If you choose to help the brain, you will have gained a follower. Some allies may temporarily join you and you can also directly control their movement and actions by clicking on their character portrait on the left side of the screen.
Reach the Helm
As you continue forward, you'll encounter Lae'zel (X:-39 Y:-430), a female Githyanki Fighter who can become one of your potential Companions. Join her to fight the imps you'll encounter ahead (X:-45 Y:-402).
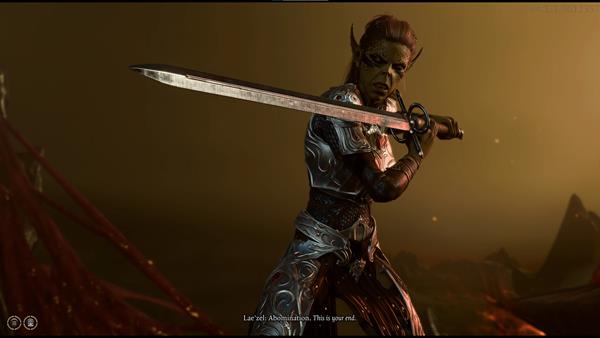
Before you engage in combat, a prompt will pop up on the screen explaining how combat works in Baldur's Gate 3. This game features a turn-based combat system, meaning you have to plan carefully at each encounter. Every participant in combat will get a turn and the game also pauses around you during combat, meaning you will have time to think about your next move. See our Combat page to learn more about the Combat mechanics in Baldur's Gate 3. During your turn, you are allowed to move, take an action, and take a bonus action. The green icon you'll see below represents your Actions, the orange triangle icon represents your Bonus Actions. After you finish your turn, click the button labeled "End Turn" located on the right corner of your Hotbar to end your turn.
For this fight, it is recommended that you use the Intellect Devourer as your tank and lure the Imps out one by one when taking them out. Be careful not to get surrounded as Imps can move fast and have ranged attacks, you may also not have the chance to heal once you get surrounded. If you are using a Class that can use Find Familiar, use it to gain an advantage in combat. Unlike in BG1 and BG2, the death of your familiar won't cause a permanent decrease in Health.
(Note the Nautiloid of the Final released version of BG3 is a bit different from the EA version. The outer decks are removed. Once you finished fighting Imps with Lae'zel, you will directly enter the chamber with Shadowheart's pod.)
After defeating the Imps, loot the items from their corpses and heal yourself using the Restoration if needed. Then move forward to the deck. The Dragons' attack and the fights between imps and thralls have lefts tons of bodies on deck, you can loot golds, potions, scrolls, and all sorts of items on them. Climb the Arterial Mesh (X:-43 Y:-367) you will immediately see as you proceed to get to the next area(X:-31 Y:-356).
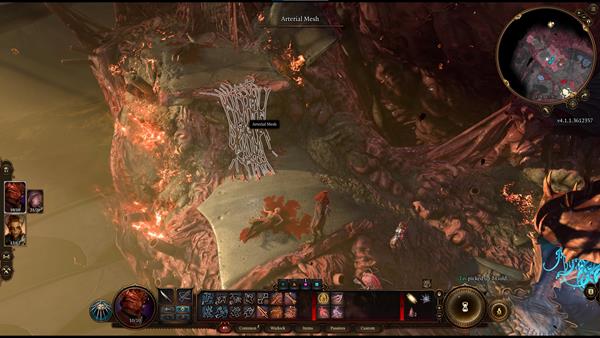
Upon entering the room, you'll find a control panel in the middle (X:-11 Y:-354). The various slates in the rooms that are above the buttons have their text hidden behind a DC 15 Arcana skill check. The three slates in the first room you go to read, in order from left to right: "Unleash - Aggression - Annihilate". The 'Unleash' button plays a short scene but ultimately does nothing. The middle button will cause the thralls to attack you, while the rightmost button will instantly kill them. On the left side of the room, you'll see another Mind Flayer Pod with someone inside the chamber (X:-3 Y:-347). You will also notice a control panel beside it.
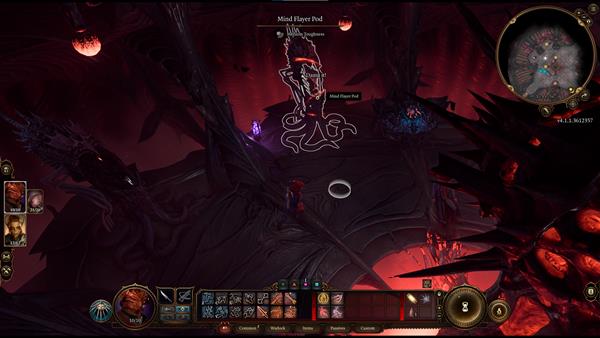
As you approach the pod, Shadowheart, a Shar priest and a potential Companion, tells you to get her out of there, Lae'zel insists that we leave her as we don't have much time.
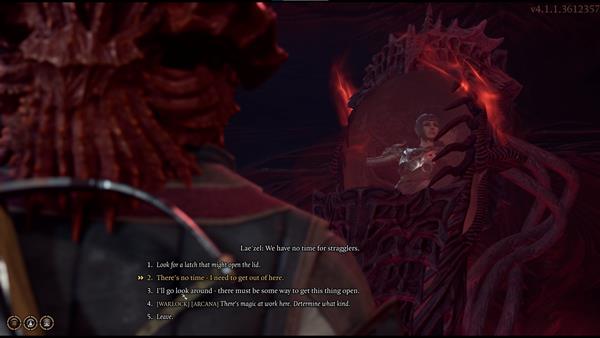
From here, you will have 5 dialogue options:
- Look for a latch that might open the lid.
- There's no time - I need to get out of here.
- I'll go look around - there must be some way to get this thing open.
- [WARLOCK] [ARCANA] There's magic at work here. Determine what kind.
- Leave.
Depending on your character, choosing the fourth option will require you to pass a skill check with DC 7, successfully passing the skill check will allow you to control the console and release her later on. Now interact with the console on your right. You will then have 4 options:
- Look for a switch or release.
- Hit it.
- [WARLOCK] Inscribe the device with the glyphs you sensed from the pod's warding runes.
- Leave.
Again, this will depend on your unique character, for this instance, choosing the third option and successfully passing the skill check will prompt another action you can choose. From here, you will have another three options:
- Place your hand on the console.
- [ARCANA] Take a closer look at the powered-up console.
- Leave.
If you choose the second option, you will need to pass another skill check with DC 10. After successfully passing the skill check, you will notice that the control panel looks more like a beating heart than a machine, from here you can touch the control panel. And from here, you have two options:
- [ILLITHID] [WISDOM] Will the pod to open.
- Leave.
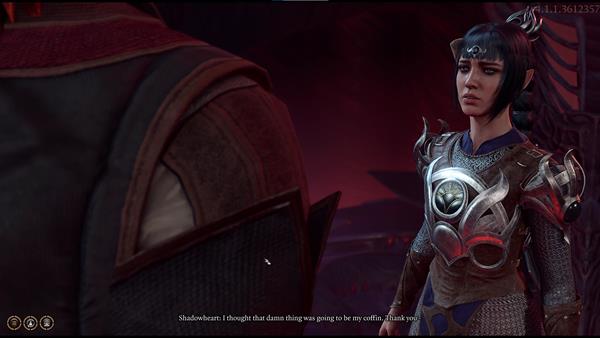
Choosing the first option will require you to pass another skill check with DC 2. Successfully passing the skill check will release Shadowheart from the pod. Interact with Shadowheart and speak to her, you can choose to make her your companion if you let her accompany you to the helm.
Now proceed to the next area, you can find a Gold Key on a corpse (X:28 Y:-354) just as you enter, you can use this to open an elaborate chest. In the middle of the room, you'll see another woman trapped inside a Mind Flayer Pond (X:46 Y:-354). North of the room, you'll see another corpse on the ground (X:61 Y:-353), she will have a Bronze Necklace and an Eldritch Rune that you can loot. Once you interact with the control panel, the woman inside the pod will start to transform, but cannot attack you as it will stay inside the pod.
- NOTE: If you couldn't pass the skill checks where you initially investigate the console, you can use the Eldritch Rune that you loot from a corpse in the east room from where Shadowheart is. Simply place the rune into the socket of the console and select Place your hand on the Console. The next dialogue choice is a Wisdom Skill Check that will allow you to open the pod if you pass DC 2.
Connect the nerves of the transponder
Now make your way to the helm (X:-20 Y:-389). Once you reach the area, you will witness the mind flayers and devils fighting. You will then immediately engage in combat after the short cutscene. You can focus on defeating the imps while ignoring Commander Zhalk, as he'll focus on fighting the Mind Flayer. Once you reach the other side of the helm, more imps will appear. This battle will be a race against time as you will need to reach the Transponder before the Nautiloid crashes. You will see on the right side of the screen how many turns you have left before the Nautiloid crashes. Do note that you can also kill Commander Zhalk and loot the Everburn Blade from him (2d6 + 1d4 fire). However, once you kill him, the Mind Flayer will turn hostile and some Cambions will appear in the area and start to attack.
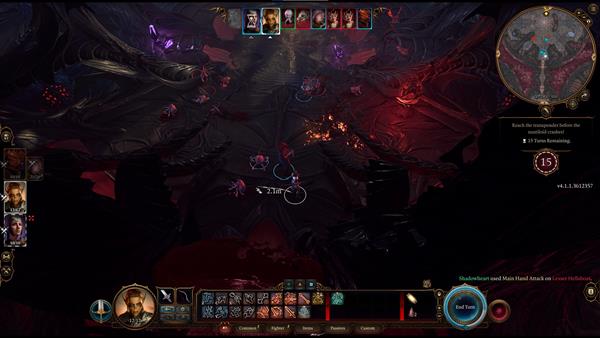
After clearing them out and connecting the transponder, the Nautiloid will leave Avernus. This marks the end of the prologue, and the next quest Find a Cure will start shortly after.
BG3 Nautiloid Map
BG3 Act 1
- Previous: Nautiloid
- Next: Emerald Grove
- Recommended Levels: Levels 1-2
Act 1 Main Quests
Ravaged Beach Main Quest/s
BG3 Ravaged Beach All Quests
Ravaged Beach Walkthrough
Find a way to remove the mind flayer parasite
As you begin the quest, you'll find yourself at the Ravaged Beach. Continue following the path ahead and you'll find Shadowheart unconscious on the ground( X:271 Y:217). Interact with her and you will have three options to choose from:
- Wake her.
- Reach for the artefact.
- Leave.
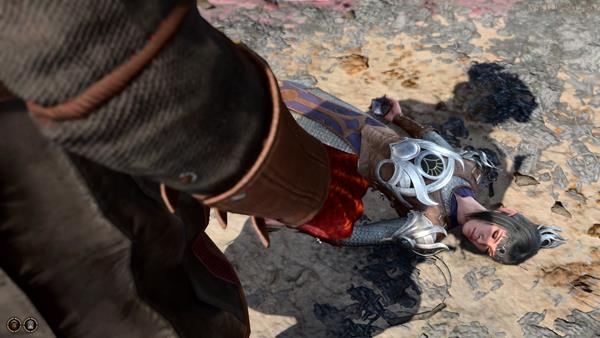
Choosing the first option will wake her up, she'll then ask how it's possible you're both alive. From here, you have two options to choose from:
- I was hoping you might know that.
- Doesn't matter - we made it.
Choosing the first option will prompt her to say that she only remembers the ship and falling down from the ship, and then nothing. You will then have to choose among three responses:
- Now what?
- Do you have any idea where we are?
- What happened to our gith friend?
If you choose the second option, she'll say that she doesn't recognize the place. She'll then go on to say that you first need to find supplies, shelter, and most important of all, a healer, for the monsters living inside your head. This will prompt 3 more dialogue options:
- 'We'? You want to stay together?
- What happened to our gith friend?
- Indeed, I'd better get moving then. Farewell.
Choosing the first option will make her say that you both need each other and she can't think of a better company. And then you will have the option to go together or part ways with the dialogue options that will appear:
- All right, let's get moving.
- No. This is where we part ways.
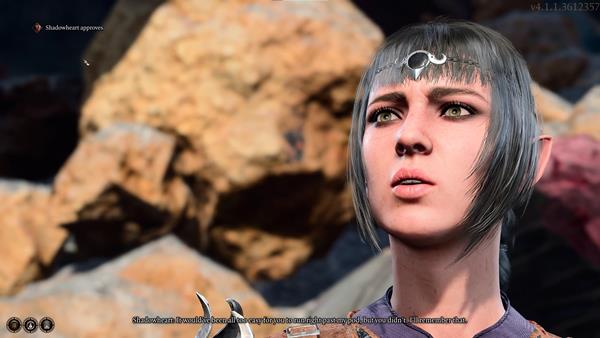
Choosing the first option will allow you to have Shadowheart accompany you, but before you continue with your journey, she thanks you for freeing her from the pod back in Nautiloid. You'll then get an approval up from her. As you proceed, you'll find an Ancient Sigil Circle on the wall (X:285 Y:296), just beside the Ancient Door in the Overgrown Ruins. When you interact with the Ancient Door, it won't open, Shadowheart will suggest looking for another entrance.
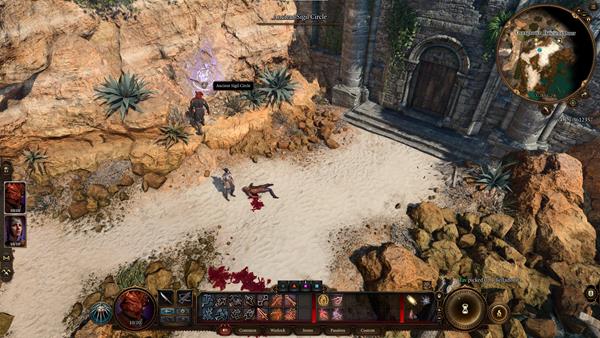
Head west and you'll a couple of Intellect Devourers in the area (X:259 Y:279). Try to keep your distance throughout the fight to make quick work of them, these are low-level enemies but can be dangerous once you're surrounded by a group of them.
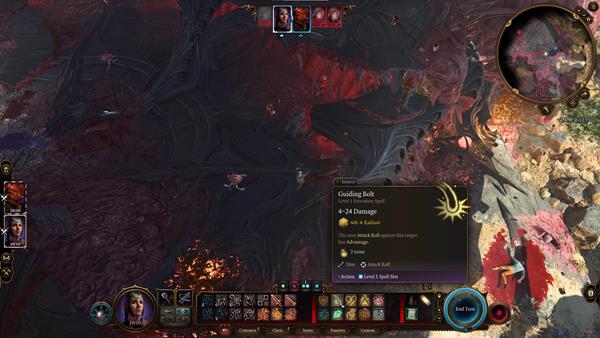
Once you've slain all the Intellect Devourers, explore the area and loot what you can then head west. Continue following the main path and you will come across the destroyed Nautiloid wreck, then slightly up a hill, you'll find Astarion, a High Elf vampire and a potential Companion, calling for help (X:176 Y:284). He says he's cornered one of the Intellect Devourers hiding in the grass. He then asks if you can kill it just like how you killed the others. From here, you will have three options to choose from:
- Easily. Stand back.
- Kill it yourself - you look capable enough.
- Leave.

Choosing the first option will reveal that this was just a trap, the boar comes out of the grass and Astarion suddenly takes a stance with his dagger. You will have three options to choose from:
- Put it away. We don't need to fight.
- If this is a robbery, you're off to a bad start, elf.
- One more step and I'll make you eat that knife.
Choosing the first option will make Astarion suspicious of you as he says he saw you get out of the ship of the mind flayers, before being interrupted by the worms in your brains. He asks what happened, and you will have to choose from these options:
- It's the mind flayer's worm - it connected us.
- Honestly? I have no idea.
- Put the knife away and I'll tell you everything.
Choosing the first option will make Astarion calm down and get ahold of the situation. He then apologizes, you now have three dialogue options to choose from:
- Apology accepted. I might have done the same were the roles reversed.
- Glad to see we're all caught up now.
- You'd better have more to offer than 'apologies'.
If you choose the second option, Astarion will then introduce himself and say he was in Baldur's Gate when those mind flayers snatched him. You then have three dialogue options to choose from:
- [BALDURIAN] Introduce yourself - you're a Baldurian too.
- Tell him your name and your story.
- Nod.
You can choose any of the options above, he'll then ask if you know anything about the worms. You have three options to choose from:
- Yes, unfortunately. They'll turn us into mind flayers.
- I know we don't want them in our heads.
- You know as much as I do.
You can choose any of the options above, and then he'll suggest that maybe if you can find someone who can control these things, there might still be time. You then have four options to choose from:
- Control it? We need to get rid of it.
- You should travel with me. Our odds are better together.
- I need to get moving, but you can shelter at my camp.
- I've wasted enough time here. Farewell.
Choosing the first option will give you the same three options from above:
- You should travel with me. Our odds are better together.
- I need to get moving, but you can shelter at my camp.
- I've wasted enough time here. Farewell.
If you choose the first option, he'll tag along and accompany you as you proceed.
Now head northeast to the crash site, you'll notice footprints in the area, there are dead goblins on the ground and you can loot some items and supplies from their corpses. Continue following the path then head southwest, you'll encounter an injured mind flayer in the area (X:180 Y:325). Interact with it and you'll have three options to choose from:
- Give in to the emotion.
- This isn't right. Step away.
- No. You should be furious... shouldn't you?
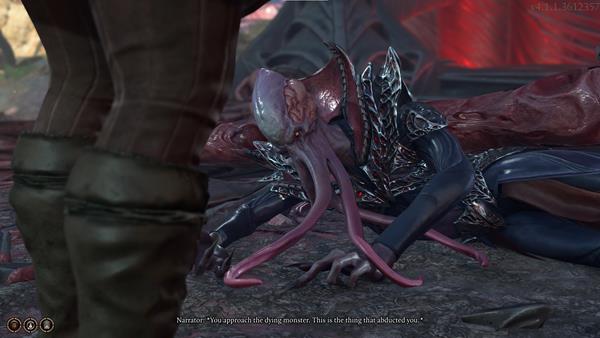
Choosing the first option will give you two more options to choose from:
- [INTELLIGENCE] Concentrate on its thoughts.
- Take advantage of the lapse - break free.
Choosing the first option and succeeding the skill check will reveal that you can offer yourself to the mind flayer for sustenance, this will give you another two dialogue options:
- Submit to the feeling - lean in, as for a kiss...
- [WISDOM] Resist the intrusion with everything you have.
Choosing the second option and succeeding the skill check will prevent you to give yourself in. Now you notice the mind flayer exhausted and its eyes radiate with malice. You now have two options to choose from:
- Close those eyes forever.
- Leave it to die - slowly.
Choosing the first option will make your character stomp the mind flayer's head and kill it. You can then loot its corpse for some items.
Now head north then climb the platform, and continue following the road uphill, your character will then make a remark that you heard shouting up ahead. Shadowheart will follow up with a comment that we should check it out. Along the way, you'll come across a dirt mound with a shovel sticking out. You can dig it and uncover a chest, you can loot the items inside the chest if you wish to do so. As you move forward, you'll find Lae'zel trapped in a wooden cage and two Tieflings discussing whether to kill her or leave her to the goblins (X:242 Y:357). You are able to communicate with Lae'zel even without actually speaking to each other via the monsters inside your head. Lae'zel tells you to get rid of the Tieflings, you will have to select from these options:
- Why should I help you?
- Don't worry - I'll get them out of here, one way or another.
- [DECEPTION] This creature is dangerous. Get out of here - leave it to me!
- [PERSUASION] Shoot the trap down. We must kill it before it harms someone.
- Attack the tieflings.
- Leave.
Choosing the second option will make Lae'zel communicate with you telepathically and tell you she knows a cure for the things living inside our heads. Shadowheart then reminds you that Lae'zel was keen on leaving her to die when you were all within the Nautiloid and that you can't trust her. You will have to choose among these four choices:
- [DECEPTION] This creature is dangerous. Get out of here - leave it to me!
- [PERSUASION] Shoot the trap down. We must kill it before it harms someone.
- Attack the tieflings.
- Leave.
Choosing the first option will require you to pass a skill check, successfully doing so will make the tieflings agree with you. Damays will then mention something about checking the blast. You can either ask about it or leave:
- A blast? I could use more specifics.
- Leave.
Asking for specifics will make Damays reveal that the blast shook their camp and that's why they went out, to take a look. Now you can use Persuasion to ask where the camp is, or leave:
- [PERSUASION] I'm in dire need of healing. Where is this camp?
- Leave.
Choosing the first option will require you to pass a skill check, successfully passing the skill check will make Damays tell you the location of the camp. He says it's located northwest and once you make it there, look for Nettie. Nymessa then joins the conversation by telling you to be careful as there are goblin traps everywhere. Once the tieflings leave, Lae'zel demands you to set her free, and your next set of choices will look like this:
- Now that they're out of earshot, sure.
- Say 'please'
- Leave.
Choosing the second option will not make Lae'zel say the word. Astarion and Shadowheart will approve of this decision. You can then attempt to free her after the dialogue.
Finding a Healer
After freeing Lae'zel, interact with her to initiate conversation. She then says the longer we wait, the more the parasite consumes. She also says that her people possess the cure for this infection and she wants you to join her in looking for a Crèche. Shadowheart steps into the conversation and tells you to be careful, she warns you to not let her take advantage of you, as she sees your kindness as a weakness. Your next set of choices will look like this:
- And what exactly is a crèche...?
- A simple 'thank you' wouldn't go amiss.
- All right, we journey together. Let's find this crèche.
- We'll go our separate ways, I think.
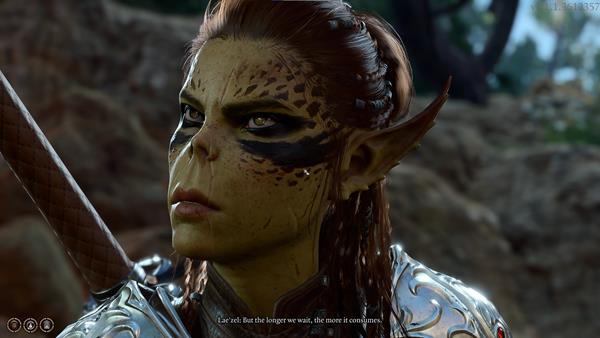
The two choices that will matter are choices 3 and 4. The first two choices will only extend the conversation. When asked about a crèche, Lae'zel explains that it is many things, it is a hatchery, a training ground, and a shelter. She also explains to you about the Githyanki protocol. Choosing the second option will make her say that the cure will suffice as thanks. Now you must decide whether or not to journey with her or go your separate ways. If you choose to join her, Shadowheart will disapprove of this decision. She then says that she trusts your judgment, but she doesn't trust Lae'zel yet. Lae'zel then explains that since the tieflings mentioned a camp, there's one tiefling named Zorru, who has seen githyanki. She suggests we ask Zorru where he has seen the other githyankis.
Before Reaching the Emerald Grove
Continue heading south, then head west, you'll see an unstable rune on the wall (X:224 Y:324). Interact with it, you can then touch it or leave it be:
- Touch the sigil.
- Leave.
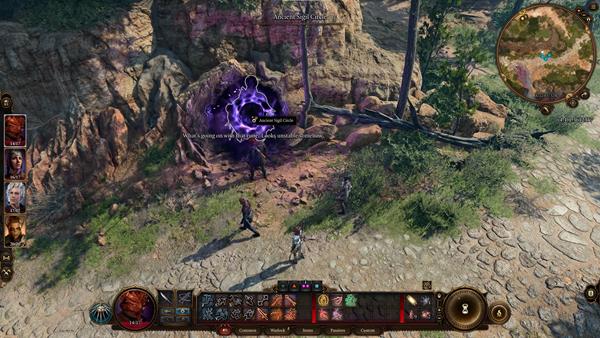
Choosing the first option will make your character try to touch the sigil, but then a slight shock would prevent you from doing so. An arm then extends out, asking for help. Your next set of choices will look like this:
- Who are you?
- Slap the hand.
- [STRENGTH] Grab the hand and pull.
- [WARLOCK] [CHARISMA] Attune yourself to the sigil's magic, then bid it to quiet down.
- It's far too dangerous. Leave him to his fate
The first two options can be chosen without affecting anything. Choices 3-5 are the ones that will affect the story. Choosing the third or fourth option will require you to pass a skill check in order to get him out of that portal.
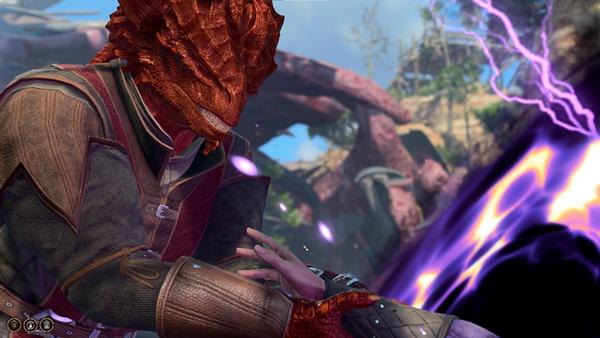
After successfully pulling him out of the portal, he will introduce himself. This is Gale, a Human Wizard and a potential Companion. After the introduction, he says he remembers you from the Nautiloid. From here you will have three choices:
- I was, yes.
- Never mind the nautiloid. How did you get stuck in that stone?
- You don't trust this man. Draw your weapon.
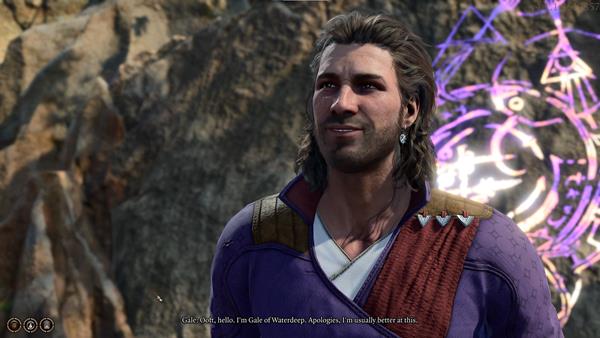
Choosing the first option will make him say that he assumes you were also infected with the parasite inside your brain. You can choose to extend the conversation or tell him it's none of his business. These are the options you have to choose from:
- Go on...
- Couldn't have phrased it more repellently myself.
- That's hardly any of your business.
Choosing the first option will reveal that the process you and your current companions are going through is called Ceremorphosis, where after a certain period of time, the parasite that entered our brain will turn us into mind flayers. He then asks if you happen to be a cleric. You have these options to choose from:
- I was going to ask you the same question.
- Can't say that I am.
- [WARLOCK] My patron offers me many gifts, but tadpole extraction is not one of them. I can't cure our parasites.
Choosing the third option will then make him say that you should look for a healer together. you have two choices here:
- Sounds like a plan. You're welcome to join me.
- No, thank you. I'm not looking for another travelling companion.
Even if you choose the first option, Gale would not join you right away and says that you have plenty of company already. He says that he can join you later and meet you at your camp.
If you head southeast of Roadside Cliffs, you'll reach the Chapel Entrance (X:272 Y319). You'll be able to enter the Refectory here where you'll eventually enter the Dank Crypt.
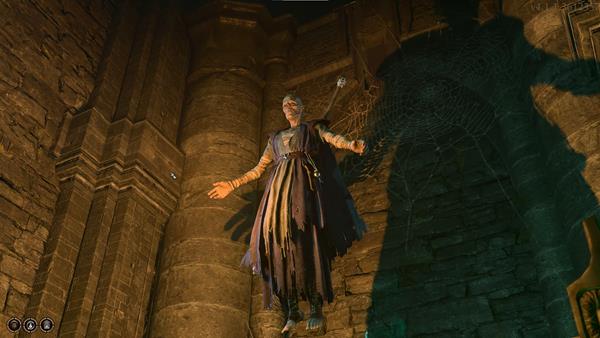
You can also do the side quest Explore the Ruins once you reach this area. Inside the Dank Crypt is also where you'll first encounter Withers which is an important NPC that you should consider inviting to Camp if you have plans on respeccing your character, reviving dead party members, or if you wish to have Hirelings as your companions. He will provide his services to you in exchange for a specific amount of Gold.
BG3 Ravaged Beach Map
BG3 Act 1
- Previous: Ravaged Beach
- Next: Forest/Owlbear Nest
- Recommended Levels: 3
Act 1 Main Quests
Emerald Grove Main Quest/s
BG3 Emerald Grove All Quests
- Save Arabella
- Save the Goblin Sazza
- Investigate the Beach
- Investigate Kagha
- Find your Belongings
- Steal the Sacred Idol
- Save the Refugees
- Get Help from Auntie Ethel
- Get Help from Healer Nettie
Emerald Grove Walkthrough
Battle at the Gates
Before making your way inside Emerald Grove, you first need to go here (X:216 Y:411) to initiate a cutscene. The cutscene will show Aradin, alongside his companions Remira and Barth, arguing with Kanon to open the gate leading to Emerald Grove. Kanon does not budge as he says the gates must be kept shut as per Zevlor's orders. Aradin then tells Zevlor that they were fighting off a group of Goblins and now followed them there, Zevlor then orders Kanon to raise the gate, but it's too late. The group of goblins arrives and just as Kanon was raising the gate, he gets struck by multiple arrows. Although it may seem they are being overwhelmed, Wyll shows up at the scene to help.
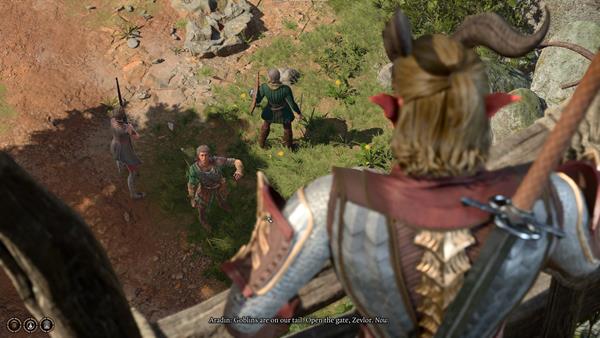
After that, you will immediately engage in combat. During this combat encounter, take advantage of your positioning as you are already at a high ground. Once you've slain all the enemies in the area, Zevlor will then order someone to open the gate. Before going through the gate, you can loot the corpses of fallen enemies for useful items. You can loot the Brass Locket out of Barth's corpse if he dies during the encounter.
Now go through the gate, and you'll reach Emerald Grove (X:209 Y:454). As you move forward, you'll see Aradin and Zevlor arguing about what just happened.
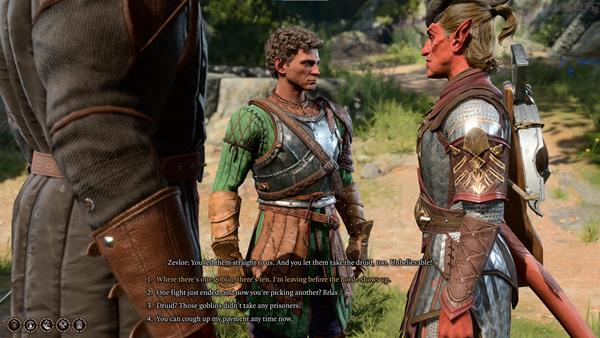
Your next set of choices will look like this:
- Where there's one goblin, there's ten. I'm leaving before the horde shows up.
- One fight just ended, and now you're picking another? Relax.
- Druid? Those goblins didn't take any prisoners.
- You can cough up my payment any time now.
Choosing the second option will just make Zevlor provoke Aradin in some way. Then they go back and forth insulting each other. Your next set of choices will look like this:
- [INTIMIDATION] If you want me to take both of you down, I will. Otherwise, knock it off.
- Stand back and watch.
- [PERSUASION] More violence won't bring back those you lost. Stop and think.
Choosing the third option will require you to pass a skill check with DC 15. Successfully passing the skill check will make Zevlor say you're right and there's too much at stake. Aradin then makes another side comment to insult Zevlor but he didn't bite back and says squabbling is pointless since the goblins already found their camp. You will also receive an approval from Shadowheart and Gale for choosing the third option.
At this location (X:248 Y:444), you can encounter a tiefling named Nadira who's about to get ambushed by a Bugbear Assassin. you can get the Soul Coin from her after going through a series of dialogue options.

Now head north and find Zevlor (X:206 Y:477) and interact with him. He thanks you for your assistance earlier during the goblin attack, then he starts introducing himself.
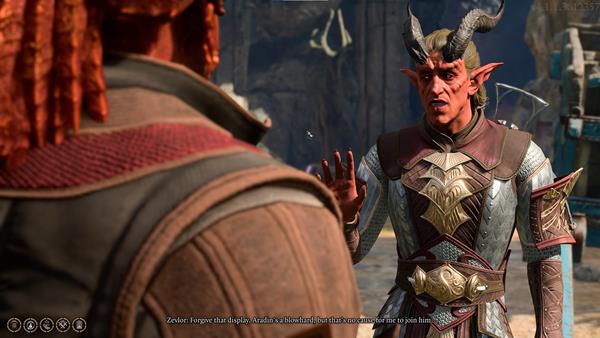
Your next set of choices will look like this:
- I'm Player's Name
- What is this place?
- I take my thanks in coin.
Choosing the first option will make him warn you that visitors are no longer welcome in Emerald Grove. He then says whatever your business is with this place, he wants to see to it quickly, since the druids are forcing everyone out and this attack will only strengthen their resolve. Your next set of options will look like this:
- I have no quarrel with druids.
- Why are they forcing you out?
- Those goblins - have there been many attacks like that?
- I won't be staying long - I just need to find a healer.
Choosing the third option will reveal to you that there have been several attacks by different monsters but the druids are blaming them "outsiders" for drawing them there, that's why no one's welcome anymore. He says they can't stay but leaving isn't an option either since they'd be slaughtered. Your next set of choices will look like this:
- This ritual - is there no way to convince the druids to stop it?
- I need a healer.
- What brought you here?
- Leave.
Choosing the first option will reveal that he already tried and that their new First Druid, Kagha, won't even see him. He then asks if you could persuade Kagha, even if it's not your business. He thinks you can persuade her since she owes you for saving this place. Your next of choices will look like this:
- I'll see what I can do.
- I'm sorry. I've got my own problems.
- I have my own temporal concerns. I need a healer.
- What are you offering for my aid?
Choosing the third option will reveal that you can find healer Nettie within the inner grove with the other druids. Your next set of options will look like this:
- I'll find her. And I'll speak to Kagha while I'm there.
- Enough about the ritual. I have my own problems.
- Leave.
You will receive a disapproval from Astarion if you choose the first option. Zevlor then says he owes you a great debt and asks that you talk some sense into the druids, before more lives are lost. The conversation will end here and you can proceed.
Within The Hollow
As you make your way inside The Hollow (X:206 Y:496). There's a merchant named Arron located at (X:204 Y:512).

You can interact with him to see his inventory, you can also engage in a conversation if you wish to do so.
Just up ahead at (X:212 Y:544), you'll see a couple of Tieflings, as well as Wyll training a young tiefling named Umi.
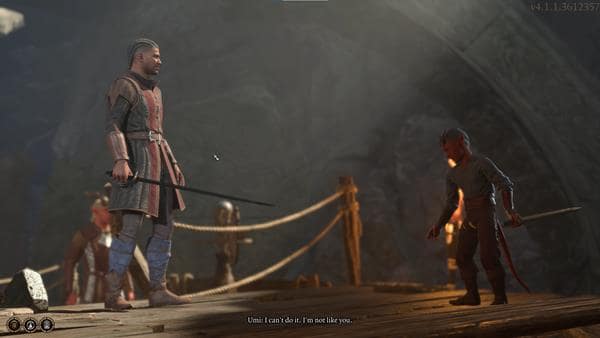
You can then interrupt their training with these presented dialogue options:
- Hey there. Can I have a word?
- This whelp is hopeless. You're wasting your time.
- It's good advice, child. You'd do well to listen.
- [DRAGONBORN] Heed the man's words, child. His form is highly efficient.
- Leave.
Choosing the DRAGONBORN option will make Wyll reply with "Kind words un unkind times, my friend", then just as he starts approaching you, you connect telepathically and learn that Wyll was aboard the Nautiloid ship with you at the same time you were abducted.
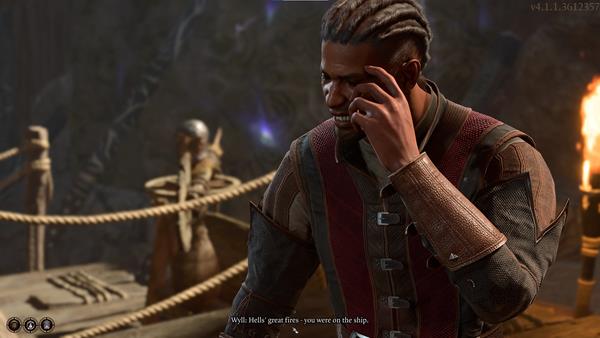
Your next set of choices will look like this:
- Yes - and we both carry parasites.
- Another escapee? Thank the gods - I need all the friends I can get.
- Who was that woman, the one in your thoughts?
- Peer further into his mind.
Wyll acknowledges that you both have parasites inside your brain upon choosing the first option. He also says that tentacles haven't sprouted yet, so he's guessing you're both just lucky. As he continues, your minds collide once more, this time you learn more about the woman in his thoughts. Your next set of choices will look like this:
- Who is she?
- Hunting in the Hells. Dangerous territory.
- Cavorting with devils, I see. You should consider better company.
Wyll will then tell you her name, the woman in her thoughts is named Karlach, an archdevil's soldier he swore on his good eye to kill. He said he tracked her down through the Hells to the mind flayer ship. But he was infected before he could kill her. He's worried about her being out in the open, preying on the innocent, and if he doesn't deal with her as soon as possible, she'll be leaving a trail of corpses. Your next set of choices will look like this:
- Let's join forces. I'll help you cast this devil back into the Hells.
- I'm looking to cure this infection. I suggest we partner up.
- Good luck with your devil problem - it seems your work's cut out for you.
Choosing the first option will give you a disapproval from Lae'zel. Wyll agrees with your decision, but he says your party's full at the moment, but he says when the time comes, you can call him. Your next set of choices will look like this:
- Go to my camp and wait for me.
- Leave
You can recruit Wyll to your party and meet him in camp if you choose the first option. You can also meet him at this place if you ever don't want him to go to your camp.
Now head north and you'll find Zorru (X:205 Y:568). Interacting with him will gain you Lae'zel's approval. He starts off being scared of Lae'zel and says "My f-friend's blood not enough? Come to rip me open, too?" Lae'zel then says that in Crèche K'liir, a formal greeting starts with a bow. Zorru then asks you if this "monster" is with you.

Your next set of choices will look like this:
- Yes. And I suggest you do as she says.
- [DRAGONBORN] Give the tiefling a menacing glare.
- Hold it, Lae'zel. I'll see to this one.
Choosing the second option will gain you the approval of Astarion, Lae'zel, and Shadowheart. Upon staring at him, he slowly lowers his head, but Lae'zel wants him to lower his head even further. Your next set of choices will look like this:
- Wait for the tiefling to obey.
- [DRAGONBORN] On your knees. She won't say it again.
- That's enough, Lae'zel. I'll take it from here.
Choosing the second option will gain you another approval from Lae'zel. Zorru bows down and gets on his knees. Lae'zel asks where Zorru saw another githyanki. Zorru replied and said near the mountain pass on the road to Baldur's Gate. He also says it saw them before they saw it and jammed its blade through his friend, Yul. Lae'zel then asks him to show it to her on the map. Once Lae'zel's request has been granted, Astarion interrupts and says he was hoping she'd kill him. Lae'zel says to him to cool his blood and he'll indulge him soon enough. Your interaction with Zorru ends.
An exclamation mark will then be seen on top of Lae'zel, interact with her to start a conversation. She'll start off by saying "The locals prove complaint. A useful trait.", then Shadowheart joins the conversation and says she warned you about keeping Lae'zel around, she's worried Lae'zel would cause real trouble soon.
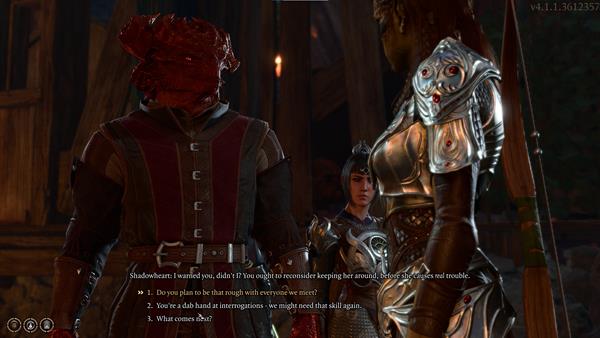
Your next set of choices will look like this:
- Do you plan to be that rough with everyone we meet?
- You're a dab hand at interrogation - we might need that skill again.
- What comes next?
Choosing the first option will gain you Shadowheart's approval, but gain Lae'zel and Astarion's disapproval in the process. Lae'zel then replies "When the tentacles sprout from your lips, will you still cry that I was rough?". Your next set of choices will look like this:
- Enough. Just tell me what's our next move.
- All right. You made your point.
- Leave.
Upon choosing the first option, she says if what Zorru said was true and if there are githyanki west of here, that must be our current objective. Your next set of choices will look like this:
- Heh - did you say 'teeth-ling'?
- What do you mean 'purification'?
- Leave.
Lae'zel says that the crèche holds the zaith'isk and it will cleanse us of the parasite upon choosing the second option. You will then be presented with the first dialogue option again and you can choose to extend the conversation or leave.
Now move straight ahead, you'll see a hooded tiefling named Eramas (X:188 Y:572). If you interact with her, she'll just say this grove is a death trap and to grab what you can and get out. Then she'll be on her way.
Just near her is a shabby door leading to the Makeshift Prison area (X:188 Y:592).
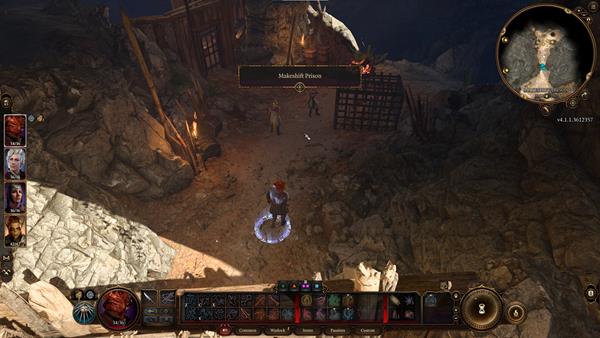
As you go through the door, you'll see a goblin named Sazza imprisoned in a cage, and a tiefling named Arka aiming her crossbow at her. She thinks this goblin killed her brother, Kanon. Memnos then tries to stop her but she refuses to listen, so he just walks away. Sazza still continues provoking Arka to pull the trigger.
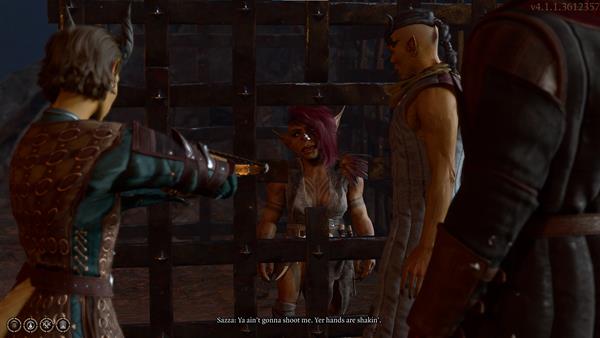
Your next set of choices will look like this:
- Shut up. Those words could be your last.
- Step between the crossbow and the goblin.
- Do nothing.
Choosing the second option will gain you the approval of Gale. Arka then asks you to move. Your next set of choices will look like this:
- [INTIMIDATION] Lower the crossbow, or I'll deliver you right to your brother.
- [PERSUASION] No, shoot me. Should be easy, right?
- [PERSUASION] This won't avenge Kanon. It won't change anything.
- [DETECT THOUGHTS] Read the tiefling's thoughts.
- Step out of the way.
Choosing the third option will require you to pass a Charisma skill check with DC 10. Successfully passing the skill check will make Arka lower her crossbow, she then says you're right, but she wishes you weren't. She then asks why do you care if a goblin lives or dies. Your next set of choices will look like this:
- Because she's not a practice target. She's a person.
- If she dies, she'll take everything she knows to the grave.
- A goblin prisoner. Her life isn't yours to take.
- Because vengeance eats people alive. You'll grant the goblins two victories this day.
- My reasons are my own.
Choosing the fourth option will gain you the approval of Shadowheart, but disapproval from Lae'zel, and she says your soft heart will be the death of us. Arka hopes you're right, Memnos then steps in again and says it's all right, and asks her to come with him.
As the two tieflings walk away, you can engage in a conversation with Sazza. She says she wasn't sure why you protected her just now, but she doesn't care either, either way, her tribe's coming and will burn this place to the ground.
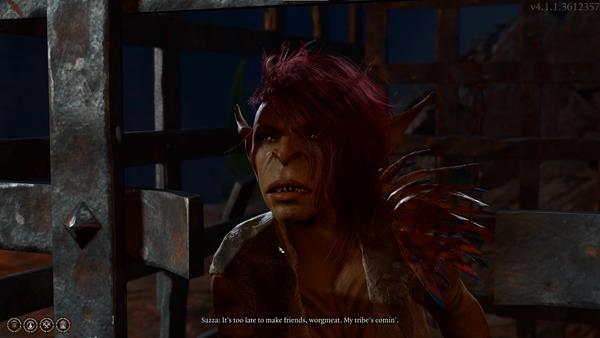
Your next set of choices will look like this:
- I just saved your life. Show some gratitude.
- Who is this Absolute you're so fond of? Your god?
Choosing the second option will reveal that the Absolute is actually a goddess, and they plan on burning her name across the world. Your next set of choices will look like this:
- You've caught my interest. Have any holy literature on you?
- An all-powerful goddess that can't get you out of a cage?
Choosing the second option will make her think that maybe the goddess sent you to help her, and she says it would be wise of you to help her if you want to save yourself. And if ever the tieflings manage to injure you while escaping with her, she assures you that this Priestess Gut will patch you up. Lae'zel then interrupts saying that her words cannot be trusted. Your next set of choices will look like this:
- Well, I'd certainly like to meet her.
- Nice story. Buy it for a copper in a tavern nearby?
Choosing the second option will make Sazza swear on your mother's grave. She then wants to make a deal, help her get out of there and she'll tell you where to meet her. Your next set of choices will look like this:
- Deal. I'll get you out of there.
- You already told me what I need to know. I'll find the priestess myself.
- Not a chance. You can rot in that cage.
- Leave.
Choosing the second option will make her say that even if you do find her tribe, they'd set the Worgs on you. She says you need her, tells you again to help her escape and she'll put in a good word for you. Your next set of choices will look like this:
- Deal. I'll get you out of here.
- Not a chance. You can rot in that cage.
- Leave.
Choosing the second option will make her insult you and it will end the conversation.
Now exit through the door you just came in, on the northwest side, you'll meet Dammon, a smith within the grove. (X:180 Y:559). If you interact with him, he'll thank you for fending off those goblins earlier and says if you ever need to replace any gear, just ask. He also says his selection's pretty slim as he left most of his equipment in Elturel. You can also check his inventory if you choose to see his wares. He's got a variety of weapons, armours, and shields among other items.
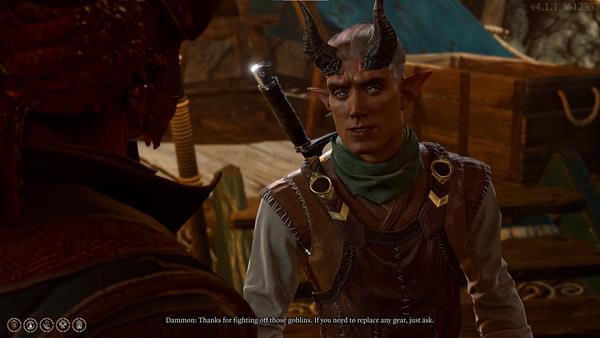
Just a few steps ahead at the northwest, you'll find Aradin (X:165 Y:546). Once you interact with him, he'll start off by greeting you as the fearless goblin-slayer. He asks if you're sure you want to be seen with him as he is not really likable in the grove.
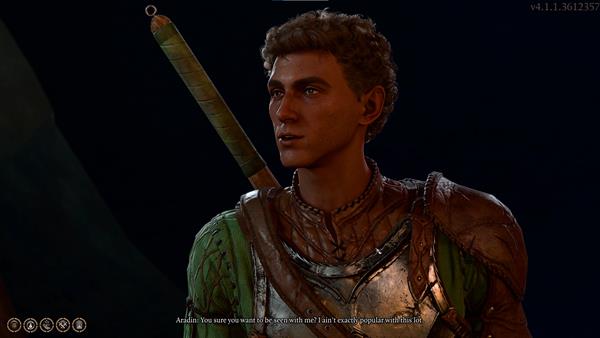
Your next set of choices will look like this:
- All you did was stand up for your crew. I respect that.
- You could try to be a little friendlier.
Choosing the first option will make him say that half his crew are full of holes, and now he's being blamed for leading the goblins in this grove, also adding that he lost track of the druid. Your next set of choices will look like this:
- Where did the goblins come from?
- Who's the druid you lost track of?
Choosing the first option will reveal that they were chased from the ruins they were poking around in. Your next set of choices will look like this:
- And is that where you lost track of the druid you mentioned?
- Sounds like you were looking for trouble.
Choosing the first option will reveal that he was tracking a Druid named Halsin within the ruins. He says they got a contract to hunt down some relic and Halsin wanted in on the job. The job didn't work out and the goblins got to Halsin when they were fleeing. Your next set of choices will look like this:
- Can I have a look at the contract?
- Did you think getting rich would be easy?
- You ran away from a few goblins?
He'll give you the contract and says the job's all yours upon choosing the first option. He says there's a wizard in Baldur's Gate that'll pay a lot for a relic that's supposedly buried around these parts. Your next set of choices will look like this:
- Just tell me where to find the relic.
- Any idea what the relic actually is?
Choosing the first option will reveal that the relic is called the Nightsong and it's supposed to be hidden under the temple where they encountered the goblins. He says he'd give you the map but his friend Brian got ahold of it and died during their encounter with the goblins at the temple. he says the contract will show you where they turned back. You can thank him or leave. If you choose to thank him, he'll say there's no need, as he'll be well on his way to Baldur's Gate when you die. This will end your conversation, and you will acquire the contract Stamped Handbill.
Head down the ladder, and just northeast at (X:193 Y:548), you'll see Auntie Ethel. Interact with her and she'll start off by saying you're the talk of the camp, as she continues talking, she notices something wrong about you. She asks you what you need as she can sort it out, she's got a lot of potions at her disposal.
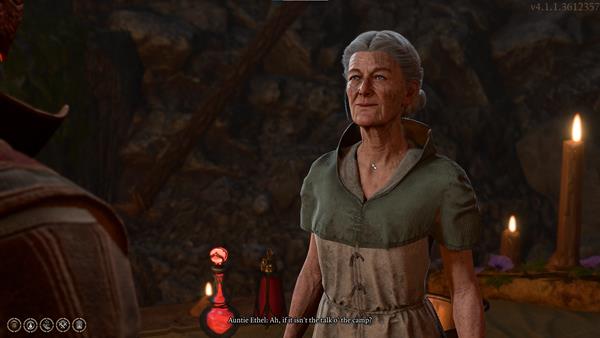
Your next set of choices will look like this:
- There's no need. I'm fine, really.
- I'm just here to trade.
- Let her fuss over you.
- What are you, an alchemist?
- Leave.
You'll see what she has to offer by choosing the second option. This is what she has at her disposal:
- Corellon's Grace
- Spellthief
- x3 Potion of Hill Giant Strength.
- Balsam Bundle
- x2 Mergrass Bundle
- Potion of Invisibility
- Potion of Fire Resistance
- x4 Potion of Healing
- Potion of Greater Healing
- x5 Water
- Wispweed Bundle
You can start a conversation again once you interact with her after trading goods. Your next set of choices will look like this:
- I need help. I've been infected by a mind flayer parasite.
- What harm? Show me your wares.
- Nothing for now.
Choosing the first option will gain Astarion's approval, but you'll also get Shadowheart's disapproval. As you tell her your story, she nods along. She then says her heart goes out to you, and she sees no sign of tentacles yet, but that could change in an instant, and that you need serious help immediately. She then remembers she might have something at her home that could help. Your next set of choices will look like this:
- Such as?
- My time could be running short. I can't afford to spend it paying you a house visit.
- [WARLOCK] There is something strange about you.
Choosing the WARLOCK option will give you three more Warlock responses:
- [WARLOCK] You have a certain bearing. An almost fey-like quality.
- [WARLOCK] I detect something devilish, I think.
- [WARLOCK] Might you hail from Thay, perhaps?
Choosing the first option will make her shrug off the idea, and she's just an old woman who loves tea and potions. She then says she'll be going home shortly, and marks her home on your map if you ever decide to visit her. This will end your conversation.
At the north entrance of The Hollow (X:257 Y:451), you'll see a group of tieflings in a heated argument against the druids. Komira wishes to see her daughter, Arabella. But Jeorna claims Komira's daughter is a thief and will wait for Kagha's judgement. Komira threatens to rip Jeorna's throat out if she doesn't let them pass, but another druid begins to transform into a bear to make them back off.
If you interact with Komira and Locke, you can start the quest named Save Arabella.
Finding Healer Nettie
Now head down the stairs and you'll have reached the Sacred Pool (X:262 Y:535). You can talk to Jeorna. Maggran growls at you in his bear form, Jeorna asks him to calm down, she turns to you and tells you to get back.
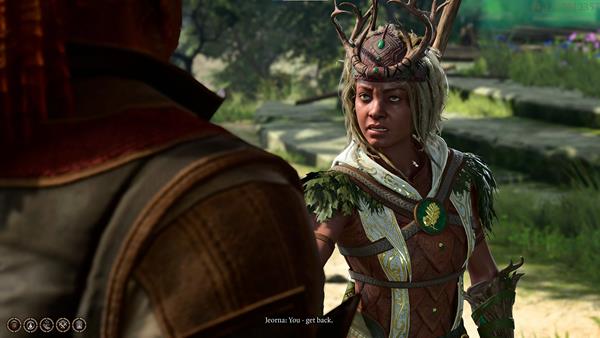
Your next set of choices will look like this:
- If it weren't for me, you'd be overrun by goblins by now. I'll go where I please.
- Why? What's so special down here?
- I'm not looking for trouble. Can't you just let me by?
- Ignore them and proceed.
- Leave.
If you choose to say that you're not looking for trouble, she still insists on not letting you through, but her companion Mino whispers to her ear and suddenly she says Kagha wants to see you and lets you through eventually.
As you make your way to the Secluded Cove and you'll find a tiefling child named Mirkon (X:327 Y:553).
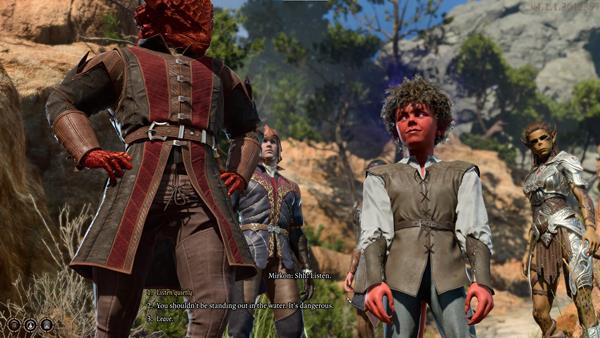
If you interact with the child, you can start the quest Investigate the Beach.
Now make your way back to the Sacred Pool, you can head through the Stone Door located at (X:228 Y:521) and advance the quest Save Arabella and you can also talk to Kagha about Zevlor's request to advance the quest Save the Refugees if you wish to do so.
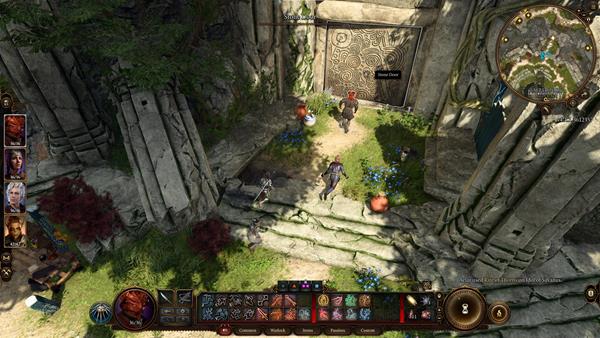
After heading through the Stone Door and seeing Kagha for the first time, go to the Druids' Chambers (X:-443 Y:-6) and you'll find Nettie trying to patch up an injured bird. Once you interact with her, she'll tell you to give her a moment.
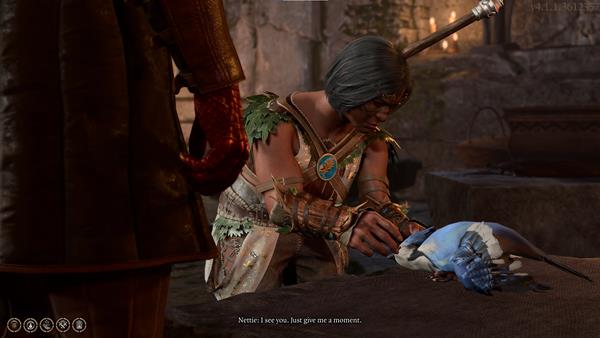
Your next set of choices will look like this:
- Is there anything I can do to help?
- Wait patiently.
- Excuse me? I'm more important than some bird.
- Leave.
If you choose to wait patiently, you'll see her perform a spell that will heal the bird instantly. She'll then ask what you need. Your next set of choices will look like this:
- I'm looking for Nettie.
- I need help. Now.
- Healing. Looks like I came to the right person.
Choosing the first option will make her reply that you found her, but she still doesn't know what she can do for you. Your next set of choices will look like this:
- Healing. As soon as possible.
- Do you know anything about mind flayers?
- I hear Halsin's the best healer around. I need to find him.
If you say you need healing, she'll give you a look and say you seem healthy enough. Your next set of choices will look like this:
- No good way of putting this. I... uh... have a tadpole in my head.
- More than tired. Something crawled into my eye.
- Right. Yes, I'm... very tired indeed.
If you tell her about the tadpole, you'll be presented with these choices:
- You know of them? Can you help me?
- What other kinds are there? It's not like a frog hopped in my eye.
- Actually, never mind. I'll get help elsewhere.
If you choose the first option, she'll say she'll do what she can and she might be able to help. Now you need to follow her inside the Enclave Library. You'll then see a dissected drow on the table. She says it had the same problem as you, and that this drow attacked her in the woods with some other goblins, and then a tadpole crawled out of his head soon after. Your next set of choices will look like this:
- The drow and I have the same kind of parasite?
- I'm hoping for a less grave cure.
- So you killed him and laid him out on the table?
- Is everyone being captured by mind flayers these days? Didn't think it was a common experience.
If you choose the first option, she'll say that you do have the same parasite. She'll also mention that Halsin has greater knowledge about these things as he studied them, and that's why he joined the adventurers on their expedition. She then says she'll see what she can do. Your next set of choices will look like this:
- Thank you, I'll take anything that can help.
- What's that plant? Will it help?
- Just hurry up and cure me. I don't have time to chat.
If you choose the first option, she'll ask you about what's happened so far and if there are any symptoms. Your next set of choices will look like this:
- I can merge my mind with anyone else that's infected.
- I fell from a ship in the sky, but something caught me. Saved my life.
- An intellect devourer spoke to me as if I were one of its own.
- No, nothing strange, I just want it out of my head.
Choosing the first option will make her ask you how you picked up the parasite. Your next set of choices will look like this:
- On a mind flayer ship - I was kidnapped and infected.
- I don't know. I just woke up with it.
- You're asking a lot of questions.
- Look, are you going to cure me or not?
If you choose the first option, she'll say you're dangerous, but you have a good soul. She then tells you to swear to her that once you feel any symptoms, you'll swallow the Wyvern Poison she's about to give you.

Your next set of choices will look like this:
- I thought you could cure me? What about that branch of yours?
- I swear.
- All right. Hand it over.
- No. I'm not taking poison from a woman I can't trust.
If you ask her about the branch, she'll say it's coated with a fatal toxin and it was just a last resort in case she couldn't trust you. She says she doesn't have a cure, only a way out. She then apologizes for misleading you. You'll then be presented with the same set of choices as before excluding the one you just picked. If you swear to take the poison if you ever show any symptoms of changing into a mind flayer, you will gain Lae'zel's approval, but get Shadowheart's and Astarion's disapproval. Nettie hopes it doesn't have to come to that but she thanks you, then hands you the Wyvern Poison. She then goes on to say that she's been treating people all her life and never encountered a mind flayer infection, and there are suddenly dozens of people like you. And what she finds weird is that the ones infected should be changing into a mind flayer and there should be an army of them by now, but the infected ones seems perfectly normal. Your next set of choices will look like this:
- What do you mean 'should' be changing?
- You must've learned something from studying them.
- Just tell me if there's a cure or not.
If you choose the first option, she'll explain that mind flayers reproduce by infecting someone with their parasite, and after seven days, the victim will transform, and a new mind flayer is born. The one residing inside your brain is different from their records, as it gives you telepathic powers and doesn't turn you into one of them. Your next set of choices will look like this:
- So you think it's only a matter of time?
- That's... good news?
- You said you were tracking other victims. Did they change?
If you choose the first option, it'll reveal that people infected like you were converging on an old temple in Selune, and this is what led Halsin to join the adventurers, and whatever he found there, he didn't make it back. Your next set of choices will look like this:
- What do you want me to do?
- So? Go and get him.
- You think he's still alive?
If you choose the first option, she'll say she's already sent birds to find Halsin, but the place is overrun by goblins and no one can get close. But you could maybe go there as she says they wouldn't kill someone carrying their parasite. She says if you can find and rescue Halsin and discover what he's learned, there's a chance it could save your life. Your next set of choices will look like this:
- All right. I'll find Halsin.
- It sounds like you're making a lot of assumptions that could kill me.
- You're sure he can cure me?
- That sounds like suicide. I won't do it.
If you choose the first option, she'll thank you as it would mean everything to the grove and to her. She wishes she could tell you more but only those adventurers that went with Halsin know what happened. She then reminds you of the oath you took before bidding farewell.
Meeting Raphael
As your conversation ends with Nettie, make your way to the Servants' Quarters (X:-461 Y:-17). At the back of the bookshelf, you'll see an open path, you can find Kagha's Chest there at (X:-488 Y:-4). If you try to Lockpick the chest, you will need to pass a Dexterity check with DC 10. Successfully doing so will let you loot the items within the chest.
Now that you've attempted to remove the parasite from your brain and rested, at any point in time you can meet Raphael. He then introduces himself and says he's at your service.
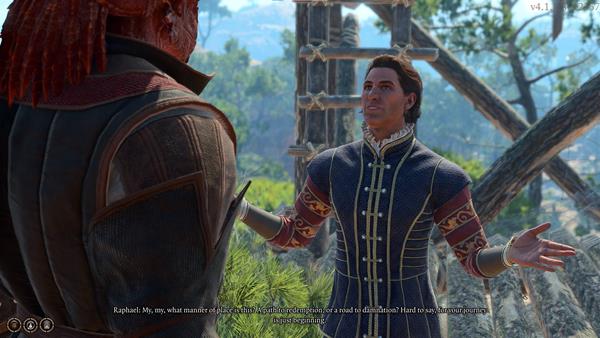
Your next set of choices will look like this:
- Pleasure. I'm Player's Name.
- Am I talking to the mouse or the cat?
- Pretty words. If you want to threaten me, don't disguise it.
- Walk away while you still have legs to walk with.
Upon choosing the second option, he'll teleport you to a fancy dining room. He'll say you're now in the Middle-of-somewhere. Your next set of choices will look like this:
- Nice decor.
- Can you be more specific than 'somewhere'?
- Take me back. Now.
- Reach for your weapon.
If you choose the first option, he'll say this is the House of Hope. He then tells you to enjoy the food warning that it might be your last meal. Your next set of choices will look like this:
- What makes you say that?
- I'm getting tired of your games.
- Are these theatrics leading somewhere?
- Ignore him and fill your plate.
If you ignore him he'll continue with the conversation, then he'll transform into a devil.

Your next set of choices will look like this:
- Draw your weapon.
- What makes you think I need saving?
- Why would you help me?
- I don't care what you are - I care what you want.
If you decide to draw your weapon, Raphael will de-escalate the situation and offers to fix your situation. Your next set of choices will look like this:
- I'll do anything to get rid of the tadpole.
- I need to think this over.
- You're mad if you think I'll make a deal with a devil.
- Then fix it - or die at my hand.
If you call him mad, Astarion, Lae'zel, and Shadowheart will approve. He's hoping you'd change your mind down the road. Your next set of choices will look like this:
- And if I do want to take this deal - how would I find you?
- I'll have the last laugh in the end.
- Take me back. After that, I never want to see you again.
- I'll rip out your mocking tongue.
If you choose the first option, he says he'll be around. Then transports you back to where you met him.
BG3 Emerald Grove Map
BG3 Act 1
- Previous: Emerald Grove
- Next: Sunlit Wetlands (Putrid Bog)
- Recommended Levels: 3-4
Act 1 Main Quests
The Forest Main Quest/s
BG3 The Forest All Quests
The Forest Walkthrough
Finding Edowin
You can reach the Forest by heading west from the Emerald Grove Environs Waypoint. If you're heading to the Forest after meeting with Raphael, head northeast towards the cliff's edge, then climb down the Cragged Rock to get to the green pastures of the Forest.
You'll find yourself at around (X:170, Y:416) when you first enter the Forest from the above two methods. Nearby at (X:172, Y:419), you can approach the stone wall to roll a Perception Check. If anyone in the party succeeds, you'll find a hidden Stone Door that grants you access to the Underground Passage linking the Forest with the Emerald Grove.

From here, you'll have two paths to follow. Head north up the dirt path. At (X:143, Y:440), you'll find two people looking over a dying Dwarf. A cutscene will begin when you get close enough to them. Brynna will be suspicious of you and you'll have four dialogue options to choose from:
- Freeze and hold up your hands
- What happened to your friend?
- [MEDICINE] His wounds look deep. I might be able to help.
- [ILLITHID] [WISDOM] I will go where I wish.
If you attempt the Medicine Check, you'll have to pass a DC of 10. If you choose any of the first three options, even if you fail your Medicine Check, Edowin will intervene, and you will be met with another 3 options:
- Try to block him out.
- Hold his stare.
- Move away, reaching for your weapon.
If you choose the second option, he will recognize you as a True Soul and get Andrick and Brynna to trust you. They'll ask you what to do next, to which you have the following responses:
- You're mistaken - I'm no True Soul.
- True Soul?
- Explain this Absolute to me.
- Perhaps you can help me. I'm looking for the druid Halsin.
- Why are you out here? The wilderness is dangerous.
- What happened to your brother exactly?
You can freely choose any of the options without consequence to learn more about the topic you choose, except the second option where you say that you are not a True Soul. Be careful as well after choosing the fifth option, asking them what they are doing in the wilderness. If you tell them that you are a survivor of the crash afterward, they will turn hostile and force you into a fight. Andrick will drop a Chain Mail and a Longsword and Brynna will drop a Leather Armour and Mace. If you choose the sixth option and ask what happened to Edowin, you may get the option to order them to help you defeat the Owlbear in the Owlbear Nest later on.
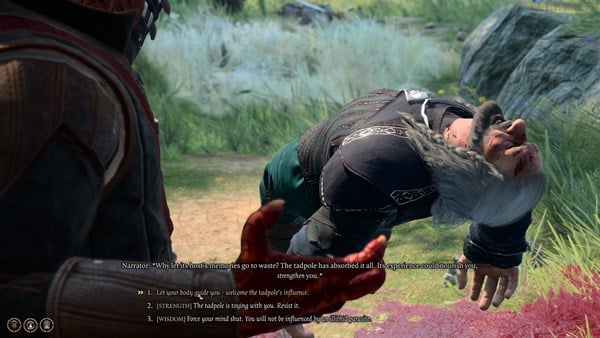
Whether or not you fought Andrick and Brynna, you'll be able to loot Edowin's corpse. When you do, your character will be pulled towards the tadpole in Edowin. You have three options to choose from here:
- Let your body guide you - welcome the tadpole's influence.
- [STRENGTH] The tadpole is toying with you. Resist it.
- [WISDOM] Force your mind shut. You will not be influenced by an illithid parasite.
If you choose the first option or fail your checks when choosing the other options, you will get a tadpole that you can use to unlock a new Illithid Powers. If you choose the third option, you will have to succeed in a DC 12 Wisdom Check to resist the tadpole. Succeed, and a small tadpole will scurry away from the body, to the west. If you are quick enough, you may be able to kill the parasite. This interaction with Edowin's corpse will be noted in your journal under the Find a Cure Main Quest. If you interact with Edowin's corpse again, you'll be able to loot some items off of his body, including the Shaft of a Broken Spear, one of two items required to make the Vision of the Absolute.
Exploring the Forest & Owlbear Nest
Besides the above interaction, there aren't any other opportunities to progress the Main Quest in this location. It is, however, worth it to explore the Forest fully for several Items and NPC interactions. If you head southwest down the dirt path from Edowin's body, you can cross the river at the next split to get to a Cave Mouth at (X:89, Y:443). Your party members will automatically roll Survival Checks when you get near and if anyone succeeds, they will be able to identify the cave as an Owlbear Nest.
Within the Owlbear Nest, you'll find an altar to Selune with a locked chest. Pass an automatic Perception Check behind the large statue of Selune to find the Selûnite Prayer Sheet. If you read it in front of the chest, you'll be able to unlock it and loot the Moondrop Pendant. Do note that if you have Shadowheart in your party, you'll have to pass a Persuasion Check to open the chest without her disapproval. Further in the Owlbear Nest, you'll bump into the Owlbear living within. You'll be able to pass it by peacefully by succeeding in a Performance, Survival, or Animal Handling Check. Fight it, and you can loot the Head of a Broken Spear from it, the second piece of the Vision of the Absolute, as well as invite the Owlbear Cub to your Camp later on. Nearby, on a Skeleton next to the nest is The Oakfather's Embrace.
Back outside and in the Forest, west of Edowin's body is a bridge at (X:135, Y: 408). Cross over and your character will find 5 corpses. On one of the Goblin corpses is the Goblin's Drawing that, when read, will initiate the Defeat the Goblins Quest in the Blighted Village. The entrance to said village can be found nearby at (X:65, Y:404). To the north at (X:79, Y:471), you'll find Scratch the dog who can be brought back to Camp if persuaded. In the southern part of the Forest at (X:50, Y:314), you'll be able to reach the Sunlit Wetlands.
BG3 The Forest/Owlbear Nest Map
BG3 Act 1
- Previous: Forest/Owlbear Nest
- Next: Underground Passage
- Recommended Levels: 3-4
Act 1 Main Quests
Sunlit Wetlands (Putrid Bog) Main Quest/s
Sunlit Wetlands (Putrid Bog) All Quests
Sunlit Wetlands (Putrid Bog) Walkthrough
Visiting Auntie Ethel's House
You can find the Sunlit Wetlands south of the entrance to the Blighted Village at (X:50, Y:314) in the Forest. When you get there, you'll notice two men arguing with an elderly lady. When you approach them, you'll enter a cutscene with Auntie Ethel, Johl, and Demir. The two men are brothers of a pregnant widow called Mayrina and accuse Auntie Ethel of having kidnapped her. You can intervene and ask what's going on or ask the brothers to lower their weapons. Afterward, you'll get the following prompts:
- I won't let you hurt Auntie Ethel.
- I'm not getting involved.
- Ethel, what did you do to their sister?
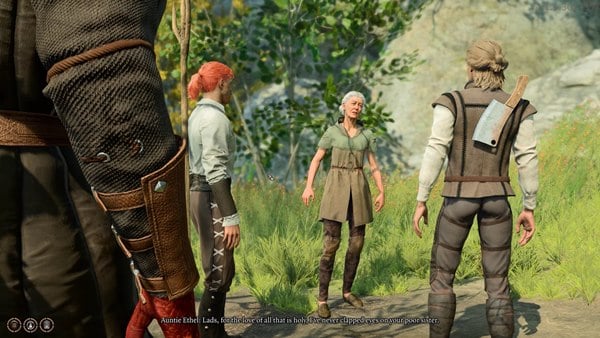
If you choose the third option, Auntie Ethel's ruse will drop and she'll disappear. You can ask the two men what's going on, but even if you offer to help them, which Lae'zel and Shadowheart disapprove of, Johl won't trust you enough to allow you to help. This interaction with Auntie Ethel and the two men will start the Save Mayrina Quest. Continue south through the wetlands, and you'll feel like you're being watched. You will have 3 options to choose from in this cutscene:
- [INVESTIGATION] Look for anything out of the ordinary.
- [ARCANA] Draw on your pact to empower your sight. (Warlock-specific)
- Ignore the feeling.
If you pass any of your checks, the Sunlit Wetlands will reveal its true nature. The pleasant and sunny marsh turns into a dark and stinking swamp - the Putrid Bog. Continue west and you'll eventually get to the Riverside Teahouse Waypoint. Further west, you'll find Auntie Ethel's home, the Gnarled Teahouse. As soon as you enter, you'll be pulled into a cutscene with Auntie Ethel and Mayrina. Most of the dialogue here will be for the Save Mayrina Side Quest, but eventually, Auntie Ethel brings up the Illithid parasite. After asking her if she can remove it, you'll get the following dialogue options:
- I know a devil that's offered to remove it.
- Depends on the price.
- Yes. Get this damn parasite out of me.
- I'll take my chances on my own.
- [WARLOCK] Such things are rarely done for free. What's the real bargain here?
- Leave.
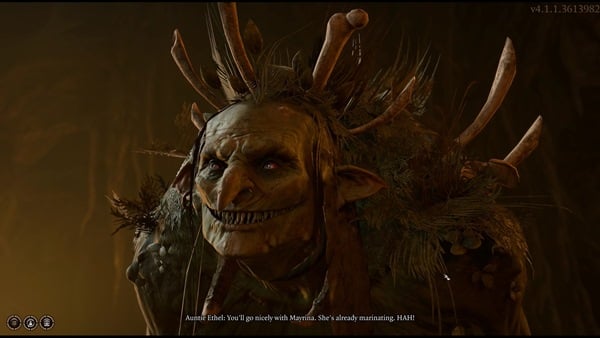
If you choose the second or fifth option, she'll tell you that she wants your eye in exchange for removing your parasite. You can freely ask questions about the procedure, after which you'll have to choose whether or not to accept the deal. If you refuse, she'll tell you that you're always welcome to come back to take the deal. If you agree, she'll reveal her true form as a hag and ask which eye you want taken. You will have the option to attack her at this point, the final way out of the deal. Continue through with the deal and you'll gain disapproval from your companions, as well as the Paid the Price Condition. This will contribute to the Find a Cure questline.
Exploring the Rest of the Sunlit Wetlands/Putrid Bog
Auntie Ethel's teahouse and the Save Mayrina quest encompasses most of the exploration you'll do in the Sunlit Wetlands/Putrid Bog. Some Items of note include the Whispering Mask, The Ever-Seeing Eye, Bitter Divorce, and the Staff of Crones. The first item can be found in the Overgrown Tunnels beneath the Gnarled Teahouse, while the latter three can all be found in the Acrid Workshop reached by heading into the depths of Auntie Ethel's home, or through a mushroom circle found south of the Gnarled Teahouse at (X:-72, Y:210). If you complete Save Mayrina and spare Auntie Ethel at the end, you may also get Auntie Ethel's Hair to increase on Ability Score of your choice.
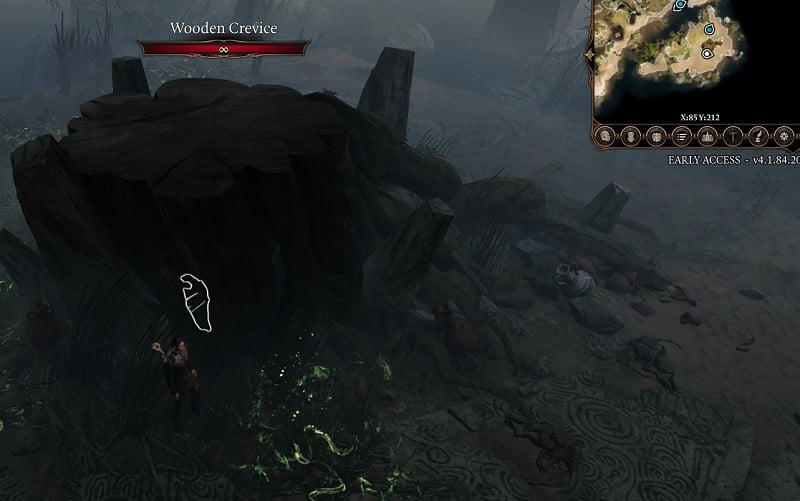
There are a few other places of interest within the Sunlit Wetlands you might want to check out. In the southeast portion of the area is the Decrepit Sanctuary, Here, you'll find a large island with some hostile Wood Woad and Ancient Mud Mephit, but more importantly, the Wooden Chest here holds The Sparkle Hands, and the large log in the middle of the island contains the Letter to Kagha used for the Save the Refugees Quest.
Directly southwest of the Riverside Teahouse Waypoint, you'll find Gandrel, a Gur intent on finding and capturing the vampire spawn Astarion. Interacting with him gives you several opportunities to gain approval (or disapproval) from Astarion and learn more about how other NPCs see Astarion. If you end up in a fight with Gandrel, you can loot Gandrel's Aspiration from him afterward.
BG3 Sunlit Wetlands (Putrid Bog) Map
BG3 Act 1
- Previous: Sunlit Wetlands (Putrid Bog)
- Next: Blighted Village
- Recommended Levels: 3-4
Act 1 Main Quests
Underground Passage Main Quest/s
Underground Passage All Quests
Underground Passage Walkthrough
Navigating the Underground Passage
The Underground Passage is a shortcut that connects the Emerald Grove and the Forest. If you approach the stone cliff at the entrance of the Forest at (X:172, Y:419), your party members will all roll automatic Perception Checks. If anyone succeeds, you'll notice a Stone Door appear. Interacting with this door will take you into the Underground Passage. Alternatively if you're entering through the Emerald Grove, a Stone Door can be found by lockpicking into the hut opposite of Sazza's cage in the Emerald Grove at (X:175, Y: 600) and scaling the ledges below the hut.
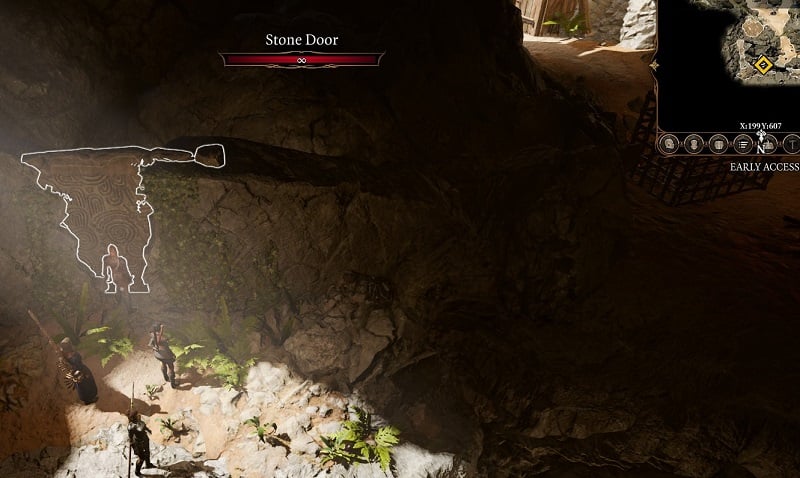
Scattered throughout the Underground Passage are several Guardian Statues that shoot fireballs. You can stealth past them and deactivate them by interacting with their corresponding blue Rune (i.e. to disable the Guardian Statue that looks like an Eagle, you need to interact with the Rune of the Eagle and so on). While there are no Main Quests in this area, this path is the safest to take if you are trying to complete the Save the Goblin Sazza Quest.
While in the Underground Passage, you'll find an unconscious man, Findal, about to be killed by a band of Goblins. If he survives after your encounter with the goblins, he can be healed and sent back to the Emerald Grove. If he dies, you can loot an Arcane Circlet off of him. Close by, the lone island next to Findal has a Charred Key in it. This key is used to safely unlock the Heavy Chest on the upper ledge close to the exit leading into the Forest. If the chest is unlocked in any other way, it will trigger a powerful fire trap, dealing heavy damage to anyone close to it. You can find Nature's Snare within this chest among other things.
BG3 Underground Passage Map
BG3 Act 1
- Previous: Underground Passage
- Next: The Risen Road
- Recommended Levels: 3-4
Act 1 Main Quests
Blighted Village Main Quest/s
Blighted Village All Quests
Blighted Village Walkthrough
Exploring the Blighted Village
The entrance to the Blighted Village can be found on the west side of the Forest at (X:65, Y:404). You can find a sign by the entrance that will say Moonhaven. As you approach its entrance, your party will roll automatic Perception Checks. If anyone succeeds, you'll notice that there's trouble ahead in the Blighted Village. There are no Main Quests in this area, however, you'll find plenty of interesting Side Quests and Items, as well as the way to The Risen Road here.
You can enter the village by fighting the goblins at the entrance or persuading them to back down. Up ahead and to the left will be the Blighted Village Waypoint. The house directly next to it has a substantial cellar that you may want to hold off exploring until you finish exploring the Whispering Depths. Opposite the Waypoint, you can lockpick a chest that contains the Haste Helm.
In the southwest part of the village, you'll find a worn-down house occupied by three ogres - Fank, Chock, and Lump the Enlightened. If you manage to deceive them about being a disciple of the absolute, they will give you Lump's War Horn, an item used to summon the three to help you in combat. Otherwise, you'll have to fight them, after which Lump drops the Warped Headband of Intellect.
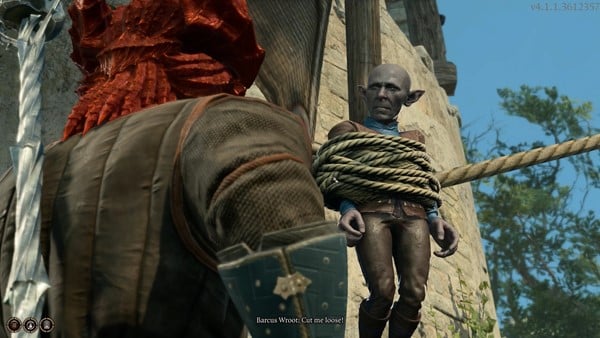
If you head to the northwest part of the village instead, you'll encounter some goblins by a windmill. When you approach them the Quest Rescue the Gnome begins. The gnome can be saved peacefully if you pass certain checks when speaking with the goblins. Fail the checks and you end up fighting the goblins, one of which drops the Very Heavy Greataxe. After saving the gnome, Barcus Wroot, he can later be encountered in the Grymforge again.
Reaching the Whispering Depths
In the northern part of the Blighted Village is the blacksmith's house at (X:30, Y:425). You can find Highcliff's Journal in the small alcove next to the fireplace. Reading this book starts the Side Quest Finish the Masterwork Weapon. In the next room is some webbing that can be burned away to access the basement. The chests in the first room contain Highcliff's Blueprints, the Steelforged Sword, and a piece of Infernal Iron. The next room is a forge that leads into the Whispering Depths. The Whispering Depths can also be accessed by interacting with the well near the village waypoint.
As you explore the Whispering Depths, you'll encounter multiple Phase Spider Eggs. These eggs should be destroyed to make the fight with the Phase Spider Matriarch easier. This area is relatively small and consists of two main levels. On the ground level, keep an eye out for the Apprentice's Journal on a skeleton to start the Search the Cellar Quest, as well as a Heavy Chest with the Spiderstep Boots. On the upper level, you'll find the Phase Spider Matriarch, a Level 5 spider with the ability to teleport to and hatch any unbroken Phase Spider Eggs on the ground. You can pick up the Poisoner's Robe after defeating her. In addition to that, you'll be able to access the western side of the cavern and loot the Dark Amethyst required for Search the Cellar, and unlock the Whispering Depths Waypoint.
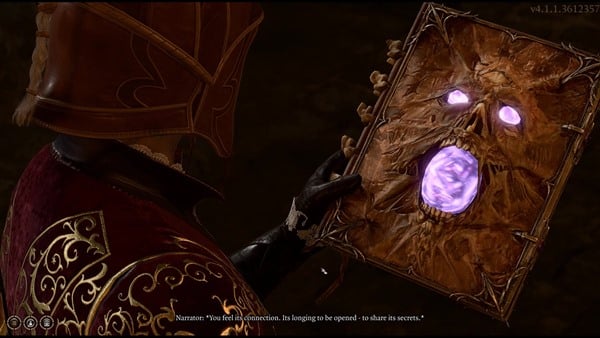
After completing the Whispering Depths, you can return to the house next to the Blighted Village Waypoint to complete the first part of Search the Cellar. Within the cellar, you'll find the Scroll of Summon Quasit, Bracers of Defence, and more importantly, The Necromancy of Thay. You will have three options when dealing with the tome, the first of which is to end the quest early by destroying the book with Radiant Damage. This tome can also be given to either Astarion or Gale to earn their approval. Alternatively, you can choose to read the tome yourself in order to gain the Necromancy of Thay effect and have the opportunity to unlock the tome's full potential later in the game.
To leave the Blighted Village, you have to return to the gates to the north at (X:30, Y:425). Past the gates is a barn to the right, where you'll find Buthir and Grukkoh, and further northwest at (X:12, Y:482) is the broken bridge leading into The Risen Road.
BG3 Blighted Village Map
BG3 Act 1
- Previous: Blighted Village
- Next: Goblin Camp
- Recommended Levels: 3-4
Act 1 Main Quests
The Risen Road Main Quest/s
The Risen Road All Quests
- Find the Missing Shipment
- Hunt the Devil
- The Hellion's Heart
- Rescue the Trapped Man
- Free the Artist
- Find the Githyanki Creche
The Risen Road Walkthrough
Arriving at The Risen Road
To reach the northern part of the map, the main path is through the Broken Bridge, accessible from the south, specifically the Blighted Village. Although the bridge is partly damaged, it's not a big issue as you can guide your team to jump across. Once you reach the edge of the Broken Bridge, you'll be approximately at coordinates (X:-8, Y:494).
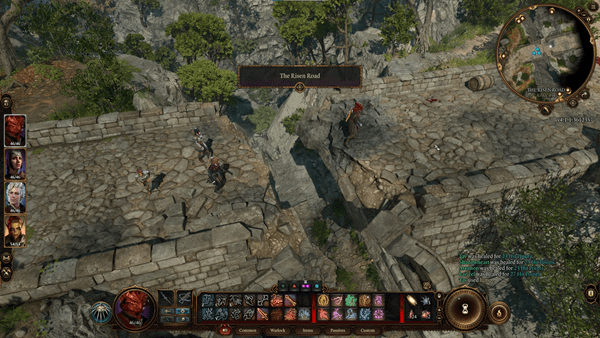
After crossing the bridge, you'll come across some Mangled Corpse on the right (X:-1, Y:516). Go to the corpse and interact with the surviving Hyena. In a cutscene, the Hyena appears to be in pain, and you can choose from several dialogue options:
- Try to comfort the Hyena.
- Step back to watch what happens.
- [Melee Attack] Strike while the beast is vulnerable.
- Leave.
If you choose to comfort the Hyena, a Newborn Gnoll will emerge from its insides, leading to a battle with some Gnolls. Once you defeat all the enemies, you can loot the battle area and collect items from the remains of the Gnolls. While looting, you'll also find a letter on the ground titled "To the Good Godly Folk of Faerun." Another letter can be found on a corpse atop the nearby mountain, labeled "An Open letter on oppression and Peacocks." Yet another letter can be found just to the right of the first one, titled "As per my last letter." Close to this last letter, an important corpse contains a Quest Item called "Shipment Orders," triggering the quest "Find the Missing Shipment" and updating your quest journal.
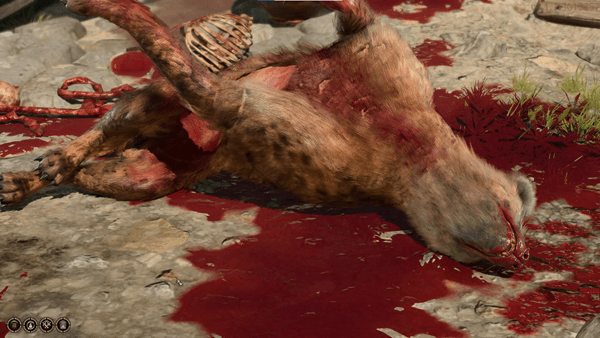
Starting from your current location (X:71 Y:633), head in the Southeast direction until you come across a Toll Collector's Key Item lying on the ground at (X:98 Y:523). Once you pick up the item, head North West until you reach a new waypoint. From there, go left to find a small village filled with dead bodies. Inside one of the houses, you'll meet someone named Anders. Talk to him and choose the following options:
- Who - or what - attacked you?
- What is this place?
- Rest easy. I'll only stay a short time.
After choosing the first option, Anders will tell you about the attack, and more dialogue options will appear:
- Where is this devil?
- It isn't like a devil to use their brawn instead of their brains.
- Let me help. I can hunt down this monster.
- I wish you and yours well, but I must be on my way soon.
- Now that she softened you up, I'll finish you off.
Select the second option, and Anders will agree with you. Then, choose the first option again, and he will give you the location of the Monster. He'll also reward you with the Sword of Justice if you defeat the Monster, but you can choose to reject the mission. The dialogue options for this are:
- Very Well, I'll bring you her head.
- I'll think about it.
- I have other things to deal with.
- The only head that will roll is yours.
This will activate another quest called "Hunt the Devil." Proceed to the next room and talk to Cyrel, selecting the first three options to trade with her. Outside the room, speak to Trynn, who will mention a cellar. Choose the second option to inquire about it, and Trynn will explain that it used to be a Tollhouse and there might be gold inside. Ask her about Tollhouses, and she'll mention a locked door in the cellar that no one has been able to open yet.
Meeting Karlach
Once you've spoken to all the NPCs, head Southeast down the river until you reach (X:114 Y:507). There, you'll meet Karlach, the devil you need to hunt down, as the Paladins warned you about. This will update the "Hunt the Devil" quest. Speak with Karlach and choose from the following options:
- Are you all right?
- Devil! Face Me!
- Try to Douse the flames.
- She looks dangerous - watch her carefully
- These are no natural flames - prepare to fight.
- I know you - you're the monster the blade of frontiers is hunting.
Select the first option, and she'll mention that she's okay. Karlach will recognize you and ask about the Paladins of Tyr. Choose the first option to inquire about how she controlled the flames. As Karlach talks, you'll both experience a vision. Select the first option to explain that the tadpole in your heads connects you. Karlach will briefly comment on the visions and introduce herself.
Reply with:
- I'm (name)
- Karlach. I met someone named Wyll who was hunting you. He said you were a devil.
- I'm your key to curing that tadpole - eventually.
- I'm not interested in making friends.
- Here to take your head.
Choose the second option, and she'll reason with you that Wyll was wrong about her. She wants to prove it and reveals how she excelled at slaying demons during the Blood War. Karlach also explains that a group of evil beings is posing as Paladins of Tyr, and she wants to take them down. Choose the following:
- Let's send them back to where they came from.
- So you want me to kill the people hunting you?
- Why should I do your dirty work?
- I'm here to kill you, not send you back to Zariel.
- I have my own problems. I don't need yours.
Select the second option, and Karlach will reassure you that she'll lead, but she needs your help. Astarion will sarcastically agree. Respond to Karlach with:
- Let's do it.
- Why should I do your dirty work?
- I don't think so - you'll have to go it alone.
You can ask why she wants you to do the dirty work, but eventually, just select option 1. After this interaction, three new journal entries will be available, and a new quest called "Our Old Fiery Friend" will trigger, while "The Blade of Frontiers" and "Hunt the Devil" quests will update.
Exit the attacked village and at (X:-84 Y:577), you'll come across another Waypoint. Proceed South West along the Risen Road until you reach the Mountain Pass at (X:103 Y:553).
Here, speak to a woman named Ellyka, who warns you to stay hidden before anyone spots you. You can reply with:
- What's the issue?
- Who are you?
- I'd be concerned if I knew who they were.
- I didn't like that term you used. Watch your words.
- I'll leave.
Choose the first option, and Ellyka will show you enemies below, advising you to take an alternative route as she plans to do. Respond with:
- Who are you?
- Your survival instincts are good. Maybe you should join me.
- I'll leave.

Select the second option, but Ellyka will reject it. Choose the first option, and she introduces herself as nobody. As you prepare to move your character, a cutscene unfolds. The enemies begin to draw their weapons against each other. Gauntlet Dion tries to mediate, but Sarth Baretha's faction refuses to comply. A dragon suddenly appears and destroys the bridge under Gauntlet Dion. The dragon sides with Sarth Baretha, and another dragon named Kith'rak Voss lands nearby. He warns Sarth Baretha to focus on finding the weapons and not fail the queen.
The scene shifts to your group, where Astarion warns that the Githyanki can be dangerous. This update affects the "Find the Githyanki Creche" quest in your journal.
Progress towards the Githyanki located at (X:-136 Y:555). As you draw near, a cutscene will unfold, showing Lae'zel conversing with the leader, Kith'rak Voss. Lae'zel faces threats from the leader and is asked for her name. You can respond with:
NOTE: Some dialogue options will depend on the Race and Class you've chosen. For this playthrough, the race chosen is Dragonborn and the class is Warlock.
- Nod to Lae'zel. Proceed.
- [DRAGONBORN] I shall speak for her, gith.
Select the second option (Lae'zel approves), and Lae'zel will introduce herself to Kith'rak Voss. The leader, Voss, introduces himself, and Lae'zel recognizes him. Voss informs that a ghaik vessel has fallen from the sky, and thieves aboard have stolen a precious weapon. He describes the weapon, causing Shadowheart's anxiety to rise as she realizes it matches the artefact she possesses. Shadowheart suppresses her unease to avoid suspicion from the Githyanki. Voss instructs Lae'zel to join the search and speak up. You can reply with these dialogues:
- Signal Lae'zel silently: 'Truth'.
- [Persuasion] Signal Lae'zel silently: Play Along.
- Present the unusual artefact. Are you seeking this, I presume?
- I have my own agenda. Prepare to face defeat, gith.
Choose the second option. With sufficient Charisma, Lae'zel will play along, earning Voss's approval. (Shadowheart and Lae'zel approve.) The Githyanki leader departs, and you engage in a conversation with Lae'zel. She expresses relief that you adeptly intervened while conversing with Kith'rak. She feared that revealing the group's possession of the artefact would have led to their demise. Your quest journal will update with two entries for "Find the Githyanki Creche" and "The Githyanki Warrior." This marks the conclusion of available quests around The Risen Road.
BG3 The Risen Road Map
BG3 Act 1
- Previous: The Risen Road
- Next: Shattered Sanctum
- Recommended Levels: 4-5
Act 1 Main Quests
Goblin Camp Main Quest/s
Goblin Camp All Quests
Goblin Camp Walkthrough
Infiltrating the Goblin Camp in BG3
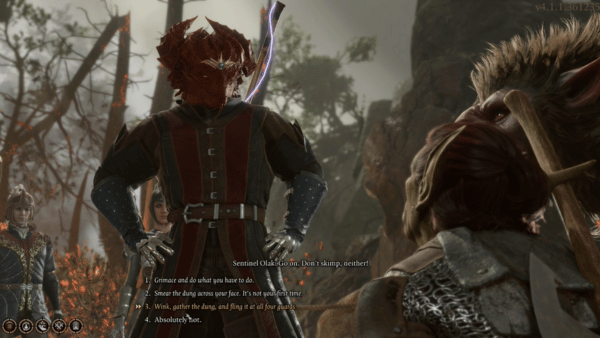
There are several ways to gain entry to Goblin Camp. In this guide, we will approach the guards, and speak with Sentinel Olak. You will have to convince him of one of the options presented to you or engage them in a battle. By engaging them in a battle, you will be able to gain the approval of Lae'zel and Astarion.
You will find yourself in a conversation with Sentinel Olak, together with his minions, wargs, and other goblins. Deceive him by telling him that their leader summoned you. As part of this act, you will get to choose an option later to "Wink, gather the dung, and fling it at all four guards." Take note that by doing this, a battle will commence and will also grant the approval of your companions.
If you attempt the Charisma Check, you'll have to pass a DC of 15. You still have 4 other options to proceed here and you can succumb to the Goblin's wishes, but risk the disapproval of your companions.
- [Illithid] WISDOM: Stand aside.
- [Intimidation] I'm a hired sword- employer's inside. Stand aside. Now.
- [Nature] Glossy coat on that animal. Does she belong to the Nordiland worgata family?
- [Deception] Your leader summoned me.
- [Detect Thoughts] Read the goblin's mind.
This fight should be an easy one with a well-balanced party, and this will grant you access to the Goblin Camp without alerting hordes of goblins. Approach the bridge that you see here, and at about (X:-103 Y:36), you will encounter a small group of goblins seated by a table, and you will engage in a conversation with Devout Wasp. You can ask him if he has seen the Flaming Fist, any survivors of the attack, and finally, about Moonrise. Devout Wasp will also point the way to enter Goblin Camp with one word: North. Before this, he acknowledges that there are survivors who have been taken into Moonrise.
When you reach coordinates (-X:103 Y:391), you will see a broken bridge. Continue following this path that will lead into the Goblin Camp. Finally, the mobs are no longer hostile here unless provoked. You will see Volo, the Bard performing as he struggles to entertain his audience.
You will have 5 options here as you approach Volo. Be careful making any of these choices as this could put Volo's life in danger, unless of course, that applies to your roleplay. There are no DC checks to be made here, but the Goblin Gribbo will react to your presence, and Volo will continue to distract the goblins.
- Give him your rapt attention.
- Fragulous? Galide? I don't know this language.
- Bravo!
- Boo! Get off the stage!
- Leave.
This interaction will update your journal, adding Volo to your objectives, as part of Save the Refugees. Inside the camp, you will find Grat the Trader, you can buy items from him as needed, as long as you have the gold to pay for the goods. The goblins inside aren't hostile so you are free to interact with them. As you look around, you will find a Waypoint at (X:-72 Y:-42). This is placed next to a bloodied platform where Crusher, a goblin, is telling a story of how he crushed humans. Approaching the goblin will give you 4 options:
- Lot of assumptions here. I don't think I'm better than anyone else.
- I don't just think so; it's a fact. You're nothing but dirt beneath my feet.
- Leave.
- [ILLITHID] WISDOM: I'm your superior. You'd better show some respect.
Crusher here will then command you to kiss his foot but Lae'zel immediately reacts to this. She refuses to see you grovel to the goblin, and if you do so, will risk her disapproval. After that quick interaction, you will have another 4 options:
- You can't be serious.
- I'd sooner spit in your face.
- [INTIMIDATION] How about you kiss my feet instead?
- Attack the goblin.
Take note that starting a fight with Crusher will cause the other goblins to join in and risk your party's life in danger. If you choose Intimidation, you will need to succeed a DC check of 15. If you succeed at this, you will get further options with Crusher:
- Not so high and mighty, after all.
- [INTIMIDATION] You better kiss my foot. Now.
- [ILLITHID] WISDOM: You will obey me. Kneel.
- [DETECT THOUGHTS] Scan his mind.
- Leave.
Depending on what you choose, you can provoke the goblin into a fight. Kill him and you can loot Crusher's Ring from him. The first one will further anger him and will commence a battle. However, a sneak attack can put this fight to an end immediately with the help of one of your companions. The rest of the goblins will watch on as Crusher bows down and kisses your feet. You are still free to explore the goblin camp, and no hordes will be triggered by doing this.
After this, you will approach the Gazebo located at (X:-96 Y:445) where Booyahg Piddle, a goblin is reading a book. Your goal here is to convince the goblin to hand over the book, and gain Shadowheart's approval if you wish to do so. To do this you will have to choose Persuasion from the 5 options presented to you:
- [ILLITHID] WISDOM: You will give me the book.
- [INTIMIDATION] It'll be a very short lifetime if you don't hand me the manuscript.
- [PERSUASION] You should spend your time in prayer- not reading this nonsense.
- [DETECT THOUGHTS] Scan his mind.
- Leave.
To pass this, you will need to get a Charisma DC Check of 10 or higher, and successfully persuading Booyahg Piddle will cause him to give you the item: "On Goblins: My Life Among the Conquering Host" and the approval of Shadowheart. Next, you will want to go to the area below, where the rest of the goblins are gathered. You will find Krolla here again, who invites you to Chicken Chase. You can attempt to free the young Owlbear here by persuading it that the Goblins are responsible for its pain. It will then attack Krolla, but in order for the Owlbear Cub to escape, you will have to help it by defeating the Goblin horde.
The Shattered Sanctum
Further exploring the Goblin Camp will take you to the Shattered Sanctum. You will find the entrance to this area by approaching a troll called Guard Gurgon at (X:-104 Y:462). This character is not hostile and you can just walk inside the Shattered Sanctum. Once inside, Shadowheart will engage you in a conversation and informs you that being inside this area gives her an uneasy feeling, and she would like to leave as soon as you're done with what is needed in the area. She doesn't explain any further and ends the conversation there.
In this area, your goal is to locate Liam, one of the survivors who are being tortured by Goblins. You will be given 5 options on how to approach this encounter:
- Why are you torturing him?
- This looks interesting- let me put him through his paces.
- [ILLITHID] WISDOM: Leave, both of you.
- [DECEPTION] Go have yourselves a drink. Your boss sent me to relieve you.
- [PERFORMANCE] I'm taking over. Your sloppy handiwork is going to kill the prisoner too quickly.
- [DETECT THOUGHTS] Read the goblin's thoughts.
Choosing Perfomance will require you to succeed the Charisma with 15 DC Check or higher, and you can make the goblin leave so you can talk to Liam freely. Liam has information about Halsin and the Druids to the west. With the features of Astarion, he can free Liam from his shackles and he will escape to warn the Druids of the danger coming to them. Before leaving, he tells you that he has last seen Halsin transforming into a bear, but that was the last time that he has seen him. Liam will vanish into the darkness, and you can return to the others again.
BG3 Goblin Camp Map
BG3 Act 1
- Previous: Goblin Camp
- Next: Underdark
- Recommended Levels: 3-4
Act 1 Main Quests
Shattered Sanctum Main Quest/s
Shattered Sanctum All Quests
- Ask the Goblin Priestess for Help
- Save the Refugees
- Raid the Emerald Grove
- Defeat the Goblins
- Rescue Volo
- Rescue the Druid Halsin
Shattered Sanctum Walkthrough
The Shattered Sanctum
At the beginning of Shattered Sanctum, you will first speak to Liam after freeing him from his torturer. (See Goblin Camp on how to successfully infiltrate Shattered Sanctum peacefully). Your next interaction is to speak with Gribbo, the one in charge of Volo, the Bard that was seen performing upon entering the Goblin Camp. You will have a conversation with Gribbo here to attempt to set Volo free by any means. You will get 5 options here:
- I've taken a shine to this one. How much do you want for him?
- [ILLITHID] Wisdom: Set him free.
- [DECEPTION] He looks weak. Sick, even. He won't last long in there.
- [INTIMIDATION] I'm done talking. Open the cage or you'll be sorry.
- [DETECT THOUGHTS] Read her thoughts.
- Leave.
If you attempt the Deception check, you will have to pass a DC of 10. Once you have convinced her, she'll hand you the cage key and you can now speak to Volo freely. Volo will then ask to unlock his cage so he can escape. You find out that he is inside the camp to jumpstart his career, but found it to be a failure. You can now look around the room and find the letter addressed to 'Dearest Elminister' on the table. Make sure to lock the door before you attempt to free Volo here. You'll engage in another conversation with Volo and you can invite him to camp as he suggests the use of an invisibility potion to escape the Goblins. You can either agree to accept Volo or not with the options:
- I'm not looking for extra company right now. You go your way, I go mine.
- Go to my camp. We'll talk there, once we're both safe.
- Leave.
After freeing Volo, continue to explore the Shattered Sanctum and you will find Bloodied Shrine at (X:330 Y:-20) You will find Abdirak waiting outside a door, and with a Religion proficiency, additional information reveals that this man is a follower of Loviatar, goddess of pain. He reveals that he will be teaching the goblins how to inflict pain with a purpose.
This same man recognizes the pain that your character is feeling and offers to alleviate the pain through the teachings of Loviatar. He claims that his work will grant peace and serenity. Lae'zel chimes in and states her interest to see what his 'skilled hand' can do. No DC checks here but your answer will have a bearing on the approval of Astarion and Shadowheart. You can decide for yourself what you want to do:
- All right, why not?
- Touch me and you'll lose your hand.
- Leave.
Abdirak will ask you to stand by the door as he performs the 'ritual'. You will get options here and attempting the Performance check (Charisma) will require you to pass a DC of 5.
- [CONSTITUTION] Try to hold back your cries.
- [PERFORMANCE] Yelp loudly and dramatically beg for mercy.
- [INTIMIDATION] Come on. A child can hit harder than that.
- Stop. That's enough.
Shortly after, Abdirak will continue to hit you. Attempting the Performance check (Charisma) will require you to pass a DC of 10 for this section.
- [CONSTITUTION] Try to hold back your cries.
- [PERFORMANCE] Writher in exaggerated agony and cry out.
- [INTIMIDATION] Come on. A child can hit harder than that.
- Stop. That's enough.
As Abdirak hits you, Shadowheart and Astarion engage in quick exchanges as if savoring your suffering. Attempting the Performance check (Charisma) will require you to pass a DC of 10 for this section.
- [CONSTITUTION] Try to hold back your cries.
- [PERFORMANCE] Ah mercy! I can't take it... it's too much!
- [INTIMIDATION] Come on. A child can hit harder than that.
- Stop. That's enough.
Abdirak proceeds with hitting you and he finally acknowledges you that he has served your penance. If you state that you have found the ritual to be interesting, he tells you that Loviatar would like to bless you. You will get Acolyte: A Kiss Without Mercy, an event that inspires Shadowheart. When the ritual is done, you can grab the Ritual Dagger and Ritual Axe on the table if you wish to do so. After the ritual, you will also get the condition: Loviatar's Love. You can leave this area or you can loot a Necrotic Mace from him if you kill him.
On to your next encounter, explore further the Shattered Sanctum at (X: 270 Y:13) you will find Brakkal, a follower of Maglubiyet, who, with your Religion proficiency, is recognized as a tyrannical deity who treats his followers as slaves. In a nearby area, you can interact with a Rat to get further information on the area by using Speak with Animals, or a relevant potion.
In the next area, still at Shattered Sanctum at (X:290 Y:34), you will find one of the leaders Dror Ragzlin performing a ritual on one of the corpses in front of his followers. Here, you can approach the corpse and get the following choices:
- Study the corpse. Was this the mind flayer that tortured you?
- I haven't made a habit of it.
- What kind of ceremony is this?
- Settle in to watch the proceedings.
- Move in for the kill.
- Turn away from the rite.
As you study the corpse, Dror Ragzlin will claim that this creature had a weapon and they're looking for the killer, and thus, the weapon. He invites you to settle in. As a Dragonborn, the character here feels the anxiety of Shadowheart, who carries the weapon that they are looking for. Next, you will get another choice here on how to tackle this:
- Then let the ceremony proceed.
- Attack the hobgoblin.
- Leave, before the mind flayer can identify you.
Choosing to stay here will play a cutscene of Droz Ragzlin attempting to give a semblance of life back to it. You will get a choice here.
- Allow the hobgoblin to speak freely, lest he sense your intrusion.
- [Wisdom] Dig into Ragzlin's mind and control the interrogation.
- Attack the hobgoblin.
- Leave, before the mind flayer can identify you.
Allowing the hobgoblin to continue the interrogation will give the information through a vision of a memory that reveals you as the killer. Dror Ragzlin is angered by this and you can now choose how to respond to this accusation. Attempting the Persuasion check (Charisma) will require you to pass a DC of 10.
- [PERSUASION] It's a mistake. I'm a True Soul, remember? We connected.
- [DETECT THOUGHTS] Cast Detect Thoughts on him.
- Thrust yourself into his mind.
- Drop the ruse and attack.
After persuading Dror Ragzlin, he acknowledges that you're a True Soul and commands you to seek Minthara and join her on the attack on the grove. Agreeing here will get Shadowheart's approval. This event will also inspire Astarion 'Charalatan: Devil's Advocate.' As your party walks to the next destination, you will see a Scrying Eye, and Astarion points out not to do anything suspicious while it's watching. Inside Shattered Sanctum (X:333 Y:42), you will find Nightwarden Minthara holding a meeting with other goblins.
She recognizes you as a True Soul, and asks if you will be joining her hunt. Remember that Dror Ragzlin asked you to join her hunt but you can still decide here if you want to go on your own hunt. Here you can tell her that you are looking for Halsin, a druid, who is the same Druid that they're after. You are given a choice before she senses that you have been to the grove. You can confront Minthara here as she is left with very few goblins in this area. If the Scrying Eye spots you in this area, make sure to destroy it too. Pick up the valuable items you can get from Minthara such as the Mind Flayer Parasite Specimen.
Continue exploring Shattered Sanctum to find the Roah Moonglow, a halfling at (X:274 Y:-29). An NPC who sells items within the sanctum. If she recognizes you as a friend of the family, then she will offer a discount, albeit, a small one.
Your next meeting here will happen at (X:296 Y:-25), where you will find True Soul Gut in the middle of a platform. She claims that she will brand you as well, just as The Absolute has done. She claims that it is protection and is embedded in magic. You can dive deeper into her mind here but be aware that she can also do the same to yours, allowing both of you to get further information about each other.
She claims that she can help you with anything and invites you into her chapel, away from the others. Note that agreeing to receive help from True Soul Gut will warrant the approval down of Astarion. Before the ritual begins, she asks the others to leave and then the interaction begins. You can choose if you will attack her here, fight the intrusion, or let her in your mind. Fight off her intrusion, and repel her attempts successfully to complete the quest. She claims now that she can't help you and ask The Absolute for help immediately, you can begin attacking her while she is away from the others. Retrieve the Rancid Note, Mind Flayer Parasite Specimen, and Priestess' Key from her belongings.
Meeting Halsin, the First Druid
Your next destination is the Worg Pens (X:393 Y:-60) where you will find a caged bear that is being hurt by Brawler Birka. The bear asks for your help and you can decide to interfere with them and offer your assistance to the bear. Agreeing here will cause the bear to attack the gate and the battle begins. Your goal here is to not let any of the witnesses escape as you help the bear. After winning the battle, the bear transforms into Halsin, the Druid that you were looking for.
Seek his help to remove the parasite and he acknowledges that you are different from the others, and not bowing down to the powers of the True Absolute. He informs you of what he knows about the parasites and is aware that someone is using powerful magic to modify the tadpoles, he then explains that he can't cure you, but still offers to help. He tells you that these powers come from Moonrise Towers and that it's possible to find a cure there.
He claims that killing the three leaders will restore order. He asks for your help and offers to help you out after he is secure the safety of his grove. In this next selection you can choose how to go about tackling this:
- Having a shapeshifting bear-druid at my side might make things easier.
- I'll deal with this. You get to safety.
- The grove isn't my problem. I have to concentrate on saving myself.
- You ask too much of me. I can't help you.
Choosing the second option here that lets Halsin leave will grant the approval of Astarion but the approval down of Shadowheart. After this conversation, you will find a locked Grated Iron Doors at (X:410 Y:-32) and have Astarion unlock it for you. You will find a corpse of an elf on the wall. Attempting the Investigation check here will require a DC score of 5. Pulling out the body reveals a tunnel that can possibly lead to another area.
The Dream Visitor
As you rest, you will drift into a dream where an elf visits you. You recognize her voice and she reveals that she has saved you before, and will save you once more. She also claims that she will protect you and prevent you from becoming a mind flayer. She claims that the way to win it over is to learn how to wield it, and she will keep it from consuming you. In this dream, she shows the fight for the fate of Faerun.
You return to your party and feel better from last night. Here, you will speak to Gale who shares about having the same visitor from your dream. Sharing with Gale that you have had the same dream will get him to ask you if you will take the word of your visitor. If you say that it's only a dream, then Gale will appreciate your caution. Next, you can offer to give Gale a magical artefact to gain his approval. However, he claims that he isn't feeling the same effect as last time and needs time to himself.
While you're at your campsite, make sure to interact with Volo to complete your quest here. When Volo decides to remain in the camp will reward you with a Blazer of Benevolence. When you're done at camp, return to the mysterious hole that you found. When interacting with this, you find out that it is still blocked so you will attempt to clear this out. For now, you will return to Dror Ragzlin's throne where you first encountered him. This time, there are no rituals but he is seated on his throne. For a better chance of surviving this battle, you will want to take out the Narvass, the Novice of the Absolute who is alone above the throne behind Dror Ragzlin.
An enemy will detect this, however, but you will have an advantage now that you were able to take out one of them. Be careful not to get anyone killed in your party, but if you end up having one of your allies dying, you can use Scroll of Revivify on them. When the battle is over, go to Dror Ragzlin's body and recover his key and the Mind Flayer Parasite Specimen. Your thoughts get interrupted as the dream visitor speaks to you in your mind. It commands you to absorb its potential which can enhance you. Rejecting the tadpole here will not gather any approval or approval down from the current party.
However, if you decline, Astarion offers to at least let one of the party members try it than just let it sit in your pack. This will update your journal under Personal Quest if you prefer to Embrace your Potential by harvesting the parasite's memories. With the key that you recovered from Dror Ragzlin, you can unlock the Iron Gate right on the balcony behind his throne to get valuable items such as Amulet of Selune's Chosen, Infernal Iron, Springstep Boots, and other items.
Proceed to the locked Heavy Oak Doors at (X:310 Y:-25). Be careful as opening this door will launch enemies into attacking you and your party. This will be a long battle and you must be well prepared for it. After winning this, you should by now, have killed all of the leaders of the goblins. This is an event that will inspire Lae'zel.
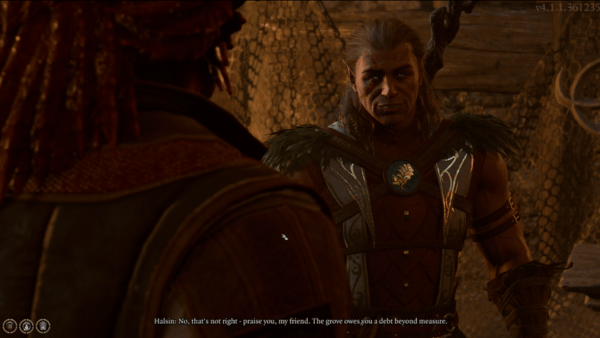
Next, return to Halsin who has asked for your help in defeating the goblins to restore order and protect his grove. You will find him at (X394 Y:-31)., inform him that you have slain all three of the leaders. Now you can invite Halsin to join your party and help you on your quest to get to Moonrise Towers. After this area, return to Druid Grove by using the Waypoints that you have unlocked. The closest will be Emerald Grove Environs and you begin traveling from there to continue your quest with Halsin.
Return to the Emerald Grove
NOTE: The section below of this walkthrough takes place after you explore the Shattered Sanctum and you rescue Halsin.
When you're done exploring Shattered Sanctum and after rescuing Halsin from the Goblins, you will need to return to Emerald Grove to complete your quest. Make sure to check Shattered Sanctum to see the walkthrough. Teleport to Emerald Grove by using the waypoints, and then move to (X:209 Y:434) where you will find the entrance to the grove. You will first interact with Zevlor, who welcomes you and would wish to show appreciation for your hard work by offering gold from everyone. After this conversation, the quest Defeat the Goblins will be completed and you will also receive an item, a Patched-Together Sack.

Continuing your quest Save the First Druid, you need to speak with Halsin and find him at Emerald Grove. In the meantime, you can also look for Dammon, the trader in the area at (X:179 Y:554), and interact with him to buy and sell wares through him. Walk toward the Sacred Pool at (X:262 Y:518) and you will be able to speak with Halsin here, who is currently engaged in a heated conversation with Kagha. Halsin has decided that Kagha will remain in the grove but she will begin as a novice once more. Halsin declares that the grove still needs her, hence, why she needs to stay.
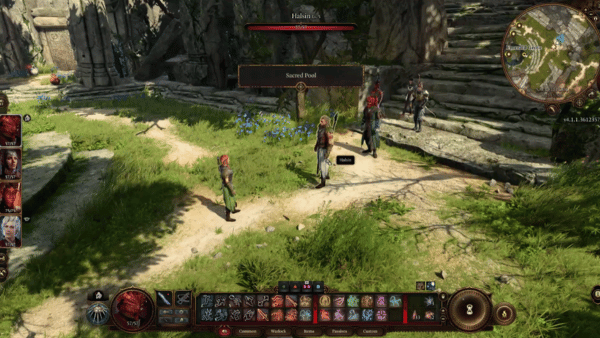
Halsin turns his attention to you and begins to acknowledge and thank you for your work and then he will ask you to speak with Zevlor to help out with the parasite that's troubling you. Tonight, the Druids wish to celebrate and they will begin the plan tomorrow. Approach the Stone Door at (X:229 Y:519) to return to Emerald Grove and speak with Rath. Rath will show gratitude for bringing back Halsin and for defeating the goblins. You will get choices on how to respond:
- For someone like me? It was pretty simple, actually.
- Think nothing of it. I'm glad Halsin is safe.
- It was a hell full of blood and ash.
- I'm just here for the reward.
Choosing the second option here will open up Rath to give you a reward, a rune that will show the location of the cache. He asks that you take it to the library and claim the contents of the cache when the wolf glows the brightest. After receiving the reward, this will complete the Save the First Druid quest. To claim your rewards, you will find the library at (X:439 Y:21) that will take you to a Hidden Vault beneath it after solving the puzzle.
Approach the Empty Socket inside the library and then put the Rune of the Wolf into it, then click on combine. Then, activate the Rune of the Eagle, Rune of the Bear, then finally, Rune of the Elk. This will unlock the hidden access to the basement where you will find elixirs, potions, equipment, and other valuable stuff that you can use.
BG3 Shattered Sanctum Map
BG3 Act 1
- Previous: Shattered Sanctum
- Next: Grymforge
- Recommended Levels: 5
Act 1 Main Quests
Underdark Main Quest/s
Underdark All Quests
- Avenge Glut's Circle
- Cure the Poisoned Gnome
- Defeat the Duergar Intruders
- Deliver Nere's Head
- Find the Missing Boots
- Find the Mushroom Picker
- Free True Soul Nere
- Blind the Absolute
- Find Explosives
- Save the Grymforge Gnomes
- The Adamantine Forge
- Get Past the Rubble
Underdark Walkthrough
Reach Underdark by Hidden Door from Shattered Sanctum
On this walkthrough, we will guide you on how to travel to Underdark by discovering the hidden access located within Shattered Sanctum. To do this, you must first return to Goblin Camp, and defeat the remaining enemies. You may refer to the Goblin Camp page to see details on how to get there, or by using the Waypoint.
Once you made it to Shattered Sanctum, you will find that there are still remaining enemies here even after their leaders were killed. After taking out their leaders as part of rescuing Halsin, the goblins have become hostile towards you and your party. You will find Warrior Trinzas still located at the entrance together with a few other mobs where you will battle them.
Continuing to reach the Underdark, you will journey to Defiled Temple at (X:392 Y:27), where you will encounter Polma, the Bodyguard of the High Priestess. The dialog shows that a theft has been reported, and you are the only suspect. You are given the following choices:
- Hand over the stolen items.
- Try to talk your way out of the situation.
- Perhaps a little gold could smooth this over? (652)
- Attack.
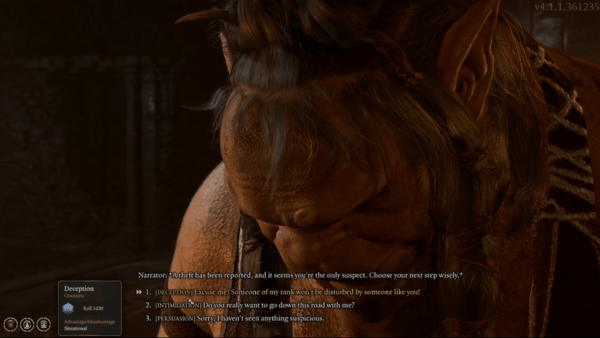
Next, you will get another set of choices. Attempting the Intimidation check (Charisma) will require you to pass a DC of 15. Failing this will result in a battle against the Ogre. After fighting the ogre, you will now continue to look for the location described in the journal. At (X:437 Y:58), you will discover a lever pictured below:
Into the Underdark
To unlock this, have one of your party members pick the lock. Attempting this Sleight of Hand (Dexterity) will require you to pass a DC of 15. Slowly after, your party can now enter through the newly opened door that will lead to the Selunite Outpost, then to the Underdark. Right as you reach the area, you will find locked doors which will require a Sleight of Hand (Dexterity) to open. You will need to pass a DC of 15 to open these doors and chests.
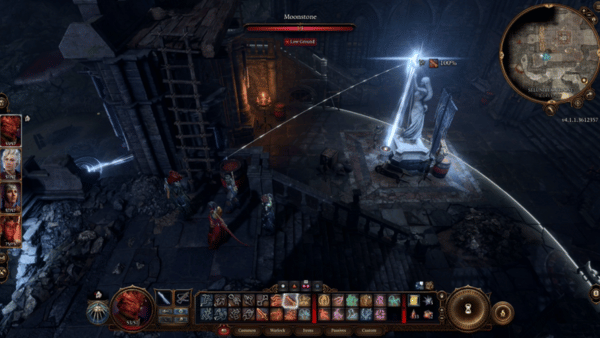
In the distance, you will see a statue holding up a Moonstone, that serves as Selune's protection in this sacred ground. You can destroy this by going up a flight of stairs at (X:145 Y:-227) and shooting it down from there. However, this will alert a Minotaur nearby causing it to attack the gate. You can quickly take it out as you will be standing in a high position to freely hit it.
In one of the rooms, go to (X:170 Y:-237 to discover a Waypoint, and then look around to discover a logbook and some items on the shelf. Now, you can return to where the Minotaur died and open the gate by interacting with the lever nearby. Finally, you will now arrive at the Underdark. In the distance, you will see a weapon buried in the ground, as you walk your way toward the path, at (X:137 Y:-203), you will be interrupted by a voice. Your party acknowledges that they can hear the voice as well, and the cryptic voice will stop.
At (X:116 Y:-192), you will find the drow blade. Interacting with it will give you 3 options. Attempting the Religion check (Intelligence) will require you to pass a DC of 15.
- [STRENGTH] Grab the sword with both hands and pull.
- [RELIGION] This feels holy. Consider what the appropriate ritual might be.
- Leave.
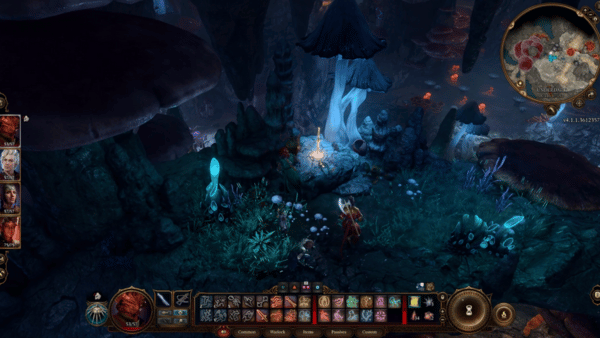
When you are successful, it reveals that the blade was a warrior's sacrifice to Eilistraee and that it demands blood. After offering your blood to it, the blade will rise up in the air and you can claim the Phalar Aluve for yourself. This event called 'Last Rites of the Dark Dancer' will inspire Shadowheart. You can now continue exploring Underdark here and face another enemy at (X:119 Y:-186), your party will be fighting against Bulette, Predator of the Dark.
After taking out your enemy, move one of your party members to the edge of the ground and shoot down the Torchstalk closest to the character. This will cause a series of explosions among the nearby torchstalks. Continue doing the same for the rest of the torchstalk and once it's clear, the rest of your party can now cross to the other side. Continue exploring the Underdark and your subsequent interaction will happen at (X:115 Y-130), where you will find the Restless Myconic. This creature stands tall before you and your party and demands that you state your purpose after threatening you with a vision of your lifeless body.
Choosing the 2nd option will grant the approval of Shadowheart and Karlach. This interaction ends for now, peacefully. The sovereign acknowledges that they are expecting you and prompts you to follow them to the path behind them, to Ebonlake Grotto. You will also discover a waypoint at (X:100 Y-100). Shortly after, you see a gnome writhing in pain. You recognized the poison and were aware that she needs an antidote sooner than later. You will have the following options to respond:
- Who did this to you?
- How did you end up here?
- Give her an antitoxin.
- [PERSUASION] You're in a bad way. I could end your suffering if you want.
- [INVESTIGATION] She's helpless. Check if she has anything worth taking.
- Leave.
Choosing the first option here reveals that she was slashed by Duergar. Then, you will get the option to attempt a Medicine check (Wisdom) which requires you to pass a DC of 15. You discover that the poison can be cured and you'll get the next choices:
- Sit tight. There must be more than one way to cure you.
- How did you end up here?
- Give her an antitoxin.
- [PERSUASION] You're in a bad way. I could end your suffering if you want.
- [INVESTIGATION] She's helpless. Check if she has anything worth taking.
- Leave.
Choosing the 3rd option or giving her an antitoxin will grant the approval of Karlach. As you talk to Thulla, the poisoned gnome, she reveals that her kin needs her. As she is in a condition that cannot help anyone, she asks for your help instead. She tells you that her clan, the Ironhand has been taken by the Duergar to dig an old ruin across the lake. This event will inspire Karlach 'Outlander: A Noble Endeavour' which requires you to use a noblestalk mushroom effectively. She will also ask for your help and will give you a new quest: Save the Grymforge Gnomes.
Following the Restless Myconid that you spoke with earlier, you will find its kin at (X:79 Y:-101). You hear the melody again and a memory will be shown to you of Dark Dwarves and Duergar breaking their peace and killing their young. The Sovereign Spaw asks for your help to destroy these invaders that remain on their land. Karlach interjects and prompts you to respond with one of the options below:
Choosing the first one reveals that they are looking for a gnome, a guest of the Myconid. You will now choose how to respond with the following choices:
- You harbor a fugitive gnome? Admirable of you.
- Sure, I can handle those Duergar nearby.
- What in the hells did you do to that corpse?
- Forget it. If you want them dead, you can kill them yourself.
- Leave.
Agreeing to help the sovereign will show you a vision once more. One that shows a wall of vines parting to reveal glowing light. The sovereign then speaks, that when you cleanse the rot, you will earn the reward. After this interaction, you will look for Blurg and his Illithid friend, Omeluum. Blurg is a scholar and a trader who welcomes you to the Underdark Myconid. He asks what brought you to the Underdark. Telling him that a mind flayer has infected you with a tadpole will prompt him to call on his Illithid friend, who will offer to help you understand what's going on.
Omeluum is intrigued that no ceremorphosis has taken place yet despite being infected with a tadpole and asks if you are looking to have it extracted. If you choose the first option, he will ask you to open your mind to him. If you agree to this, Omeluum tells you that the larva is infused with strange magic, and is currently in stasis. Omeluum tells you as well that he will not be able to extract the tadpole as it appears to be shielded from physical and magical influences. He continues to explain that even without the shield, extracting the tadpole will result in severe cranial trauma, a process that would surely kill you. He then continues to assure you that he will examine you once more, should you transform.
If you were to trust Omeluum, you can ch oose to tell him about the strange mind flayer ship, or otherwise, choose one of the 2 other options below:
- Tell Omeluum about the strange mind flayer ship you were on.
- Thanks for the information.
- All that probing was useless in the end.
He tells you that he has never set foot on a nautiloid. He explains that these are warships from the greatest eras of the Illithid Empire, ruling the entire Astral Plane from their decks. He then apologizes for being unable to assist in the removal of the parasite. Before the conversation ends, Omeluum comes up with the idea to bypass the stasis. He tells you that he needs a fresh Tongue of Madness and Timmask Spores, which are both dangerous mushrooms. You will be given an option here if you would accept Omeluum's help:
- Eating those doesn't sound like a great idea.
- Lovely. So where do I find these mushrooms?
- That's too risky of an experiment for me. Count me out.
- Leave.
If you choose the second option, Blurg will tell you that you can find these mushrooms in the Underdark, but he warns you that finding these mushrooms are perilous. He points you to Lenore, a cleric who served Mystra. Then you will have another chance to accept or reject their help:
- Eating those doesn't sound like a great idea.
- That's too risky of an experiment for me. Count me out.
- All right. I'll come back when I find the mushrooms.
- Leave.
Continue to explore Ebonlake Grotto and look for Derryth Bonecloak at (X:54 Y:-91). A merchant gold dwarf who will give you the task 'Find the Mushroom Picker'. Make sure to also check her wares and buy essential items from her such as equipment and potions. You will also speak with Sovereign Glut nearby who will ask you to tell him of home. You will get the following options in the picture below:
If you choose the second option, Glut will respond with its own picture of his own home. He will continue to tell you that Duergar destroyed his people, and left without a circle. He wishes to join you to help cleans the Duergar rot. He offers to raise the dead and you will have command of it. You can respond with one of the options below:
- Are you sure? It's going to be dangerous.
- Join me? That depends- can you make yourself useful?
- Very well- you may join me.
- I don't need your help.
- I'm not traveling with some overgrown mushroom.
- Leave.
If you accept his help, then you will be given a new quest which is Avenge Glut's Circle.
Setting Camp at the Underdark
While at camp, your companions will approach you and share their insights and experiences. During this period you can freely interact with them to make progress with your romances and relationship with them. While at camp, it's also possible that you will get a vision or see the Dream Visitor who will tell you secrets of the parasite. This factors in the progress that you have made in the game so make sure to take long rests and camp as necessary.
Back to the Underdark
When your camp ends with the party, you will now return to the Underdark and continue your journey here. At (X:71 Y:-190), you will find an executed deep gnome and recover Shortsword of First Blood from its body. After agreeing to help Sovereign Glut, you will now go to seek the Duergar threatening the peace of the Myconid Colony.
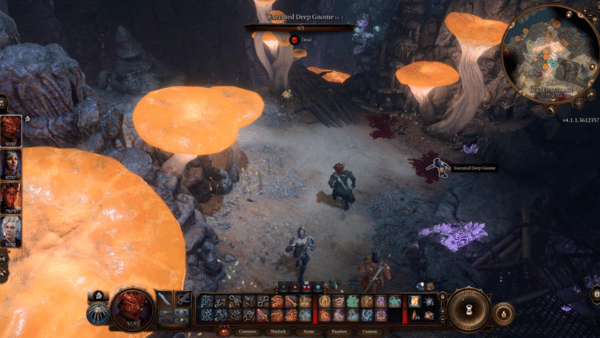
In the Decrepit Village at (X:15 Y:-179) a Duergar will spot you and take you to Gekh Coal who is ready to fight after you get caught sneaking. Attempting the Persuasion (Charisma) will require you to pass a DC check of 15.
- I could've killed you before you even noticed me, but didn't. Stand down.
- [INTIMIDATION] Take your hand off that axe before you lose it.
- [PERSUASION] I can be discreet. No need for bloodshed.
- Attack him.
- Turn to leave.
If your attempt is successful he will let you live. He shares that a certain slave ran away and took Sergeant Thrinn's boots, which describes the same situation as Thulla did before. You can decide if you want to give the boots and tell him that you have it, or do it at a later time, or simply attack him here. If you have decided on how to proceed with this, make sure to walk towards (X:23 Y:-211) to discover a waypoint before moving on to the next interaction.
Following this walkthrough, we will keep our word to Sovereign Glut and Thulla. You can now return to the Myconid Colony and inform Glut that the Duergar has been taken care of. He demands to see the bodies, and you can walk back to the area to show him. However, as soon as Glut sees the body he's dissatisfied and wishes to take Spaw's circle. Glut is blinded by his hunger for power and wishes to devour the colony whole. If you take Spaw's side, you will gain Astarion's approval.
You can now return to the Myconid Colony and speak with Spaw to report to him what took place.
- The Duergar are slain; the rot has been purged.
- I have slain the creature called Glut. It was scheming to slaughter your circle.
- Leave.
If you choose the first one, you will gain the approval of Karlach. Spaw is pleased with this and tells you that you can now claim the promised rewards. However, he informs you that threat still remains in the Underdark and asks you to take care of a drow named Nere, lurking in the shadows. He will give you a new quest: 'Deliver Nere's Head'. After this, he will name you Peace-Bringer and then, Kin Spirit.
Enter the Sovereign's Refuge at (X:52 Y:-78) to claim your rewards. You find a body of a drow scholar, which you can investigate by the use of Speak with Dead. You find a book laid closely and pick it up. Attempting the Investigation/Nature will require passing a DC check of 15.
The book reveals its secrets to forging adamantine and now, you can turn your attention to the body on the ground. The drow of the name Xargrim reveals that they're searching for The Adamantine Forge. You also learned that the forge is hidden deep within the Underdark, and would require a mould and mithral ore into each of their chambers to activate the lever.
Following your quest to Find a Cure, you will set out to look for the mushroom picker. Go towards Dread Hollow at (X:-5 Y:-115) where you will see Bibberbangs blocking the path pictured below. Make sure to hit these from a distance as they can erupt into poisonous fumes. In the area below, you will find more Bibberbangs blocking your path. These plants exhale poisons and expel them when they sense vibrations, which makes them incredibly dangerous.
In the distance, you will see a dwarf, Baelen Bonecloak surrounded by all the dangerous shrooms. You begin your conversation with him here:
- This is quite a predicament you've landed yourself in.
- Surely you can navigate around some fungi, can't you?
- Turn away.
You know that he needs a misty step, and you can decide how to help him. If you have the scroll, you may safely throw it to his direction, or fetch his bag first. Attempting the Strength check will require you to pass a DC of 10 to help the dwarf. You can tell him that you met Derryth and then he hands you an item to thank you, a Scroll of Invisibility. He runs away after this quick conversation. Don't leave the area yet, as there's a noblestalk plant in this area, however, to get it, you must not trigger the Bibberbangs.
One method is to just run back and grab it, triggering the Bibberbangs. As soon as you have it, turn on turn-based mode and the Bibberbangs will continue to explode. Once they finish and the mist goes away, use your turn to use Misty Step, heal, etc. You may refer to Find the Mushroom Picker page for more detailed guide on how to retrieve it. Now, you may now return to Derryth at Ebonlake Grotto who is currently talking to Baelen who has just arrived.
It appears that Baelen has forgotten the noblestalk that you picked up earlier. Derryth explains that they need it for their shop in Baldur's Gate, and will ask you to hand it over. You can decide her if you want to keep it for yourself or give it to her, or attempt an extortion with the following options:
- Give it to her.
- Keep it to yourself.
- What will you do with it?
- How much is it worth to you?
If you hand her the noblestalk, she will reward you with Gloves of Uninhibited Kushigo and this will also mark your quest complete for Find the Mushroom Picker.
Continuing your journey in the Underdark, you will search for The Adamantine Forge, which was described in the journal of the dead drow in the Sovereign's refuge. During your journey make sure to stop by at (X:-50 Y:-142) to discover a waypoint in Sussur Tree. Walk further into the center of the tree and at (X:-18 Y:-144), you can pick up the Sussur Tree Bark, which is a quest item that you'll need to Finish the Masterwork Weapon.
Then, you will encounter a boss here, Filro the Forgotten, who is also aware of the existence of The Adamantine Forge. You will find him at Dread Hollow at (X:-43 Y:-166). Once he is dead, you can now use Speak with Dead to commune with it.
- Who are you?
- You lived among those creatures?
- How did you come to be here?
- Your notes mention a Guardian- what is it?
- The glowing tree- what is it?
- Leave.
You discover that the glowing tree stills the Weave and protects him from the others. He tells you that the Guardian is born from hellish heat designed to protect The Adamantine Forge. You discover that there's 3 of them looking for the forge, Xargrim, and Dhourn. Xargrim was the one found at the Sovereign Refuge, which leaves you to search for Dhourn.
Battle with Spectator
Continuing your search for the Adamantine Forge, you are now set to look for Dhourn, the 3rd member of the drow party aware of its existence. Deeper into the Underdark at (X:120 Y:-247) you will encounter a boss, Spectator. In this area, a cutscene will play showing stone statues resembling a party of dark drow. It casts the unpetrification on the Drow that will bring it back to life. This battle will go on allowing the Spectator to cast unpetrification on the rest of the Drow to help it in combat.
Upon defeating it, you can recover The Spectator Eyes from the boss and other valuable items from their party. With the protector out of the way, you can now use Speak with Dead to commune with Dhourn. You find out through him that the original members of their party turned against each other and ended up killing one another. Make sure to check his pack to recover the Memory Shard from Dhourn. Use the shard to see a vision of the Adamantine Forge, confirming its location in the bowels of the Underdark.
The Festering Cove
At (X:-425 Y:282) you will find BOOOAL worshippers led by Overdripp the Zealous. They are in the middle of their chants and want to sacrifice you to their lord. You will be given 5 options pictured below and attempting the Investigation or Arcana check will require you to pass a DC of 20. If you are successful, you will be able to identify that this is a hoax. The bloodied creature demands a sacrifice putting you and your party's life in danger.
- Wait! If it's blood you want, I can make another offer.
- [PERSUASION] Are your followers aware you're just a rabid little fey creature?
- Attack.
If you attempt the Persuasion check, you will need to pass a DC of 15. If you pass, the bloodied creature will reveal its true identity before its priest and followers. BOOOAL asks if its power you want and you will get the following options:
- What kind of power?
- I'll just kill you and claim it for myself.
- [To priest] Well, Bow before BOOOAL's Chosen!
- I don't need your power- or theirs.
- I won't let you enslave them any longer.
Choosing the second option will grant the approvals of Astarion and Shadowheart and the fight will commence right after. If you kill BOOOAL, Pooldripp the Zealous praises you for defeating the pretender and gives you a new name: MAKHLOOMPAH! Then, the priest asks you what is your first commandment to your new worshippers.
- A better name than 'Mahkloompah', for one.
- Go out and build me an army.
- No more blood rituals.
- Just keep doing what you're doing.
- Perhaps you should study the teachings of my god.
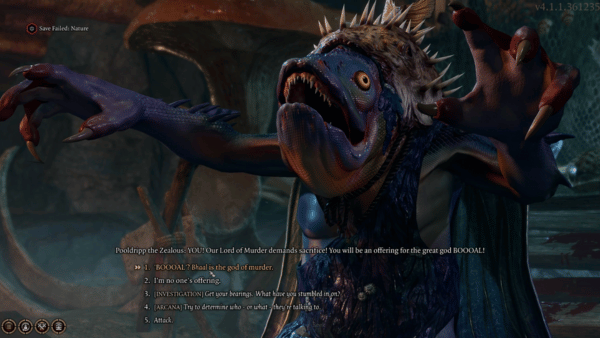
Make sure to grab the items that you can get from BOOOAL's body before moving on to the next area. There's a Gilded Chest located at (X:-402 and Y:327) unlocking this chest will require you to pass a Dexterity check DC 10. You can get a Slippery Chain Shirt and gold from this chest. There's another Gilded Chest with the same unlocking requirements to obtain Pale Green Dye and other camp supplies.
Continue exploring The Festering Cove and at (X:-398 Y:-258) you will find a Message In a Bottle, an item that you can open to read a letter from Doni addressed to his father. There's also a nearby area where you can find a chest to obtain a Scroll of Blink. This is already unlocked and there's no need to break it open or pick its locks.
Return to the Underdark (Main Area)
After exploring The Festering Cove, you will now return to the Underdark, where you will head first to (X:66 Y:-259). You will find a drow who seems to have fallen to its death, given the condition of the body, as your companion pointed out. To know more details about their death, you can use Speak with Dead or simply go through their belongings. You can get a Scroll of Slow and a Hide-Bound Journal from their body.
Next, you will head to (X:72 Y:-260) to recover a Sylvan Stone, that will help you to unlock a recipe: Essence of Sylvan Stone. To reach this place you have to jump upwards a series of mushrooms growing through the walls. You will see these mushrooms pictured below:
When you reach the top, you will find more Sylvan Stones on the ground that you can recover. Make sure to explore the top area to go through a fake wall pictured below:
By going through this area, you can recover more Sylvan Stones and you can see a Mushroom Circle glowing on the ground. If you interact with this, you will be teleported back to the ground where you first started jumping up. Now that you're back on the ground, you will continue your search for the Arcane Tower.
Approaching the Arcane Tower
Your journey to the Arcane Tower begins upon reaching (X:35 Y:-251) with a tall doorway. When you get here, it is ideal to switch to turn-based mode so you can take precise control of your characters. There are two Arcane Turrets protecting this area and if you come any closer, it will automatically attack you. To avoid these attacks, go to the right side, away from the watchful eye of these towers. These turrets are built strong and have Sturdy condition, you may only damage these if your attacks can deal at least 10 damage. You may also use Eldritch Blast on these cannons to deal massive damage to them.
Once the turrets have been temporarily disabled, you can now explore the area to read a letter addressed to Yrre from Lenore and then take items such as ingot dropped on the ground. You will also find a locked Heavy Chest here which contains a Skybreaker and silver ingot. To open this chest, you will need to pass a Dexterity DC 15. With the Arcane Turrets disabled, you will now move past the second turret on the stairway pictured below:
Note that these turrets can come alive again after a certain period of time so make sure to watch out for that before it starts attacking your party. To permanently disable these turrets and activate the elevator to go up the tower, you will need to go to the lower area of this ground. Jump through the mushrooms pictured below until you reach the lower area.
When you reach this door at (X:-60 Y:-294) you can destroy this or use a lockpick skill. Attempting the Dexterity check will require you to pass a DC of 15. Once you enter you can immediately see the generator here which keeps the turrets powered. To disable this, simply add the Sussur Bloom to it. A short cutscene will play showing the turrets disabled and the Arcana Tower will be powered up. Make sure to take a look around the area as well and you will find chests that you can loot valuable items from.
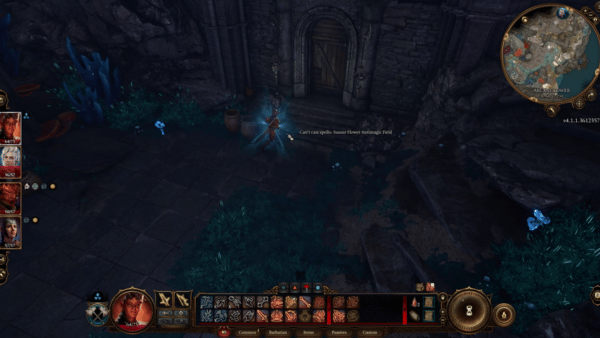
There's a tongue of madness at (X:-29 Y:-291) a quest item that you need in the quest Find a Cure, through the help of Omeluum. At exactly (X:-45 Y:-272) you will also find Timmask Spores, another item for Omeluum's quest. You can continue exploring the tower and you will discover that it is filled with chests and valuable items such as potions and other alchemy ingredients.
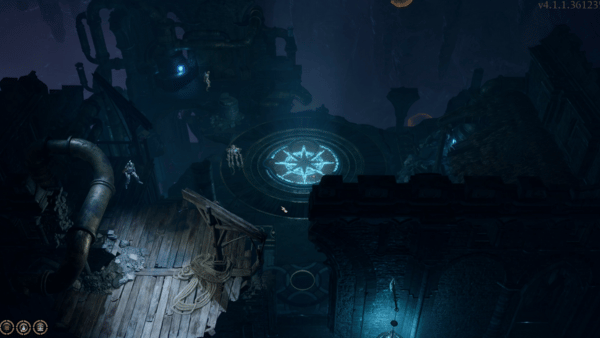
Once you have reached the top of the tower, you will be greeted by Bernard and you will get the following options to respond:
- 'Or art thou friend, a rescue from my lonely wake?
- Out of my way. I'm not interested in riddles.
- I'm a friend. I come in peace.
- I'm not foul or contemptuous, but I am a foe.
- Attack it while it waits for an answer.
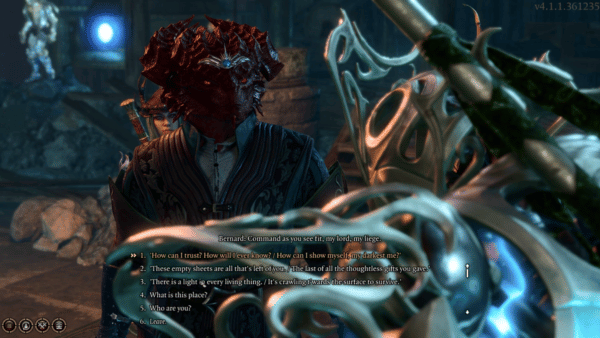
If you choose the first option, Bernard will see you as its new lord and will address you as 'my liege'. If you choose the option to accept a hug from it, you discover that Bernard addresses you as 'Lenore' and he will now remain a friendly ally to you. You can continue having conversations with Bernard to further discover the truth about the Arcana Tower. If you choose the first option, Bernard will respond with: "If you do not your deepest secrets show? Reveal your truth, give what you wish to see."
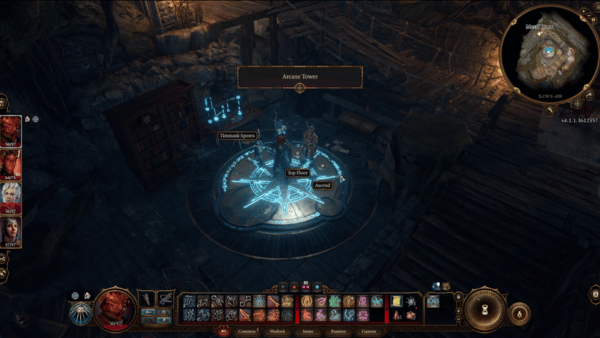
Shortly after, he will walk towards the desk and will put an item on the table. Pick up the Guiding Light on the table. With the ring in your hand, interact with the elevator again. This ring will open up a new level in the Arcana Tower that will lead you to the basement. You can recover Basilisk Oil, more Tongue of Madness, The Sparkswall, and a Staff of Arcane Blessing in this level.
Omeluum's Quest: Find a Cure
You were able to gather all of the items that Omeluum needed to help you in extracting the parasite. You can now return to Ebonlake Grotto to speak with him there. As soon as you hand him the mushrooms, he will begin to brew the potion. He tells you that you need to drink the entire draught. You will now get the options below:
- Drink the potion.
- What exactly is this going to do to me?
- I need some time to prepare.
After choosing to drink the option, Omeluum tells you that you may find yourself acting irrationally, and will ask you to try and stay focused. With the potion starting to take effect, you will now get the following options:
- [SAVING THROW] Draw on your willpower and resist.
- [SAVING THROW] Focus on the present, not the illusions.
- Stare into the swirling abyss.
Attempting the Intelligence check will require you to pass a DC of 10. If you are successful, you begin to feel the tadpole fighting back. You will get the following options:
- [SAVING THROW] Drown out the tadpole by focusing on a tune.
- [SAVING THROW] Resist the panic from within.
- [SAVING THROW] Wall off your mind from the psionic seizure.
- Let the terror take you.
Attempting the Saving Throw check will require you to pass a DC of 15. The parasite surges even stronger and then Omeluum suddenly exclaims, interrupting you. The parasite has calmed down and you notice that the parasite has actually grown stronger. Omeluum tells you that its power is unsettling and that he didn't expect this outcome. He then tells you that the tadpole is still inside your brain but he offers another temporary solution.
He tells you that he owns a Ring of Shielding, which prevents elder brains from noticing his presence. He continues to explain that it will not remove the parasite but it will limit the parasite's influence. He asks you if there is something that you could offer to him in return.
- Why didn't you mention the ring before this potion debacle?
- I have gold. Will that suit?
- No, I want this power. Keep your ring.
- How about I tell you more about that nautiloid? Every last detail.
- [INTIMIDATION] Either give me the ring, or I'll run you through.
- Leave.
If you choose the 4th one by telling him details of the ship, you will need to do either an Intelligence or Performance check that will require you to pass a DC of 15. By doing this, you will get the approval of Shadowheart. This event will mark the Help Omeluum Investigate the Parasite quest as completed.
BG3 Underdark Notes & Tips
- There are multiple ways to reach Underdark. Either through the Defiled Temple, or jump from the phase spiders' tunnel using Feather Fall, use the Portal in Overgrown Tunnel, or use the elevator at Zhentarim Hideout.
- Northwest to the Selunite Outpost, there's a rare sword Phalar Aluve, pass the Religion or Strength checks to get it.
- Killing Glut will be the end of him and you can then collect your reward from Spaw. Spaw will give you the title Peace-bringer and Kin Spirit.
- For killing Spaw, and all of the inhabitants of the Myconid Colony (Except Blurg, who will fight for three rounds when you attack the colony, then teleport away), Glut will give you the title: King Bringer.
- Explore the Underdark and unlock a Heavy Chest at (X:82 Y:-204) this will require you to pass a Dexterity DC of 15 to get a Drow Studded Leather Armour and other loot.
- In the purple glowing area at (X:104 Y:-242), you will find Glowing gems scattered.
- The arcane tower is at the southwest of the Underdark, however, its front gate is guarded by 2 arcane turrets. You can use Misty step or Feather Fall to climb the mushrooms on cliff near the arcane tower.
- To access the basement of the arcane tower jump down the gap of the wooden stairwell leading to the elevator.
- In order to Turn off the Arcane Turrets and activate the elevator, you need to reach the first floor of the Tower, and then combine Sussur Blossom with the generator. (You can find some at the backyard)
- Outside the Underdark fort, there are 2 minotaurs. One of them carries an uncommon amulet - Amulet of the Unworthy.
- Right next to the Underdark Fort, among a group of petrified Drows, there's a Spectator Beholder. After you killed the Spectator, if there's still some drow left (either freed by you or the beholder), they will attack you. However, if their leader - Dhourn was killed by either you (while he is mind-controlled) or the beholder, they'll stay neutral.
- You can find an Icy Helve on Dhourn's body (used for Mourning Frost), along with some info regarding Grymforge)
- Near the Underdark - Sussur tree, there are 4 Hook Horror and a wizard.
- At the Underdark Beach, there is a group of Duergars waiting to ambush you. (Unless you use Tadpole's psionic power or pass Deception/Persuasion 20 to talk your way out of this.) One of the Duergar has an uncommon 2 handed weapon - Exterminator's Axe. Cast the Speak with Dead spell and you can get some information from a dead raider.
- On one of the dead deep gnome, there's an uncommon 1 handed weapon - Shortsword of First Blood.
- Blurg, the merchant and scholar, sells a rare Helmet - Circlet of Blasting.
- You can reach The Festering Cove by a jump from the above location. Succeed in Investigation (15) or Arcane checks will find out the true identity of the BOOOAL, if you then succeed in a Persuasion (15) or performance check, you need only to find the red cap, otherwise, all Kuo-toa will turn hostile.
- You find some Sussur tree bark for the quest Finish the Masterwork weapon.
- There's a dog grove you can discover at southwest of Sussur Tree (On a cliff of sorts overlooking the Duergar beach), use a shovel to find the dog collar. Later when you explore the Arcane Tower, there is a button on the 3rd floor, press it and your character notices the dog collar vibrates. It can now be equipped as an amulet, wear it and press the button again it will dispense food.
- On the skeleton near the mushroom picker, there's an Explorer's Ring. (You can save the mushroom picker with mage hand, it won't trigger Bibberbang.)
- Using the boat at the beach will take you to Grymforge (Duergar Camp).
- Helmet of Smiting can be found at Selunite Outpost, in a chest.
BG3 Underdark Map
BG3 Act 1
- Previous: Underdark
- Next: Ruined Battlefield
- Recommended Levels: 5
Act 1 Main Quests
Grymforge Main Quest/s
Grymforge All Quests
- Help the Cursed Monk
- Save the Grymforge Gnomes
- The Adamantine Forge
- Get Past the Rubble
- Free True Soul Nere
- Blind the Absolute
- Find Explosives
Grymforge Walkthrough
Reaching the Grymforge
While exploring the Underdark, you can find a charmed drow with some hooked horrors and some petrified drows near a Spetator. After defeating them you can learn that they are searching for the Gryforge, and a potential weakness of Grymforge's guardian. (you can also get a legendary weapon MOURNING FROST by combining three icy items.)
To reach this location, you can take the boats in the Decrepit Village, located at x: 19 Y: -208. You will be received by a Duergar, who asks you what happened to Gekh.
On your way to Grymforge, a Duergar boat will stop you, you can fool them by showing them the mark of Absolute, or pass persuasion checks. Otherwise, you need to fight them (you can push Duergars out of the boat to kill them, but be careful, they can do the same to you). Here are the available dialogue options:
- I seek the sergeant - I believe she's keen to get these boots back
- [Intimidation] In the name of the absolute - you will let me pass.
- [Deception] I'm afraid Gekh is dead - he fell fighting the myconids
- Reach out to the burger's parasite
- [Athletics] Push the duerger into the water
Once you reach Grymforge by boat, you will meet, and find two Duergar there (Fight them or persuade them you are with the absolute. No need to pay them 100 gold). Just near you, you can find the Battered Note and a Grubby Map. Take the stairs to discover the Underdark - Grymforge Waypoint (X: -465 Y:385).
Once up, you can take the left stairs down to meet a Duergar torturer who has been killing a Drows. There's a small boat nearby, in which you can sail to the previous Underdark area. At X:-627 Y: 367. You can find a group of spiders “arguing”.
You can discover this by passing a Wisdom check (10) or Speak with Animals spell, if you pass the check, you learn that the larger spider is in conflict with the other three spiders. You can tell them to knock it off, don't do anything to see how it plays out or attack the nearest spider. (If you pass the Religion/Persuasion checks, you can tell them to abandon the Duergar, so they won't join Duergar's fight.)
Past the Duergar torturer, you will find two Duergar, throwing Deep Gnome corpses into the water (X: -610 y: 409). Ask for loot on the corpses, and If you pass a Perception check (10), you can find something valuable on the bodies (including a very rare ring Fetish of Callarduran Smoothhands). The Duergar will ask you to lend them a hand or leave.
The Dig Site First Visit
You can find Sergeant Thrinn in a room with a Scrying Eye (X: -627, Y:319 ), she is working with a group of Deep Gnomes to free True Soul Nere, who is trapped under rubble. This will give you Free True Soul Nere. If you have the Boots of Speed from Thulla you can give them to her, to receive a reward. Here are the dialogue options for Sergeant Thrinn:
- Give her the gnome's boots.
- How did Nere get trapped?
- Clearing that rubble will be no easy feat. Any ideas?
- I'll take care of it
- I've got some explosive powder. That should do the trick.
- Sound like you have a tough job ahead of you. Better hurry.
Choose the third option to hear from the sergeant that she doesn't have any idea. Then, pick the second option to learn that the place is very old and previous occupants set up a trap. She explains that if you can rescue Nere, you'll earn Absolute's favor. An extra dialogue option appears: "What are you hoping to find at this dig?" The sergeant mentions it leads to an entrance to an ancient temple. This updates the "The Chosen of Shar" quest. Next, go for the first option, and she'll express gratitude and offer a bounty reward, finishing the "Find the Missing Boots" quest. Finally, choose the second option to conclude the conversation with the sergeant.
Just in front of the sergeant, Gnomes are trying to clear the rubble. You can talk to one named Barcus Wroot, who your character mentions needing rescue again. Barcus Wroot doubts your capability, and you can respond with these options:
- That sounds like a challenge. I'll handle your captors and get you out of here.
- I could, but I probably won't.
- Leave.
If you choose the first option, Barcus Wroot gets excited, updating the "Save the Grymforge Gnomes" quest. Next, you can listen to a conversation among the Gnomes. Options are:
- [Perception] Listen to the conversation.
- Clear your throat.
- Leave.
Opt for the first choice to learn that one Gnome wants to use smoke powder to clear the rubble, while another opposes it to protect someone named Phil. You can intervene with:
- I'm a friend - Thulla sent me.
- What's happening here?
- [Intimidation] About the smoke powder - give me details now.
- [Persuasion] Listen - I can help. Act frightened, or you'll draw attention.
- Leave.
If you select the first option, Laridda will be surprised. Lunkbug mentions their trapped friends in the cave and how he can help them escape, but Larrida tries to stop him due to her fear of Nere. You can reply with:
- That sounds like quite the drama. I can't wait to watch.
- Leave the True Soul to me. Now tell me what you know.
- A terrible situation. I'm sure you'll pay handsomely if I help.
Choose the first option, and Larrida will try to stop Lunkbug from talking. He insists and reveals information about someone named Philomeen who set the blasts. Lunkbug marks her hideout on your map. This updates quests "Save the Grymforge Gnomes" and "Find Explosives". Respond with:
- I'll do what I can.
- I have explosive powder. I can use it to free them.
- My hands are full. Ask someone else.
- Excellent. I can add Philomeen's head to my collection.
If you select the first option, Larrida will beg you not to harm Philomeen. Now, head North East until you reach 2 Duerger at (X:-626 Y:351) and listen to their conversation. They'll approach you, suspecting you're a True Soul, and demand repayment. Respond with:
- Why would you think I'm a True Soul?
- You want my gold? Fight me for it.
- I don't support those True Soul cultists.
- I want Nere out - you have a lead.
- Leave.
Select the third option, and Birthvar will threaten you for lying. Respond with:
- A stench? Absurd. I'm no True Soul.
- Go ahead, try. I'm ready for a fight.
- I overheard you. I want Nere out - you have a lead.
- Leave.
If you choose the first option, Brithvar remains suspicious. Respond with:
- Fine - I'm a True Soul. What's your plan?
- [Deception] You're mistaken. I'd never bow to the Absolute.
- [Deception] I was a True Soul, but the cult lied - seeking revenge now.
- [Detect Thoughts] Cast Detect Thoughts.
- Leave.
Opt for the second choice. With enough Charisma, convince him you're not a True Soul. He'll ask if you want to earn gold and join their plan against Nere once freed. Respond with:
- I'm in.
- Count me out.
- Good plan. Sergeant Thrinn should know.
- [Persuasion] Sounds good. I expect half the spoils.
If you choose the fourth option, he agrees, mentioning an orb-eye that needs knifing as it's used for cult surveillance. This triggers the "Blind the Absolute" quest. Attack the orb-eye to complete the quest.
Find Explosives
Behind two Duergar throwing gnomes into the water, there is an enormous double iron door. You have to unlock it to enter.
If you pass a Perception check at the end of the room, you will find a secret door, activate the button on its side, open it and take the set of stairs up.
Before the stairs, you will find a chest on your right, you can loot an Arrow of Ice among other things, and head to your left. At the end of the hallway, there is another Perception check. Bypassing it, you will notice the loose stone.
Head up and you will have to take another Perception check, if you pass it, you will notice that an ambush is incoming.
Three Ochre Jelly will come from the ceiling. Once defeated, keep going up the stairs. Upstairs you can find a Trap Disarm Toolkit, an Arrow of Ice, and an Arrow of Lightning.
Turn left and continue along the catwalk, when you reach the end, jump through the gap to the other side, and you will reach a locked intricate door. Unlock it (DC: 10) to reach the Contemplation Chamber. You can loot a Hand-drawn Map from a nearby backpack, to update the Quest Find the Explosives.
Move deeper into the chamber to find Philomeen (X: -539, Y: 468), standing near a smokepowder barrel. She threatens you as you get near because she doesn't trust you. There are a few options to attempt to convince her otherwise.
- Philomeen, I presume. What's going on here?
- Calm down. Let's talk this through.
- You wouldn't dare - you don't have the courage.
- Holy hells. Have you gone mad?
When you choose the first option, Philomeen remains doubtful. You must then select a dialogue option to persuade her:
- [Persuasion] Laridda sent me. The gnomes need your help.
- [Intimidation] If I was a true soul, you'd be dead. Stand down before you hurt yourself.
- [Persuasion] Smile sincerely and hold out your hand.
- [Persuasion] Are you sure about this? Once you're dead, that's it. It's over.
- [Detect Thoughts] Use Detect Thoughts.
- I don't care. Go ahead, blow us up.
Opt for the first choice, and Philomeen will still be cautious, but she won't trigger the explosion. She'll show vulnerability, and you can reply with:
- Calm down. Beldron's trapped in a cave-in, and I need the smokepowder.
- I'm not taking you anywhere. You're free to go.
- I'd rather have the pleasure of killing you with my own hands.
Choose the first option, and Philomeen will be shocked that you want to use runepowder for something else. She mentions that any true Ironhand would sacrifice their life for the powder. You can respond with:
- [History] Ironhand and Runepowder - Where have you heard these terms before?
- What use is a single vial?
- Deal.
- No deal.
If you choose the first option, the narrator explains the background of Runepowder. Your reply can be:
- Runepowder? I thought that was a children's story.
- What use is a single vial?
- Deal.
- No deal.
Select the first option, and Philomeen confirms that it's real, but she can only spare one vial for you. An additional dialogue option appears, "I'll need to know a little more about your so-called 'mission' before I let you go." Philomeen explains they're freedom fighters who need the powder to make a point. She mentions that one vial should be enough. Now decide if you accept the deal:
- Deal.
- No deal.
When you choose the first option, your quest "Find Explosives" updates in your journal. Philomeen gives you the vial and asks you to inform Larrida of her fate. You can reply with:
- You'd abandon your beloved? That's quite heartless.
- Where will you go now?
- I'll pass on the word - right after I kill you.
- [DRAGONBORN] So you'll just leave your clan behind?
- Leave.
Select the first option, and she asks you to leave. She plans to take the barrel to Baldur's Gate alone.
If you fail to convince her, she will blow up the barrel dealing massive damage and probably wiping your entire party out. But if you manage to convince her, she offers you Runepowder Vial, or you can simply attack her to attempt to take the whole barrel. If you kill her, you have to pass a Dexterity check (DC:20) when you interact with the barrel.
There's a skeleton over a stone bed that can be looted to obtain a Pitted Key. (X:-534 Y: 476). If you head all the way to the opposite direction of where Philomeen was, you can find a Chasm Creeper (X: -566 Y: 468)
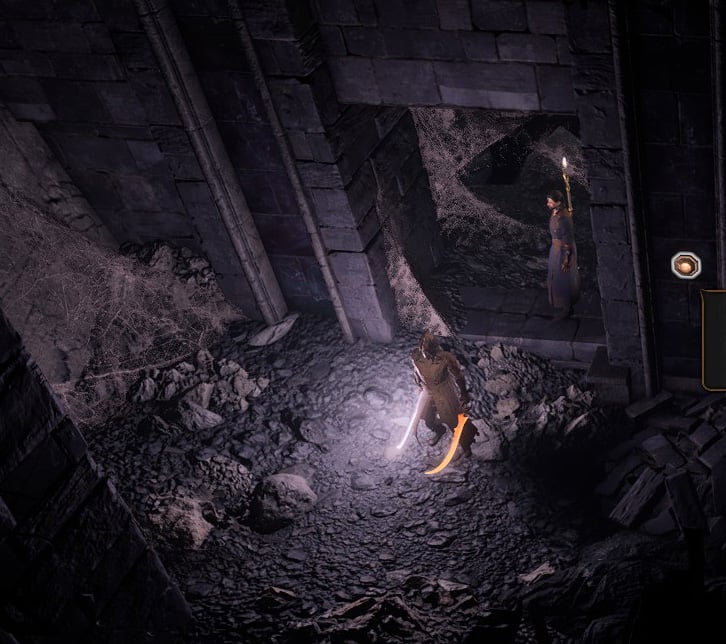
There are other explosives at (X: -587 Y: 390), behind a secret door.
Once you have the needed explosives. Return back to the two Duergar throwing gnomes corpses into the water.
Past them, you can find a heavy chest that contains an Arrow of Darkness and an Arrow of Lightning. (X: -611 Y: 425).
Return to where the Duergar Torturer is, but this time take the first stairs you find, to your left. You will find two Duergar annoying a Deep Gnome (X -607: Y: 380), and asking for a drink refill. He tells you he won't be working to free True Soul Nere, and if you want to do that, you can do it yourself.
If you interact with the iron fence past the Duergar, the male will tell you that you won't last a second if you don't have one of Nere's Moonlanterns. You will choke almost immediately if you attempt to go without one of Nere's Moonlanterns.
However, you can decide to don't pay attention to the warning and head through the door. The Mysterious Artefact will save you if you attempt to do so without the Moonlantern.
If you decide to help the Deep Gnome, you can fight both these Duergar. You will earn a Wyvern Poison from the Gnome once you kill them.
Return to the waypoint, and take the stairs up, on your right there is a chest that contains some gold and an Arrow of Ice. (X: -650 Y: 367). Past it, turn right on the next corner, and meet two duergar interacting with what seems to be some crumbled statue. (X: -660 Y: 366).
Return to the Dig Site
Once you have the Runepowder Vial you can return to the Dig Site to free Nere (Alternatively, you can use a black powder bag from the windmill and hands grenades) and this will complete the quest "Find Explosives". Throw the vial at the rubble and blow it off with a spell. Nere will come out and threaten the slaves. You can intervene, which leads to him doubting you and your reasons for doing that. Or you can encourage him to kill them. If you do, he will taunt Sergeant Thrinn, and proceed to kill her if you don't support her. Here are the Dialogue options:
- Stop! No more innocent will die today, Nere.
- Finish the Slaves, True Soul. For the Absolute.
- Say Nothing.
Select option 1 and Nere will be surprised that you care for the weak. You can respond with the following:
- I came on the myconid sovereign's behalf. It demands revenge.
- I act on orders of the Absolute.
- Of course, I care. I can't let these gnomes suffer.
- This isn't about them. I just can't stand your face.
Select option 1 and Nere will order Sergeant Thrinn to kill you. You can respond with the following:
- You wouldn't dare. I'm faithful to the Absolute.
- That's your cue, Brithvar. It's time you got paid.
- You so much as touch me, and I'll tear you from limb to limb
- Say nothing.
- [DRAGONBORN] This battle will make a good story. Come, then.
Select the 5th option and Nere will simply say that you chose a battle that you cannot win. Afterward, Brithvar will intervene and will ask Nere to pay up while threatening him with a dagger. He will reveal that he has a deal with you and continue to threaten Nere. Nere will ask you to put your faith in him and earn his trust again by striking down Brithvar. you can choose one of the following:
- Side with Nere.
- Side with Brithvar and the rebels.
- Do nothing.
Choose option 2 and the quest "Save the Grymforge Gnomes" will update in your quest journal. This will also start a battle.
If you talked to Brithvar previously and made a deal with him, he will interrupt your conversation demanding to get paid. After this, True Soul Nere will ask you if you side with him or against him.
Siding with Nere
- By siding with Nere, you will have to fight Brithvar and five Duergar. Nere and the Sergeant are your allies during this fight if she wasn't killed in the previous interaction.
- After the fight, Nere will attempt to kill the Deep Gnomes, you can do nothing, attack him, or attempt to enter his head to prevent him from killing the Gnomes (DC: 15). If you fail you will have to fight him.
- After killing him you get 120 XP.
Siding with Brithvar
- If you side with Brithvar, it is the other way around. You have to fight True Soul Nere, Sergeant Thrinn, and her Duergar crew. After the fight, you can persuade him to free gnomes (DC: 10)
- Quest Deliver Nere's Head will update
- Quest Travel through the Underdark will update
- Quest Save the Grymforge gnomes will update
Afterward, head to the corpse of Nere and remove his head. Before you do, loot his corpse first to obtain the Broken Moonlantern which will trigger a cutscene where you can inspect it. Choose from the following:
- [Investigation] Inspect the lantern in more detail
- [ARCANA] Examine the dust within the lantern
- Leave.
Select the 2nd option and you will come to the conclusion that the dust is pixie dust. Start looting again and you'll also find Disintegrating Night Walkers and Mind Flayer Parasite Specimen. Afterward, speak with Lunkbug and you'll see him excited to see that Beldron is okay. Beldron will notice you and will thank you for your actions. He will also question why you helped them despite being a True Soul. You can respond with:
- It would seem not.
- Are you always so suspicious of those who save you?
- The cult thinks it owns me. I beg to differ.
- You say you're grateful - but my coinpurse is still light,
- Thank Tulla - she's the one who set me on your trail.
Select the 5th option and Beldron will start to talk about Wulbren. You'll find out that Wulbren has been taken and the gnomes will wonder what he has gotten himself into now. This will also update a new quest called"Rescue Wulbren". You can respond with:
- Would this have anything to do with Runepowder?
- Spare the secrecy. Philomeen already escaped with the Runepowder
- Before you ask, no - I'm not going to stage a rescue
- Whatever the cult wants, I want the opposite. We need to free your friend.
Select the first one and Beldron will be surprised of your knowledge. You'll learn that Wulbren discovered the runepowder formula first and the Absolutists have taken him to interrogate his knowledge of it. If they manage to get the formula knowledge, Sword Coast may fall. you can reply with:
- Then we'll just have to free him first.
- How long do you think he can hold out?
- I don't plan on being anywhere nearby when they do.
- If it's truly that powerful, then we can't let the cult have it.
Select the 2nd option and Beldron will mention that there is not enough time. They have other arrangements to deal with. Barcus Wroot will violently react and accuse Beldron of being cruel for considering leaving Wulbren behind. you can reply with:
- Enough. Bickering won't save your friend.
- You're just abandoning your leader? That's cold.
- Run away then. I have my own business to be about
- If my path takes me to Moonrise, I'll see about freeing Wulbren myself.
Select the first option and this will mark the completion of the quest "Save the Grymforge Gnomes". Head back to the corpse of Nere and retrieve his head.
Stonemason Kith
Stonemason Kith, asks for your help. He asks you what you see in the rock and rubble surrounding the place. There are three possibilities to choose from, each one tied to a different check that need to be passed. They are History (DC: 10), Investigation (DC: 10) and Perception DC: 10).
After passing all three checks, you are ready to report your observati(ons. After Stonemason Kith's speech, he gives you Infernal Iron. You can also trade with him after the conversation. Keep going past the the Stonemason and along a corridor you will find a few skeletons on the floor, clad in the same dark armour. You can attempt a History check (DC: 10) to learn more about them. If you manage to do so, you learn that they once were Shar worshippers.
Turn left and up the stairs, where there's a lone skeleton, turn left again, and walk through the catwalk to find a locked chest behind two archery targets. (X: -666 Y: 401). Keep advancing and take the path to the right, you will find an abandoned camp. You can go down slowly through the rift, and can loot Chasm Creeper. (X: -694 y: 410).
Get back again to the place where you can find the skeletons. Turn left, to find three Duergar lashing at some beasts to clear some rubble. If you pass Charisma Check (DC: 15), he will tell you that there is Adamantine behind the rubble.
You can decide to fight the Duergar and his two henchmen, alongside the two Deep Rothe, if you want. To clear the rubble behind them you will need to use an explosive. To do so throw the Runepowder Vial at it and then ignite it with a Fire Spell.
Head past the archway, you will immediately find a Metallic Mask (X:-672, Y: 459). Take the stairs up and continue among the bunch of skeletons, turn right, and keep heading up the ladders.
You will eventually find a broken bridge on your left, beware there's a trap near the edge, you have to pass a Perception check to find it. There's also an Orb of Darkvision on the bridge. You can use Misty Step to reach the other side, note that the other edge is also filled with traps.
To the right there's a long corridor filled with fire traps, midway through it you can take a ladder down, and interact with two levers that move a platform in the middle. There's also a chest containing gold. You can use the controls and the platform to move part of your team to the middle section of the level. You can find a Longsword Mould (X:-629, Y: 407).
Continue along the platform to find a skeleton that has a Dark Justiciar Mask (X:-625, Y:352), when you reach the end you will realize that if you don't have the means, you won't be able to reach the other side (Misty Step or improving Jump magically).
If you decided or were able to send a character to the other side, walk alongside the corridor, jumping when necessary.
There is a big locked door, that once opened leads to a hall. Jump to the right of the stairs to reach the little room to loot a Skeleton (X: -592; Y:395). You can obtain a Harper Key from it and an Undelivered Letter. Jump back to the stairs and keep exploring.
Upstairs and to the right, you will find a large door, behind it there are Enemies, but it is locked.
On a hanging skeleton (X:-566 Y:407), you can loot a Rusted Silver Key and on another skeleton, at the top of the stairs, besides the rubble, you can loot a Shield Mould (X: -559; Y: 410).
With the Rusted Silver Key, you can open the locked door. A Merregon Legionnaire and 3 Hellsboar will be waiting for you at the other side.
Once you defeat them, you can loot the chest at the side of the room to find Firestoker. (X: -579 Y: 382). On the altar at the back of the room, you can find a Rusted Key and an Old Letter among other stuff. But there's nothing else to do here.
There is another skeleton here that contains a Dark Justiciar Mail (X:-604 Y: 347). You can find a Map of Moonhaven near the skeleton. (X: -611 Y: 344).
Continuing alongside the stairs, there is another skeleton at the end. You can loot a Scimitar Mould from it. (X: -607, Y: 322). Next to it, there are two levers. Use it to take the other part of the party forward. Use the right lever to elevate or lower the platform and the left one to move the platform back and forth. Once you are in position, make the platform party jump.
Move forward to the edge, and jump towards the rocks on your left. You will find the Mace Mould (x: -613, Y: 285). You can also find a Waypoint near the wall. (X: -609, Y: 284). There is again, a few skeletons lying on the ground.
Head all the way left, and past the small staircase, turn left and jump towards the edge to find Splint Mould (X: -597, Y: 309). Now turn back and head to the right, you will be attacked by 4 Animated Armour.
Once they are defeated, you can calmly loot the Scale Mail Mould at (X:-621, Y: 260), and climb the ropes behind it to loot a skeleton to obtain a Dark Justiciar Helm (X: -622, Y: 258). Head back down, and take the small path that goes downward, behind the previous location of the Animated Armours.
Climb down, preferably with a single character, to avoid the molten lava. Jump through the gap. You will enter the Ancient Temple area. There is a giant Mithral Vein that can be found at the edge, get near and attack it. You will obtain Mithral Ore when you manage to destroy it. There is not much else to do, here, turn back to the entrance of the forge.
Alternate Way to enter the Forge
You can find a defaced statue of Shar at the Dig site that can be interacted with (X: -614, Y: 314). From there, if you have it available, you can use Misty Step over the edge, to reach the other side. This leads directly to the Forge. You can find a Waypoint close by to relocate your group.
Heading to the Adamantine Forge
This time, go down the middle set of stairs. Halfway there, you can Jump to the left, to a rocky platform. Many Magma Mephit will attack you. At the end of the fight, there's another giant Mithral Vein.
Return to the main stairs, and head down to enter the Forge itself. Jump to it, before touching anything, head to the circle located directly on your right, and jump to the other edge. Continue along the path to reach a lava-filled room.
Lava erupts and deals damage to your characters if they are near the edge. There is also a powerful Lava Elemental patrolling the zone.
On the "island" ahead, you can find a chest (X: -626, Y: 224), that contains a Sentient Amulet. When you grab the Amulet, it will talk to you. You will gain the quest Help the Cursed Monk. Return to the Forge
The Adamantine Forge can be used to create the following equipment:
- Adamantine Scale Mail
- Adamantine Mace
- Adamantine Shield
- Adamantine Scimitar
- Adamantine Splint Armour
- Adamantine Longsword
How to use the Forge to create Items
The Adamantine Forge can move between two different levels: High Level and Low Level. You'll need to move the Forge into the Lower level to be able to pour magma. To do so, place a mold into the chamber and a Mithral Ore into the Crucible. Interact with the Forge Lever and the anvil will hit, taking the Forge to the lower level. Once you are in the lower level follow these steps to forge an item
- Interact with the Crucible and insert a Mithral Ore. This will allow you to use the Forge Lever to lower the Forge and start crafting. The Mithral Ore will be consumed when the process is complete.
- Interact with the Mould Chamber, and insert one of the Moulds you have: Scimitar Mould, Shield Mould, Mace Mould, Splint Mould, Longsword Mould, and Scale Mail Mould. The mold won't be consumed when you craft the item. You can extract the mold by interacting with the lever located next to the Mould Chamber, this will allow you to insert a new mold.
- Pull the Lava Valve. This will cause the Forge to be surrounded by lava. Evade at all costs being caught up by the lava. Try to position your characters on the big surrounding circles to avoid suffering an immense amount of damage. Also notice that the first time you do this, you will summon a Golem called Grym
- Pull the Forge Lever, this will make a giant column to impact the mould chamber, forging the item you have put into the Mould Chamber in the process.
- Once the item is created, use the button located next to the Forge Lever, this will take the Forge back to the High-Level area.
- You can repeat the process from step 1 by inserting a new Mithral Ore. Remember to swap the Mould if you want to create a different Item.
Fighting Grym
As mentioned before, Grym, a massive Level 8 golem will emerge once you pull the lava valve. It has a whopping 225 HP and can deal enormous amounts of damage. Your party earns 500 XP once you manage to defeat it, and you can loot the Grymskull Helm from its body.
You have to take into account a few things when fighting it:
- When you activate the lava and Grym appears, your terrain will be limited to the Circles surrounding the "anvil" part of the forge. Avoid passing through the lava at all costs!
- When Grym is standing on lava, it gains a status effect called Superheated. Only when this status effect is active you can damage the golem. This will cause Grym to become vulnerable to Bludgeoning damage, lower his Armour Class and make him resistant to Thunder, Cold, and Force. He will remain immune to all other elements.
- Grym will attempt to attack the character that attacks it, (and hits it), first at each turn and set it as "Prime Target". This can be exploited to use the anvil to deal massive damage to Grym
- Position a character near the Forge Lever and, another one near the anvil's strike position. Lure Grym thereby attacking it with that character and, once the golem is in position, pull the Forge Lever. The anvil strikes down, dealing 100 points of damage approx and leaving the golem Prone.
- If the Lava is removed, interact with the Lava Valve to refill the chamber and force Grym to walk over it.
- Grym won't take damage from the Anvil if he doesn't have the Superheated status effect.
Return to where you found Stonemason Kith, and take the path behind him. Turn right to the cliff, and descend the cragged rock. If you succeed at a History check, you will notice that it is a Harper rune there. Keep heading towards the cliff and you will find three chests. One of them, the one on the right is labeled as a Toy Chest (X: -699 Y: 375). Grab it, and a Harper Stash appears in between the three chests. If you interact with it. You will be ambushed by three Mimics.
Once defeated, you will find Gold inside the Harper Chest, as well as a Scroll of Evidence. Head back and climb the Cragged rock up again. This time take the stairs up next to you, and past a camp, you will reach a large wide area.
BG3 Grymforge Map
Baldur's Gate 3 Act 2 Walkthrough Quick Navigation
Click to jump to a specific section of the page
BG3 Act 2
- Previous: Grymforge
- Next: Last Light Inn
- Recommended Levels: 6-8
Act 2 Main Quests
Ruined Battlefield Main Quest/s
Ruined Battlefield All Quests
- Lift the Shadow Curse
- Punish the Wicked
- The Blade of Frontiers
- The Hellion's Heart
- The Wizard of Waterdeep
Ruined Battlefield Walkthrough
Entering the Shadow-Cursed Lands
After you head up the elevator within Grymforge, you’ll find yourself in a place that looks like the ruins of a part of Grymforge. The plaques here have some writings pertaining to the Shar, and moving straight ahead to the west brings you to a locked Absolutist Expedition Trunk with lockpicking DC of 10, containing some potions and/or elixirs. Heading up the stairs and following the path around will have you bump into Elminster Aumar. He’ll call you over to ask about Gale. If you don't have him in your party, you'll get automatically transported to camp where you'll talk to him to hear a message Mystra herself charged him to deliver. It seems Gale will be forgiven for whatever wrong he did to Mystra, provided he put an end to all your problems by finding the Heart of the Absolute, and blowing it up with the orb he has inside, along with himself.

Exit the camp to find yourself back at the castle ruins. Past where Elminster was is an Absolutist Expedition Key, in case you aren’t able to pick the lock of the previous chest. Head to the west to a hall filled with overgrown roots. On the broken pillar to your right is a Broken Moonlantern. The corpse on your left should have some scrolls as well as Orders. It seems this particular adept was killed by her own explosives. Head further west to the end of the hall to finally enter the Shadow-Cursed Lands, specifically the Ruined Battlefield.
Exit the camp to find yourself back at the castle ruins. Past where Elminster was is an Absolutist Expedition Key, in case you aren’t able to pick the lock of the previous chest. Head to the west to a hall filled with overgrown roots. On the broken pillar to your right is a Broken Moonlantern. The corpse on your left should have some scrolls as well as Orders. It seems this particular adept was killed by her own explosives. Head further west to the end of the hall to finally enter the Shadow-Cursed Lands.
After the short scene, follow the path to the south. You’ll eventually have to cross some shadow-cursed ground, which will cause you to be afflicted with the Shadow Curse as well. Use a Torch or cast anything that can light your way in order to prevent yourself from being afflicted. Shadowheart seems to be immune to the curse, as a chosen of Shar. If you ignore the bridge to the southwest first and turn left to the south, you’ll come across some barrels and boxes with some miscellaneous items. You can find a campfire that was used by a Druid, now just a skeleton. Reading his Dead Druid’s Journal will have you do a Nature Skill Check.
Head back north and then cross the bridge now to the southwest. The path up to the structure further south leads to a dead end and a skeleton you could loot for some jewelry and an Unsent Letter. Before you go down, you might want to light the brazier to give you a boost for later. Head down to the west to bump into the Harpers. Despite your best efforts at subterfuge, their leader Lassandra will spot you and ask who’s there. You’ll have the following choices to respond with:
- Lower your weapon first.
- My name is Tav. Who are you?
- A nightmare in the dark.
- Back away from them, palms up
Choosing the first and second choice will have them ask you to come forward with your hands up. You’ll roll a Perception check to see that it’s safe to do so. Unfortunately, one of them fails to move close enough with the torchers and gets taken by something in the dark. He emerges afterward, corrupted by the shadows. You’ll have the following dialogue options to choose from form here:
NOTE: Some dialogue interactions will have additional options depending on the Race or Class of your character.
- Move. I’ll take care of this.
- Get ready to fight.
- [WARLOCK] His soul… consumed by darkness. Not a good sign.
- Run

Choosing any of these options aside from the last one will initiate a combat engagement. You’ll be up against seven Enemies - six Shadows, and a corrupted Yonas, and will have the help of the Harpers. They shouldn’t be too hard but just don’t forget that you’ll get afflicted with the curse if you aren’t near a source of light. Any ranged allies can safely fight from the lit brazier in the higher structure back to the south. There will be a Shadow there though, so they will still have to be careful. After the fight, Lassandra will show you where you can go that’s safe from the curse. You’ll have the following choices to reply with:
- ‘Safe place’? You mean somewhere the shadows can’t penetrate?
- I’ll follow in a moment.
- Thanks, but I’m heading to Moonrise Towers.
Choosing the first will have her explain that the place she mentioned is an inn that’s magically protected. It also seems like traveling deeper in won’t be safe anymore with just torches and light Spells.

Follow the path to the southwest to move further along. You’ll eventually spot a raven on the ground. Your party will roll Arcana checks to see that the raven has been claimed by the shadows. Interacting with it will start a combat engagement against twelve Shadow-Cursed Ravens. They shouldn’t be too hard to get through but you will have the added handicap of being Surprised. After the fight, you can loot the original raven’s body for a note marked “HELP!” There should be a locked Traveler’s Chest atop the roof of the nearby dilapidated house with a lockpicking DC of 10 if you’d like to jump up and get it. Otherwise, continue southwest.
You’ll eventually get to an intersection. The path on your right to the northwest will lead to the Last Light Inn that the Harpers pointed you toward. In fact, you’ll find them at the entrance to the place so move toward them for a cutscene.
BG3 Ruined Battlefield Map
BG3 Act 2
- Previous: Ruined Battlefield
- Next: Reithwin Masons' Guild
- Recommended Levels: 6-8
Act 2 Main Quests
Last Light Inn Main Quest/s
- Infiltrate Moonrise Towers
- Resolve the Abduction
- Find Ketheric Thorm's Relic
- Seek Protection from the Shadow Curse
Last Light Inn All Quests
- Find Mol
- Find Zevlor
- Investigate the Selûnite Resistance
- Rescue the Grand Duke
- Rescue the Tieflings
- Rescue Wulbren
- The Blade of the Frontiers
- The Pale Elf
- Wake up Art Cullagh
Last Light Inn Walkthrough
Held Up at the Bridge
They’ll allow you in and you’ll be able to meet Jaheira for the first time. She’ll use some nature magic to root you in place, to which you have the following options to respond with:
- Just this once, I wish people would simply say hello.
- Jaheira, is it? I’m Tav, and I assure you none of this is necessary.
- You have to the count of five to let me go.

Choosing the second option will just make them push further. You’ll have the following options to respond with next:
- Easy. Give me a chance to earn your trust.
- I saved your soldiers and this is the thanks I get?
- Could you at least explain to me why you’re doing this?
- Back off. Now.
It seems she is mainly suspicious of you because she has a captured tadpole reacting to the tadpole in your brain, which makes them think you’re a True Soul. You’ll have the following options to respond with:
- I am not… a True Soul…
- Look to the Harpers you saved.
- Accept your fate.
- [STRENGTH] Rage against the vines.
- [WARLOCK] Beseech your patron to help you.
If you choose the fifth option, Mol will intervene and vouch for you. Jaheira will then question how you could have a tadpole but not be a thrall. You’ll have the following choices to answer the question:
- Because of this artefact. (Show Jaheira)
- I work in mysterious ways.
- You’ll just have to take my word for it.
- Attack
Karlach will approve of the first option. The tadpole she has will react negatively to the artefact as you take it out. Jaheira will question what exactly you are showing her, to which you’ll have the following choices to respond with:
- Tell Jaheira everything you know about the artefact.
- So far it’s been a life-saver. Here’s hoping you agree.
- Your guess is as good as mine.
If you choose the first option, they’ll finally ease up on you and ask why you’re there. You’ll have the following options to reply with:
- To destroy the Absolute in its lair: Moonrise Towers.
- I just want a cure for the parasite in my head. Moonrise Towers is my only lead.
- I’m here on holiday.
- My intentions are my own.
Choosing the second option will finally have them let you off to your own devices, before inviting you for a drink in the inn. Karlach will have an exclamation point over her here if you brought her along. If you talk to her she’ll fangirl over Jaheira. You’ll have an extra choice for dialogue here if you chose Background as a citizen of Baldur’s Gate. Choosing it or asking her if she knows her will have her explain to you the stories of Jaheira’s bravery.
NOTE: Some dialogue interactions will have additional options depending on the Background, Race or Class of your character.
Afterward, move forward and examine the runes on your right to activate the Waypoint for the Last Light Inn. Head down the path further in toward the opening at (X:51, Y:143) that leads to the actual inn. There will be a realistic bear statue on your left as you enter. Your character will do a Nature check as you enter to ascertain what it actually is. Head inside and find Jaheira at (X:67, Y:139) and talk to her. She’ll propose a toast to your health. You’ll have the following options to choose from in response if you have Karlach with you:
- To your very good health.
- [MEDICINE] Smell the wine first.
- You’ll have to pardon my friend Karlach. She’s very excited to meet you.
- I’m not thirsty.
If you choose the second option and pass the Medicine check, you’ll discover that she’s laced the drink with an herb that acts like a truth serum. You’ll have the option to express your trust wavering as a result afterward, but then you’ll still have to choose whether you’ll drink it or not. Drinking it will gain disapproval from Astarion and Shadowheart, but will gain approval from fangirl Karlach, if you’ve brought any of them with you. Jaheira will then ask if the parasite is affecting you or not. You’ll have the following choices to answer the question with:
- I see now why you’ve spiked my wine.
- Yes. The parasite is giving me powers I never had before. It’s changing me for the better.
- It’s trying to change me, trying to win me over, but I’m resisting its temptations.
- [SAVING THROW] Despite knowing you’re under the effects of a drug, try to deny the tadpole has any influence over you.
The first option will just have her press you for a different answer. Choosing the fourth choice and being successful will have her be satisfied with your answer, but explain why she has to be cautious. She will say that tracking the parasites led her to someone who should’ve been dead for over a century. If you ask who it is, she’ll reveal it to be General Ketheric Thorn, the leader of the Absolutist cult. It seems that not only is he not dead, he’s also currently unkillable. They had an encounter with him as he and his army were marching to Baldur’s Gate. Suffice it to say, he defeated them and had them chased all the way to this inn. However, she seems to have some hope in you. You can respond to this with the following choices:
- What do you have in mind?
- You think I can kill him?
- I don’t think so.
Her plan is to have you infiltrate his base as a True Soul and find out how to deactivate his invincibility. You’ll have the following options to reply with:
- Ketheric’s days are numbered. I’ll make sure of it.
- You want to make use of my infection - I want to be cured of it.
- Seems like I’ll be doing most of the heavy lifting.
- I’m not doing this.
Choosing the second option will have her explain that you’ll probably find a means to cure yourself in the Moonrise Towers anyway. You can then ask her how to get there past the debilitating shadows. She’ll explain that Isobel, a Cleric of Selune, protects the inn with her light, and will be the key that’ll let you protect against the darkness. She bids you go upstairs at her recommendation.
The Light in the Shadows
Head up the stairs at (X:71,Y:134) to get to the second floor. Harper Mijah’s on the eastern side of the building patrolling along the balcony. Isobel’s room is to the north but she’s actually further along on another balcony, which you can reach through a door at (X:64, Y:168). You’ll see the shielding spell take its toll on her before she notices you. Choosing the first choice will have her express that she’s full glad to have you as their little miracle against the darkness. She’ll proceed to enchant you and your party with the same shield she’s cast around the inn but will warn you that it won’t be enough to protect you when you reach the depths of the Shadow-Cursed Lands, though it should be enough to reach Moonrise Towers. If you’ve brought Shadowheart along with you, she’ll get stung by the Spell, and ask her lady Shar for forgiveness. As she gives you advice on how to best Ketheric, you get interrupted by Flaming Fist Marcus, a former brave ally of theirs, now turned by the Enemy in exchange for a pair of wings. You’ll have the following options to react with:
- What are you?
- Isobel, do you know this man?
- I say we follow the winged freak.
After she introduces him to you, he’ll reveal himself as a True Soul and try to telepathically order you to take Isobel back to their home base. You’ll have the following options to respond with:
- [WISDOM] Probe his thoughts for more information.
- What does he want with her?
- Sounds like fun - I’m with you.
- I’m not like you - I don’t take orders from the Absolute’s cronies.
- Touch her and I’ll kill you.
Choosing the first option and passing the Wisdom check will allow you to see Ketheric give the order to Marcus. Isobel will question your telepathic interaction, to which you’ll have the following options to respond with:
- Marcus is trying to kidnap you, Isobel. We’re going to need to fight our way out of this one.
- Say nothing.
- You’re going to meet Ketheric - face-to-face.
If you’ve brought them along, Astarion will disapprove of the first option, while Shadowheart and Karlach will approve of it. Choosing it will reveal your allegiance. Marcus will let out a roar to call out more minions, and you’ll enter a combat engagement. If you brought Shadowheart along she’ll gain inspiration from having a Selunite spell cast on her. For this fight, you’ll have to attempt to defeat Flaming Fist Marcus and six Winged Horrors. All of them are going to do their best to go straight of Isobel. Your best bet for a small chance of winning here is to use a protection spell on Isobel, while you dish out as much damage as you can on Marcus before he knocks Isobel out. Chances are, however, you’ll lose this fight due to Marcus’ sheer bulk and power. After he knocks out Isobel, all hell will break loose in the inn, resulting in the death of most of its inhabitants.
The shields will disappear, allowing the shadows to enter the inn and turn some into Enemies, while the others die to the horrors that enter. Outside, Jaheira will see the shields melt and ask you what happened. Choosing the first choice will have her restate your mission to figure out Ketheric’s invincibility. Before you get out of here to do that though, you’ll have to clear the area of allies turned to foes. This won’t be difficult by any means, other than the fact that they used to be innocents. There’ll be another group waiting for you on the bridge to the southeast, which is also bring in some Creepers.
After the fight, loot as much as you need and then proceed back to the bridge at (X:-11, Y: 120) to head back to the Ruined Battlefield.
Return to the Ruined Battlefield
After crossing the bridge, head straight ahead to the path at (X:11, Y:9), toward the southeast. When the path splits three ways, head to the southwest first, to your right. You’ll come across the bodies of cultists and refugees alike. Loot as necessary. This must be where the ambush happened. The path splits three ways here again, so head first to the path going up to the west. You’ll notice some standing torches. A successful Arcana check will tell you they’re continual flames that can’t be put out. Follow the path out of this small camp to the southwest. You’ll come across a dilapidated storehouse right after an arch formed by a tree. Passing a Perception check here apprises you of a movable brick by the storehouse’s entrance. If you look closely inside, however, there are invisible meazals waiting to ambush you. Deal with the meazals however you see fit. If you brought Karlach along, she’ll gain inspiration from being attacked by invisible foes lying in wait. Loot as necessary as you explore the storehouse. Head back to the entrance and jump on a ledge to the left of the storehouse to then get to the roof. Cross the roof to the far end of the storehouse, where there’s a locked Potter’s Chest with a lockpicking DC of 14 containing a pair of Luminous Gloves.

Head back to the entrance of the storehouse and head up the stairs to the southeast. You should see some wooden stairs on your left as you go so head up there head into the ruined house. A cutscene will ensue as you watch some cultist pass by, led by the drider Kar’niss. One of them will notice you in the shadows who yells at you to reveal yourself. You’ll have the following options to react:
- Clear your throat to make yourself known.
- Stay hidden, keep watching.
- Attack!
If you choose to stay hidden, there’ll be an internal squabble, resulting in Kar’niss slaughtering the goblin that noticed you, so you’ll have one less to kill. After that, you can either clear your throat and reveal yourself, or do a Stealth check to wait for them to pass. Choosing the first option will have the drider recognize you as a True Soul and ask how you’ve survived the shadows without protection. As per your current objective of finding the answer to the same question, you can ask him in return how he has survived thus far. He’ll reveal that the lantern he carries is the key. You’ll then have the following courses of action to choose from:
- [INTIMIDATION] The Absolute has asked me to carry the lantern. Hand it over.
- Thank you - let’s go.
- Or I could kill you and take that light.
Naturally, choosing the third option will result in a fight, but there’s no telling if he’ll give the lantern over anyway. Kar’niss will likely start the fight with Sanctuary. If anyone in your party has Counterspell as a reaction, you can stop this. Otherwise, it’s not a bad thing to let it happen as might want to take care of the Enemies with lower health points anyway. Thanks to your antics, you’ll have to clear out the drider, two goblins, and two Half-Orcs. Kar’niss has a massive amount of health, but you should be able to whittle him down easily especially once he’s alone.
Looting him afterward will net you his Moonlantern and the Cruel Sting longsword. Taking the Moonlantern will reveal a pixie trapped inside that’s responsible for the light that protects against even the deeper shadows. A successful Intelligence check will tell you that they can be playful and even malicious. Dolly Dolly Dolly, the pixie will claim that she’s in constant pain inside the lantern as it’s the only way to get the light shining constantly. You’ll have the following options to respond with:
- Who are you?
- You’re fuel for the lantern? How does that work?
- What’s this mechanism at the base of the lantern?
- Release the pixie.
- Ignore the pixie. You’ll be needing this lamp.
Choosing the first option will have the pixie formally introduce itself as Dolly Dolly Dolly, and ask you to free her. Afterward, the first option will be replaced by a proposal to help you travel through the shadows in exchange for freeing her. If you choose that option, it’ll seem to wholeheartedly agree to it. Asking about the mechanism will have it claim that it’s dangerous for her to even talk about it. If you choose to release it, you’ll gain approval from Astarion and Karlach if you brought them along. She’ll then ask how she can repay you, and you’ll have the following options to answer with:
- I need to get through this shadow curse. Can you help?
- What’s on offer?
- Nothing - my help doesn’t come with strings attached.
Choosing the first option will have her toy with you for a bit but ultimately give you a magic bell, called the Filigreed Feywild Bell, that you can ring for the protection you asked for. Continue looting as necessary. One of the goblins will have some Thermoarcanic Gloves you can cop. Note that the pixie already has you blessed so there’s no need to actually use the bell yet. There’s a locked chest on the southwest side of the house that you can lockpick, or you can get the key for it on the roof, which you can get to with the ladder.
Depending on whether or not you’ve got Wyll in your party if you rest at camp now, Mizora will come for a visit. She’ll tell you that one of Zariel’s devils has been captured by the cultists and brought to Moonrise Towers. Wyll’s next task, as per their pact, is to free this devil. You’ll have the following options to respond to this with:
- And this is our problem how, exactly?
- Forget it. This ‘asset’ can rot in the Towers for all I care.
- If this devil is so powerful, how did they manage to get captured?
If you choose the first option, she’ll do her usual referencing of their contract. Before she leaves, you’ll do a Perception check here to see if she’s hiding anything behind her usual attitude, and blurry appearance.

If you did choose to take a long rest, you’ll be visited by your Dream Visitor again as you sleep. They’ll comment on how strong the Absolute’s influence is where you are, and then commend you for saving the refugees at the grove. You can respond with the following options:
- It wasn’t even a choice. They needed my help.
- It doesn’t seem like my help did them much good. The cultists caught up with them.
- It was a waste of time. I regret it now.
- I didn’t do it for them. The goblins were in my way, so I killed them.
Choosing the first option will have them say it’s not a choice just anyone could make, before wincing in pain. A successful Perception check will tell you that they’re hiding their struggle to protect you. You’ll have the following options to react with:
- What is it?
- Are you all right?
- Focus! Don’t you dare drop my protection.
- Say nothing.
A successful Insight check this time will tell you that despite her disciplined, strong demeanor, she also needs some comfort. You can choose to do the following:
- Say nothing. Wait.
- Hold (them) tight.
- You look terrible. Do you need a hug?
- Pull yourself together. We’ve got work to do.
They’ll appreciate the gesture if you choose to hold them and mention that it’s been quite a while since they’ve been held by someone. If you ask them who it was that used to hold them, they’ll reveal the name Belynne who they were very close to. They’ll tell you how the Absolute’s mental attacks to transform you have been relentless, but they’ll reaffirm her resolve to protect you for as long as they can.
Before leaving camp, you can talk to Wyll who’ll be quite pissed at his new task. You can ask him if this task violates their contract, as he was supposed to be killing devils, not rescuing them. Knowing how Mizora thinks, however, he confirms that the contract doesn’t say anything about saving a devil so the task still stands. You can continue the conversation which will end with the resolution to complete the task so he doesn’t get turned into a lemure.
Back to the ruined house where you fought the drider, head to the southeast, and turn left at (X:31, Y:-13). You’ll pass by another house with a chest containing a book and some valuables. If you look out on the cliff toward the north, you’ll see the Waypoint for the Ruined Battlefield below you. Get to it by heading back toward the southwest and then turning right at the fork.
From the Waypoint, follow the path west all the way to the end. You should find yourself back at the ruined storehouse where you fought some meazals. Enter the building and then turn left at the end this time, toward the south, at (X:-50, Y:3). As you follow the path, there should be a ruined tower on your left. Be careful going in, as a successful Perception check will reveal an explosive trap at the entrance. Inside, there should be a locked Traveler’s Chest under the shelf among the pots, with a lockpicking DC of 10, containing a Ring of Twilight. If you head to the west there’ll be a short, messy wooden bridge leading to some stairs with a thick layer of shadows. This is the entrance to the .

BG3 Last Light Inn Map
BG3 Act 2
- Previous: Ruined Battlefield
- Next: Gauntlet of Shar
- Recommended Levels: 6-8
Act 2 Main Quests
Reithwin Masons' Guild Main Quest/s
Grymforge All Quests
Reithwin Masons' Guild Walkthrough
Passing Through the Guild
Coming from the eastern entrance, from the Ruined Battlefield, head north along the walls first. In the end, you should be able to find a ladder that will let you climb up and reach a Heavy Chest at (X:-112, Y:0), which contains some potions and valuables. Climb back down and head back toward where you came from, but turn right to enter the paved area at (X:-114, Y:-12). Head inside the door here to a building that has some statues lined up. The table to your immediate right should have a Barkskin Recipe for you to read. If you move forward, there’ll be a pile of bones on top of some concrete. Investigating the plaque below it will inspire you if you had picked the Guild Artisan Background. Head through the door past it to the north and then head to the west side to find an Ornate Wooden Hatch. Enter it to enter the Masons' Guild.

Down here, head up the stairs to the left to circle around the room. At the end of the room, a successful Perception check will reveal a Keyholed Herald on the wall. You can either lockpick the keyhole or use a Tower-Shaped key to open a path in the wall. Follow the path to a Reinforced Gilded Chest. Another successful Perception check will reveal that it’s trapped, but don’t bother ‘cause it’s empty. Move forward and go through the wooden doors to a large chamber with a dining table. Exploring this area will put you in a combat engagement against five Shadows led by a Wraith. The fight shouldn’t be too hard, but be wary of the Wraith. At the southern end of the hall is another Gilded Chest that’s trapped. Its disarming DC is 21, and its lockpicking DC is 14. It should contain the Helmet of Arcane Acuity. On the east side of the chamber on the upper level is a button you can only find by passing the Perception check. Clicking it will reveal another hidden room behind the wall. Inside will be two Armored Chests with some scrolls and potions.

Head all the way back to where you landed upon entering the hatch. Interact with the stone slab connected to the elevator to head up. Up here, cross the bridge of vines to head to the west to a small graveyard. Turn to the left and open the gate. If you were able to save Arabella at the grove, you’ll see a cutscene with her if you talk to her here. It seems touching the idol back then gave her some power over nature. If you ask her where her parents are, she’ll recount how they got separated by the cultist ambush. Afterward, if you tell her you’ll find her parents, you’ll gain approval from Karlach and Shadowheart. Shadowheart will also approve of allowing her to stay at your camp. Move forward to the northeast for a Perception check. If you pass it, you’ll find the True Love’s Caress among the pile of bones nearby. There are Grated Iron Doors to the north that you can lockpick with 10 DC. Inside is a sarcophagus hiding the Boots of Apparent Death.
There’s another chamber to the north with two sarcophagi inside, containing the Icebite Robe and some minor items. If you head out and continue your journey to the west from here, you’ll find the door to the House of Healing. If you ignore the door and head north you’ll come across some Dark Justiciar corpses. Continue along the path to eventually find Raphael. He’ll start you off with a warning in the form of a rhyme, to which you can call out his worry over you. Afterward, you can ask him what dangers he’s warning you about. If you ask him for specifics, he’ll explain that there’s an ancient demon ahead lost to time, and approaching them risks awakening their plague onto the world if you don’t manage to kill it. If you want him to be more specific, you can try to pass a Persuasion check. Afterward, you can do an Insight check to see if he’s hiding anything else from you. Upon further probing, you’ll learn that it’s an Orthon you’re after. Telling him that he’s afraid of this target will have him warn you not to underestimate it. Finally, he’ll assure you that he hasn’t forgotten his end of the bargain about translating the scars on Astarion’s back. Behind him, to the southwest is the entrance to the Grand Mausoleum.

The Thorm Mausoleum
After entering, when you go through the iron fence, you’ll hear a talking skull telling you to beat it, but it won’t do anything else if you interact with it. A part of Ketheric Thorm’s diary sits near his diseased wife’s coffin. Other parts as scattered around this area if you want to look into his past. In the eastern area of this first area, you can find a locked Traveller’s Chest at (X:-259, Y:-882). It has a lockpicking DC of 14 and contains the Vivacious Cloak, some alchemy materials, some valuables, and possibly a potion or two.
Loot the rest of the area as much as you’d like, and then head over to the northern section. The plaque here reveals that Isobel is Ketheric’s daughter and that the tomb here belonged to her. Successful Perception checks here will reveal traps on the vents and various tiles on the floor, as well as gargoyle heads on the walls, all around the room. To move forward from here, you’ll have to press the buttons below the three paintings around the room in the right order. Start with the button below the Moonrise Towers painting first, and then the Grief painting beside it, before finally pressing the last button under Ketheric Thorm’s painting. Getting the order correctly will open up the walls beside the last painting and allow you to pass through. Interact with the Traversal Gem here to travel down and get to the Gauntlet of Shar.
BG3 Reithwin Masons' Guild Map
BG3 Act 2
- Previous: Reithwin Masons' Guild
- Next: Moonrise Towers
- Recommended Levels: 6-7
Act 2 Main Quests
Gauntlet of Shar Main Quest/s
Gauntlet of Shar All Quests
Gauntlet of Shar Walkthrough
Reach Gauntlet of Shar by Hidden Room in Grand Mausoleum
To reach the Gauntlet of Shar, you have to be within the Reithwin Graveyard in Grand Mausoleum. Successful Perception checks here will reveal traps on the vents and various tiles on the floor, as well as gargoyle heads on the walls, all around the room. In order to reveal the path, you need to press the buttons under the 3 paintings in the following order: Start with the button below the Moonrise Towers (X:-248 Y:-848) painting first, and then the Grief (X:-278 Y:-842) painting beside it, before finally pressing the last button under Ketheric Thorm’s (X:-280 Y:-830) painting. After pressing the corresponding buttons, the walls beside the last painting will open up and allow you to pass through. You'll find a platform there with a Traversal Gem, interact with it to travel down the Gauntlet of Shar. There are 4 Umbral Gems in Gauntlet of Shar, you need to collect all of them in order to progress Shadowheart's personal quest, Daughter of Darkness: The Chosen of Shar.
Continue heading north and go through the first Stone Door to enter the first chamber. In this area, there is a small statue holding an orb. You'll get pushed back if you attempt to approach it. In order to solve this puzzle, you need to explore the side rooms and pull the levers to lower all the lanterns. Do note that all rooms with levers will have traps. Once you've pulled all the levers, interact with the lowered lanterns to extinguish the light. When the room is completely shrouded in darkness, you'll see the pattern on the floor. Use only one character to crouch-walk and avoid the glowing lines to prevent your character from being blasted away. Once you touch the orb, you will open the door leading to the next area. For an easy way to reach the orb in the middle of the forcefield, you can use any sort of teleportation. simply teleport directly next to the orb and then click the Umbral Gem.
Now continue heading west and on the left side of the room (X:-775 Y:-853), you can jump across the platforms that'll lead you to the next area. All of your characters should be able to make the jump as the platforms are relatively close to each other. You can then go down through the cragged rock (X:-801 Y:-850). As you move forward, you'll see a Cloaker in the area. If you pass the perception check, you'll notice you're going through an area that's perfect for an ambush, then you'll initiate combat. The Cloaker can summon Phantasms which are basically clones of itself. It is recommended that you aim for the main body, as killing the Cloaker will make the Phantasms disappear. There's a chest at (X:-824 Y:-866), you can loot its treasure.
Meeting Balthazar
Once you leave camp, you will return with your party to the Gauntlet of Shar. From the last area you left off, head north and go down the stairs. You'll see a giant locked door. You can lockpick or attack it until it breaks down. Now head to the room located east and interact with the Altar to Shar (X:-807 Y:-816). You can then either pray to the altar or leave. If you choose to pray, you'll need to pass an Intelligence check in Religion with DC 14. If you successfully passed the skill check, you will gain Nightsinger's Favour, you will be resistant to any type of necrotic damage until your next long rest. In the room located west, there's a traveler's chest and a Key on a Skeleton you can loot (X:-839 Y:-813).
Now go to the middle and pull the level on the left side to open the door ahead. As you enter the room, you will find three undead skeletons. As you approach them, the one in the middle asks if you are a friend, a foe, or a thief. Then it will say you're a friend, but you were uninvited as he did not request help.

Your next set of choices will look like this:
- Who am I really speaking to?
- I'm no friend of yours - whatever you are.
- Attack.
If you choose the first option, it will tell you to join him and find out. The camera then cuts to the lantern above shaking, suddenly the whole place is shaking. A portal opens up next to you and a Justiciar Avenger comes out. You'll then initiate combat after the cutscene. This can be a difficult combat encounter as the Umbral Tremors can keep appearing throughout the battle.
Once you've slain all the Justiciar enemies, go inside the room located west and you'll meet Balthazar (X:-851 Y:-786).

You'll then be presented with these options once you interact with him:
NOTE: Some dialogue interactions will feature additional options depending on the Race or Class you've chosen.
- Who are you?
- I fought a battle right under your nose - whoever you are, some help would have been useful.
- True Soul? Bold of you, to assume I'm a comrade.
- Naturally-born? That's a strange thing to hold against someone.
- [WARLOCK] Well, I'm not just a True Soul. I have some extraplanar help, so to speak.
- Attack.
If you choose the WARLOCK option, he'll say you're a leech and says there's always room for improvement when it comes to the flesh. Your next set of choices will look like this:
- Who are you?
- Your creations? Mindless undead minions, from what I've seen.
- You're assuming I'm an ally. Unwise, perhaps.
If you ask him who he is, he'll introduce himself as Balthazar, the Chief Advisor to General Thorm and he's here because he was entrusted with an important mission. He then asks you if you know what's at stake at the moment. Your next set of choices will look like this:
- Enlighten me.
- Judging by how you're cowering in here, your survival?
- [HISTORY] The name Balthazar seems vaguely familiar, but from where?
If you choose the HISTORY option, you'll need to pass an Intelligence Check with DC 14. If you failed the skill check, you'll be presented with the same options from before excluding the one you just picked. If you choose the first option, he'll say he's been sent here to collect a Relic for General Thorm. He says you will help him as you've shown some prowess in scouting in combat. You'll realize he has General Thorms trust and this could gain you access to him if you play your cards right. Your next set of choices will look like this:
- So you need my help - what would I have to do?
- [WARLOCK] [PERSUASION] I'm not the type to make a deal without the details. What exactly am I looking for?
- As much as I enjoy you flattering me, this isn't my problem.
If you choose the second option, you'll need to pass a skill check with DC 14. Successfully passing the skill check will reveal to you that this relic gives General Thorms his strength and invulnerability. He says it must be recovered before his enemies attempt to exploit it. Your next set of choices will look like this:
- You need my help?
- This sounds like your problem, not mine.
- I think I'd rather exploit this relic - after I've gotten rid of you.
If you choose the first option, he'll reveal that the relic is close by but he needs you to clear the way for him. he says he'll remain in that area whether you succeed or fail. Shadowheart will then make a comment that it's better to play along for now. Your next set of choices will look like this:
- I'll see what I can do.
- What exactly will you be doing while I'm out risking myself?
- [PERSUASION] You have resources to spare - give me something to aid my search.
- This sounds like your problem, not mine.
If you choose the PERSUASION option, you'll need to pass another Charisma check with DC 14. Successfully passing the skill check will gain you Astarion and Shadowheart's approval. Balthazar will also assign someone to aid you as you clear the way. He'll offer you the bell that can summon his brother. You can either take the bell, attack, or extend the conversation. If you choose to take the bell, you'll receive the item Summon Golem Bell. This item will summon Balthazar's brother and can only be used in combat while in the Gauntlet of Shar. After your conversation with Balthazar you will advance the quest Infiltrate Moonrise Towers.
You can also decide to kill Balthazar and successfully doing so, you will achieve the Acolyte: Those for Whom the Bell Tolled.
Now exit the room and on the north side you'll see a locked Vault Door. You need to lockpick the door with DC 30, successfully opening the door will reveal three Opulent Chests inside. All the chests will contain valuable loot but the most notable loot is inside the chest in the middle, this one has the Scroll of Seeming which is a very rare scroll. It's a single-use item that lets you disguise up to 4 members of your party.
Exit the vault and continue heading east, at this location (X:-752 Y:-789) you'll find a waypoint that lets you fast-travel to this location at any time.
If you head north, you need to pass a perception skill check to reveal the invisible enemies in the area (X:-652 Y:-776).

If you get too close or fail the perception check, you'll immediately engage in combat. Once you've cleared all the enemies within the area, you'll complete the Kill Raphael's Old Enemy quest. We recommend checking the enemies' corpses as you may find some valuable scrolls and weapons, there's an enemy there named Yurgir that has a very rare weapon called the Hellfire Hand Crossbow.
Continue heading north until you reach this location (X:-648 Y:-724) and interact with the Spider Meat.

You'll then be presented with these choices:
- Take a good long sniff.
- give it a lick
- [INVESTIGATION] Study it.
- Leave.
If you choose the INVESTIGATION option, you'll need to pass an Intelligence check with DC 14. Successfully passing the skill check will reveal that the spider has fresh bite marks and an old puncture wound. You will then be presented with the same options as before excluding the one you just picked, and an additional option depending on your class. If you're running a Warlock, you can choose the WARLOCK option to scan the meat for signs of magical interference. This will require you to pass another Intelligence check with DC 16. Successfully passing the skill check will reveal that the spider has been dosed with some type of potion. Now you can choose to leave or give it a lick and take a sniff. Taking a sniff will reveal that the dead spider has something fragrant. If you give it a lick, you'll need to pass a Constitution skill check, and successfully doing so will gain you the approval of Karlach but the disapproval of Shadowheart. After licking the dead spider's meat, you'll notice that it's charmed. You'll then achieve Guild Artisan: Mating Season and inspire anyone in your party including yourself if you have the Guild Artisan background. Head east and you'll find a Heavy Chest that has some gold and a rare Boots of Brilliance.
Now head to this location (X:-648 Y:-738) and drop down from the pile of rocks. Then head east and you'll find a Heavy Chest here (X:-677 Y:-759). Continue by going down the stairs, and you'll find a corpse of a Zealot of the Absolute, loot its corpse and you'll find an item called Instructions from B, among other items. There's also a Gilded Chest at this location (X:-649 Y:-758) that contains a very rare Purple Worm Toxin, some gold, and other loot.
Head back up and go back to this location where you dropped down (X:-648 Y:-738). Head south then go west and jump across the broken stairs (X:-687 Y:-786). Then head north and place both Umbral Gems you've collected at the Ancient Altar (X:-716 Y:-776) to activate the platform. Before you can go, Shadowheart will tell you to wait. You can then respond by asking her what's wrong, ask her if this isn't one of her episodes, or simply glance around. If you ask her what's wrong, she'll say it's nothing, and if you failed the perception skill check, you'll be presented with these choices:
- What's going on? Tell me.
- Snap out of it.
If you ask her what's going on, she'll say there's a holy weapon hidden away called the Spear of Night. She says she has to claim the weapon and use it to make a sacrifice in Lady Shar's inner sanctum so she can become a Lady Justiciar. Your next set of choices will look like this:
- A sacrifice? You intend to kill some innocent down there?
- You're not going to turn against me, are you?
- All right. Where is this spear?
- And you just figured this out by yourself, just now?
- This is nonsense - we've already cleared the way forward.
- Let's move on. Perhaps this mission will prove real - or not.
If you choose the first option, she'll say she'll sacrifice a monster, saying that this place has been empty for years and no simple mortal would have been here for a while now.
Ending the Day
Once you end the day, Raphael will show up. Astarion will then make a remark that Raphael needs to hold his end of the deal as his devil Yurgir has been dispatched. This will also advance Astarion's companion quest, The Pale Elf.
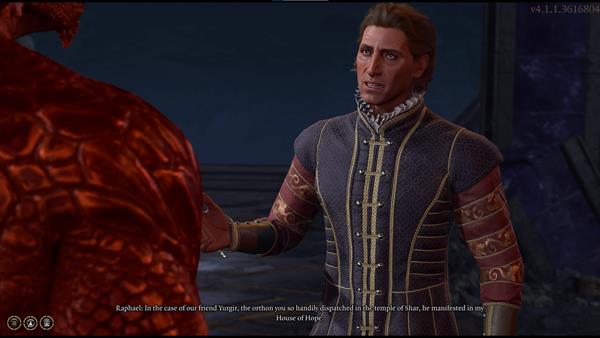
Your next set of choices will look like this:
- Stop stalling.
- Are you sure you want to know, Astarion? Maybe it's best left in the past.
- Spill it - this sounds fascinating.
If you choose the first option, Raphael will reveal the story about the scar on Astarion's back. He says that his former master, Cazador Szarr, made a contract with the archdevil Mephistopheles that states Cazador will be granted knowledge infernal knowledge. If Cazador completes the ritual, he will become the Vampire Ascendant, which amplifies all his vampiric abilities, while enjoying the luxuries of the living. This ritual requires Cazador to sacrifice all his vampiric spawns, and Astarion is the only vampire left that Cazador needs to sacrifice. After Raphael concludes the story, he vanishes. Astarion is left speechless, and your next set of choices will look like this:
- Cazador is a piece of ****. We're going to stop him.
- 'Hmm'? That's all you have to say?
- You don't need to go back to Cazador - you're with me now.
- You're... quiet. It's unsettling.
If you choose the first option, Astarion will ask you if you think it's that simple. Your next set of choices will look like this:
- We can't let Cazador complete that ritual. He could unleash terrible horrors.
- I think you should run. If Cazador can't find you, he can't complete his ritual.
- You'll never be free while Cazador lives.
- There's a way to become a living vampire... That must mean a lot to you.
If you choose the first option, he'll say that Cazador would never leave him alone and would hunt him down. He needs to take the fight to Cazador and needs your help with it. Your next set of choices will look like this:
- After we dealt with our tadpole problem, yes, I'll help you then.
- Of course I'll help. We'll hunt him down and kill him.
- If he comes for you, I'll defend you. But we're not risking an attack on his lair.
- Not a chance.
If you choose the second option, he'll thank you and you will also gain his approval.
Sharran Trials
To find the remaining Umbral Gems, you need to complete Sharran Trials. The Soft-step Trial can be found here (X:-761 Y:-755), just northwest of the Gauntlet of Shar Waypoint. You'll see a Bulky Door as its entrance.
Go inside and interact with the Sacrificial Bowl, Shadowheart will then interrupt and say this is one of Lady Shar's trials. You can then let her do as she wishes or tell her to stand down. If you choose to let her do as she pleases, you will gain her approval. She then wounds herself and offers her blood on the bowl, the gates will then open after. Now you need to skulk to the end of the maze without being spotted by the shadows and if you are spotted, you'll immediately be transported to where the Sacrificial Bowl is. Using an invisibility spell and turn base mode works well. But be careful of the traps. You need to find Soft-Step Key (on the table of a hidden room) or use lockpick to open the final gate. Alternatively, you can use Dimension Door spell to bypass this trial. Once you've made it inside the gate, retrieve the Umbral Gem to complete the trial. You can then interact with the Umbral Transporter to transport you back to where the Sacrifical Bowl is and exit the room.
Continue heading north and you'll find the Self-Same Trial here (X:-763 Y:-733).

This trial forces you to fight a clone of your parties. If you wish to make the combat encounter easier for you, get naked and remove your armor and weapons before you offer your blood to the Sacrificial Bowl. You can just re-equip them before you enter the room. The clone team has the ability to dip in and out of the shadows. For this trial, you would also need to take note of the Cheater's Folly condition, if any member of your party attacks the enemy team that's not their own clone, all their Ability Scores will be reduced by 1 and this effect can stack.

So it's recommended that you only attack your own clown if possible so you won't get stacked with debuffs. If you ever get the Cheater's Folly inflicted on one of your party members, simply killing the clone will remove that debuff. Once you've slain the enemy team you can loot the Umbral Gem from the last clone you killed. You will also find a very rare ring called the Killer's Sweetheart.

Just like before, you can use the Umbral Transporter to transport you back to where you came from to exit the area.
The last and final trial, the Faith-Leap Trial can be located downstairs (X:-744 Y:-728).

For this trial, the room will be plunged into darkness after you offered the blood, and you need to remember the location of the platforms to reach the Umbral Gem. However, you can use the Daylight spell to light the entire room, or use Fly or Dimension Door spell to reach the final platform. Once you reach the final platform, retrieve the Umbral Gem and transport yourself to where you started and exit the area.

Silent Library
Once you've completed the trials, continue heading south and at this location (X:-756 Y:-753) is the Silent Library. You'll notice there's a white barrier at the entrance, you can go through but you will be Silenced and you'll be unable to cast any spells. There will be several Justiciar enemies in the area, if you want to avoid combat, you can try to sneak attack them with ranged attacks. They don't seem to get triggered by getting damaged, which will make this section easier. Once you've slain all the enemies in the area, press the button on the far right corner of the room (X:-778 Y:-751) to unlock the gate to the Treasure Room. Once you enter the room, disarm all of the traps first, then look for the book called Teachings of Loss: The Nightsinger, then interact with the plinth and place the book. After placing the book, the door to Treasure Room will be open.
Inside you'll find the Dark Justiciar Helmet, Dark Justiciar Half-Plate, and the weapon to kill the Nightsong - Spear of Night.
Once you retrieve the weapons, loot whatever you can inside and exit the room. While exploring the area, you find lots of Rats. Try talking to them and you can find they are not natural. Use the Cragged Rock between the 2nd and 3rd trials to reach the feet of the giant Shar Statue. Here you can find a Broken Effigy and a book, read the book and talk to the rat to learn his story - another victim of Raphael and the last remaining Dark Justiciar.
The rat will also reveal the location of Sharrn Provisions if you agree to spare him. If you want to side with Yurgir, you can kill the rats and the last Justiciar. Doing so can avoid a fight with Yurgir. And later easier to get his help when you sneak into Raphael's House of Hope and confront the archdevil. Yurgir is also a potential ally in Gather Your Allies. But you can still persuade Yurgir to join you even if you killed him here. Alternatively, if you chose to help the Orthon break his contract, you learn more about the trickery of Raphael after killing the rat swarm at this location.
Inner Sanctum
Now make your way back to the Pedestal of Reckoning at this location (X:-717 Y:-776).

She'll say that even if half her memories are locked away, she still remembers the stories about this place. You'll then be presented with these options:
- Examine the altar.
- What are these trials, Shadowheart?
- Leave.
If you choose the second option, Shadowheart will say that in order to join Lady Shar's elite, you would need to pass her trials and then make a sacrifice in her innermost sanctum. The inner sanctum will only reveal to those who have proven themselves, and very few have made it that far. She says she's dreamed of this place, she thinks this is her destiny. Your next set of choices will look like this:
- This is a distraction. We need to stay focused on finding a cure.
- Are you sure this is what you want?
- What does becoming a Dark Justiciar mean?
- All right, I'll help if I can.
If you choose the second option, she says if she completes the trials, Lady Shar will bless her with powers that can be used to take on the Absolute and also rid of the parasite. After your conversation with Shadowheart, get on top of the platform and interact with the Traversal Gem to reach the Inner Sanctum. Once you've been transported down, interact with the Ancient Altar and place three Umbral Gems you've collected to unlock the door ahead. If anyone in your party has a background of Guild Artisan, they will be inspired and you will also achieve Guild Artisan: Dark Machinations. head down the stairs and you'll discover the Verge of the Shadows waypoint at this location (X:-717 Y:-842).

Interact with the Shadowfell Entrance pool to trigger a dialogue with Shadowheart. She says she needs to pray, and tells you that everyone made it this far because of Lady Shar's grace. Your next set of choices will look like this:
- Shadowheart...?
- There'll be time to pray later - let's move.
- [WISDOM] Use the power of the parasite. Feel inside Shadowheart's mind.
- Leave her to her prayers.
If you choose the WISDOM option, you'll need to pass a Wisdom check with DC 16. Even if you successfully pass the skill check, you will get a disapproval from Shadowheart. She'll then say that wasn't for you to hear. Your next set of choices will look like this:
- I deserve to know what I'm getting myself into.
- I'm sorry, I couldn't help myself.
- Whatever you think you're going to do there - forget it.
If you choose the first option, she'll say that Lady Shar only demands one sacrifice, but it doesn't matter since Lady Shar's reward aligns with your own interests. Your next set of choices will look like this:
- All right. Fine. Let's move on.
- One life is too high a price.
- Forget it. We're not going to sacrifice a life to Shar.
If you choose the first option, you'll gain an approval from Shadowheart. She'll also tell you to remember what she said about letting her do what she must do. A prompt will then appear on the screen asking you if you want to proceed, depending on your choices, the state of the region could change and some active quests may become unavailable. If you choose yes, your character will step into the pool, you will be transported to Nightson's Prison.
Nightsong's Prison
Continue heading northwest, you'll need to make multiple jumps to reach the objective area. You don't need to worry about fall damage as the gravity in this plane is adjusted. You'll also notice Justiciar Soulhunters along the way, as long as you don't attack them, they won't turn hostile. Once you reach this location (X:-606 Y:-1435), you'll find Nightsong.
Interact with her to initiate a dialogue sequence. She says she felt Shadowheart come in and she's the first after a century has passed. Shadowheart is set on killing Nightsong, but you can still sway her.
Your next set of choices will look like this:
- Trust Shadowheart - do not interfere.
- Do as you must.
- Is this truly what you want?
- Choose your own way, Shadowheart. You cannot allow your goddess to control you.
- Please, Shadowheart. Don't do this.
If you choose the fourth option, she will say that this is her life's purpose. Your next set of choices will look like this:
- All right, fine. Do as you will.
- [PERSUASION] No, it's not. Your life is whatever you make it - don't give up on yourself.
- Find a new purpose then. My mind is set.
- Please, Shadowheart. Don't do this.
If you choose the PERSUASION option, you will need to pass a Charisma check with DC 30. If you fail the skill check, there's a possibility for her to turn on you as she'll say she'll do whatever it takes to fulfill Lady Shar's wishes, even if she has to step on your corpse. Your next set of choices will look like this:
- All right. You have my support.
- This is wrong... but I can't afford to lose you. Do what you must.
- You want to fight? Fine.
Shadowheart and Nightsong will have a short dialogue interaction with each other and you will be given these set of choices:
- Kill her. Let's finish the ritual.
- [PERSUASION] Don't do it, Shadowheart. Don't kill her - you'll regret it.
- She knows something about you. Spare her, and see what she has to say.
- Say nothing.
If you choose the third option, Karlach will approve. Shadowheart will then ready her spear, but she will start to hesitate, and then throw away the spear. She'll then say Lady Shar will disown her. Shadowheart will then touch Nightsong to release her from her prison. Nightsong will then receive all her powers and armour back. She says Shadowheart has great power, but she will also need a powerful weapon. She then asks if she is ready.
Your next set of choices will look like this:
- Ready for what?
- Dark Lady be merciful... What have I done?
- To get out of this place? Absolutely.
- For my weapon? Naturally.
If you choose the first option, Nightsong will say to be ready to kill Ketheric Thorm. Nightsong will then fly away. Shadowheart will tell you that you need to get out of this place as Lady Shar will not be happy after what she did. She also says that Nightsong will be headed to Moonrise Towers and you should get there as well. After the dialogue interaction and the short cutscene, you will receive the Moonlight Glaive weapon. You can then interact with the Shadowfell Portal to exit the area.
Return to Gauntlet of Shar
NOTE: The section below covers a walkthrough wherein the character plays along with the army of Ketheric Thorm, pretending to be one of them. The guide below happens after investigating the towers and freeing the prisoners in Moonrise Towers Prison, then returning to Gauntlet of Shar after.
In order to defeat Ketheric Thorm, you now realize that there's a power that makes him invulnerable. Your investigation will lead you to travel to Gauntlet of Shar where you will continue to aid Balthazar at the request of Disciple Z'rell. At the Verge of the Shadows at (X:-718 Y:-845) you will find a body of water that serves as the entrance to Shadowfell, the domain of Lady Shar. You will get a warning that the state of the region can change depending on your decisions, such as quests becoming unavailable. If you proceed to do so, we recommend following our guide to get your desired outcome.
As you step forward into the statue and through the body of water, you will feel your body struggle as you fight back the sensation. Your character will get knocked out, together with your party. Once you come back to your senses, you will find yourselves in Shadowfell, and Shadowheart immediately recognizes the presence of Lady Shar. However, you will be interrupted as Balthazar flies in to tell you to hurry along and become a witness to his work. Shadowheart defies him and quickly tells him that he does not belong in the Dark Lady's domain. You will now get the following options to respond:
- I was hoping for something more substantial than 'thanks'.
- How did you get here?
- What is this place?
- I cleared the way to this place, not you. Why shouldn't I just kill you instead of letting you interfere?
- Lead on, then.
- Attack.
In this area, Balthazar has no desire to fight even if you choose the 4th one. He will ask that you follow him as he leads the way into Nightsong's Prison. Your party will be doing a series of jumps until you make it to the bottom of Shadowfell. The pattern shouldn't be difficult and each member is guaranteed to survive the jumps as long as it's near the ledge, and not falling off the rocks. Once you finally catch up with Balthazar, you realize that the relic that Discipe Z'rell was referring to was the Nightsong, which is in fact, a humanoid. She invites you to "heap more sins upon your head. My retribution will be all the sweeter for them." Nightsong continues to reveal, that she supplies Ketheric Thorm's immortality with her own soul. Balthazar calls her "Aylin" and commands you to keep back to secure her for a journey. You will now get the following options to respond:
- Wait- the Nightsong is a person?
- What are you going to do to her?
- I can't let you take her, Balthazar.
- Attack him.
If you choose the first one, Balthazar tells you that she is more than that. He shares that she possesses immortal strength and lends it to General Throm through his work. After realizing that she is the key to Ketheric Thorm's immortality, you will now have the option to save her or let Balthazar do his job.
- If she's the reason Ketheric Thorm is invulnerable, you're not taking her. Leave, or you're a dead man.
- Go on, then. Take the Nightsong to Ketheric. Get it over with.
- Attack him.
If you choose the first option, Karlach will give you her approval and you will begin to fight Balthazar right after. Take note that this area is surrounded by Balthazar's minions and they will have the advantage as they are in a higher position. Plan well so you can survive this assault. With Balthazar out of the picture, the Nightsong addresses Shadowheart. She possesses the power to free her or kill her. Shadowheart will turn to you and tells you that "Her fate is mine to seal. Let me handle this." but the Nightsong tells her that the only fate she's sealing is her own and that to become a Dark Justiciar, she will know no love, no joy, but only servitude.
Shadowheart is conflicted about what she wants to achieve and you will be given the option to help her out:
- Trust Shadowheart- do not interfere.
- Do as you must.
- Is this truly what you want?
- Choose your own way, Shadoeheart. You cannot allow your goddess to control you.
- Please, Shadowheart. Don't do this.
If you choose the 3rd option, you will sense hesitance in her voice. You will get another chance to talk to her, or sway her with the next choices:
- Trust Shadowheart- do not interfere.
- Do as you must.
- Choose your own way, Shadoeheart. You cannot allow your goddess to control you.
- Please, Shadowheart. Don't do this.
Choose the 4th option which will then lead you to the next choices:
- All right. You have my support.
- This is wrong... but I can't afford to lose you. Do what you must.
- You want to fight? Fine.
Next, choose the 2nd option so Nightsong will once again, interrupt your conversation with Shadowheart. Nightsong reveals that she knows of the only memory that Shadowheart has. The memory of her being hunted by wolves, and yet, Shadowheart still can't remember what she has lost. Shadowheart still believes that she is meant to become the Lady Justiciar, and you will get the next choices here:
- Kill her. Let's finish this ritual.
- [PERSUASION] Don't do it, Shadowheart. Don't kill her, you'll regret it.
- She knows something about you. Spare her, and see what she has to say.
- Say nothing.
If you attempt the Persuasion check, you will need to pass a DC of 21, choosing the 3rd option will also get the same results and grant the approval of Karlach. When successful, she will procure the spear of Lady Shar and grips it tightly as if she's ready for anything that was to come, and yet, she throws away the spear, abandoning her lifelong quest. Shadowheart now fears that she will be disowned, and she fears what will happen next to her. Nightsong tells her that her fate is not fixed and to lay a friendly hand on her, to fight the battle that has been awaiting her, the one that will take your party to Ketheric Thorm, back to Moonrise Towers.
Upon doing so, she calls out to Moonmaiden Selune as power surges through her arm. She declares that the Nightsong is no more, and she transforms into an armored Dame Aylin. She spreads out her wings and swings her mighty sword. She addresses Shadowheart once again and urges that she was able to spurn her Dark Lady, and may start to feel a stirring of the truth after what she has done. Dame Aylin that there is a battle yet to be fought after being freed from her century-long prison. She will now ask Shadowheart, "Are you ready?"
- Ready for what?
- Dark Lady be merciful... What have I done?
- To get out of this place? Absolutely.
- For my weapon? Naturally.
If you choose the first one, she responds with "To kill Ketheric Thorm" and she will fly away to lead the assault in Moonrise Towers against Thorm's army. Shadowheart asks that you leave Shadowfell already after what she has done, and she doesn't want to be in her domain when her rage falls upon her. Freeing the Nightsong will grant you Selune's blessing and a Moonlight Glaive. As you travel through the portal, Shadowheart goes out for a moment. She tells you that she heard Lady Shar's voice after she defied her. She has been abandoned by her goddess and allies. Powerless, she will now seek answers from Dame Aylin. Afterward, you now get the option to respond to Shadowheart as you please if you want to progress your romance with her.
BG3 Gauntlet of Shar Map
BG3 Act 2
- Previous: Gauntlet of Shar
- Next: Mind Flayer Colony
- Recommended Levels: 8-9
Act 1 Main Quests
Main Quest/s
Moonrise Towers All Quests
- Find Ketheric Thorm's Relic
- Find the Nightsong
- Rescue the Tieflings
- Rescue the Grand Duke
- Find Arabella's Parents
- Rescue Wulbren
- Infiltrate Moonrise Towers
Moonrise Towers Walkthrough
NOTE: There are 2 versions of this walkthrough that will affect the outcome of your relationship with one of the companions. We recommend following the version indicated here, but you may view the alternate version indicated in the guide later. The first guide will feature infiltrating the Moonrise Towers and playing along as a faithful warrior to The Absolute, only to betray them once you discover that Nightsong is the relic that Ketheric Thorm was referring to. Shadowheart will abandon her duty to Lady Shar by freeing the Nightsong, instead of killing her.
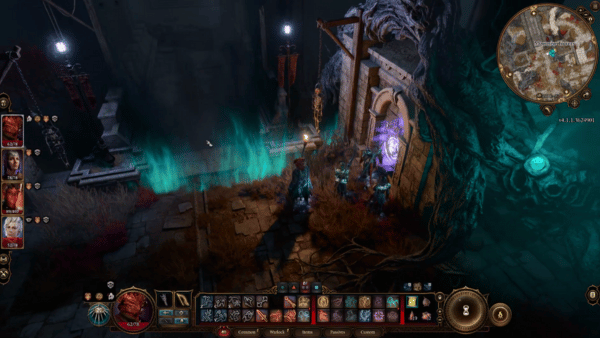
The Path to Moonrise Towers
In order to reach the Moonrise Towers, you will be traveling in the Shadow Cursed Lands where you will meet different characters of different races. At exactly (X:-156 Y:-97) you will see a bridge with glowing lights coming from the ground underneath. There's also a Waypoint that you can unlock here. Walk towards the bridge where 2 guards will stop you at the foot of the stairs. The other one, named Zealot Malik will recognize you as "True Soul" and will begin to act more friendly towards you. To respond, you can choose from the following:
- Little from the field. What news inside?
- I might ask the same. Why is one of our ranks on guard duty?
- That's for your superiors to know.
- I've infiltrated an encampment of Harpers protected by a cleric of Selune.
- Great news: I'm here to take your head.
Given their friendly nature, it's recommended to avoid combat to avoid conflict. The goal here is to infiltrate the towers and pretend to be loyal to The Absolute and thus, choosing the first option will prompt them to give you information on what's going on inside. The other guard, Adept Merim, tells you that Z'rell is waiting in the audience chamber, whom she thinks, will be wanting to hear from you. There are ghouls patrolling on the sides of the entrance but they are not hostile and you can just walk up the stairs to enter the tower.
Interact with the Heavy Oak Doors, and continue to walk towards the center of the tower where you will be welcomed by Zealot Brinn. You will notice that there's a Scrying Eye roaming in this area, so be careful not to do anything suspicious that will raise their alarms. Explore the Main Floor and go to exactly (X:-128 Y:-193), you will find a trader named Araj Oblodra who will also notice Astarion, and refer to him as a pale companion. She will ask if you would accept her services and you can respond with the following choices:
- I'm listening.
- What does a "trader in blood" do exactly?
- What are you interested in my pale friend?
- I just want to see what you have in stock for now.
- Leave.
She continues to tell you that she trades blood and creates potions out of them. She will brew a potent potion for you and then she will keep the rest. She goes on to tell you that, the potion will be unique to you, one that contains your blood essence and The Absolute's blessing intertwined. Then you will have the next options to choose from:
- And what exactly will you do with the blood you keep?
- Sounds interesting. Let's do it.
- No, I'm not interested.
You find out that she keeps the blood for 'research' and does a little bit of experimentation with it. Next, you can decide if you want to go on with brewing a potion. If you agree, she will extract blood from you, and then as she collects it, she will turn her attention to one of your companions, Astarion to be specific. She mentions that he's a vampire and by this, Astarion responds that he won't bite, as they are all friends under The Absolute. However, Araj Oblodra will respond with, "Oh I prefer if you did." and then asks you a question, "I assume he belongs to you?"
- Excuse me? He's his own person.
- We travel together- that's all.
- He does what I tell him, if that's what you mean.
- Yes. All mine.
Choosing the first option here will gain Astarion and Karlach's approvals. Then, Araj will turn her attention to Astarion and she tells him that she has always dreamed of being bitten by a vampire. She offers to give you a potion that will increase your strength permanently if you let Astarion bite her. However, Astarion will refuse her and will instead ask for your help to decide on this matter. You will have 3 options:
- He said no. There's nothing more to discuss.
- I am surprised, Astarion. I thought you'd jump at a chance like this.
- Just bite her- the potion sounds useful.
If you force Astarion to do this, he will disapprove of this, however, you will gain 2 potions. One is unique to your character, during our playthrough, we got the Elixir of Dragonborn Prowess: Fire. Then, for the other potion, Potion of Everlasting Vigour, which increases your Strength by 2 permanently. You may also interact with Araj Oblodra again, to check her wares. She's also a trader dealing in Moonrise Towers.
Exploring the Main Floor of Moonrise Towers
After you encounter the trader in blood, you can continue to explore the Main Floor of the Moonrise Towers and head to (X:-152 Y:-200) where you will find Ketheric Thorm sitting on his throne and his audience. The lives of Fezzerk and his group are being decided upon by Z'rell. They are being questioned about what happened. You will get an option to respond here:
- Don't kill them! They're loyal followers of The Absolute.
- Keep silent and keep watching.
- Hear, hear!
- Attack.
During the first exchange, if you choose to keep silent, Ketheric Thorm will turn his attention to you and will ask for your judgment. Then, you will get the next choices:
- They're faithful soldiers. You should set them free.
- I saw the horrors they committed in The Absolute's name.
- Just kill them- they're worthless.
- Attack the half-orc and the general.
If you choose the first one, Ketheric Thorm will disagree, saying that he can't afford more mistakes. He will order the goblins to be killed, but one of the unbelievers, the one unaffected by the parasite, will throw a spear into Thorm's chest, in an attempt to kill him. However, it seems that Thorm is unaffected by this and even asks to try again. He demonstrates that he cannot be killed and when he's done, he proceeds to kill the rogue goblin swiftly. Fezzerk's fate will be handed over to you, and you are free to decide on how you want to deal with them. If you show mercy on the goblins, Astarion will disapprove of this.
Continue to go around the Main Floor of Moonrise Towers and you will find Lann Tarv, who will have a dialogue with Karlach. An old friend of hers, named Flo, wishes to hand over three Soul Coins to her. These soul coins can come in handy, but you also consider that it's dangerous to accept any offers from a Cambion. If you reject this, Karlach will give you her disapproval. After that, you may also check Lann Tarv's wares, who is also a trader. Also, Roah Moonglow, another trader is also stationed here.

You will come across Mig, a troll who tells you about meat sounds. She suspects that it's as big as the whole tower and can be heard loudest from the kitchen. With this, you head to the Kitchen located at (X:-112 Y:-197). You will find Linsella among gnolls that seem tame enough to listen to her. As you talk to her, you will find out that she was able to control them with the power of The Absolute granted to her, putting the beasts under her control. As she demonstrates her power, the gnoll will try to break free from her. Your character will get an option to intervene or not with the following choices:
- [WISDOM] Sever her control once and for all.
- Reinforce her efforts with your own.
- It seems you're not as commanding as you think.
If you attempt the Wisdom check, you will need to pass a DC of 16. When successful, the gnoll that he calls Barnabus will be free from her control and attacks her. Now, in the face of a gnoll, you will have options on how to face it:
- [PERSUASION] Easy! I freed you- I'm a friend.
- [INTIMIDATION] Try it- I dare you.
- [ILLITHID] [WISDOM] Now, now, Barnabus- behave.
- Attack.
If you attempt any of the checks, you will need to pass a DC of 16. When you are successful with Persuasion, the gnoll will thank you for freeing it. This event called "Pied Piper" will inspire Astarion, where you will successfully influence gnolls, either to break free or continue being subservient. Following the meat sounds that the troll mentioned earlier, you will arrive at (X:-127 Y:-175) You will find some sort of mucus blocking a doorway. Given its current state, your party won't be able to enter and investigate from here.
Exploring The First Floor
At (X:144 Y:-210), you will find yourselves on a landing that will take you to the First Floor of Moonrise Towers. There's a bigger journey awaiting your party here and the first thing that you will witness here is Z'rell and Radija in a conversation, that no one is allowed to disturb the prayers of Thorm on the rooftop. They reiterate that no one is allowed, not even Z'rell. She will turn her attention to you and ask about how you handled the goblins.
Given that you let the goblins walk free in this walkthrough, she will discover the act that you have done after reading your mind. You will get the following options as you try to redeem yourself:
- [DECEPTION] Dead, they're a waste. Free, they spread the word of The Absolute.
- [PERSUASION] They won't get far. Let the curse take them, and save us the job of cleaning up their innards.
- You said I could do whatever I wanted with them- so I did.
Attempting the Persuasion or Deception check will require you to pass a DC of 16. If successful, she will go through again your mind to discover your wants and hopes. This, however, has a bigger reason for why she's doing it, as she's questioning your faith. You will now get the following options to respond:
- [PERSUASION] Distract her with thoughts of your care for Shadowheart.
- [PERSUASION] Distract her with thoughts of your romantic desires.
- [DECEPTION] Fake it- fill your mind with love for the Absolute.
- Distract her by drawing her toward your hunger for power.
- [WISDOM] Overwhelm her by unleashing a wave of hatred as you prepare to attack.
Choosing the first option will require you to pass a DC of 14, when successful, she shares her story of how the Absolute gave her everything she wanted which is freedom. She gives you a mission and then you hear the voice of the dream visitor inside your head. They urge you to play along so you can get closer to the general, and so you'll be able to find the answers you seek. She tells you that General Thorm needs a relic that is currently located at the mausoleum beneath the tower. She asks you to make contact with Disciple Balthazar and retrieve the relic.
To reach Balthazar's room, you will head to the first floor where you will see Glourik standing watch by the door at (X:-133 Y:-187). With Balthazar's room key, you can explore his room and pick up the Moon Lantern, which you will be needing as you explore the Mausoleum later on. You will notice that there's a locked Metal Door within his room, and attempting to unlock this will require passing a Dexterity check DC of 30.
Inside the room, you will find an undead hound guarding the area. You can attempt an Animal Handling, Performance, or Intimidation check that will require you to pass a DC of 18. Once successful, you can now freely roam the area without fighting the hound. There are more chests that you can unlock in this area as well and pick up valuable items such as elixirs and scrolls.
There's another locked door here, that will lead to a different room. Unlocking this door will require you to pass a DC of 15. Inside this room, you will find more chests to loot and letters to discover. The unique chest can be found at the foot of the bed where it transforms into a Mimic the moment you get near it. When you're done killing it, you can loot its items.
Heading to the Moonrise Towers Prison
When you're done exploring the Main Floor and First Floor, you can now go to the Prison located beneath the tower. You will find a stair leading to this area at (X:-175 Y:-193). Interact with the stairs here and this will take you to the Moonrise Towers Prison. If you still have a good relationship with the cultists or haven't started a fight with them, the guards will let you in without a fight. Make sure to explore each room here if you want to stock up on scrolls and elixirs. You will also find barrels and chests that you can open. As you head into the prison rooms, you will find a Scrying Eye guarding. With this sentinel, you have to make sure not to do anything suspicious while it watches in that area.
You will find the Tiefling Lia standing at the prison cell with who you can engage in a conversation, this however, will be put to a stop by one of the guards watching, forbidding you from speaking to them. You will be given 3 options to respond:
- [DECEPTION] I have permission from Balthazar. Ask him.
- [PERSUASION] What are the prisoners going to do? Talk me to death.
- My apologies- won't happen again.
Attempting the Persuasion check will require you to pass a DC of 14. When successful, you can continue talking to Lia and she tells you that the gnomes are up to something and they're working together. Urging you to find these gnomes to talk to them. Continue to go around the cells and you will find Wulbren, who is curious about how you were able to order the guard successfully. He wants to know what is your business with them. You can offer to help him for free or for a fee or tell him that you want to torment him.
If you choose to help them for free, he will want to know the reason behind this. You can attempt the Persuasion check that will require you to pass a DC of 10. Your turn to respond:
- Barcus told me you were here, and asked me to help.
- [PERSUASION] I know the Tieflings imprisoned here- I want to break you all out.
- [PERSUASION] My mind is my own- the Absolute has no control over me.
- [DECEPTION] I'm an undercover agent for the Flaming Fist.
- Fine, die in here for all I care.
When successful, Wulbren will tell you about his plan which involves looking for tools. He will ask for you to hand them anything that can break rocks and also make sure that no one will see you helping them. He also tells you that the Warden robbed them of their tools, and you can start looking from there. Locating the Tieflings and Wulbren will update the quests for these characters in your journal.
You will find the Warden in their room at (X:572 Y:-655), and ask her questions about confiscated items to reveal that she is hiding these in the office above. You may also attempt the Intelligence check which will require you to pass a DC of 13, this will reveal that levers behind her desk can open the doors of the cells, and the larger lever is used to trigger the alarm.
With her back turned against you, you can sneak to go up the ladder. However, there is a Scrying Eye in this area so it's not advisable to steal the tools under its watchful eyes. The moment you get spotted, she will confront you to explain yourself:
- Acquiesce and follow to prison.
- Try to talk your way out of it.
- Try to convince them you belong here.
- Perhaps some gold would make up for my little indiscretion? (1238)
- Try to buy your way in. (4952)
- Attack.
Choosing the second option will you further choices which requires you to pass a DC of 15:
- [DECEPTION] Would you look at that- my map's upside down. I should have turned right at that crossroads.
- [INTIMIDATION] Let me be, or you won't live to regret it.
- [PERSUASION] Haven't you ever been turned around on your way to a date with destiny?
Another option is to fight The Warden since this area is unseen from the level above. Make sure to destroy the Scrying Eye in this area so that the others will not be alerted. After this, you can now search the office where items are being stored. Make sure to loot the Warden's body to retrieve the Spellcrux Amulet and the Moonrise Guard's Key from her.
The chests above are locked but you can unlock them by doing a Dexterity check which requires you to pass a DC of 14-16, which varies on the difficulty of the chests. With The Warden gone, you can free the tieflings and Wulbreg by interacting with the levers behind the desk. However, there are still guards nearby so this will commence a battle between them and your party. It is best to take care of the nearby guards before handing them the tools so that they can escape through the tunnels.
Follow them through the tunnels by using the walls that they have broken through. You will find a boat docked at (X:572 Y:-577) and their party will take their leave. This will complete your quests Rescue Wulbren and Rescue the Tieflings.
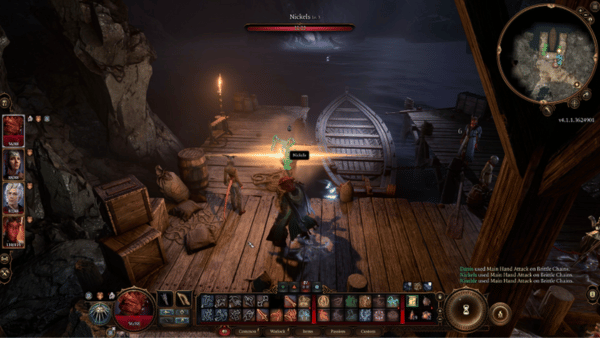
Now that the prisoners have escaped Moonrise Towers, you can continue investigating the prison. You will find traces of the red mucus that you found in the kitchen at (X:507 Y:-617), there is a cragged rock that you can interact with that will take you to the Oubliette. This event of reaching the bottom will inspire Karlach on Delving into the Deep. Hook Horrors are roaming about in this area and these monsters are immediately hostile as soon as they see you. There's not much to do here but continue on the quest given by Z'rell, which is to aid Balthazar in looking for the relic. You will see some enemies gathered at a lower level of Oubliette, but this area is still blocked and you will need to go back up to the towers and look for another entrance.
To Gauntlet of Shar
In order to defeat Ketheric Thorm, you now realize that there's a power that makes him invulnerable. Your investigation will lead you to travel to Gauntlet of Shar where you will continue to aid Balthazar at the request of Disciple Z'rell. At the Verge of the Shadows at (X:-718 Y:-845) you will find a body of water that serves as the entrance to Shadowfell, the domain of Lady Shar. You will get a warning that the state of the region can change depending on your decisions, such as quests becoming unavailable. If you proceed to do so, we recommend following our guide to get your desired outcome.

As you step forward into the statue and through the body of water, you will feel your body struggle as you fight back the sensation. Your character will get knocked out, together with your party. Once you come back to your senses, you will find yourselves in Shadowfell, and Shadowheart immediately recognizes the presence of Lady Shar. However, you will be interrupted as Balthazar flies in to tell you to hurry along and become a witness to his work. Shadowheart defies him and quickly tells him that he does not belong in the Dark Lady's domain. You will now get the following options to respond:
- I was hoping for something more substantial than 'thanks'.
- How did you get here?
- What is this place?
- I cleared the way to this place, not you. Why shouldn't I just kill you instead of letting you interfere?
- Lead on, then.
- Attack.

In this area, Balthazar has no desire to fight even if you choose the 4th one. He will ask that you follow him as he leads the way into Nightsong's Prison. Your party will be doing a series of jumps until you make it to the bottom of Shadowfell. The pattern shouldn't be difficult and each member is guaranteed to survive the jumps as long as it's near the ledge, and not falling off the rocks. Once you finally catch up with Balthazar, you realize that the relic that Discipe Z'rell was referring to was the Nightsong, which is in fact, a humanoid. She invites you to "heap more sins upon your head. My retribution will be all the sweeter for them." Nightsong continues to reveal, that she supplies Ketheric Thorm's immortality with her own soul. Balthazar calls her "Aylin" and commands you to keep back to secure her for a journey. You will now get the following options to respond:
- Wait- the Nightsong is a person?
- What are you going to do to her?
- I can't let you take her, Balthazar.
- Attack him.
If you choose the first one, Balthazar tells you that she is more than that. He shares that she possesses immortal strength and lends it to General Throm through his work. After realizing that she is the key to Ketheric Thorm's immortality, you will now have the option to save her or let Balthazar do his job.
- If she's the reason Ketheric Thorm is invulnerable, you're not taking her. Leave, or you're a dead man.
- Go on, then. Take the Nightsong to Ketheric. Get it over with.
- Attack him.

If you choose the first option, Karlach will give you her approval and you will begin to fight Balthazar right after. Take note that this area is surrounded by Balthazar's minions and they will have the advantage as they are in a higher position. Plan well so you can survive this assault. With Balthazar out of the picture, the Nightsong addresses Shadowheart. She possesses the power to free her or kill her. Shadowheart will turn to you and tells you that "Her fate is mine to seal. Let me handle this." but the Nightsong tells her that the only fate she's sealing is her own and that to become a Dark Justiciar, she will know no love, no joy, but only servitude.
Shadowheart is conflicted about what she wants to achieve and you will be given the option to help her out:
- Trust Shadowheart- do not interfere.
- Do as you must.
- Is this truly what you want?
- Choose your own way, Shadoeheart. You cannot allow your goddess to control you.
- Please, Shadowheart. Don't do this.
If you choose the 3rd option, you will sense hesitance in her voice. You will get another chance to talk to her, or sway her with the next choices:
- Trust Shadowheart- do not interfere.
- Do as you must.
- Choose your own way, Shadoeheart. You cannot allow your goddess to control you.
- Please, Shadowheart. Don't do this.
Choose the 4th option which will then lead you to the next choices:
- All right. You have my support.
- This is wrong... but I can't afford to lose you. Do what you must.
- You want to fight? Fine.
Next, choose the 2nd option so Nightsong will once again, interrupt your conversation with Shadowheart. Nightsong reveals that she knows of the only memory that Shadowheart has. The memory of her being hunted by wolves, and yet, Shadowheart still can't remember what she has lost. Shadowheart still believes that she is meant to become the Lady Justiciar, and you will get the next choices here:
- Kill her. Let's finish this ritual.
- [PERSUASION] Don't do it, Shadowheart. Don't kill her, you'll regret it.
- She knows something about you. Spare her, and see what she has to say.
- Say nothing.

If you attempt the Persuasion check, you will need to pass a DC of 21, choosing the 3rd option will also get the same results and grant the approval of Karlach. When successful, she will procure the spear of Lady Shar and grips it tightly as if she's ready for anything that was to come, and yet, she throws away the spear, abandoning her lifelong quest. Shadowheart now fears that she will be disowned, and she fears what will happen next to her. Nightsong tells her that her fate is not fixed and to lay a friendly hand on her, to fight the battle that has been awaiting her, the one that will take your party to Ketheric Thorm, back to Moonrise Towers.
Upon doing so, she calls out to Moonmaiden Selune as power surges through her arm. She declares that the Nightsong is no more, and she transforms into an armored Dame Aylin. She spreads out her wings and swings her mighty sword. She addresses Shadowheart once again and urges that she was able to spurn her Dark Lady, and may start to feel a stirring of the truth after what she has done. Dame Aylin that there is a battle yet to be fought after being freed from her century-long prison. She will now ask Shadowheart, "Are you ready?"
- Ready for what?
- Dark Lady be merciful... What have I done?
- To get out of this place? Absolutely.
- For my weapon? Naturally.

If you choose the first one, she responds with "To kill Ketheric Thorm" and she will fly away to lead the assault in Moonrise Towers against Thorm's army. Shadowheart asks that you leave Shadowfell already after what she has done, and she doesn't want to be in her domain when her rage falls upon her. Freeing the Nightsong will grant you Selune's blessing and a Moonlight Glaive. As you travel through the portal, Shadowheart goes out for a moment. She tells you that she heard Lady Shar's voice after she defied her. She has been abandoned by her goddess and allies. Powerless, she will now seek answers from Dame Aylin. Afterward, you now get the option to respond to Shadowheart as you please if you want to progress your romance with her.
The Alternate Version
NOTE: This walkthrough is the alternate version that begins from Gauntlet of Shar and involves Shadowheart killing Nightsong. This guide shows Shadowheart embracing her Lady Shar, and gives Shadowheart the opportunity to become the Lady Justiciar.
When confronting the Nightsong, she tells Shadowheart that the only fate she's sealing is her own, that she will know no love, no joy, but only servitude. At this point, you sense Shadowheart's hesitation, and you may be able to sway her from the path of duty to the path of light. If you want the outcome of Shadowheart becoming Lady Justiciar, choose the second one.
- Trust Shadowheart- do not interfere.
- Do as you must.
- Is this truly what you want?
- Choose your own way, Shadoeheart. You cannot allow your goddess to control you.
- Please, Shadowheart. Don't do this.
Then your next choice should be the first one. However, if you choose the first one, Karlach will give you her disapproval, while Astarion will give his approval.
- Kill her. Let's finish this ritual.
- [PERSUASION] Don't do it, Shadowheart. Don't kill her, you'll regret it.
- She knows something about you. Spare her, and see what she has to say.
- Say nothing.

Shadowheart summons the Spear of Lady Shar and pierces Nightsong with it. Nightsong tells her that she is Shar's child after all as she feels true death, at last. Shortly after, Shadowheart will hear the voice of her goddess, Lady Shar. She calls out to her as her Chosen, her Warrior, and her Dark Justiciar. After this, Shadowheart will receive rewards from Lady Shar. Lady Shar speaks of attacking Ketheric Thorm after he shunned her embrace and using her domain to house the Nightsong. If you follow this guide, killing Nightsong will complete the 'Find the Nightsong' quest. You can now begin your attack on the Moonrise Towers, now that you were able to weaken Ketheric Thorm.
Shadowheart will receive the following rewards:
- Dark Justiciar Gauntlets
- Dark Justiciar Half-Plate
- Dark Justiciar Mail
- Dark Justiciar Boots
- Shar's Spear of Evening
Return and Infiltrate Moonrise Towers
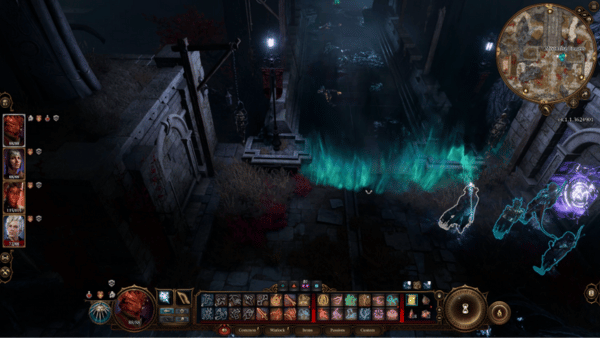
With Dame Aylin leading the fight against Ketheric Thorm's army, she will fly across the Shadow Cursed Lands and make her way to Moonrise Towers. As for your party, your travel will begin at the bridge of Moonrise Towers where Jaheira awaits at the foot of the stairs. She tells you that she is the last one standing, and asks if you will take the final steps together, with her.
- It would be my honor.
- If you're the last Harper standing, it's only fitting that you walk alone.
If you choose the first one, Karlach will give you her approval. You will be leading the assault on Moonrise Towers and you will find Thorm's army waiting for you at the Main Floor. You will battle Disciple Z'rell, Barnabus, and the others. Make sure to plan ahead so you come out victorious in this battle. You will have temporary companions in this area, like Jaheira, and you can take full control of her temporarily.
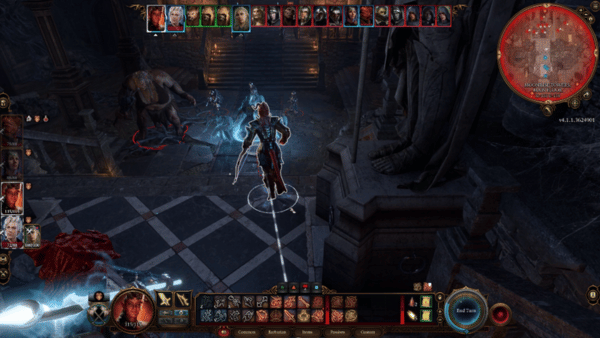
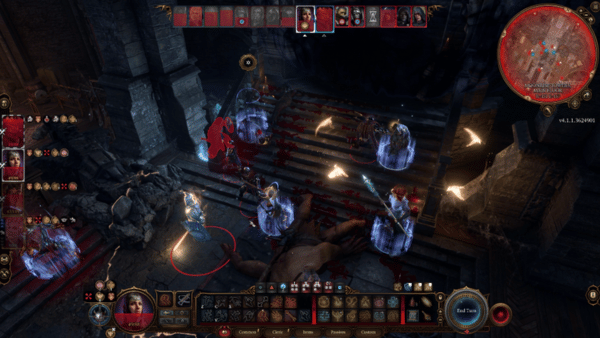
After clearing the Main Floor, Jaheira offers to stay behind as you go up the tower with your party and assist Dame Aylin. She wants to make sure that no one will be able to cross and assist the battle against Thorm. She tells you that the final audience with Ketheric Thorm awaits you. There are still enemies awaiting on the First Floor that you must defeat on your way to reach Thorm. Fight the disciples and eliminate them to find Thorm.
As you open the Ornate Door, this will lead you to Moonrise Towers Rooftop, where a weakened Ketheric Thorm stands before you. He demands to know what you have done to him and you can respond with the following options:
- You're mortal again, Thorm. I've come to finish you.
- You did this to yourself.
- You were feeding off Nightsong for a century. No longer.
- [INTIMIDATION] Surrender now, and I'll consider letting you live.
- [PERSUASION] Melodia wanted more for you than this, Ketheric. Stop, and you may redeem yourself yet.

If you attempt the Persuasion check, you will need to pass a DC of 10. Balthazar responds that there is no redemption for him. He acknowledges that he died a long time ago and he only intends to bring Isobel back. After this, you get another set of options to respond to Thorm:
- You're wrong, Ketheric. It isn't too late for you.
- Melodia is waiting for you in the afterlife. Return to Selune, and your souls will be reunited.
- So you'll continue this spectacle of violence? To what end?
If you choose the second option, Thorm will refuse to believe you because the Moonmaiden failed to intervene when his life was dismantled. He acknowledges that a true soul like you has defeated him, but the gods beat him first. Now, you will have the following options:
- I can help you, Ketheric- if you let me.
- It isn't too late Ketheric. Your story doesn't end here.
- Come quietly, and you'll be spared.
- Seeing one's enemies cowed never gets old.
Offering to help Ketheric by choosing the first option will get Karlach's approval but Aylin will interrupt your conversation and demands that Thorm fight. You can try to tell Aylin that he has surrendered, but Aylin refuses to believe your word and will continue the battle against him. Thorm now realizes that he needs to use his power that can't be hidden anymore. He offers you one last chance to bow, or he will destroy both you and Dame Aylin.
He commands you to bow but it will be revealed that you have The Prism with you. This angers Ketheric Thorm and the battle will now begin against Ketheric Thorm. Your party will raise their weapons against Thorm and what's left of his army on the rooftop. There's still quite a handful of them here and they are surrounding the area. Make sure to plan accordingly and focus on defeating Thorm first. Once you get Thorm's HP to 0, he will not be downed, but instead, he stands up once more and tells you that his Lord beckons him. Dame Aylin will fly away and swoop down as if ready to end it all, however, Thorm has been keeping his trump card all this time.
A colossal tentacle swings upwards from the foot of the tower and attacks Dame Aylin, she vanishes right before your eyes together with Thorm who was able to escape his fate, for now. There are still enemies left behind by Thorm, make sure to eliminate them to focus on the task at hand. When you're done fighting, make sure to search the chest atop the throne where Ketheric Thorm was seated. You will find Jaheira has followed you to the rooftop. She tells you that she fears that the Nightsong has been captured again and that their next step is to follow it beneath the tower to find them. You will get the following options to respond:
- Don't you want to see how this ends?
- I can handle this- don't worry.
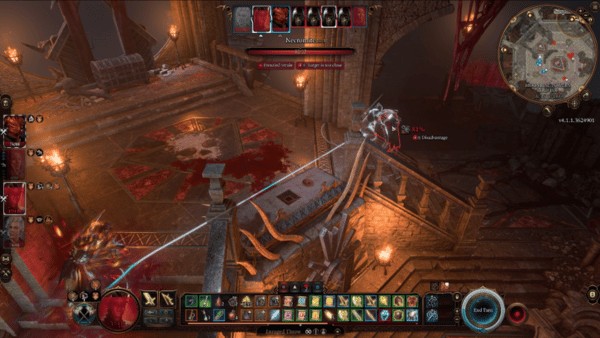
For the next dialogue, you will get an option if you want Jaheira to follow you in battle. If not, she will stay behind and be on guard with her harpers. After Thorm's escape, the one way to reach them is to drop down the chasm created by the colossal tentacle. You can camp just before you begin the next battle so you can replenish your health and spell slots of your party.
The Walkthrough for Moonrise Towers ends here and you may continue reading the next location: Mind Flayer Colony.
BG3 Moonrise Towers Map
BG3 Act 2
- Previous: Moonrise Towers
- Next: Astral Plane
- Recommended Levels: 8-9
Act 1 Main Quests
Mind Flayer Colony Main Quest/s
- Defeat Ketheric Thorm
- Embrace Your Potential
Mind Flayer Colony All Quests
Mind Flayer Colony Walkthrough
NOTE: This walkthrough will feature an alternate version wherein one of your companions, Gale, gets an opportunity to end the control of the absolute as part of The Wizard of Waterdeep quest. When he gets close enough to the elder brain, he can cause himself to explode killing everything else around him. We recommend following our initial guide here but we will still indicate the alternate version below.
Once your party has rested, you can now interact with the Hollow Tower. Once you do so, you will get a prompt that will ask you if you will leap after Ketheric Thorm and the tentacle that drew him underground with the Nightsong. If you agree, your character will look down on the chasm as Shadowheart asks if you intend to jump down. Seemingly as if your character didn't hear anything, you will jump down the chasm and upon reaching the ground, you see the walls around you are covered with the same red mucus that you found inside the tower, from where the suspicious sounds came from. The mucus is far thicker indicating that you are closer to the source.
You and your party have finally reached the Mind Flayer Colony and your Dream Visitor speaks to you that you are closer to the source of the parasites, the ones that were used to infect your party. Interact with the membrane that's blocking the path to destroy it and reveal new sub-areas. These membranes are surfaces that your character can interact with. The dream visitor continues to speak again to remind you to be careful as you get closer to the source.

You will find Intellect Devourers in this area but they are not immediately hostile. You will find them roaming around and seem to be running away from you. Follow the passage down to your right to reach a Flesh-Wrought Door that will reveal the Morgue sub-area. You will see rotting bodies and cages dumped nearly anywhere and if you were able to reach Oubliette while you were exploring Moonrise Towers Prison, this was the area that can be seen from the central part.
On your right, you will find a brain that is contained inside it, if you did not destroy the brain in the Nautiloid Ship, they will show up here in the Morgue sub-area. They will ask for your help to have them freed because it claims that they are not like the others and that they will be destroyed. If you save them, they can accompany you in battle in the form of a summon. To reply, you will get the following options:
- I'll free you.
- Let me think about it.
- Not my concern.

There's also a console in the center of this area. When you interact with it, a corpse will fall through the hatch. Chop speaks out, that those are offering from Moonrise Towers. Next, you can speak with Chop, a creature with a hollow mind that has been enslaved by The Absolute. It seems that it is following orders but can't think much on its own. You will now get a chance to choose how to interact with Chop:
- [ILLITHID] Enter his thoughts.
- What is this place?
- What did you do to all these people?
- About that creature in the cage...
- I need to find your master- Ketheric.
- Leave.


You find out that Chop has been harvesting the brains of their captives, while The Absolute turns them into Intellect Devourers and eventually, they will become a part of the hivemind. It also tells you that the brain inside the cage is different from the others, and needs to be fixed. Now you'll get the option if you want to free it or let him do his work:
- What's wrong with it?
- [ILLITHID] Let it come with me. We sing the same song.
- [PERSUASION] I'll take the creature with me. It won't disrupt the hivemind anymore.
- [INTIMIDATION] Free the creature or I'll kill you and every one of your creations.
- Do as you will with it.
If you attempt the Persuasion check, you will need to pass a DC of 14. When you are successful, he will hand you the key to free it. Upon successfully freeing the brain, you will receive an item: "Summon Us", they tell you that they will remain with you until you call out to them. Continue looking around this area, and you will find helms on the table. Check your party's equipment and see if any of the items are fit for them.

Your next destination is the Necrotic Laboratory which you will find at (X:715 Y:-49), before entering this area, your party must be prepared for a battle against a horde of enemies. You will find Zombies, Winged Horrors, and a Death Shepherd commanding them. When you are done fighting them, you will have a pile of bodies to loot from. The area that they were standing from shows Profane Womb that can be attacked and destroyed. Behind the ritual zone, there is a secluded space behind it.

Jump over the ledge towards (X:695 Y:-110) to find Resonance Stone on the table. Next to the table, there's a Slack-Skinned Head that speaks in incomplete sentences that seems to be lending the voice to the elder lore. Next, go to the other side of the laboratory where you can locate another console. This one is in desperate need. You will get an option if you want to help this console or not. If you do, you can get a weapon from this and understand the Grand Design built by the Illithids.
The Mind Flayer Colony Puzzle consists of four nodes to match the other end. Follow this order to complete the puzzle:
- Emotion: The yellow node will connect from the outer left edge to reach the final Emotion Node on the other end.
- Speech: The blue node will connect from the top, then go right, then forward to reach the Speech Node on the other end.
- Memory: The green node begins from the right, then through the middle, and then back towards the left to reach the Memory node.
- Reason: The pink node will connect the remaining nodes, all the way through to the other end.
You can now walk to the stony statue at the back of the puzzle where a voice will finally speak. The Desecrated Relief tells you about The Grand Design and the words: order, perfection, and unity. The Dream Visitor speaks to you again to tell you that the Grand Design is the restoration of the Mind Flayer empire, the dream of all Illithids. After this cutscene, look around in the ground and you will find the Blade of Oppressed Souls right next to the opening of the statue.
Continue exploring the path on your map and follow the guide to the 'Suspicious Sounds' that is highlighted in a yellow ring. At exactly (X:686 and Y:-13), you will see another Flesh-Wrought Door. This door will lead you to the Tadpoling Centre where you will find similar pods that were used to capture you in the Nautiloid ship.
You can interact with each of the consoles to find out about the prisoners that they once held. There's a Neural Apparatus next to it that you can interact with. You find out that there are Illithids, and the not yet infected ones that are desperate for release. It is your choice if you want to release or purge these creatures, together with the non-infected ones or let them be.


If you choose to release them, Karlach will give you her approval, while Astarion will give his disapproval. Zevlor is inside one of the pods but freeing them means you will have to fight against the Mind Flayers that will be freed together with the rest of the prisoners. By doing so, the Intellect Devourer will also become hostile at the command of the Illithids. Defeat the enemies here and speak with Zevlor after. He is eager to find out what had become of his people, and you can respond to him with one of the following options:
- You abandoned them. Do you really think you have the right to ask?
- Some. Others ended up in a cell in Moonrise. That's on you.
- They found refuge but what the hells happened out there, Zevlor?
- I can't tell you.

If you choose the third option, he tells you that they were ambushed by the cultists and that he has heard a voice of a woman who whispered promises in his mind. He realized that he was put under a charm, and it was too late for the ones that he was supposed to be protecting. He surrendered and even welcomed the Absolute, he said.
- If you wanted power, you never needed a god- only to live up to your ideal.
- 'For a moment'- until you realized your reward would be a tadpole.
- It sounds like you were being enthralled. It's not your fault.
- Your people didn't need a paladin- they saved themselves.
After this, he is aware of the battle that lies ahead and will offer his help. He tells you that Ketheric is below and that he intends to look for other survivors and lead them out of the area. Now it's up to you if you want Zevlor to fight with you or save his people:
- I could use another blade in the fight to come.
- Find your own people. They need you.
- I don't care what you do- just get out of my sight.
- Fine. Good luck, Zevlor.


Continue exploring the yellow ring, and you will find Mizora at (X:682 Y:37) in front of Brine Pools. She speaks out loud that there are no more tadpoles and that it is an indicator that they are planning something big. She had been captured by the Illithids and you have gained an opportunity to free Wyll from his pact with her.
- [INTIMIDATION] Free Wyll, or I let the cult infect you. I bet you'd make a loyal thrall.
- [HISTORY] Remember all you can about devils and their contracts.
- [PERFORMANCE] Say you know a pact-breaking charm and chant a series of pseudo-Infernal phrases.
- Poor thing. I'll let you out of there.
- Fine. Let's get on with it.
If you attempt the History check, you will need to pass a DC of 16. Then you will remember a chant that is used to void a devil's contract. You will now get the next choices:
- 'Abi diabole, et nunquam redi.'
- [HISTORY] Remember all you can about devils and their contracts.
- [PERFORMANCE] Say you know a pact-breaking charm and chant a series of pseudo-Infernal phrases.
- Poor thing. I'll let you out of there.
- Fine. Let's get on with it.
Mizora will laugh at you and she will agree to free Wyll, but only after she's free from the pod. Now you will turn your attention to the controls next to Mizora's pod. The key here is the Right Device will free Mizora, while the Left Device will kill her. Note that Wyll's soul is still bound to her, so if Mizora dies, so does Wyll.
- [STRENGTH[ Gather your strength and smash your foot through the pod.
- Examine the device on the left.
- Examine the device on the right.
- Leave her there.
If you choose to free Mizora, she reveals that she will only release Wyll's soul after six months and calls you an Ignorang thing.
- To the Hells with your conditions. Sever Wyll's pact now, or I'll sever your head.
- A full half of a year? You've got to e kidding.
- Shrug. Six months isn't that long of a wait.
- That warlock of yours is turning out to be more trouble than he's worth.

Mizora will now leave this area and you can continue exploring the Mind Flayer Colony at exactly (X:704 Y:24) you will find another Flesh-Wrought Door that will lead you into the Barracks. You will find a Kressa Bonedaughter in this area who suspects that you are part of the attackers. You can attempt the Deception check here, which requires you to pass a DC of 21, or simply attack her.


We recommend using the Deception check first, and if that works, you can have one of your party do a sneak attack on her. The rest of the enemies will see what you have done, and you will have fewer enemies to fight. All that's left now is to eliminate Bonefighter, Maghtew Badj, and Hairy Henry. Continue the path behind this section and you will find a Restoration that looks like a mushroom. Interact with it to replenish your health.
Defeat Ketheric Thorm
In the distance below, you will see a grand area that is separated from the Mind Flayer Colony which seems to be like a grand stage. There's a Neural Apparatus that serves as a lift that will take you to the bottom of the Mind Flayer Colony. Your party is moving closer to Ketheric Thorm and you can sense the Nautiloids stronger down here. At (X:812 Y:-25), you will find another Flesh-Wrought Door, as you interact with it, the Dream Visitor will speak to you, that you have found the location of The Absolute. If you are ready to take the fight, choose Ready, or if you need some time to prepare, go to Campsite and rest.

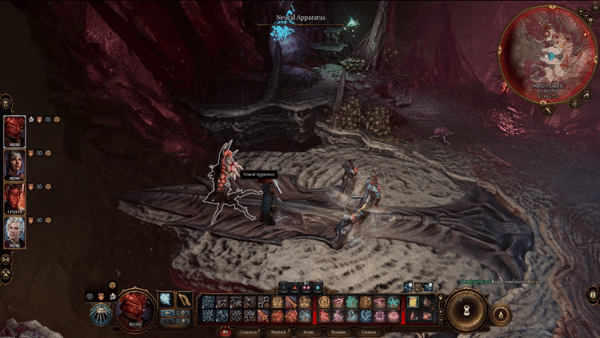
You will see 3 people engaged in a conversation: Gortash, Orin, and Thorm. They are planning on taking back the Prism from you while they held the Nightsong captive. You hear them that they will proceed with their plans, and expect Ketheric with his army and weapon. All three of them command The Absolute and the colossal elder brain floats from the water below.
They have infected Duke Ravengard with a tadpole and they leave at once to lead the march into the Baldur's Gate while leaving Ketheric behind. You will find Ketheric at the edge of the Chasm, proclaiming his worship for his Lord, and he will fall to it as Myrkul will rise from below. Apostle of Myrkul introduces himself as the Lord of Bones and you will now be fighting him. Remember that Ketheric remains invulnerable as long as he has the Nightsong captured. Your initial goal is to free Nightsong with the Help action, as she is trapped inside a soul cage by Ketheric.

When you bring his HP to 0, Ketheric refuses to die and he returns to deliver his speech and ask for his Master's help. He realizes that there is nothing but silence and that he has been forsaken. He calls out to Isobel before he dies and Dame Aylin swoops down to crush his head repeatedly as the rest of your party watches in horror. With Ketheric gone, you will retrieve Netherstone from him, the one they use to control the elder brain.
With that, The Dream Visitor comes to tell you what has happened. It's the three who were controlling the Elder Brain against its will, or what they call The Absolute. They continue to explain that the Netherstones are what's used to control the elder brain. In order to gain full control, you must collect the remaining Netherstones from Orin and Gortash. They continue to reveal that The Absolute is a front of the Dead Three called Bane, Bhaal, and Myrkul. Each of them has their own Chosen to take part in this attack on Baldur's Gate 3. You will now have these options to ask them:
- What do we do now?
- What hope do we have if the gods themselves are involved?
- I didn't come here to fight gods- I just want my parasite removed.

If you choose the first one, they will tell you to prepare for the fight of your lives, to save the lives of everyone in Faerun. They tell you that the Army of the Absolute is marching towards Baldur's Gate and that the elder brain has the power to turn everyone into Mind Flayers. They tell you that you need to seize control of the elder brain and they will offer to be your shield but asks that you must be the sword.
The Alternate Ending - Gale
NOTE: This is the alternate version of this walkthrough with the help of Gale, who will detonate the bomb to destroy the elder brain and those around him. Following this guide will complete The Wizard of Waterdeep quest in Baldur's Gate 3. A requirement for this is to have Gale as one of your companions upon entering the room in the deepest level of Mind Flayer Colony.
As your party descends deeper into the Mind Flayer Colony, your party will stop at a Flesh-Wrought Door. Just as you open the door, the Dream Visitor speaks to you again that you have found the root of it all. As you and your party prepare for a fight, you sneak inside and see 3 figures in the middle of a conversation.
As the Dream Visitor speaks about the Elder Brain being the cruelest and most powerful creature in existence, Gale, who is standing behind you is in awe of so much power before him and how he wishes to hold it. However, he stops himself and says that he can't and must obey as his goddess commands. You, as the main character will hear this and will be prompted with two options:
- Gale, you cannot do this. You can't condemn us to death.
- Go ahead. We stand no chance against such forces. Let's end this together.
If you choose the second option, he will then respond to you, "One last gust of Weave. One last gale to end them all". The Dream Visitor will disagree but Gale unleashes the bomb within him, the one that he's been keeping in check ever since your journey together began. The smoke begins to rise up from beneath the Moonrise Towers where the elder brain was destroyed.
The bomb took everything within its powerful radius, however, the remaining tadpoles that had survived will now consume the minds of their host and complete their transformations, now that the control of the Absolute is gone. Soon, Illithids will plague the lands and enslave all those they do not infect. The narrator continues, "It is an ending of sorts. Though not the one destiny had in store for you."
BG3 Mind Flayer Colony Map
Baldur's Gate 3 Act 3 Walkthrough Quick Navigation
Click to jump to a specific section of the page
BG3 Act 3
- Previous: Mind Flayer Colony
- Next: Rivington
- Recommended Levels: 9
Act 3 Main Quests
Astral Plane Main Quest/s
Astral Plane All Quests
Astral Plane Walkthrough
The Journey to Baldur's Gate

Heading down the road to Baldur's Gate from the Road to Baldur's Gate Waypoint west of the Moonrise Towers marks the beginning of Act III. Act III will kick off with a series of cutscenes - the first concluding your experiences with Ketheric, and the next giving you some insight into Gortash and Orin's intentions. When you get back control of your character, you will be at Camp at the Wyrm's Lookout. You'll get a chance to rest up and chat with your allies before you make your way to Baldur's Gate. Gale in particular might have something he wants to say before you head to bed.
When you're done with mingling, click on your bedroll to Go To Bed. You won't be able to sleep, your mind swirling with all you've learnt while at the Moonrise Towers. While the narrator is speaking, you will be asked what you want to do in regards to the Absolute and the possible power tied with controlling it:
- All I want is to be free of this parasite. I will do what is necessary to make that happen.
- I will succeed where the Chosen will fail. I will dominate the world.
- When the moment comes, I'll do what feels right.
- I will free everyone of this evil - I will be the hero that saves Baldur's Gate.

Whatever you choose, your character will once more attempt to go to sleep, only to be interrupted by the Voice of the Absolute ringing through their head. While you struggle to get your hand on the Artefact, you learn that the Absolute is rallying their forces to invade Baldur's Gate. The Dream Visitor then calls out to you, needing help from an attack and opens a portal to the Astral Plane. This begins the Personal Quest Help Your Protector.
You will be forced into combat against three Githyanki. Fighting them is not the main goal, however. On the right of your screen, you'll see a 3-turn countdown. You need to reach the portal within those three turns or the Absolute will take control of your mind. Make a beeline to the portal, ignoring the Githyanki attackers and you'll make it to the Astral Plane.
The Astral Plane
Not all is well in the Astral Plane. When you enter, you'll find some more Githyanki warriors destroying the orb surrounding the skull and once again hear pleas from your Dream Visitor asking for help. Ahead on a platform below you, you'll find eight friendly Intellect Devourers fighting two Githyanki warriors. Hop down and defeat the warriors, then continue forward into the large skull. When you enter, you'll view a cutscene of a Mind Flayer fighting against several Githyanki. The Illithid will reveal that they were in fact your Dream Visitor and ask for help in defeating the Githyanki warriors. You'll have the following options when responding to it's request:
- What do you need me to do?
- Leave the githyanki alone!
- Prove to me that your are who you say.
- This is the battle you were fighting?
- I don't believe you. You're a mind flayer.
- Die, monster!
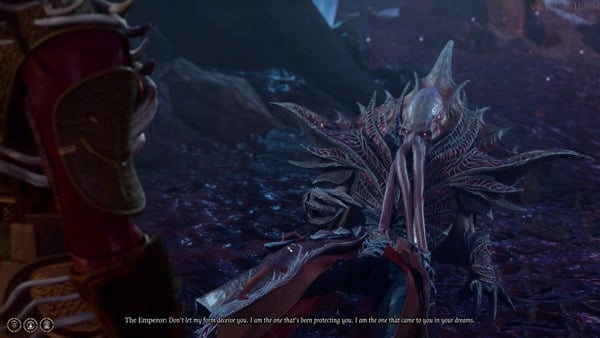
If you pick the fourth option, he will tell you that the warriors aim to free their master bound by chains and that you cannot let that happen. Agree, and you'll enter combat against four Githyanki warriors. After you defeat all four warriors the Mind Flayer, The Emperor, will thank you and explain that they are the reason you have not yet turned into a Mind Flayer yourself. You'll then have the following dialogue options:
- I ask again - who are you? And I'm going to need a name this time.
- Thank you for saving me.
- I always suspected you were a mind flayer.
- Why did you deceive me all this time?
- I prefer the other version of you.
- Tell me everything.
If you pick the first option, you'll learn more about who The Emperor was before being turned into a Mind Flayer. Your next set of choices will look like this:
- Lord Gortash was one of the Chosen in the colony...
- Did you have to eat criminals' brains?
- So are you going to tell me what this battle was about?
- How did you end up in here?
- That githyanki in the sphere - who is it?
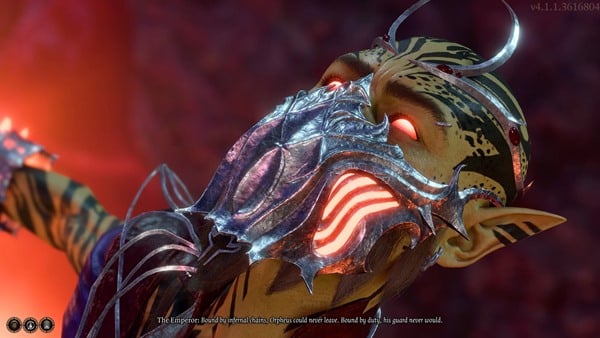
The first option is a free option, and lets you learn a little bit more about Gortash. Pick the fifth option, and he tells you a little bit about Orpheus, the bound githyanki prince, and how his powers are crucial to keeping your freedom from the Absolute. You will then have several options to ask about Orpheus and what you could do with him, as well as what The Emperor is doing in the Artefact. If you ask about freeing Orpheus, The Emperor states it's a bad idea and that the Githyanki prince will see you as a Mind Flayer as much as The Emperor is. You'll be able to give the following responses:
- We're alike in other ways too.
- The more I talk to you, the less you seem like a mind flayer.
- I'm nothing like you.
- I'm no illithid, and will never be.
If you pick the second option, The Emperor will talk about the benefits of being a Mind Flayer and encourage you to become one as well. You'll be able to respond in the following ways:
- I would like that.
- Why do you say that?
- I don't like what you're implying...
- I'm trying to avoid becoming a mind flayer - I thought you agreed to protect me.
Pick the second option again and he offers to evolve the tadpole in your head to the next stage, enhancing your Illithid Powers in exchange for a slight change in appearance. You can freely ask him why he can't stop ceremorphosis, after which you'll have to agree or disagree to his offer. If you disagree, he understands and hopes you can defeat your foes without the need of enhanced Illithid abilities, but gives you the Astral-Touched Tadpole just in case you change your mind. This conversation will be noted in the Embrace Your Potential Personal Quest, and ends Help Your Protector.
After the conversation ends, you can explore the Astral Plane freely and go back to loot the bodies of the defeated Githyanki warriors. Some Items of note include the Boots of Uninhibited Kushigo on Prelate Lir'i'c and a rare Scroll of Disintegrate on a Dead Githyanki northeast of the exit portal. West of the Dead Githyanki is a Divine Bone Shard, which, if it's the first of it's kind you pick up, will unlock the recipe for the Vitriol of Divine Miasma.
When you're done in the Astral Plane, use the portal to return to your campsite at Wyrm's Lookout. The Personal Quest Free Orpheus will begin when you leave. You'll find that the three Githyanki warriors that interrupted your sleep are now dead. You can loot them for some crafting ingredients, then head to bed for some well deserved rest. If Laezel was not in your party during the events in the Artefact, you can speak to her in the morning to let her know about what happened, and learn a bit about Orpheus from her perspective. Whenever you're done perparing and speaking to your party members, leave camp and The Emperor will urge you to find and take Gortash and Orin's Netherstones.
BG3 Astral Plane Map
BG3 Act 3
- Previous: Astral Plane
- Next: ???
- Recommended Levels: Levels 9-10
Act 3 Main Quests
Rivington Main Quest/s
Rivington All Quests
- Investigate the Suspicious Toys
- Daughter of Darkness
- Investigate Cazador's Palace
- The Pale Elf
- Help the Cursed Monk
- Solve the Open Hand Temple Murders
- Find Dribbles the Clown
- Find the Missing Letters
Rivington Walkthrough
Walkthrough
Upon reaching Rivington at (X:-13 Y:-114), you'll witness an ongoing argument between Ben Golewits and other NPCs at (X:9 Y:-98). You can step in using the following dialogue options:
- Calm down and tell me what's going on.
- You certainly know how to make people feel welcome.
- Does no one we meet ever get along?
- The army of the absolute is mere days away and you're bickering over property ownership?
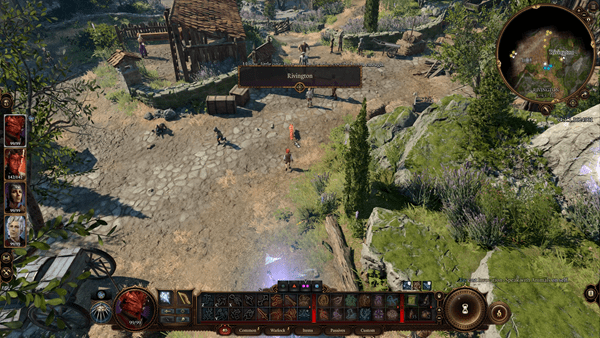
Opt for the first choice, and Arfur Gregorio will explain his desire to remove trespassers from his property. You can reply with:
- This is a pretty big house - are you sure you don't have a single spare room?
- It's always heartening to see a true philanthropist out in the wild.
- Squatters, is it? Maybe I'd be willing to lend a helping hand.
- [Detect Thoughts] Probe his thoughts.
- Leave.
Select the first option, and Ben Golewits will agree. However, Arfur's disagreement escalates into racial slurs. Karlach becomes angry, and Arfur threatens them to leave or face consequences. Respond with:
- In that case, perhaps I can help you out.
- [Intimidation] Let them stay or I'll make you leave and never come back.
- Well, good luck with that.
Choose the second option, and if your charisma is sufficient, you'll intimidate Arfur into allowing them to stay. Zenovia Dawg will then express skepticism, revealing her connection to a criminal group called the Guild. You can reply with:
- All right, I get it - how much do you want?
- Or what?
- Over my dead body.
Opt for the second choice, and Zenovia will reiterate her threat. Respond with:
- [Intimidation] I fought and killed an avatar of Myrkul recently. I think I can handle you.
- All right - how much do you want?
- [Melee Attack] Stand down.
- [Intimidation] I could give you that gold - but then I'd just take it back after I killed you.
- Let's find out shall we?
Choose the first option, and with enough charisma, you'll startle Zenovia. She abandons her intention to rob you and departs. Proceed to enter Arfur's mansion and speak to Ben. Thank him for standing up for them, and reply with:
- You're welcome.
- And you'd better be grateful for it.
- How did you end up here?
- Leave.
Select the first option, and Ben will express his gratitude as you become the first to support them.
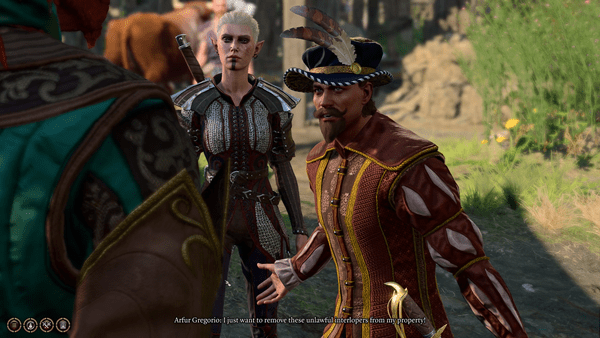
Exit the mansion, head a little North East, and observe Baldurians and Saer Grotpoll arguing with a guard named Fist Lochan. Saer addresses you as another visitor taking space. Respond with:
- [Baldurian] Baldur's Gate is the most diverse city in all of Faerun. We should take them in with pride.
- Refugees aren't strays. They are people, and they need help.
- [Baldurian] I'll have you know I was born and bred in Baldur's Gate.
- [Baldurian] Baldurian? Your accent's Rivingtonian - that hardly counts.
- I should be leaving.
Choose the fourth option, and Saer will be offended.
At X:102 Y:-111, you'll encounter Rowan, a guard, who greets you and inquires if this is your first visit to Baldur's Gate. You can respond in the following ways:
- [Baldurian] No, I'm from Baldur's Gate, born and bred. It's great to be back.
- [Baldurian] Do I look like a tourist? I live here.
- My past is private.
- Do you get extra pay for being so cheerful?
Opt for the first choice, and Rowan recounts the city's history, once known for its welcoming nature but now strained due to recent events. Respond with:
- It's not surprising. Tensions seem high.
- I didn't come here seeking assistance. I can manage on my own.
- I know ways to encourage sharing.
- Is there a way to alleviate people's burden?
- It sounds like your problem, not mine.
Select the first choice, and Rowan explains the refugee situation's challenges. Respond with:
- People in this city have become self-centered. They need a reminder of true hardship.
- If refugees possess more than they require, it's only fair they contribute.
- Educating them could be beneficial, given their lack of understanding.
- Your duty is to maintain peace, not escalate conflicts.
- Your uniform should suffice to pacify them.
Choose the fourth option, and Rowan conveys his concern that if no action is taken, more casualties will accumulate. He believes refugees have taken advantage of the city for too long. He'll ask if you'd join him in eliminating the refugees. Respond with:
- They're innocent people. You can't simply kill them!
- Both sides could benefit from a lesson: Let's address the issue comprehensively.
- You're monstrous. I'll report you to your superiors.
Select the third option, and Rowan threatens violence in gruesome terms. Suddenly, he transforms into Orin, who relays a message for Gortash, stating that Orin is watching. Then she abruptly vanishes. This update advances the main quest "Get Orin's Netherstone."
Make your way towards a Windmill located at coordinates X:47 Y:-29. Upon reaching the windmill, take the necessary steps to unlock the door, and as you step inside, approach the Mind Flayer lying on the ground. Engage with it through various responses:
- Express skepticism about its fortune.
- [Great Old One] Establish a mental connection with this fledgling aberration - awaken it.
- Launch an attack on the creature before it regains consciousness.
- [Stealth] Quietly retreat.
Opt for the first choice, and you'll find that the Emperor's voice resonates in your mind, asserting that the situation is indeed fortunate. The Emperor clarifies that the Mind Flayer has recently undergone a transformation, rendering it weakened and ripe for potential harvesting. The Emperor tasks you with killing the creature and absorbing its power. In response, you can reply:
- [Great Old One] Establish a mental connection with this fledgling aberration - awaken it.
- Attack the creature before it wakes up.
- [Stealth] Slip away unnoticed.
Choose the second option, which results in the Mind Flayer abruptly awakening in a startled state. This sudden awakening triggers a fierce battle between you and the Mind Flayer. Following a victorious outcome in the battle, search the creature's body for valuable items, including the Mind Flayer Brain and a Windmill Key. With these newfound acquisitions, you're now able to depart from the Windmill, continuing your journey ahead.
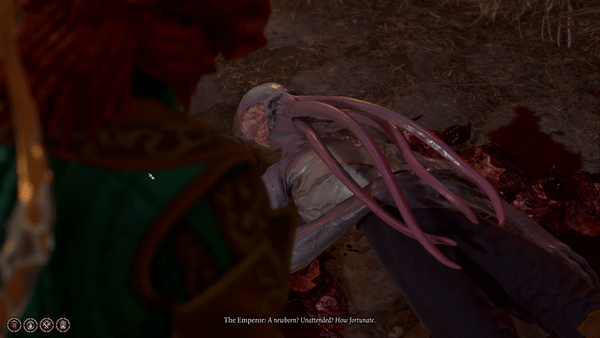
Head to X:-94 Y:109 to uncover a chest on a shattered ship, from which you can retrieve the Necklace of Elemental Augmentation. Proceed southwestward until reaching X:-140 Y:71, where two mortally wounded Stonelord Thugs await. Engage in conversation with one of them, under the mistaken belief that your presence signals the end of their journey. Your responses can include:
- Who are you?
- What led to your current state?
- Accusing innocent passers-by – an intriguing survival tactic.
- With pleasure.
Opt for the second choice, and the thug will acknowledge their unfortunate choice of conflict. He'll seek assistance for his injuries, prompting potential responses:
- Attempt to heal him.
- What task would you have me perform?
- You're beyond salvation. My apologies.
- Provoke his wound, assessing his pain.
Choosing the first option, the thug will prevent your aid, deeming it too late. He'll brandish a blade, requesting a swift end to his agony. Your responses here can be:
- I'll accompany you till the end, but I won't hasten your departure.
- I'll expedite the process – a painless passage.
- Inflict a grievous wound, inciting suffering and screams.
- No. I won't bear your blood on my hands.
Opt for the second response, and you'll witness your character promptly severing the thug's neck. However, surprisingly, the thug transforms into Orin. Orin reveals that Gortash anticipates your arrival and warns against succumbing to his deceit. A sense of being toyed with pervades as she vanishes once again.
Following this, journey deeper along the coast until reaching X:-199 Y:96. There, an altercation unfolds between Cairos and Farlin, representatives of the Stone Lord and the Guild. Farlin solicits your aid and promises reward. Your potential replies:
- The prospect of rewards appeals – I'm in.
- The Stone Lord seems a better choice.
- I'd rather abstain from this.
- I might just eliminate you both and claim the spoils.
- Can't we find common ground? Must conflict be the only recourse?
Opt for the first choice, prompting Cairos to mock your allegiance. Battle ensues, and afterward, you can converse with the fallen. Speak with Farlin if he falls:
- Who are you?
- Who were your adversaries?
- Their purpose for being here?
- Your reason for being here?
Select the third choice, and Farlin reveals they sought their share for Nine-Fingers. Inquire about the Stone Lord's identity, and Farlin portrays the Stone Lord as a perilous menace to all.
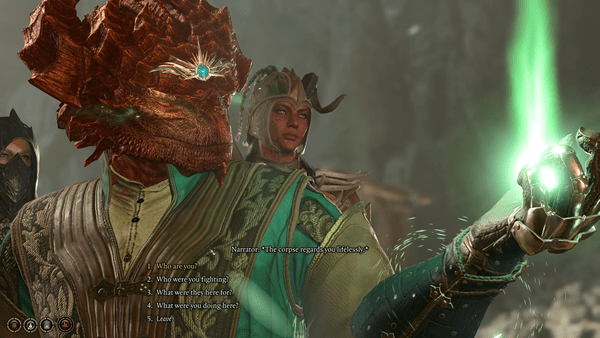
After exploring the coast around Rivington, there are a few places within the town itself you can visit to start, progress and complete several Side Quests before making your way towards Baldur's Gate.
Sword Coast Couriers & The Rivington General
In the north part of the town, opposite to the Open Hand Temple, is the Sword Coast Couriers. During Act 1, if you found Scratch and Gomwick in the north part of the Forest, you can bring up Gomwick's demise to the person in charge. Speak to the man behind the counter, Danzo Arkwright, and you'll be able to give him the Personal Note and let him know about Gomwick. He'll then explain that with Gomwick gone, he's been attempting to send letters by pigeons, but these pigeons have been getting attacked as well. This will start the Find the Missing Letters Quest. If you found and confronted the Tressym on top of the Open Hand Temple earlier, you'll be rewarded immediately after the conversation ends.
On the desk Danzo is standing behind is one white poster that you will not get in trouble for reading - Gortash Coronation Poster. If you read it, you'll learn that Gortash is being named an Archduke and that the ceremony will take place at Wyrm's Rock. Get Gortash's Netherstone and Our Fiery Friend will be updated with this information.
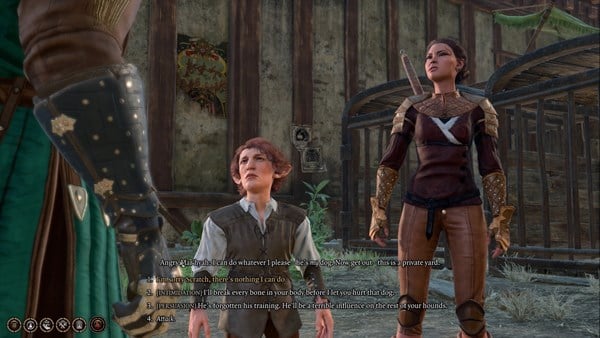
Out the Double Doors to the right of the building are the courier's dog trainers and their several dogs in cages. Scratch was one of their courier dogs and you can mention him when speaking to the dogs' caretakers. During the conversation, you can choose whether to keep Scratch at Camp, or surrender him back to the Sword Coast Couriers. If you keep him, you can speak to him back at camp to learn that he's glad you kept him. Keeping Scratch at camp gives you the approval of both Wyll and Gale.
South of the Sword Coast Couriers and northwest of Artur's Mansion, you'll find a blacksmith, The Rivington General. If you head up the stairs and speak to Gyldro Angleiron the Smith, he's irritable and points you towards the store downstairs if you want to buy anything. You'll find the door to the store behind the blacksmith. Head downstairs to find the store's clerk, Exxvikyap. If you're a Dragonborn, you'll have some special dialogue choices with her. This merchant sells several weapons, pieces of armour and arrows.
Circus of the Last Days
Exit the blacksmith an in the western part of Rivington, south of the Open Hand Temple, is the Circus of the Last Days. You can approach Klaus at the entrance to gain passage to the circus. You'll be given a variety of checks you can choose from to gain access to the circus - Persuasion, Deception, and Intimidation.

Straight ahead, you'll find two circus members - Zara the Mummy and Akabi. Zara is a Merchant who sells Dyes and face paint kits, but you'll have to do a DC 10 Insight Check first when speaking to her to understand that she's trying to sell you something.
Akabi, on the other hand, will encourage you to try spinning the Wheel of Wonders next to him. If you don't attack him, you'll gain the option to spin the wheel. Each try on the wheel costs 500 Gold. When you spin for the first time, you won't be able to win the jackpot, but Akabi will still give you a random small prize. Before he does so, however, your character will roll an automatic Perception Check. If you succeed it, your character will notice that Akabi is cheating. If you bring up that Akabi is cheating while conversing with him, he will Polymorph you into a Wheel of Cheese for 20 rounds. If you pickpocket him instead and take the Djinni Ring or if you're a Bard and distract him when spinning the wheel, you'll be able to earn the jackpot. Akabi will become enraged and send you to the Jungle, where you can find Nyrulna at the end next to the exit portal.
Down the stairs to the right side of the circus. you'll find the dryad Zethino. If you're in a relationship with anyone, she'll ask if you're in love when you speak to her, to which you can answer yes and bring your love one to her. This will begin a love test of sorts, where you'll have to answer three questions about your loved one to gauge how well you truly know them. If you answer all three questions correctly, you'll have a brief but cute conversation with your loved one, and they will gain Inspiration.

In the southwestern tent of the Circus of the Last Days, you'll find Boney and Stoney. Speak to Boney to learn that they are craftsmen, able to create statues in your likeness. If you agree to have a statue of yourself sent to Camp, you'll have to pay 5000 Gold and anyone with the Guild Artisan Background will gain Inspiration. Boney is also available as a merchant, selling you some Scrolls and a variety of Gems if you need them.
Popper, another merchant, can be found in a tent right next to Stoney. He sells the Dark Displacement Gloves and Arrow of Arcane Interference, as well as several potions. Within his tent is the Clown's Severed Hand for the Find Dribbles the Clown Quest. If you have the quest active, you can speak to Popper to try and Persuade him to give you the arm. Otherwise, you'll have to steal it from him.

Head down the stairs and to the north, and you'll find Shadow-Whiskers trapped in a cage. If you cast Speak with Animals, you'll be able to understand her. Pass several checks and she'll reveal that she plans on slaughtering everyone within the circus for stealing her cubs and killing her mate. When you approach the nearby crowd she plans on slaughtering, you will get pulled into a cutscene with Dribbles the Clown.
This cutscene can go several ways, but always ends in a combat encounter. You'll be pitted against Dribbles, Bitey Buddy, Shadow-Whiskers, Crimson, Ryland, and Keren. Shadow-Whiskers will be able to create a duplicate of herself, and this duplicate will target the audience members. If you want the audience members to live, try to grab the attention of her duplicate and Dribbles the Clown while fighting.

After the fight, you can loot Fuum, previously Dribbles, for the Word from the Tribunal and Clown Hammer. Lucretious will also approach the area from her tent. She'll be upset that Dribbles turned out to be a doppelganger and will ask you to help her find the real one. If you agree to help her, the Find Dribbles the Clown Quest will begin.
BG3 Rivington Map
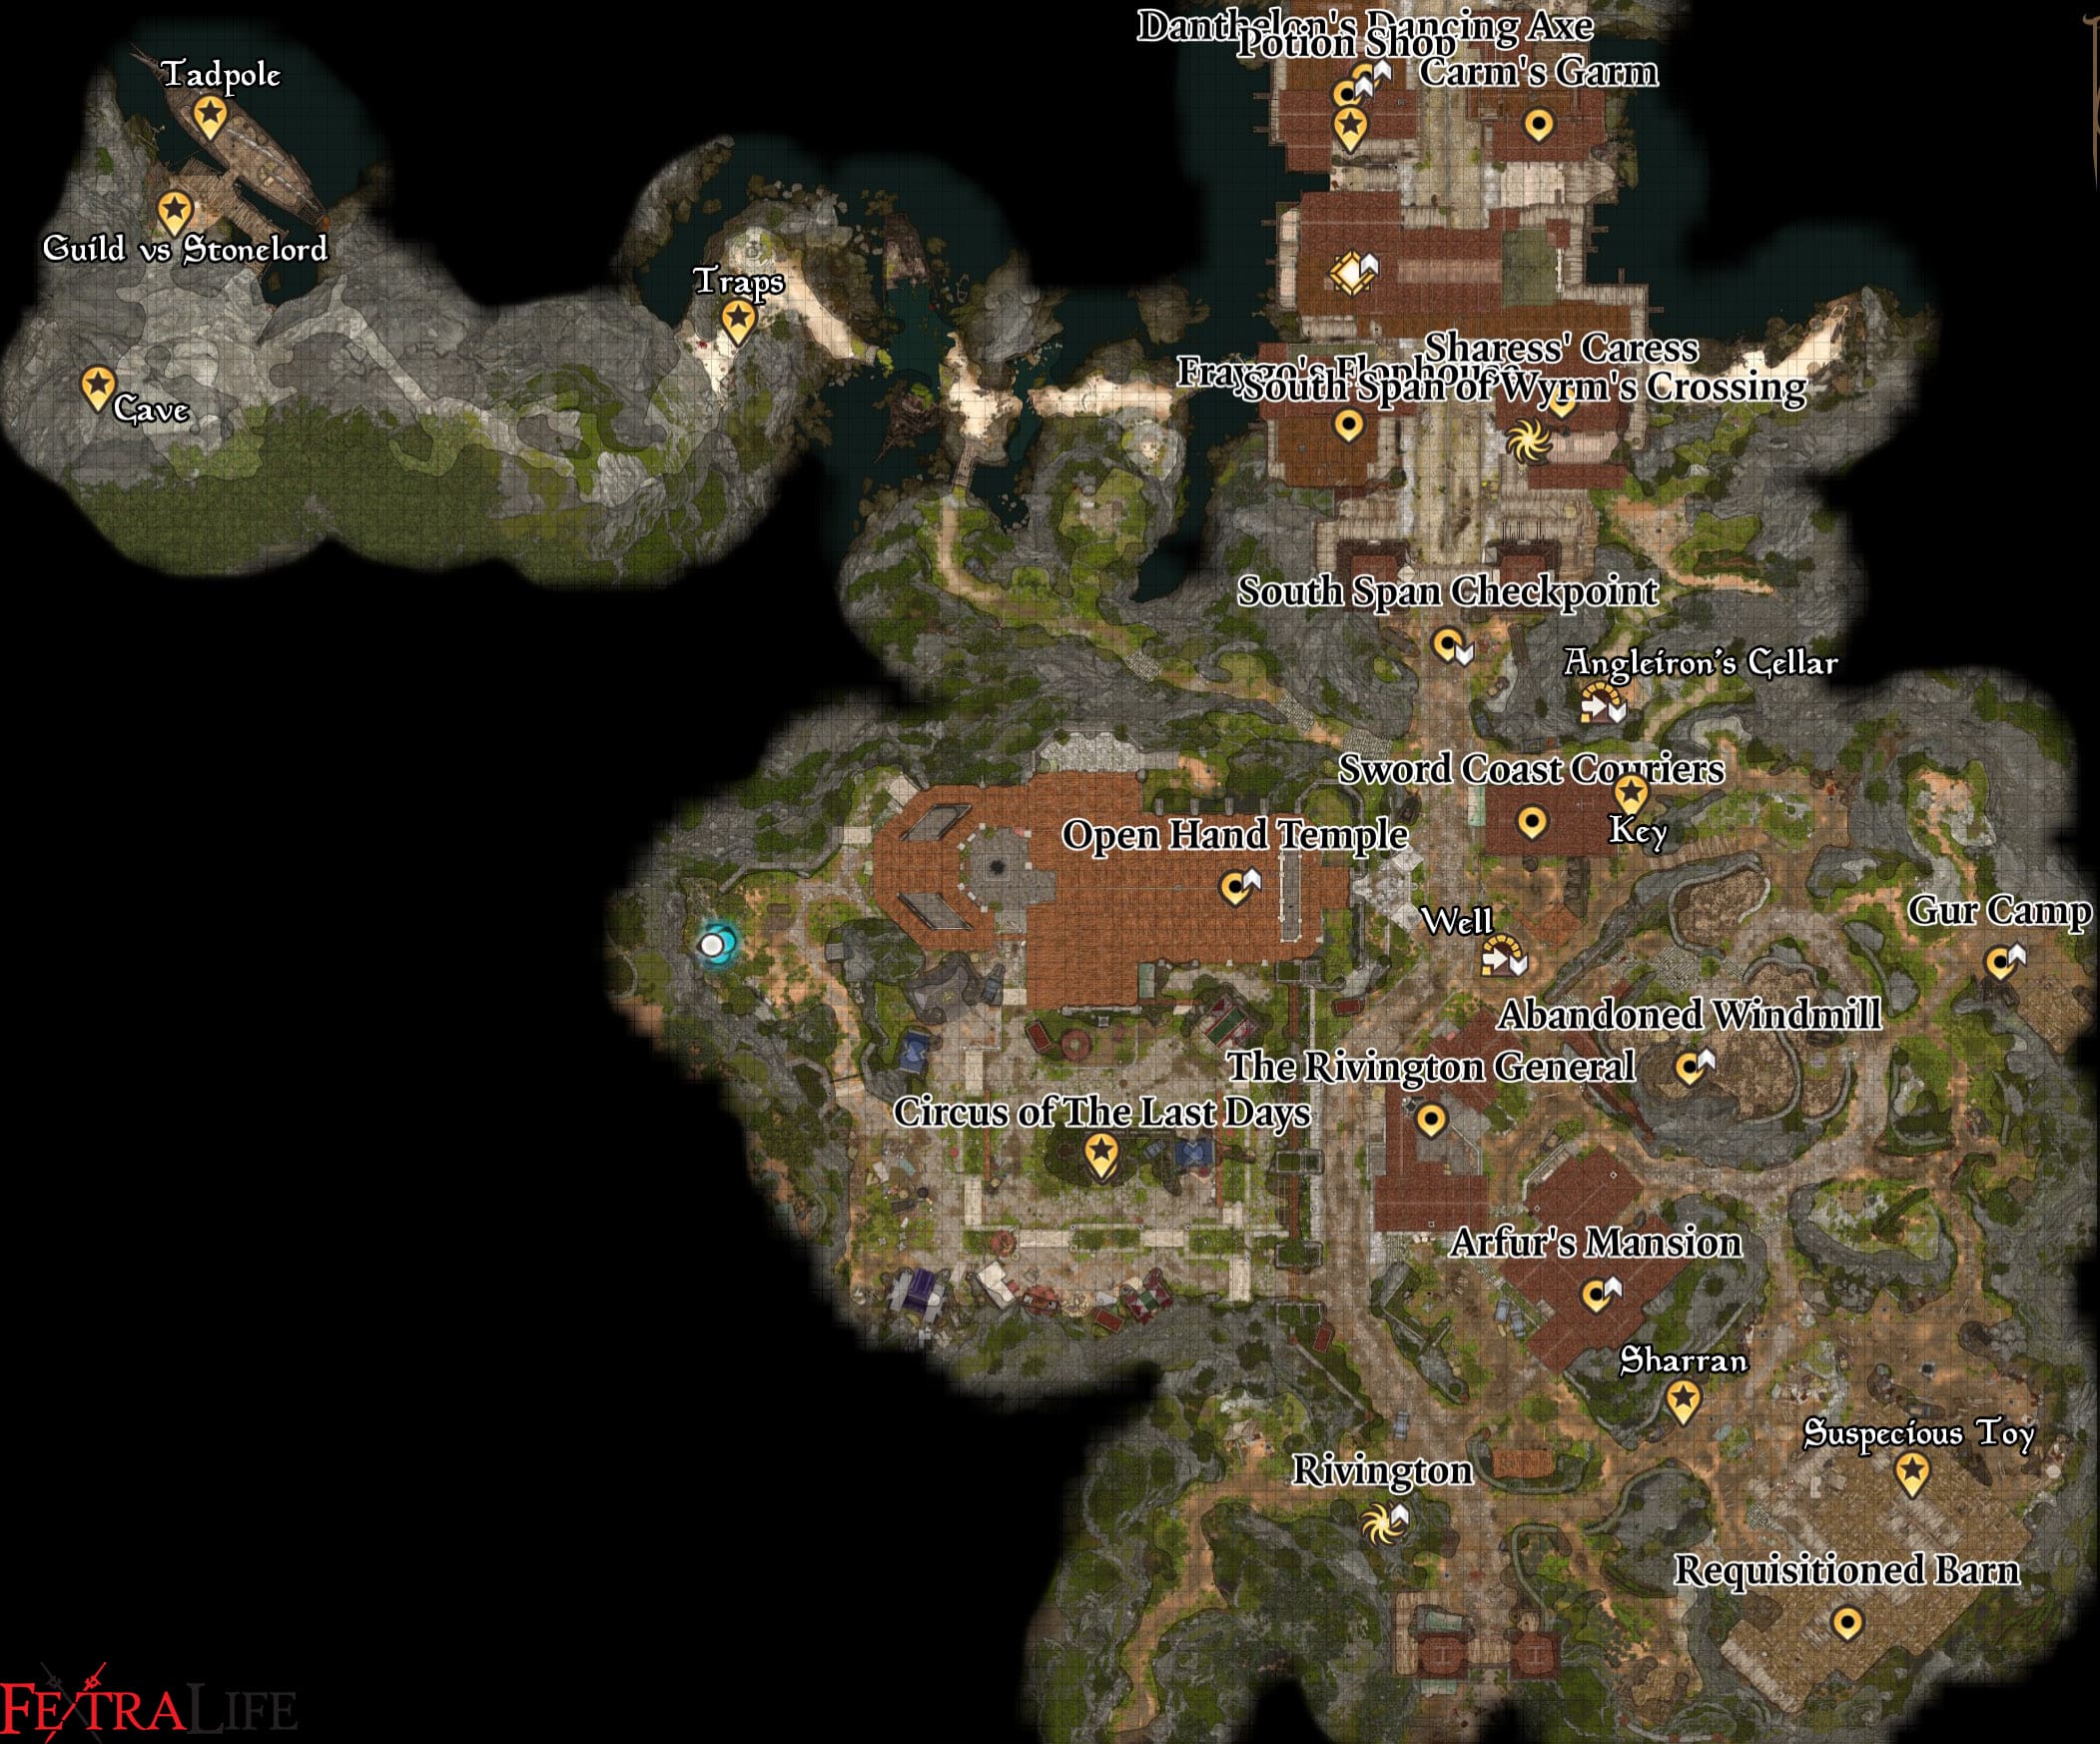
BG3 Act 3
- Previous: Rivington
- Next: Wyrm's Rock
- Recommended Levels: 10-12
Act 1 Main Quests
Wyrm's Crossing Main Quest/s
Wyrm's Crossing All Quests
- Confront the Elder Brain
- Investigate Cazador's Palace
- Aid the Underduke
- The High Harper
- Free Orpheus
- Investigate the Murders
Wyrm's Crossing Walkthrough
Walkthrough Heading 1
In Wyrm's Crossing, go to the second floor in Sharess Caress (X:10 Y:82) and encounter Valeria the Investigator. She recognizes you from the Open Hand Temple and questions if Yannis has involved you in something. You can reply with:
- I'm just here to have a drink.
- Unfortunately, yes - I've discovered new evidence, Investigator.
- She asked me to uncover Lorgan's true murderer, given your apparent disinterest.
- Leave.
Choose the third option, prompting her to notice your expression and liken you to her associate, Devella. She inquires about your findings, and you can reveal your conclusion that Father Lorgan's death is linked to a larger plot involving Bhaal. Valeria is surprised, as Devella is investigating a similar Bhaal-related matter. Present your theory, the Murder Target List, which confirms your belief. Valeria suggests you meet Devella at the Elfsong Tavern, providing a pass for Lower City access. This advances the "Investigate the Murders" Main quest.
BG3 Wyrm's Crossing Map
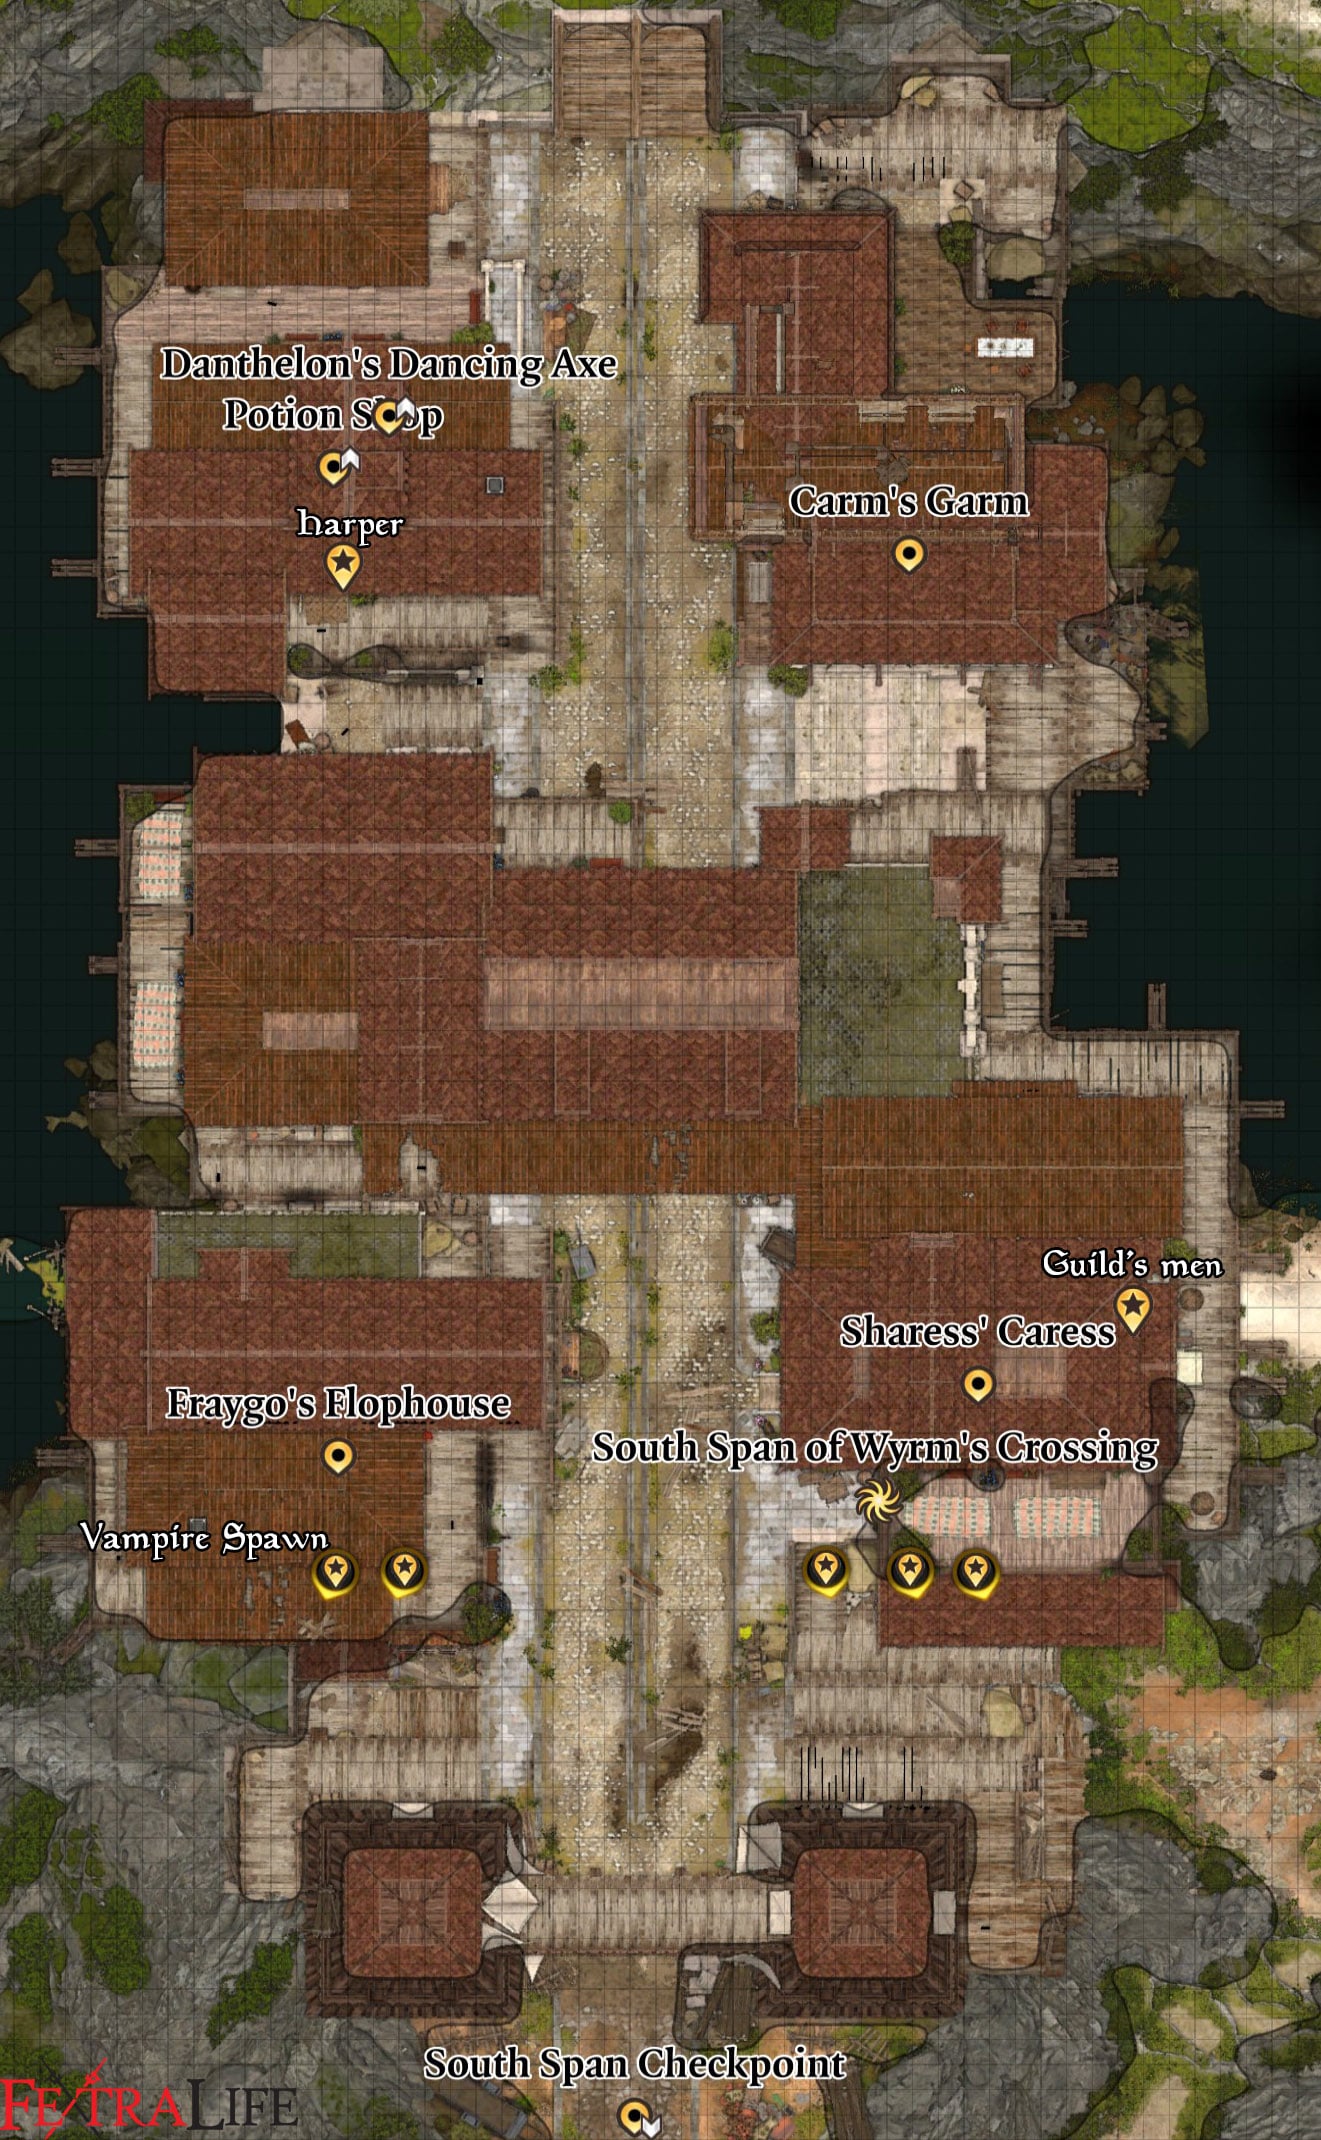
BG3 Act 3
- Previous: Wyrm's Crossing
- Next: Lower City
- Recommended Levels: 10-12
Act 1 Main Quests
Wyrm's Rock Main Quest/s
Wyrm's Rock All Quests
- Get Orin's Netherstone
- Gather Your Allies
- Our Fiery Friend
- The Grand Duke
- Rescue the Grand Duke
- The Blade of Frontiers
- Free Counsellor Florrick
- The Blade of Frontiers
Wyrm's Rock Walkthrough

Passage to Wyrm's Rock
Upon arriving on the island, you will see 3 guards stationed at the bridge. Approach one of the guards named Blaze Elin, the one who is standing on the right to ask for passage into Wyrm's Rock. However, they will tell you that it's closed for the day and you can't be let through. You will get the following options to respond:
NOTE: Some dialogue interactions will be different depending on your character's class or race.
- What's special about today?
- [BALDURIAN] Baldur's Gate is my home. I don't need permission to enter.
- Investigator Valeria needs me in the Lower City- a serial killer's on the loose.
- [PERSUASION] Such a bother. What if I were to contribute to the 'Flaming First Orphans' Fund?'
- [WARLOCK] [DECEPTION] I am Lord Gortash's new occultist- let me pass or your name goes in the Book of Vile Darkness.
If you choose the 3rd one, Astarion will give you his approval and the guard will let you through as they don't want to mess about with a murder inquiry. They will tell you to go straight ahead across the bridge and should be easy to spot. This event Rock-Solid Alibi will inspire Astarion as well. The bridge behind the guards will be lowered and you will be allowed to go inside Wyrm's Rock.
WYRM'S ROCK FORTRESS


As you head inside the fortress, you will immediately notice the stony structure and statues on the walls. There are guards stationed along the hallway and upon noticing your presence, a Steel Watcher will ask you to stop to tell you that Lord Gortash has been expecting you. After a short while, the watcher seems to pause and begins to speak with a different tone and poise. It is now speaking to you as 'Lord Enver Gortash'. He recognizes you as the Prism bearer and slayer of Ketheric Thorm. He welcomes you to Baldur's Gate and calls it 'his city' You will now get the following options to respond:
- This city will never be yours.
- A pleasure to meet you. Could we talk face-to-face?
- I'm going to find you, and I'm going to kill you.
- Attack.
If you choose the first one, he replies that it's already his but continues to invite you to go inside and see the city for yourself. He formally invites you to his inauguration which will take place in the ceremonial hall. Now that you have a formal invite from Gortash, you shouldn't have more trouble with the guards.
If you have Karlach as one of your companions, approach one of the steel watchers stationed along the hallway and you will find out that it recognizes her as one of them. The steel watcher continues to share that her 'unit' is a highly outdated model and will ask her to report to the Steel Watch Foundry. You will now get the following options to respond:
- It thinks you're one of them, Karlach. Why?
- Same thing Dammon said. Do you know how to fix this malfunctioning engine?
- Where is this Steel Watch Foundry?
- Leave.

The steel watcher will continue to tell you that the foundry is off-limits to visitors and though Karlach is not sure why it thinks she's one of them, she believes that what keeps them going may be similar to her tin can. When you are done with the conversation, enter the door to your left to reach the audience hall. A familiar face is seen here, Mizora, if you helped her escape in Mind Flayer Colony.


She tells you that Wyll is upstairs and ordaining Gortash as Archduke. Explore the Audience Hall and you will find that many of these people are busy and will not stop for a conversation. There is one lever found in a small corner at exactly (X:-40 Y:218) This lever will reveal a door that will lead outside to let you explore the side of the fortress to grab some plants and Dragon Egg mushrooms. You will also find a locked chest at (X:60 Y:214 pictured below, near the coast with an abandoned boat. To unlock this chest, you will need to do a Dexterity Check with a DC of 15.


You can now continue to go around the fortress and it should take you to the opposite side. Climb up a wooden platform and you can interact with the Knotted Roots that will take you back to the fortress on a balcony. The door will require you to pass a Dexterity check with a DC of 20. As you reach the hallway, you will find 2 Double Doors that will lead to the ceremonial hall where Gortash will be inaugurated.
As you get closer to the ceremony, a Steel Watcher will stop you from moving forward. You will get the next options to respond:
- Point taken. I'll keep things peaceful.
- I'm not taking orders from a piece of metal.
- Prepare for battle.
If you choose the first one, the steel watcher will thank you for your cooperation and Astarion will give you his approval. In a short moment, Gortash will notice what's happening and turn his attention to you. He will greet and congratulate you for defeating Ketheric Thorm and then mentions the Netherstone that you acquired from him. He continues that it has become more difficult to have the elder brain under control because of the Netherstone that you are holding. He is worried about what will become of Faerun, should the elder brain be free from the crown. He wants to restore authority over the brain and you will get the following options to respond:
- What kind of understanding do you suggest?
- I'm not interested in bargaining with the likes of you.
- Why is the crown failing?
- You're a dead man. I can't let you take over the city.
If you choose the first one, you find out that Orin has been planning something of her own. As Bhaal's chosen, she wants to control all Netherstones for her lord. Gortash disapproves of this and he tells you that he wants to lead the city to glory. Gortash expresses also that Orin is interested in obtaining his and your blood. You will now get the following options to respond:
- What do you propose?
- You want me to believe you mean no harm to the city?
- It's going to take a lot to make me trust you.
If you choose the second one, he will tell you that he wants to propose a pact, that no harm will be done to you by him, and him to you. Then, he continues to tell you to retrieve Orin's Netherstone and bring it back to Gortash. The other stone is yours to keep, but the goal is to reunite all 3 stones. He offers to rule Faerun together as the Absolute. Your next set of choices will look like this:
- As allies, it seems none of you can be trusted. You, Orin, Ketheric.
- I will defeat Orin and we shall be allies. You have my oath.
- I'll think about it. No promises.
- To the hells with your pact.
- [INSIGHT] Examine Gortash's body language and expressions. Can you trust him?
- [DETECT THOUGHTS] Probe Gortash's mind.
Attempting the Insight check will require you to pass a DC of 15. It will be revealed that he has the full intention of sharing the kingdom with you. Then, you will have the following options to respond to Gortash:
- As allies, it seems none of you can be trusted. You, Orin, Ketheric.
- I will defeat Orin and we shall be allies. You have my oath.
- I'll think about it. No promises.
- To the hells with your pact.
If you choose the third one, Gortash will reveal that there is one faceless among your camp. Orin is known to change her form quickly and may prove to be difficult to manage. He offers to help investigate in order to reveal the faceless. Then, he invites you to witness as he makes history as the first Archduke of Baldur's Gate. You will get the following options to respond:
- All right.
- I wouldn't dream of missing it.
- Fine. Let's get it over with.
- I have no interest in this sham of a ceremony.
- This stops now Gortash. I'm taking you out.

If you choose the second one, Karlach will give you her disapproval while Astarion gives his approval. Then, Gortash kneels before Duke Ulder Ravengard and proceeds with the ceremony. After the Duke is done with his words, he will now ask the guests for consent and you will have the following options to respond:
- Say nothing.
- Nod.
- Prepare to object.
If you choose the first one, Gortash will now be appointed as the Archduke of Baldur's Gate. When the ceremony is over, Karlach will speak to you about how you let Gortash become Archduke, and will ask what you think of him:
- He seemed like an absolute fraud in a very nice coat.
- Frankly, I'm impressed. He's wormed his way into the most powerful position in Baldur's Gate.
- I can't wait to flatten him.
If you choose the first one, Karlach will give you her approval and agrees that he has always had an expensive taste. She continues to ask how anyone in the hall could fall for this charade:
- Evidently not.
- When people are scared, they'll do whatever it takes to feel safe.
- People are mostly fools.

Choosing the second here will anger Karlach even further and wished that people knew the truth about the Dead Three being behind all of this. She wants the people to know that Gortash isn't their salvation but the very monster at the gate. The rest of the audience leaves the hall but Duke Ulder Ravengard remains and gives you a chance at a conversation. If you tell this man that he is infected with an Illithid parasite, Astarion will approve of this.

Ravengard appears to be fighting the parasite but the control over him is strong. You get the option to use your Illithid powers to explore his uncertainty. If you attempt the Wisdom check, you will need to pass a DC of 2. Then, you can now look around the fortress. You will find Mizora on the first floor back in the Audience Hall. She has more things to tell you about the condition of Ravengard. She reveals that he has been relocated and will only tell you in camp, once you have Wyll in your party. This will update Rescue the Grand Duke quest.
WYRM'S ROCK PRISON


To explore the Prison, return to the door that will take you outside. There's a crack in the wall that you can interact with at exactly (X:58 Y:189). Once inside, jump over the ledge to reach the walls of the prison. Destroy this wall with one of your attacks to gain entry to one of the storage rooms. There's a chest inside so make sure to take a look before unlocking the door. Unlocking the door will require you to do a Dexterity Check with a DC of 15.

Be careful when opening the door because a Prison Guard is likely to spot you. When this happens, you can attempt a Deception check or attack. Doing the former will require passing a DC of 15. If you're successful, there's no need to attack the guard as he will simply let you through. Continue on the path the guard is facing to reach the Prison Entrance Door. Since you don't have the key, you will need to unlock this door by lockpicking by doing a Dexterity Check which requires a DC of 20. You may also choose to fight the guards and obtain the key from them.
You will find a guard sleeping to your left upon unlocking the door. Try not to make any sound to avoid waking them up, or put them under a spell to guarantee that they will stay asleep. This passage will lead you back to the Fortress where the others are waiting.
BG3 Wyrm's Rock Map
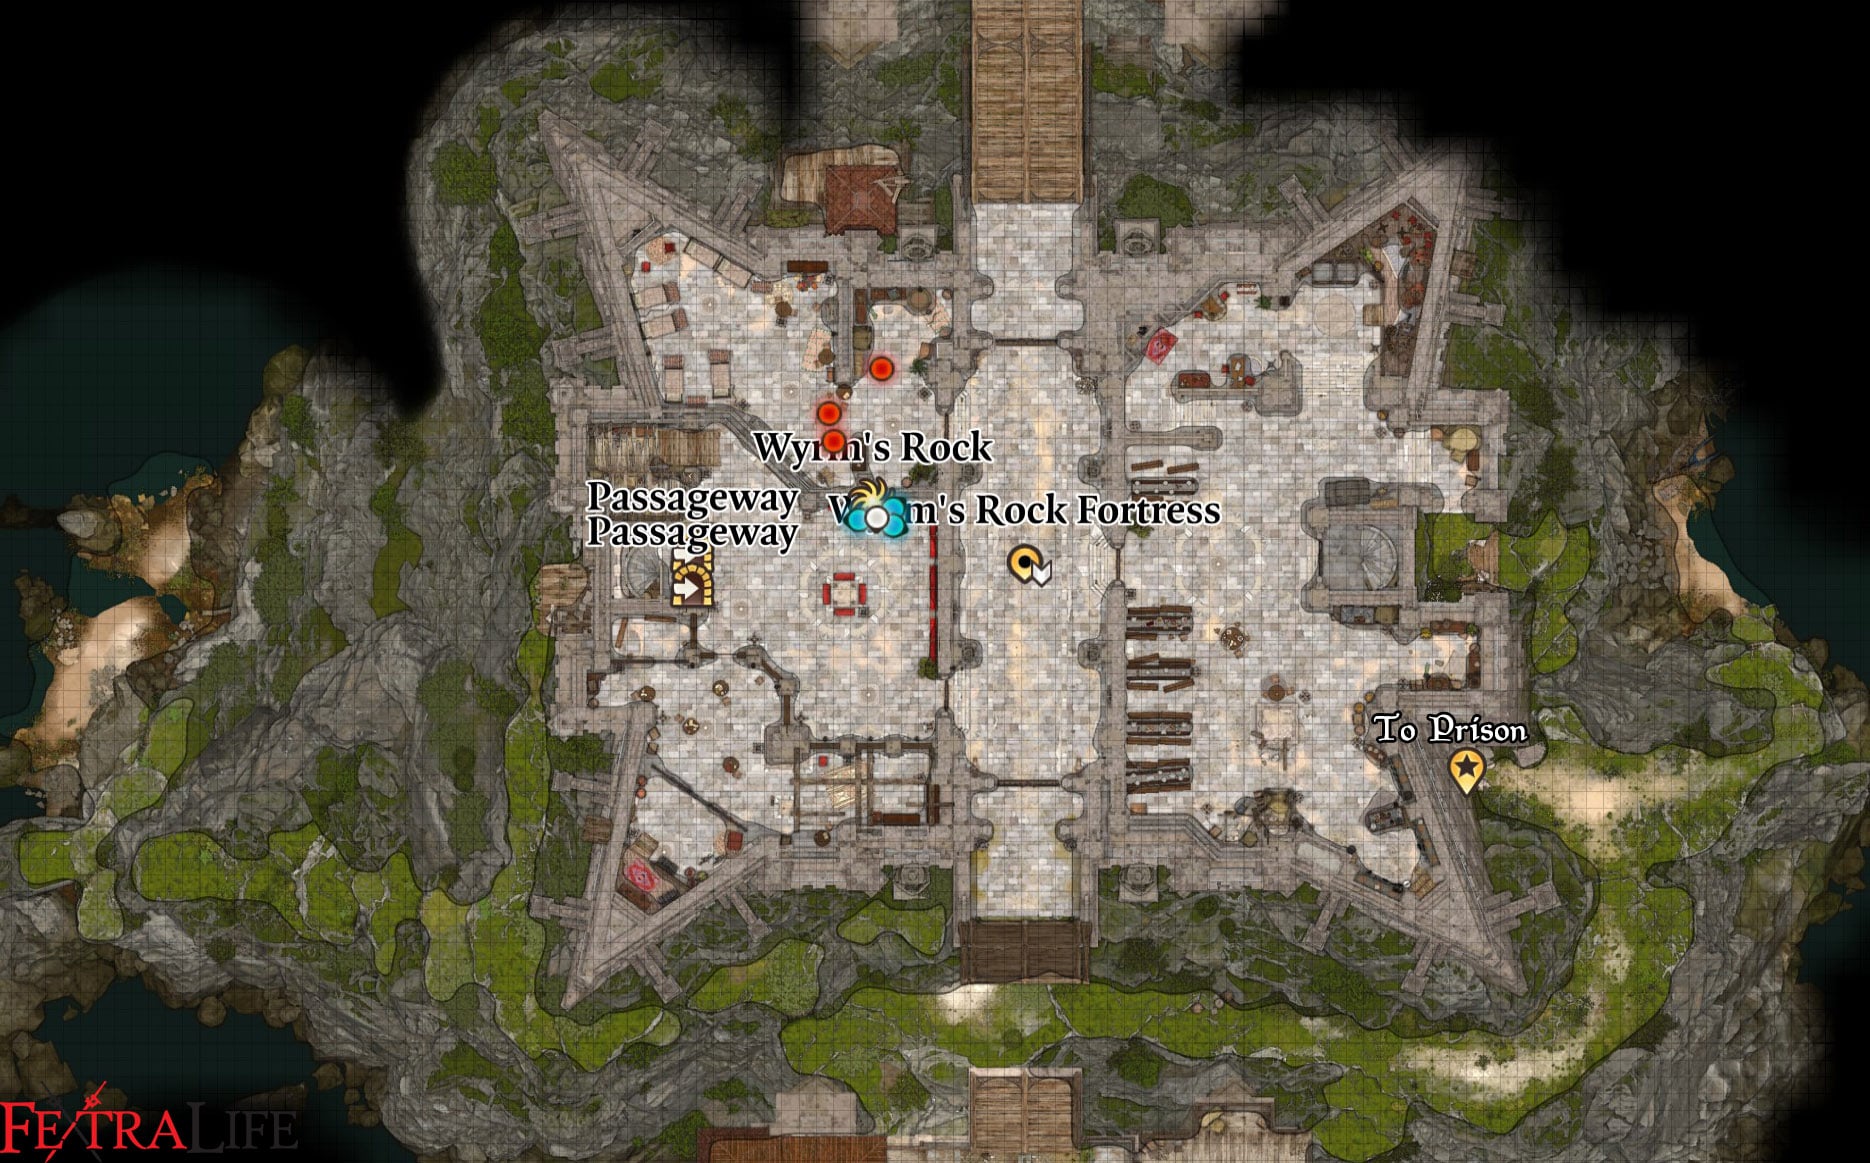
BG3 Act 3
- Previous: Wyrm's Rock
- Next: ???
- Recommended Levels: 10-12
Act 3 Main Quests
Lower City Main Quest/s
Lower City All Quests
- Acquire the Gauntlets for Helsik
- Aid the Underduke
- Avenge the Drowned
- Avenge the Ironhands
- Deal with the Gnomes
- Disable the Steel Watch
- Feed the Mind Flayer
- Find a way into Wyrm's Rock fortress
- Free Counsellor Florrick
- Find Dribbles the Clown
- Find Mystic Carrion's Servant
- Find the Missing Letters
- Find the 'Stern Librarian' Ffion
- Get Orin's Netherstone
- Help the Cursed Monk
- Help the Devilish Ox
- Help the Hag Survivors
- Investigate Cazador's Palace
- Investigate the House of Grief
- Investigate the Suspicious Toys
- Rescue Orin's Victim
- Retrieve Omeluum
- Return Rakath's Gold
- Roveer's Storehouse
- Save the Gondians
- Save Hope
- Save Vanra
- Solve the Open Hand Temple Murders
- Stop the Presses
- Visit the Emperor's Old Hideout
Lower City Walkthrough
Proceed northward to the Elfsong Tavern at X:54 Y:-25. This action will advance the quest "Visit the Emperor's Old Hideout." At the tavern's entrance, interact with Enforcer Skoona, the bouncer. She briefly mentions the loneliness of her role as muscle, and you can humorously suggest she could become a bard if she wished.
Upon entering the tavern, explore to collect Emperor's old belongings. Engage in a conversation with Chef Roveer regarding his presence on the murder list. He'll claim he can manage the murderers while tasking you with dealing with the rats. This will update the main quest "Investigate the Murders" under the "Get Orin's Netherstone" section, as well as a side quest titled "Kill the Rats." Proceed to the Elfsong Tavern Basement, where you'll encounter numerous rats to eliminate. After exterminating them, both the "Roveer's Storehouse" and "Visit the Emperor's Old Hideout" quests will receive updates.
Locate the Wine Racks in the basement and identify a mechanism that opens a secret door. Upon entering this passage, you'll find a descending staircase. Proceed downstairs and open the door to access the old hideout. Upon entering, you'll need to eliminate the Guthyanki forces that have occupied the area. This action will trigger further updates to the quest.
Explore the hideout for useful items to loot, including a silver key located on the central desk. Then head to the right side of the Huideout to find a hidden room where you can loot the Emperor's old belongings.
From the Emperor's Hideout, access the Lower City Sewers through the hatch. There, you'll encounter a bloodied Gale who warns you to distance yourself from a particular "monster." Reply with:
- What monster are you referring to?
- Gale, you're injured. What happened to you?
- Why are you here in the sewers?
- Whatever you're running from, it poses no threat to me.
Select the first option to learn that Gale was abducted by Orin the Red and held captive in her Bhaalist temple. He reveals the temple is situated within the sewers and that Orin subjected him to terrible experiences. Gale urges you to run since Orin is formidable. Respond with:
- Very well, we'll turn back and figure out how to deal with her. Thank you for warning us.
- I'm not leaving you behind.
- You won't face her alone. We'll confront her together.
- Gale, what did she do to you exactly?
Opt for the fourth option, which reveals Gale's peculiar reaction and leads to his transformation into Orin herself. Confronted by Orin, she questions your presence in the sewers and assumes you're after her Netherstone. She also mocks your concern for Gale. Respond with:
- What happened to Gale?
- You're welcome to him; I could use some peace and quiet.
- Gortash warned me that you might try something like this.
- You'll pay for this, monster.
- Prepare to defend yourself.
Choose the third option, and Orin will mention Gortash, hinting at her knowledge of him. She refers to your interaction with him and claims that the Murder Lord also desires you. Reply with:
- Why does the Murder Lord want me? What's his motive?
- If you come for me, you'll meet your god soon enough.
- The voice you hear isn't divine; it's a product of your twisted mind.
- It seems everyone wants a piece of me. He'll have to wait his turn.
Select the first option, and Orin will mention Ketheric's Killer. She indicates that before you can challenge her, you need to sharpen your skills against a different foe—the Tyrant's Throat. Orin then shifts into Gortash's form, claiming to see his whispers and promises in your thoughts. She explains his desire for the Crown of Karsus, wanting it for himself. Orin expresses her urge to eliminate Gortash but reveals she can't touch him since he bound her blade during their initial encounter. She proposes you kill Gortash, retrieve the Netherstone from his body, and bring it to her temple. After reverting to her true form, she offers to bring her assassins under control if you agree; otherwise, she threatens harm to Gale. Respond with:
- So you're betraying your ally? Or are you asking me to?
- Very well. I'll kill Gortash. Gale will live. After that, we settle things for the final Netherstone.
- Gortash can wait. First, I'm confronting you, monster.
- I'll comply. Just promise not to harm Gale.
Choose the first option, leading Orin to explain that they aren't allies, just two forces in balance. Then inquire about Gortash's whispers, and she'll confirm that she sees them. She adds that Bhaal's age is drawing near and insinuates that you could be part of it—an idol of flesh to welcome the coming dawn of his bloody reign. Orin warns not to underestimate the Steel Watch and threatens to harm Gale if she sees you in her domain while Gortash remains alive. Then, she disappears. This conversation updates the quests "Disable the Steel Watch", "Get Orin's Netherstone", and "Rescue Orin's Victim".
After your conversation with Orin, return to the Elfsong Tavern and proceed to the staircase leading to the tavern's second floor. The two Fist guards will halt you, mentioning Devella. Respond with:
- Investigator Valeria directed me to speak with Constable Devella.
- What's the issue?
Opt for the first choice. One guard will still attempt to stop you, but the other will defer to Valeria's rank and allow you to proceed. Ascend the stairs and enter the door ahead. A cutscene will unfold, showing Devella at the crime scene. While she's frustrated someone let you through, she asks why you're interrupting her. Reply with:
- Are you Devella? Valeria sent me to assist.
- I'm just a curious adventurer, interested in the scene.
- I'm no one important, just passing through.
- Your anger is quite palpable. I'll leave you be.
- I seem lost. I'll find my way out.
Select the first option. Devella will reluctantly confirm her identity. She'll express that if you lack helpful information, you should leave her to her work, as she's investigating Duke Stelmane's murder. Reply with:
- Share about the murder target list you found.
- Is it possible the murderer was tied to the Bhaal cult?
- With Bhaal's involvement, more is at stake than Stelmane's death.
- Best of luck with your investigation.
Opt for the first choice. Devella will be intrigued by your information, updating the Main Quest "Investigate the Murders." She'll elaborate that her assignment led her in the same direction, but she hadn't expected these developments. She explains that a century ago, Sarevok Anchev, Bhaal's son, ruled the Iron Throne, which masked a dark arms-dealing network. Sarevok aimed to ascend to godhood by amassing an army, leading to the revival of Bhaal's temple and cult. Although the temple was destroyed, the cult's remnants persisted, ultimately evidenced by the murder list. Devella concludes that the Bhaal cult has resurfaced, and someone is continuing Sarevok's sinister legacy. Respond with:
- Why don't you think it's Sarevok himself?
- Do you have any suspicions about who might be behind this?
- But Sarevok led the cultists a century ago; he can't still be alive, can he?
- I share your concerns. I've noticed an uptick in Bhaalist activity myself.
- You should inform your superiors about this immediately.
Opt for the first option. Devella is skeptical that Sarevok is involved, noting differences in the recent murders that suggest they're acts of worship. She explains she tried informing her superiors, but they dismissed it as conspiracy. She turns her attention to you, hoping for assistance. Reply with:
- Can't you provide any assistance?
- What will you do while I investigate?
- How about the other individuals on the list who are still alive?
- I'll do my best to uncover the truth.
- I've got more important matters to attend to than a cult investigation.
Select the first two options. Devella states she needs to alert Upper City residents and asks you to warn those on the list in the Lower City. After Upper City, she'll head to Basilisk Gate to push her superiors for action. She invites you to meet her there once you have any relevant information to report. This conversation advances the "Investigate the Murders" quest.
After conversing with Devella, descend to the tavern's second floor and exit. Make your way westward until you arrive at the Wine Festival located at X:25 Y:-38. There, you'll encounter Cora Highberry, who's enjoying the wine tasting. She invites you to join her and her friend Roger Highberry. However, Meztli interrupts, offering a solo tasting to Cora. She declines, preferring company. You sense the poison in Meztli's offered wine. Choose:
- Cora, that wine is poisonous. This man wants to harm you.
- I'll gladly take a glass, Master Meztli.
- I'll have to pass, but enjoy your wine.
- Let Master Meztli try the wine first, or should I say Dolor?
- Attack the poisoner.
Opt for the first choice. Meztli speaks briefly and threatens you before a battle ensues. Afterward, the Main Quest "Investigate the Murders" will be updated. Enter the Highberry's Home nearby to speak with Cora. She'll express gratitude for your intervention and disbelief at the assassination attempt.
Having conversed with Cora and received a reward, head southwest to a flier attached to a wall at X:-168 Y:-72. This flier holds a note from Hag survivors seeking aid against the Hags. Reading it advances the quest "Help the Hag Survivors."
Subsequently, proceed straight ahead until you arrive at Facemaker's Boutique at X:-182 Y:-32. As you enter, a cutscene unfolds, depicting Dolor attacking Devella and her superior, leaving them immobilized. Overhearing Dolor mention a gift for Lord Bhaal, you can react with:
- Halt!
- Step back. That's my target.
- [Stealth] Remain concealed as the dwarf is distracted.
Choose the first option (Astarion Disapproves), prompting Dolor to acknowledge a challenger and triggering another battle. After defeating Dolor, the quest "Investigate the Murders" is updated. Once the enemies are vanquished, Devella expresses gratitude for your rescue. She explains that Doppelgangers ambushed them, paralyzing them before they could retaliate. Respond with:
- Weren't you responsible for safeguarding the patriarchs in the upper city?
- These doppelgangers appear to be monitoring his advancement. This one seems to be gaining prominence among Bhaalists.
- Fortunately, I was here to assist.
- It's regrettable. I assume you're swamped with paperwork. I'll leave you to it.
Select the first option, and Devella elaborates that she heard a disturbance while en route to the upper city. She believes these killings are part of a trial, detailing that the document you shared outlines the test. Victims are paralyzed, offered to Bhaal, and framed as the work of the Cult of Absolute. This provides access to a "Tribunal," an initiation for aspiring cultists to demonstrate their dedication. This initiation occurs beneath 'Canduhallow's Tombstones'. However, due to her constraints, she defers the investigation to you. Reply with:
- I should probably seek out a hand, then.
- Can you pinpoint the location of 'Candulhallow's Tombstones'?
- It sounds like you have a lot on your plate. I'll handle this.
- I'll look into it.
Choose the fourth option. Devella plans to head to the upper city, meeting you at Basilisk Gate later. Lastly, loot Dolor's body and acquire the "Hand Bag," updating the Main Quest "Impress the Murder Tribunal."
Devil's Fee
Return to the Graveyard when you are done exploring the Mausoleum by interacting with the door that you came through and head to the Devil's Fee at (X:-35 Y:-11). You will see a tall building surrounded by a wrought iron fence with flowers crawling over it. Head inside the building and you will notice the floor is decorated with red carpets, bookshelves lining the walls, and a wide range of monster skulls are proudly displayed both on tables and on the walls. Interact with these items that you see and upon closer examination, it appears that these items are genuine infernal collections.

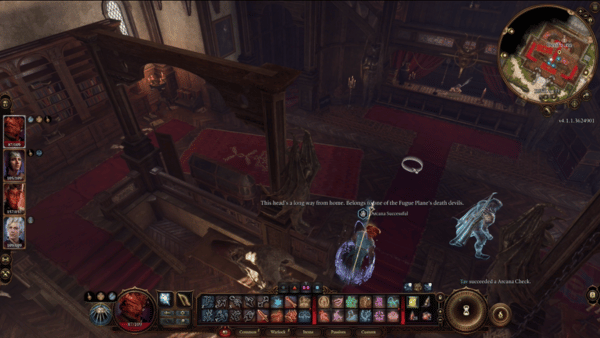

In the middle of the building, there's a trader called Helsik. Speak with her and she will show you her items like dyes, oils, and other items. However, she has more items to sell to you but first, you need to explore and take a closer look at the building. You will see there's a floor above the trader and you can access this by going through the stairs on the right of the trader. Be careful as you reach the top of the stairs as there is a trap waiting for trespassers.

For now, return to the lobby and examine the decorations that you will see. Return to Helsik once more and compliment her collection of items. She will appreciate this and will now show you her rare collection including Gemini Gloves, Cloak of the Weave, Shapeshifter Hat, and others. She claims that this is her more curated collection and she's willing to sell it to you.

Speak with Halsik once more to ask her if she can grant us access to Raphael's House of Hope. She welcomes you back to her store and you will get the following options to respond:
- Curious don't interest me. I'm interested in the hells themselves- a place called the House of Hope in particular.
- Did you help Lord Gortash retrieve some hellish curious by any chance?
- Show me your wares. The good stuff.
- Leave.
If you choose the second one, she will suspect that you are familiar with the Archduke to know a private matter such as that. You will get the next choices:
- I happened upon some of his correspondence that mentioned your dealings with him.
- We're old colleagues.
- We were lovers. It was all very steamy,
- I'm asking the questions here.
If you choose the second one, she will respond that she likes to deal with remarkable people. She will now ask for an offer to help you with the answers you seek. She servers Lord Mammon and he is asking for coin.
NOTE: Some choices may be different depending on your character's class, race, and other specifics.
- Toss a coin to the diabolist.
- Here's 100 gold.
- How about 1000 gold?
- Actually, I'll just take a look at your usual wares, if you don't mind.
- [WARLOCK][PERSUASION] I'm also of the pact-bound persuasion- don't suppose I can have a free sample?
If you choose the 5th one, she will happily oblige to give you info for free. Attempting the Persuasion check will require you to pass a DC of 10. Astarion will also give you his approval. She tells you that she's known as the Latchkeeper of the Nine Hells and she can break people into the Hells and also shares that she opened a portal for Lord Gortash. Your next set of choices will look like this:
- Where in the hells did the portal go?
- What business did Gortash have in the Hells?
- Raphael told me the Crown of Karsus was stolen from Mephistopheles- were you involved with that?
If you choose the 3rd one she will ask for more coin for information. She acknowledges that the Crown of Karsus has left the vault, and an opportunity opened for a devil named Raphael. He also collects a great deal of treasures in his House of Hope and the crown is what he's lacking. Now, you will get the next choices:
- Can you help me break into the House of Hope?
- Well, that was interesting but I'd just like to see your wares.
- That information wasn't worth what I paid.
- Leave.
If you choose the first one, she tells you that it is a ludicrous task and will require a substantial donation to Lord Mammon's coffers amounting to 20,000, you can try to bargain with her by attempting a Persuasion check to lower the price to 10,000. This will require you to pass a DC of 25. You can agree to pay her or come back when you are ready to pay the fee.
The Lodge and helping Omeluum
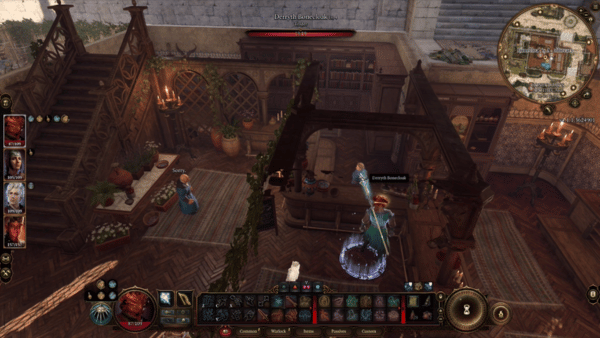
Before moving to your next destination, make sure to drop by Bonecloak's Apothecary. If you helped Derryth and her husband in the Underdark, their store will still be running, thanks to you. She sells elixirs and some equipment. When you're done, head to the Lodge which can be found at (X:-217 Y:78), and interact with the double doors to go inside.

Use the stairs on the right of the building where you will find Blurg in one of the rooms. Blurg is a friend of Omeluum, whom you met while on your journey in the Underdark. Blurg appears to be worried about Omeluum since he hasn't heard from him, who went on an investigation about your tadpole's condition. Remember to ask Blurg if he has anything to trade, as he also sells items in Lower City. Agreeing to help Blurg will give you a new quest: Retrieve Omeluum.


Your current quest will lead you to investigate the basement of Jannath's Estate. Upon reaching the entrance of her estate, a butler will greet you to tell you that she is not able to welcome any guests at the moment. This will prompt you to look for other entrances through the Gardener's Basement at (X:-251 Y:-86) this is found just below where you talked to the Butler named Tarhun Mnemonis. The door says 'Keep Out' but it is not locked at all so you can just walk inside.


Next, look at the corners of the room and you will notice a plate with a rectangular shape on the floor and an arch on the wall. Have two of your party members stand on each plate to reveal the door in the middle of the room. You will also need to move the wooden crates to pass through, be careful as you go inside because there is a trap just by the door that will explode if you can't disarm it. Next, interact with the Ornate Wooden Hatch to reach the Abandoned Cistern, a sub-area in the City Sewers.

Beware of this area as you will find many Bhaalists down here and they are hostile on contact. The good thing here is that upon arriving at the location, you will stand on a tall platform which gives you an advantage over your enemies. When you are done fighting them, make sure to look around and retrieve items from the chests and the bodies of your enemies before proceeding to the next location.

Grey Harbour Docks and Water Queen's Docks
Next, leave this area to continue your search for Omeluum and return to the Lower City. In Grey Harbour Docks at exactly (X:-226 Y:-147), you will find a familiar face that needs rescuing. Volo is seen captured by bandits led by Churg Elvek. They are calling Volo a fearmonger, an agent of chaos. Astarion speaks up to get him out of distress and you will get the following options to respond:
- Volo has done nothing wrong- you, on the other hand, serve the Absolute.
- Ready your weapon.
- What crime is this man guilty of? If he is guilty, where's the evidence? Where's the trial? This isn't justice- this is mob madness!
- Well, go on then. Do whatever it is you're planning to do to him.


If you choose the first option, Churg Elvek will claim that your mind has been clouded by the disruptor's lies and will engage your party in a battle. You will be outnumbered in this location as there are 7 enemies, but not to worry, if your party is well-equipped and if you plan your moves right, you will come out of this battle victorious. Volo is still tied on crates along the rails so make sure to reach him quickly and use 'Help' to free him. Volo will thank you once again for helping him and this event will inspire Astarion 'Saving a Fellow Tale-Spinner'.
Continue exploring South of Grey Harbour Docks to reach the Water Queen's Docks. One of their members will greet you at the entrance to carry a certain 'Holli' to her final rest in the Deep Wilds. However, she notices your confusion and asks if you are visiting for the Waveservant Holli's funeral. Now, you will get the following options to respond:
- Is that what that singing is for?
- Am I interrupting the funeral?
- Thank you.
- Leave.
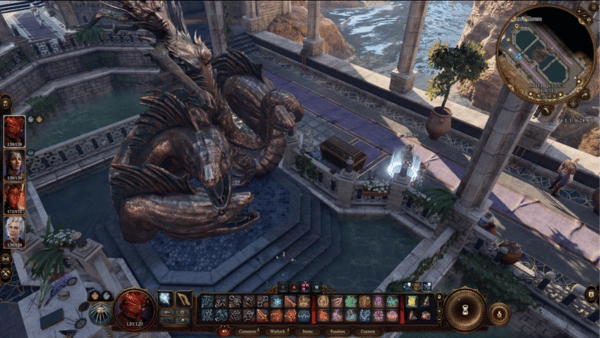
If you choose the first one, she will take it kindly and tells you that you are most welcome and that they have much to be thankful for. Inside the Water Queen's House, you will find a scenic landscape and ponds that trail in the middle leading to the fountain. One of the captains reveals that they believe in offering coin to Queen Umberlee to gain blessings during their travels in the sea.

Continue walking down the path and towards the back of the fountain, to the Main Chamber. You will hear a voice praising the Glorious Wavemother and celebrating the passing of one of her daughters. Flood Tide Allandra Grey, the one who's leading the service notices your presence and asks you what tribute you have to honor the Wavemother's fallen daughter. You will get the following options to respond:
- I've brought gold. (500)
- I've brought a prayer.
- I've brought my weapon to help avenge her death.
- Haven't brought any tribute, really.
If you choose the 3rd one, she acknowledges this and tells you that blood must be shed to avenge her. Your tribute is well-received and your next set of choices will look like this:
- Did this person drown?
- Who's the deceased?
- This is one of the more upbeat funerals I've attended.
- Nice corpse. What are we celebrating?
If you choose the first one, she will reply with "Yes, thank the Wavemother." They are praising the Wavemother for sparing her an ignoble death, however, she explains further that it was a beast that took her life. She describes the monster as a rusting pollutant that bleeds black blood, destroying Umberlee's pristine waters, she said.
- How did Umberlee 'spare her an ignoble death'?
- I'm good at slaying beasts- maybe I could help you.
- I'm not getting involved in this.
She replies that the queen is generous to those who serve her. She will then ask you to find the master of the beast and slay him, then she will bestow you with one of her most precious gifts. Then you will get the next set of choices:
- Where can I find the beast's master?
- All right- I'll see what I can do.
- Sorry, I don't have time for this.

She will describe how Holli was found by some fishermen. She was last seen swimming in Grey Harbour. She tells you honestly that they haven't found the lair of the beast and were hoping you can find it during its slumber. Agreeing to help them will give you a new quest: Avenge the Drowned. This event will inspire Shadowheart: 'Offerings to the Waves'.
To begin your investigation, one of the things you can do is use Speak with the Dead on the corpse. The corpse known as Holli Daylord will tell you that they were swimming and were attacked in the waters. You will now get the following questions to ask:
- Who are you?
- Do you remember what happened before you were attacked?
- What killed you?
- Where were you attacked?
- Leave.

If you choose the second one, the corpse reveals that they remember black blood surrounding them and described the beast as a Metal Monster. The spell's power wanes, and forbids you from asking any more questions. Now, you will return to Grey Harbour Docks where you just rescued Volo to continue your investigation on Holli's attacker.
Return to the docks where you first found Volo then walk over to a group of people gathered near a boat. Captain Sleam is not allowing any freeloaders and a father will not be able to get on board the boat with his family. You will get the following options:
- Excuse the interruption, Captain, but can I pay for the father's berth? (1000 gp)
- [PERSUASION] Captain... Sleam, is it? It would be a shame to split up the family, don't you think? Let the father go with them.
- [INTIMIDATION] I have news for you, Captain: you're going to accept for the price of three and take the father aboard, or I'll pitch you into the harbor. Got it?
- Leave.
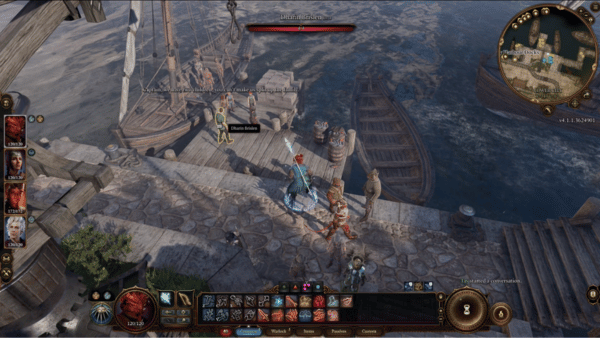
If you choose to do the Persuasion check, you will need to pass a DC of 15. The father named Dharin Brislen will thank you and you can now continue investigating Holli's attacker. Unlock the waypoint at (X:-214 Y:-262 and speak with the fishermen attending to their boat next to it. The man named Gowlan will ask you if you have any experience getting oil out of sealed wood, and you will get the following options to respond:
- Oil? This isn't black blood?
- Have you tried vinegar?
- I'm sure it'll come out eventually.
- Where did all this stuff come from anyway?
- Leave.
If you choose the first one, he will assume that you have been talking to the people from Water Queen's House. Your next set of choices will look like this:
- I'm looking into the death of a waveservant- do you know anything about it?
- Where did all this stuff come from anyway?
- Why are there so many dead fish floating in the harbor?
- Is your boat all right?
- Leave.
If you choose the first one, he will tell you that they were the ones who found her. He goes on to tell you that they tried to help her when they fished her out of the water but she was already dead. Your next set of choices will look like this:
- What happened to her body?
- Did you see anything else unusual?
- Why are there so many dead fish floating in the harbor?
- Is your boat all right?
- Leave.

Then he will tell you that the other waveservants took her body back to the temple. Then he will describe that they saw a sort of wave moving toward the docks when they picked her up even though there weren't any boats around leading them to suspect that it might be something big moving underwater toward Flynn's Cargo, so this is the next area that you will be investigating.
Flymm Cargo

You will find Flymm Cargo located south of The Blushing Mermaid. The fastest way to get there is to pass through the lodge and around the docks. Use the stairs to get to the lower levels and reach the level below. After a few sets of stairs, you can now see Flymm's Cargo in the distance. Go to the roof of the building by accessing the balcony at (X:-147 Y:-152), rotate your screen facing the North of your map to see a balcony with a door leading to the inside of the building. Jump down and have one of your characters unlock the door by attempting a Dexterity check, this will require you to pass a DC of 15.


As you head inside, you will find beasts guarding the cargo but no sign of the Metal Beast as described by the waveservants. Luckily, your party is at an advantage because of your positioning which lets you attack the enemies from a safe distance. Eliminate the beasts so you can continue investigating the building. There is a chest below the platform that you are standing on so make sure to check that. Next, you have to reveal a hatch beneath the wooden crates gathered at (X:-161 Y:-140). Move around the crates to reveal the hatch to the basement.


Down in the basement, you will see a door that leads to a larger pathway. Walk to the right of the path and you will see a crack in the wall with the description 'A greasy, smelly climb down...' Take note of this location in the meantime and then return from the path where you came from and interact with the door. Next, you will reach a small room with a 'Subacquatic Dock' door at the end of it. This room reveals a much bigger area and you can now see the water down here.
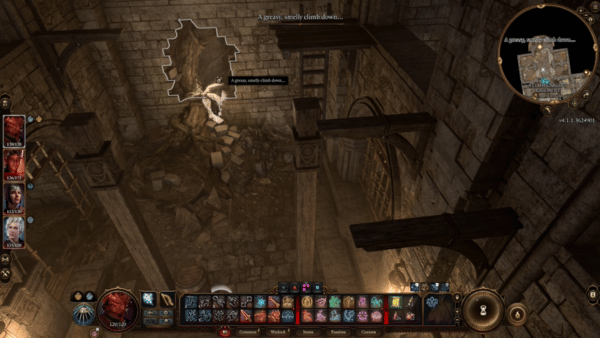
At the center, you will see Redhammer the Deviser examining something in the water. Walk over to him and then he will tell you that you're not supposed to be down in the basement. Then you will notice the metal contraption in the water and get the following options:
- That submersible- why is it here? What is this place?
- [DECEPTION] Boss sent me to check up on the situation down here.
- [INTIMIDATION] I have questions. You have answers.
- You killed one of those servants of Umberlee. Now they want you dead.
- Sorry, I just got turned around.
If you choose the first one, he will reply that it's the only port that matters in the whole city. Then, he will ask you if Gortash sent you. Your next set of choices will look like this:
- [DECEPTION] Boss sent me to check up on the situation down here.
- [INTIMIDATION] I have questions. You have answers.
- You killed one of those servants of Umberlee. Now they want you dead.
- Sorry, I just got turned around.
If you choose the 3rd one, he will ask if you will make good on that, and tell him that you just want to know what happens in the port to get more information out of him. He will continue to tell you that he uses the port as commanded by Gortash, and he transports whoever he needs to be taken to the Iron Throne. He describes it as an underwater prison and the most secure in the Realms. You will also find out that Gortash keeps Gondians in prison as collateral to keep the Steel Watch Foundry under control.
- I'll make you a deal- take me to the Iron Throne, and I'll protect you from Umberlee's servants.
- You're going to take me to the Iron Throne- I'm getting the prisoners out.
- You're as guilty as the people who imprisoned the Gondians.
- You killed someone. You need to face justice.
- Leave.

If you choose the 3rd one, then you will now begin the battle against Redhammer the Deviser. When you are done fighting him, go to the other end of the hall to find a locked Metal Trunk. The submersible in the water can be used to take you to the Iron Throne, but for now, you must leave this area and return to the path that will take you to the sewers. Later on, you will need to return to Water Queen's House to complete the quest: 'Avenge the Drowned'.
Abandoned Cistern
The entrance to the Sewers from Flymm Cargo is located at (X:-1095 Y:337). Interact with the crack in the wall with the description "A greasy, smelly climb down..." and this will take you directly to a trapped path with locked chests in the area. You can also pick up a map with an X mark on it, but you will need to tread carefully. If you have Astarion with you, switch to turn-based and have him look around to scout for traps and pick the locks on the chests. These chests can be unlocked either by passing a Dexterity or Strength check DC of 20.
When you're done going through the chests, take a dip in the sewer water and follow its flow, but there are enemies waiting for you on the other side so make sure that you are prepared to fight them. Eliminate the enemies perched on the tower and then carefully make your way to the top to surround them. When you're done fighting them, your next task is to solve the Sluice Gate Puzzle.
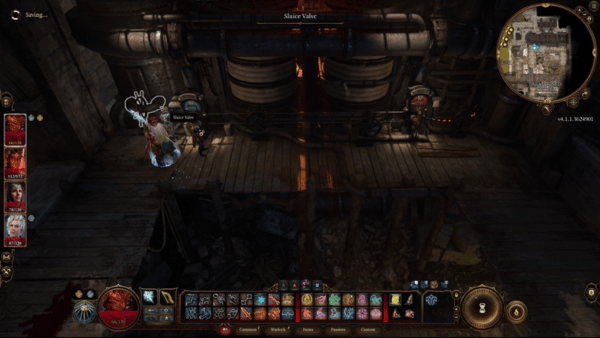
How to Solve Sluice Valve Puzzle in Abandoned Cistern
In order to solve this sluice gate puzzle, you will need to balance the heat and the amount of water flowing. There are 2 valves that you can interact with- The Water Valve on the left and the Heat Valve on the Right. This puzzle is dependent on the timing of the valves so do the following:
- Interact with the Water Valve on the let
- Ready your other character in the other valve and as soon as the Water Valve status teacher the 'Perfect Water' level, interact with the Heat Valve.
- If you got the timing correctly, then the Sluice Gate will automatically open.
Take note that if you miss the timing, the valves will cause an explosion that can do fire damage and set the surroundings on fire. You can reset the puzzle by interacting with the valve at the far right, then begin following the solution again. After the fight and solving the puzzle, your next goal is to find Minsc, and before proceeding decide if you will be helping this Human ranger or not.
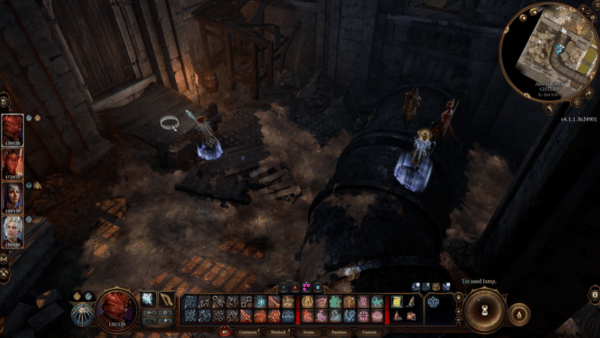
You will find a door at (X:-164 Y:879), directly in front of you, There's a loose stone that can be detected if you pass the Perception check. Walk towards it and take the Painted Key from it. Behind the pillar, from where you picked up the key, there's a chest that you can interact with. Open it and take the items. You will find more loose stones here if you pass the Persuasion check, during our playthrough, we found at least 3 of them. To the right of the corridor, you can open the door that will take you to the other side of the sewers. However, you would want to go to the other end of that hallway to reach the Undercity Ruins.
You can reach the Undercity Ruins by walking the opposite way from the door you just opened. Make sure to move close to the Waypoint so you can unlock it and then, at the foot of the stairs, you will find a trader by the name of Bareki, a Voiceless Penitent. You can try to communicate with him, but he is sworn to silence. Make sure to take the time to look at his items for sale before you proceed. You will find a Passageway of Penitence behind the trader but go to the left of the NPC, and this other Passageway will take you to the Ancient Lair.
Ancient Lair
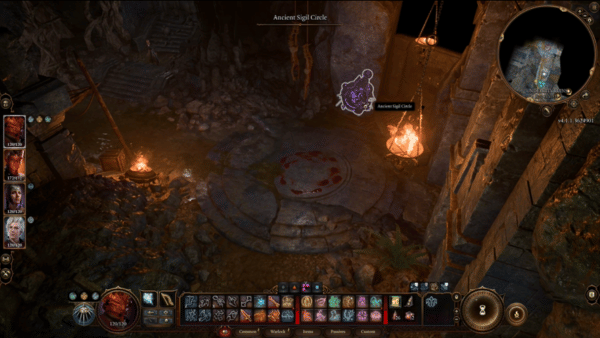
When you get to the Ancient Lair, you will be faced with two options: Kill Thrumbo and bring his body back to Philgrave's Mansion, or betray Mystic Carrion which will progress the quest 'Find Mystic Carrion's Servant'. Take note that you will receive two very different outcomes and different rewards.
- If you help Thrumbo and betray Mystic Carrion, he will reveal the secret chamber underneath Philgrave's mansion.
- If you choose to help Mystic Carrion, you will have to fight Thrumbo and receive the Torch of Revocation reward from Mystic Carrion.
Upon entering, you will dead bodies of humans, and as soon as you loot one of the opened chests, the Undead Foes will get ready to attack you. You can make use of fire spells to effectively fight them off, or use any Radiant spell, as the Undead are vulnerable to these kinds of attacks. This battle will prove to be a long and tedious fight because of their number, so make sure you have healing spells and potions available to you, so you can keep your party alive.
When you're done fighting your enemies, you can now return to exploring the Ancient Lair. You will discover chests that you can loot gold and valuable items from. Some Gilded and Opulent chests will have traps on them, so be careful as you work on them. Inside the lair, you will see a Stone Wall marking, and you can use any of your abilities to destroy it. Once the wall is down, enter the new area.
This new area is a chamber that contains a book, which reveals that Mystic Carrion's heart is contained in Thrumbo's chest. This will update your quest 'Defeat Mystic Carrion', then, look around you inside the chamber to see a jar that you need to destroy, then head back to speak with Thrumbo, should you decide to help him. You may refer to the Quests page for more info. Your next objective is to return to the Lower City Sewers and continue exploring the other side.
Lower City Sewers
Return to the door where you first encountered the Penitent Trader and then proceed to the other end of the hall that will lead you back to Lower City Sewers. There's a big door blocking your path so you can either have Astarion attempt a Dexterity check here or go around the other path to encounter NPCs and discover a ladder that will lead to Szarr Palace, Lady Jannath's Estate, and Lorroakan's Portals.
Continue exploring the depths of the Sewers from this path and you will encounter Aelis Siryasius, who has a profound fear or hate, or both for Absolutists and plans on turning you into kindling for a funeral pyre. You can try and convince him that you're not with the Absolute, then Aelis will continue blabbering about how he and his group were the best thieves in Baldur's Gate and they have stashed their loot in the Sewers where they are currently safe, while the Absolutists search for them.
However, the rest of his group had joined the cult, as Aelis believes, and he killed them. So now he wants to conduct the funeral rites, for Sarin's final resting place. This will allow Aelis to leave you alone and will not attack you for now. However, if you take him out, you will be able to gain access to his treasure and will solve the Sarin's Skeleton puzzle.
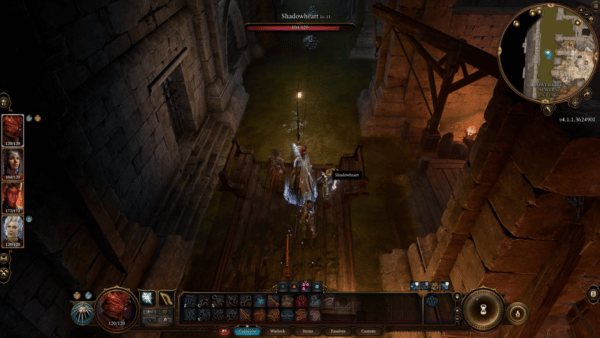
There is a door right next to where you encounter Aelis. Have Astarion lockpick this and attempt a Dexterity check. To pass, he will need a DC of 10. This will reveal a path to the raft in the sewers, and use it to move forward. This will take you to a path closer to the Lord of Murder's domain. As you jump off, switch into turn-based mode as there are traps set here that will explode on contact.
Upon opening the doors, the Night Blades will immediately become hostile as soon as they see your party enter the room. Eliminate all the enemies that you see here and continue exploring the Sewers until you reach a room filled with Noxious Fumes. On the right side of the wall, look for the lever that will dispel the fumes. Continue to work your way on the right side and dispel the traps that you see by attempting Dexterity Checks.
Then, jump on the crack on the wall, right on top of the lever that you just deactivated. You will see a breakable wall here and destroy that with Eldritch Blast or other spellcasting abilities to reveal a ladder out of the Sewers.
Entrance to Guildhall from Lower City Sewers
Continue exploring the depths of the Sewers and once you reach the Guild Hall at (X:-12 Y:774), you will see a door with the description "No Entry - No Exit". You can attempt a Dexterity check but you will need to pass a DC of 20. This will give you access to the Guildhall Bar. Directly to your right, you will see Lady Ague who will threaten to kill you, should you cross Nine-Fingers. There are other members of the guild gathered here as well as Merchants and other NPCs who offer their services.
In this section, you will find yourself in the middle of an uprising that was started by the Zhentarim Leader, Roah, and the Guildhall Leader Nine-Fingers Keene. If you choose to side with Keene, you need to inform Roah about your decision, but this will make all of the Zhentarim hostile, and the Guildhall will be on your side. Then, Keene will be grateful for your help, and they will offer to aid you in your fight against the Absolute later on. Otherwise, if you agree to take Zhentarim's side, the fight against the members of the Guildhall will begin and then Roah will become the new leader of the Guildhall and will reward you for your help by joining you in the fight against the Absolute later on.
Continue exploring the Guildhall and you will meet a man named 'The Professor' who will ask which crew you are affiliated with. You will have the following options to respond:
- [DECEPTION] Neither. I run a crew called the Wormskulls.
- Consider me an independent operator.
- I'm not with any crew. Why?
- Leave.
Choose the 2nd one so the Professor will leave you alone. He will also warn you to not get involved with Zhentarim. Then you can continue to look around and interact with the other NPCs. Follow the guide in your mini-map and interact with the door to meet Nine-Fingers Keene, who is in the middle of a discussion with Uktar who is trying to persuade her to withdraw protection from those who failed to pay tribute but Nine-Fingers is firm with her decision and welcomes you into the room as soon as they notice you.
Nine-Fingers Keene will tell you that she plans on burning the Absolute from the city, and if you want to help, she will welcome it. Now, you will get the following options to respond:
- What can I do to help you?
- Why do I need to help the Guild? I've been doing well enough without you so far.
- You can help a companion of mine who needs information- Jaheira.
- I need information.
- I ran into some of your thugs- the Rivington Rats?
- Leave.
If you mention Jaheira by choosing the 3rd option, she will start asking questions about your purpose and your identity. Then, you will get the following options to respond:
- Well, you already know I'm a friend of Jaheira's.
- A passer-by. I heard you serve good food down here.
- Just exploring the local sewer life.
- Let Jaheira do the talking.
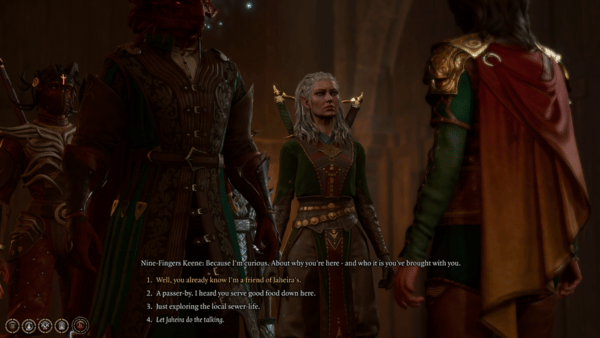
If you choose the first one, Jaheira will give you her approval. Then, she will ask Keene about a man named Minsc. Keene will respond that they're about to bring him in, but can't promise anything about his condition. Keene believes that Minsc has found a new name and believes that he is none other than Stone Lord who has been stealing her own territory for his own cult. She claims that she knows where the next attack is going to take place and plans on attacking there.
Jaheira will try to convince Nine-Fingers to call off the ambush and let your party handle it. If you support Jaheira and respond to Nine-Fingers by saying 'She's not alone- she has me.', Jaheira will give you her approval. However, Nine-Fingers is very stubborn and will not call off the ambush, so instead, you can look around in the Guildhall to search for leads. This will also update The High Harper quest.
Return to The Surface, Lower City
As soon as you're done with getting intel, you can return to the surface and complete the quest in Water Queen's House. If you offered to help the Wave Servant, which meant that you would fight Redhammer the Deviser, then make use of the Waypoint in the docks, then walk to the Water Queen's House to complete the Avenge The Drowned. Make your way to the back of the building where the Waveservants are gathered. They will ask you if it's done, and if you killed Redhammer, then you tell them that the beastmaster is dead.
Flood Tide Allandra Grey will thank you for your service and she will reward you with the Wavemother's Robe, a very rare clothing that provides Watery Rejuvenation and Temperature adjustment. Make sure to check out the Armour page for more info.
The Counting House

Following the events that took place after Jaheir and Nine-Fingers Keene's meeting, you will now continue to look for Minsc. Your next destination is The Counting House, where you will solve the Vault Puzzle and meet Minsc for the first time. You will find this building on the Southern side of the Lower City at exactly (X:-98 Y:-148).
As soon as you enter the building, you will find yourself in a Grand Hall, fitted with a tall ceiling and bright fixtures. Speak with the Head Clerk Meadhoney at the front desk who seems to be worried about something. You will get the following options to respond:
- Remind me again where Head Banker Glitterbeard is?
- Who is this Stone Lord that has you worried?
- I'm not a customer. I'm here because Nine-Fingers is planning something in your vault.
- I need access to your vaults.
- I would like to open an account.
- Leave.
Choose the second option that will prompt Meadhoney to reveal that a man named Stone Lord has taken the Head Banker below. He didn't say where specifically so you'll get the next options to respond:
- [PERSUASION] Let me help. I'll go and check on your Head Banker.
- Tell me more about this large fellow.
- It sounds like a robbery to me.
- I want to open an account.
- Leave.
If you choose to attempt the Persuasion check, you will need to pass a DC of 18. If you succeed, the Head Clerk will say that it is unusual but will agree nevertheless. He will hand you a temporary vault pass that will give access to the lower part of The Counting House. Interact with the Iron Fence next to the Head Clerk's table, then a guard will approach asking for your pass. Hand it over, and then the gate will be opened to your party.

There are locked chests here that you can lockpick to loot their gold and some others that are already opened. Take a look around here to get valuable items including gold. Then, interact with The Double Door at the end of the hall where you will see guards stationed at the gate. Before you can go, they will ask you again for your pass. So show it, and then you will be allowed access. Continue following the stairs that will lead to The Vault Door.
Solve the Vault Puzzle in The Counting House
To solve the puzzle in The Counting House, you will need to step on the correct tile in the right order. Doing this will light up the indicators on top of the Vault Door. To do this, you need to ungroup your party first and then move them to the correct tile without stepping on another tile.
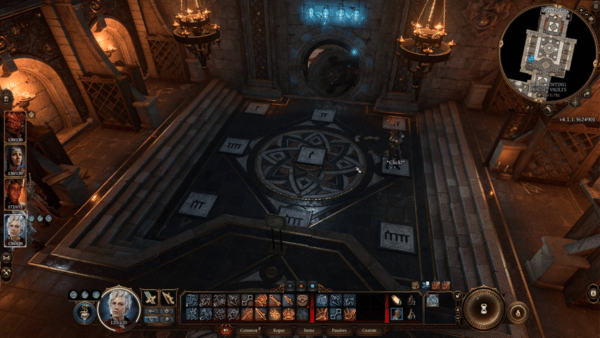
You can do this with just one character, or have your entire party stand on each plate. So as you are facing the light indicator step on the following tiles:
- Top Left Corner Tile
- Top Right Corner Tile
- Center Tile
- Middle Row, Right Tile
If you do the puzzle correctly, the Vault Door will be opened automatically. Then, follow the stairs going down. As soon as you reach the door, a cutscene will play showing Minsc and the Bhaal Cultists. Minsc was kept inside a mimic, a monster chest but he would break free from the inside. Then, a clone Jaheira will show herself and claim to be working with The Absolute. She claims that Nine-Fingers Keene set a poor trap for Minsc, and she will ask the Stone Lord to leave, and then they will retreat to the Sewers.
You will be left to fight with the remaining Bhaal Cultists here if you don't have Jaheira in your party. You are now free to speak with the Head Banker who was caught in the middle of this trap. He will ask for your help to get the coin that was stolen from The Counting House. He will invite you to look around and investigate the area, then he will leave.
Lower City Sewers
As Minsc believes that he is working with the real Jaheira, he has retreated into the dark with the clone. You will now follow their trace into the Lower City Sewers. You can make use of the Waypoint and travel to the Undercity Ruins, which is the closest one to the Lower City Sewers. Make your way back to The Sluice Gate to reach Minsc and Clone Jaheira's hiding place.
Go through the pipes and a cutscene will play where Roah Moonglow and Minsc are seen talking. They are talking about their plans and that they serve only The Absolute. Roah speaks about returning to The Guildhall to do their bidding. However, Minsc will spot your party from a distance. Roah will try to run away and the battle against Minsc and his party will begin. Attack the fake Jaheira first, and then knock out Minsc.
NOTE: If you want to keep Minsc alive, make sure to switch to a non-lethal attack. This will result in Minsc getting knocked out.
Then, using your Illithid powers, you can see the image of Jaheira in Minsc's mind. He thinks that you have killed the real one, but you can counter this with your thoughts. Minsc will continue to run away deeper into the Sewers. Follow his lead as he destroys the crumbling wall. This will take you to a small room where Minsc warns you to not show fear and to trust in him. Then, you will get the following choices:
- I do trust you. I think.
- If this is a trap, you die first.
- Can we just get on with... whatever this is?


Minsc will fall to his knees and appear to speak to a tiny creature. He will introduce you to Boo, a hamster. He calls it a Miniature Giant Space Hamster, and that you will be able to learn the difference in time. Minsc and Boo will join your party, and cleanse Baldur's Gate of Evil together. Invite Minsc to your camp if you have a full party, and he will give you his approval. This will also complete The High Harper quest.
Guildhall

Return to the Guildhall once more by traveling to the Revealed Entrace at Lower City (X:57 Y:-96), to settle the matter with Nine-Fingers Keene. At the entrance, you will find Roah Moonglow who has something to tell you after she escaped the Sewers last time. She offers her, and the Zhentarim's alliance with you to purge the Guildhall of Nine-Fingers Keene's loyal servants. She will try to convince you that Keene's guild is undisciplined and broken, but Roah's is still strong.
NOTE: If you choose to side with Keene, then you will have to fight Roah and the Zhentarim. Then, Keene will be grateful for your help, and they will offer to aid you in your fight against the Absolute later on. Otherwise, if you agree to take Zhentarim's side, the fight against the members of the Guildhall will begin and then Roah will become the new leader of the Guildhall and will reward you for your help by joining you in the fight against the Absolute later on.
Settling this matter will result in a bloody Guildhall, and you will be left to loot the bodies of the Zhentarim. Next, seek out the bloodied Keene who's seated at her desk. She will now offer to help you in the fight against the Absolute. You can also ask her about how she knew Jaheira and what happened to her Guild. The Aid the Underduke quest will also be completed upon defeating the Zhentarim.

After that, you can now return to The Counting House and return the gold that was stolen. This will complete Return Rakath's Gold, and you will be rewarded handsomely, together with a Counting House Vault 9 Key. You will find this Vault inside the large vault on the walls. You will get Elegant Studded Leather, a very rare light amour.
Return to the Streets of Lower City

Now that you were able to settle the uprising in the Guildhall, you will now return to the street of Lower City where you will continue your quest related to Mystic Carrion and his servant. Move to (X:-10 Y:-158) and you'll discover a hidden stone wall. Have Astarion unlock this door by attempting a Dexterity Check, but you will need to pass a DC of 25. This will take you to Philgrave's Mansion.
A mummy Mystic Carrion will see you right away, and he tells you that you do not have an appointment. He recognizes that you are familiar with the Necromancy of Thay. He will ask you about your thoughts of its contents. You will get two options to respond:
- You're familiar with the subject matter?
- Oh yes, I loved it. Especially the part about the unicorns.
If you choose the first one, he will suspect that you are not familiar with it and will try to turn you away and will suggest that you return to the domain of the living. You will get the next choices:
- Is there anything I can do for you?
- Have you anything to trade?
- Leave.
If you choose the first one, Mystic Carrion will consider getting your help for a task. He tells you about his servant by the name of Thrumbo who ran away. He is asking you to return the body to him, and you will be rewarded. Then, you will get the following options to respond:
- First, tell me why he ran.
- His body? It sounds like you want him killed.
- Baldur's Gate is a big city/ A name's not much to go on.
- i might be able to help. For a fee, of course.
- I'll think about it.
- You've got a deal.
If you choose the 3rd one, Mystic Carrion will tell you that he has accopmplices, and has led many others astray. If you agree to help Mystic Carrion, he tells you that spirits bore witness to the agreement, and they will follow your progress too, just like him. You will have a new quest "Find Mystic Carrion's Servant." Before leaving this room, make sure to trade with him and take a look at his very rare items for sell that might be suitable for yourself, or your companions.

Due to the lack of information from Mystic Carrion, you will go around searching the docks and looking for anything related to Thrumbo and his servants. You will find a Strange Beggar Lumbar on the streets of the Lower City at (X:124 Y:-30), just outside the mansion. As soon as you mention the name Carrion to him, he will become hostile. You will get the following options to respond:
- [DECEPTION] Carrion means Thrumbo no harm. He sent me with provisions for his journey.
- [INTIMIDATION] Either you tell me where Thrumbo is, or I drive my fist through your skull.
- [PERSUASION] Tell me where Thrumbo is, and it'll be like we never met.
- Leave.
If you choose the first one, you will need to pass a DC of 18. Lumbar tells you that he last heard from Thrumbo that he's going to get them a boat, but haven't heard from him since and he suspects that he must be somewhere near the water.

You will be able to locate Thrumbo inside Vonayn's Home near the shore in the Lower City. It's close to where Philgrave's Mansion is, and if you have explored this area before, this is where you fought Sea Monsters or Sahuagin enemies that jumped out of the water to attack you. If it's your first time, it will be an interesting encounter. Then, go inside the house next to the pier, use the stairs and you will find Thrumbo hiding in the wardrobe to your right.
NOTE: You can either choose to help Thrumbo or Mystic Carrion. This will reap you two different rewards and 2 different outcomes for this quest as well. However, you will be able to loot more from Mystic Carrion if you kill him, and you can take the Torch of Revocation from the chest inside Mystic Carrion's room if you kill him.
- If you help Thrumbo, this will involve destroying the parts of Mystic Carrion that keep him alive. You will have to travel to the sewers, in the Undercity Ruins and smash the jars containing Mystic Carrion's brain, and liver. Then, you will discover that Mystic Carrion's heart is inside Thrumbo, and he will have to vomit it so you can destroy it. Then, you must return to Philgrave Mansion and kill Mystic Carrion to get the Crypt Lord Ring from Thrumbo.
- If you choose to help Mystic Carrion, all you have to do is take Mystic Carrion's heart from Thrumbo and bring it back to Philgrave's Mansion. He will reward you with Torch of Revocation.
The Steel Watch Foundry
After settling the issues of Mystic Carrion and Thrumbo, your next destination is The Steel Watch Foundry. This is a place in Lower City where you will find many of Gortash's mechanical soldiers. If you choose to raid and disable the foundry, this will result in fighting Gortash's army, eventually freeing the people from his rule.

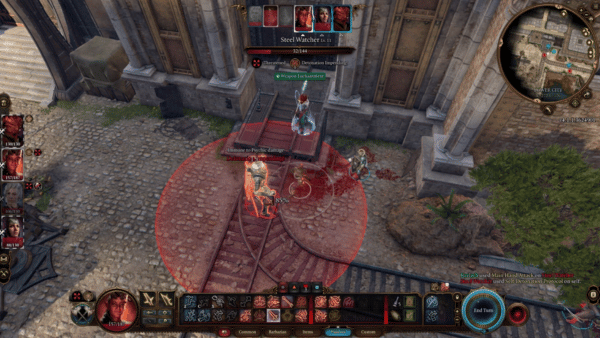

To begin, you need to locate the foundry at the Southwest corner of the Lower City. There are multiple ways to enter but we find that the most accessible area is going through the tracks at (X:-243 Y:-178). This will require your entire party to sneak past the patrolling guards. If one of your party members gets detected, the nearby Steel Watcher will be alerted and will trigger a battle. If you get caught, the fight will be tough but manageable, as long as you only have to fight one watcher at a time. Eliminate the guards so you can continue to head inside.
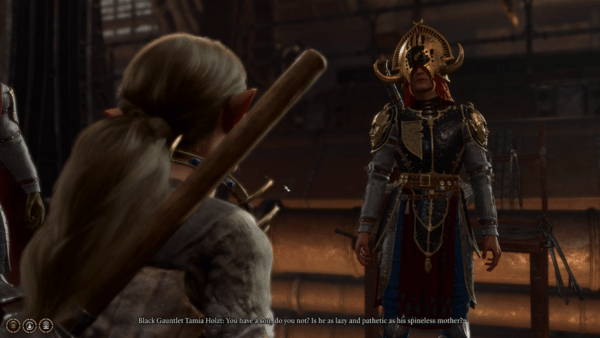

Activate the lever to lift the platform to the door's level. Upon entry, a short cutscene will play showing a Gondian named Lowa pleading to take a break. However, the Black Gauntlet Tamia Holzt is unfazed by her pleas, and she takes out a purple crystal and activates Prinski's Motivation sequence. Consequently, the collar placed on Lowa's neck will also light up. Holzt will begin asking her questions about her personal life and use that information against her. In the end, Holzt allowed her to take a break but threatened to take her son's life if she couldn't do a perfect job.
Looking around the foundry, you will see many parts of the Steel Watchers lying around. You will find an arm, a greatsword, and shields, among others. Being on the high part of the foundry, the enemies haven't detected your presence yet. If you interact with the greatsword, the narrator reveals that this was forged in the Upper City, at the Hall of Wonders itself. To progress, allow yourself to be seen by the Overseer.
Note: Some dialogue choices are modified depending on your character's traits, features, proficiencies, and others.
In this playthrough, our character's Religion proficiency allowed it to recognize the uniform of the overseer, that they are a follower of Bane- the god of tyranny. This event gave us the following choices:
- [DECEPTION] Forgive the interruption, Dread Sister. I've just arrived for duty.
- [INTIMIDATION] I wish to bathe in the blood of these worthless Banites. You can help, Gondians- or you can die.
- [INTIMIDATION] Gondians! Fight back! Do not let these people torment you.
- [PERSUASION] I am here to help, Gondians. Together, we can free you all.
- Touch these people, and I'll kill you.
If you choose the Intimidation check, you will need to pass a DC of 15. The Gondian will hear you and they will retaliate and fight with you. This will trigger a battle between Tamia Holzt and the other guards. After eliminating the enemies, you can now talk to the Gondians. Lowa will tell you that it's not only their lives that are at stake but also their families. She fears that the other Overseer will find out about what they have done, and do the unimaginable. If you speak to the other surviving Gondians, they will feel the same way about what happened.

While the rest of the Gondians are worrying about how to clean up the bodies, walk up to the metal stairs that will lead to the security office. You will need to talk to a Gondian named Zanner Toobin. You will need to get him on your side and cooperate with your party. Tell him that you have come to free them, however, he will seem to resent what you have done. You will find out that the Overseer has placed a powerful collar on each and every one of the Gondians, which prevents them from retaliating. The Overseer can just press a button and easily wipe out all of them, including their families who are being held somewhere unknown.
If you ask him if he will fight back if you free their families, Zanner Toobin will respond by saying that he'll do more and help destroy the place. He tells you that you will need to infiltrate the foundry to investigate the location of their families. He will ask you to be careful and not get spotted, or else it will mean death for all of them.
Steel Watch Foundry - Lab Level


Just below where you meet Zanner Toobin, locate the stairs that will lead you deeper into the foundry. You will find furnaces powering the foundry and other guards are stationed here. You can take on this fight as long as there are no survivors and you will also have an advantage over enemies since you have the high ground. Eliminate all threats so you can continue investigating. Your goal in this area is to go deeper by using the elevator within the foundry. You will need to defeat the boss, the Steel Watcher Titan. So keep exploring until you reach the basement level.
NOTE: To successfully save the Gondians, you have to disable the Prinski's Motivation sequence device. This will prevent the Black Gauntlet from harming the Gondians. Make sure to secure them as most guards will have one on them.
The Iron Throne

Your investigation will lead you to travel to the Iron Throne and to get there, you will use the submarine located in the basement of Flymm's Cargo. Interact with the submarine and a confirmation dialogue will be shown on the screen. Upon arriving, a voice will communicate with you using the tadpole. He informs you that you need to move fast as Duke Ravengard's life is on the line. You will get the following options to respond:
- Omeluum? Is that you?
- Where are you?
- Tell me what to do.
- I want to free the Gondian hostages.
- Get out of my head.
If you choose to tell him that you want to free the Gondian hostages, he will tell you the painful truth that Duke Ravengard is the priority because the city needs him. Then, you will get two of the choices below:
- Fine, where is he?
- [PERSUASION] You would let innocents die? Shame on you. I will save everyone, just tell me how.
If you attempt the Persuasion check, you will need to pass a DC of 20. If successful, he will agree that indeed, everyone must be saved. Then, he reveals that the Duke is being held in the security wing. He continues that the prisoners are scattered throughout the prison, and if you want to save them all, then you must be ready to spread your resources or split up the party. Doing this will also get Astarion's disapproval.


NOTE: By progressing in this story, you will have 8 turns to save everyone before the Iron Throne collapses. Before continuing we recommend equipping boots that give you extra speed, taking potions, or learning spells that increase movement speed. A good example is a Githyanki's triple jump, the Cunning Dash from Rogues, or a Teleport (Monk). Make use of all your turns here so you can save as many as possible. Aside from the limited turns, take note that there are also enemies patrolling about.
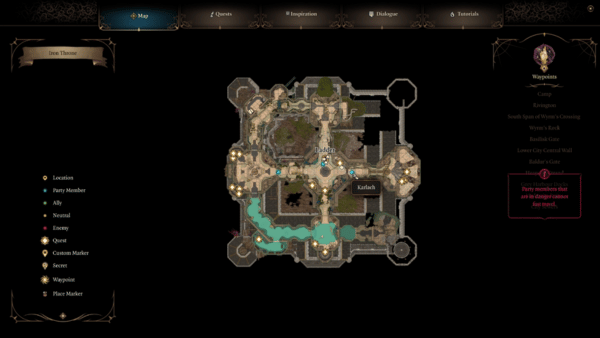
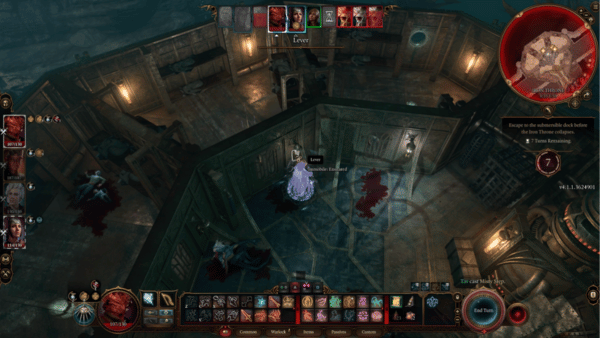
As you go around rescuing survivors, you will find Duke Ravengard held at the Security Wing at (X:35 Y:59). Activate the lever next to the door, to speak with the Duke. Shortly after, a laughing demon can be heard, possibly Mizora's voice because of her contract with Wyll. Shortly after, you will encounter Mizora here, who is planning on collecting the part of their contract, or the life of Duke Ravengard because Wyll chose to break free from the contract in our playthrough. She will then attack the Duke with exploding flames. This could play out differently for you, should Wyll choose differently.

When you are down to your 2 remaining turns, make sure to return to get out of the Iron Throne and return to the submersible. This should give you enough turns to run back. Make sure that everyone gets on board safely, or otherwise, they will be left to die. Interact with the ladder inside the submersible to return to the basement in Flymm's Cargo.

If you managed to save Omeluum who was held captive in the Iron Throne, you will find him again at The Lodge with his friend there. He tells you that he and his colleagues are grateful that you rescued him, but regrets to report that his investigation has ended in failure.
BG3 Lower City Map
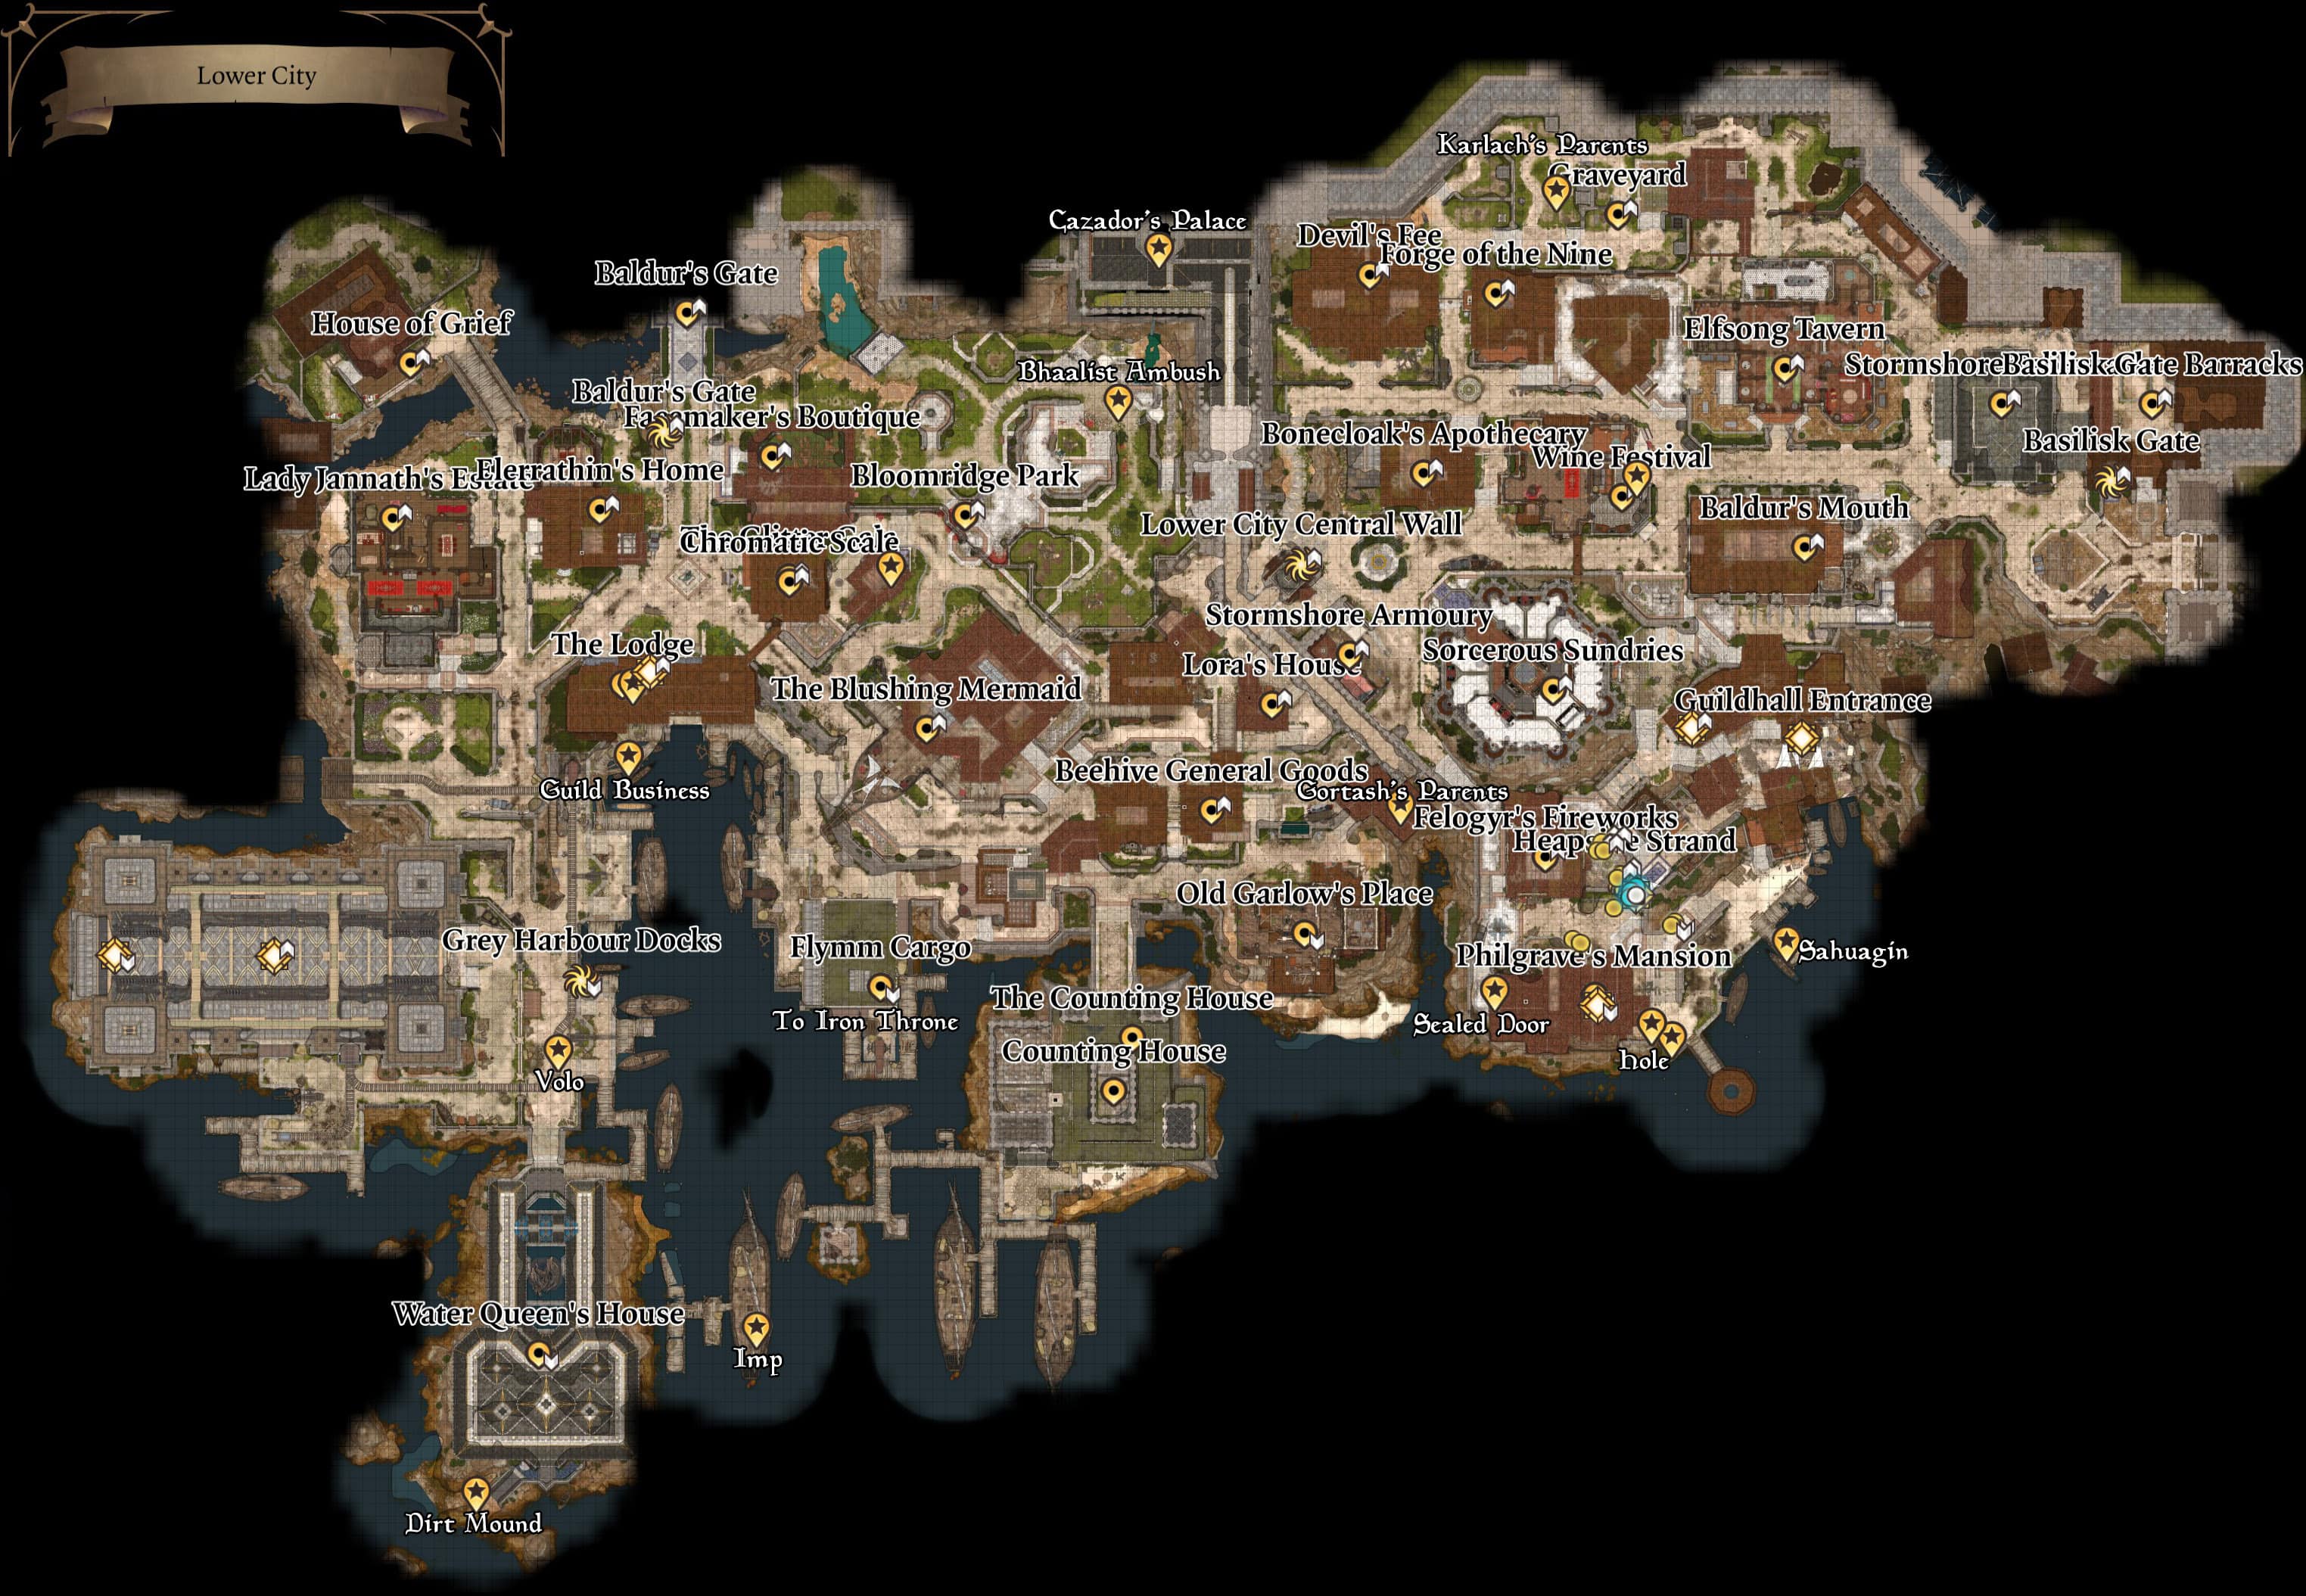
 Anonymous
Somebody put hours of time making this walkthroug and people complain because there is one step from a minor side quest missing ? How about you become a contributor instead of complaining ?

 Anonymous
it is not mention the mountain pass route...!!! Which is better? make the mountain pass before goblin camp and do laezel's quest to find the creché? or goblin camp to grymforge then mountain pass?

 Anonymous
This guide didn't even mention the side quest in the basement of the mansion in rivington...

 Anonymous
It would be useful to add that to be able to move the scruffed rock, you need to have a character with at least 13 strength in your party (so Shadowheart), with wich drag and move away the rock.

 Anonymous
guess I need to become a contributor and start writing my own pages here if I want to see act II and III info

 Anonymous
Why does this walkthrough suddenly skip ahead tenfold?
"(Pull the brake lever to stop the windmill, release means throw him away in goblin language.)"
Then next sentence, "In the doctor's basement, there is a hidden lever behind three chests. Pull it to reveal the hidden passage behind the bookshelf. ( Be careful when you explore this area, undead hide inside the coffins. Open them will trigger a fight.)"
Doctors basement? After I looked online AFAIK that doctors basement is WAAAAAAY across the map, getting there would skip a TON of the game. Maybe I'm wrong?
 Anonymous
For the owlbear fight, if you climb up the cliff above its patrol area (by climbing the rocks on the side close to the center of the whole cave), you can rain down arrows on it and take no damage. (There are also a lot of "heavy stone"s scattered around the cave, and some "fissured stalactites" hanging above her patrol area. You can probably use these to knock down/drop on her for additional damage. There is also a hidden chest in the sunlit area of the path accessible by jumping across from the cliff area.

 Anonymous
A good trick to level fast, now that you can free more character on the Nautaloid ship. Of course after getting the Everburn Blade. If you let your companions besides your main character die and then rez them on the beach, you will gain 200+ experience each. This will get you knocking on the door for level 3 before you even run into your first fight once off the ship.

 Anonymous
The prologue area was changed in update 5(?), so if you get the key from the body in the next room then open the chest in the area with Shadowheart in the pod, the relic in the chest allows you to access her nearby panel and free her on the crashing ship.
Well worth doing early because with 3 characters + the intellect devourer, its possible and easier to kill Commander Zhaik (the main demon) on the Bridge and acquire his flaming Great Sword, Everburn Blade, making Lae'zel fairly powerful early on.
 Anonymous
You can shoot out the jewel in the guardian statue near the fort in the underdark.

 Anonymous
You can turn off the fire bolt guardian of the temple of selune using a switch that is over top the exit arch that goes into the underdark - there are a pair of ladders either side.

 Anonymous
HOW DO YOU MOVE THE TRUNK/BOXES? I've tried the drag and drop and only rarely ever get one to move. And, I can't use Andom's key to unlock the door.

 Anonymous
Correction for Matriarch drop. It is Poisoners Robe, not Prisoners. It adds poison damage to some one using poison attacks.

 Anonymous
When I got the rare Necromancer amulet it disappeared from my inventory and the ability to talk to the dead was gone. is this a bug and did it happen to anyone else? was it a one time use thing?


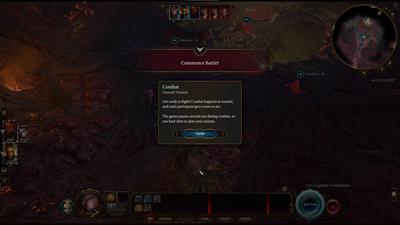
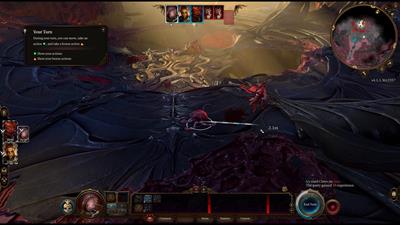
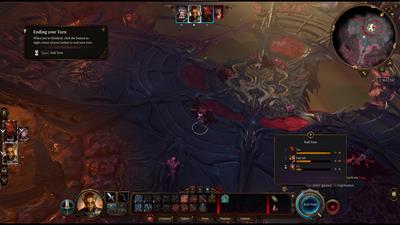
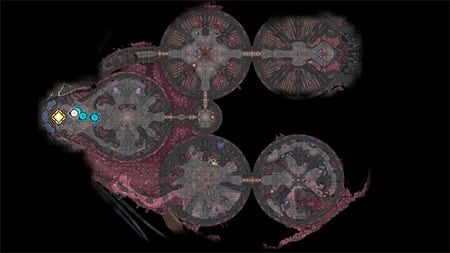


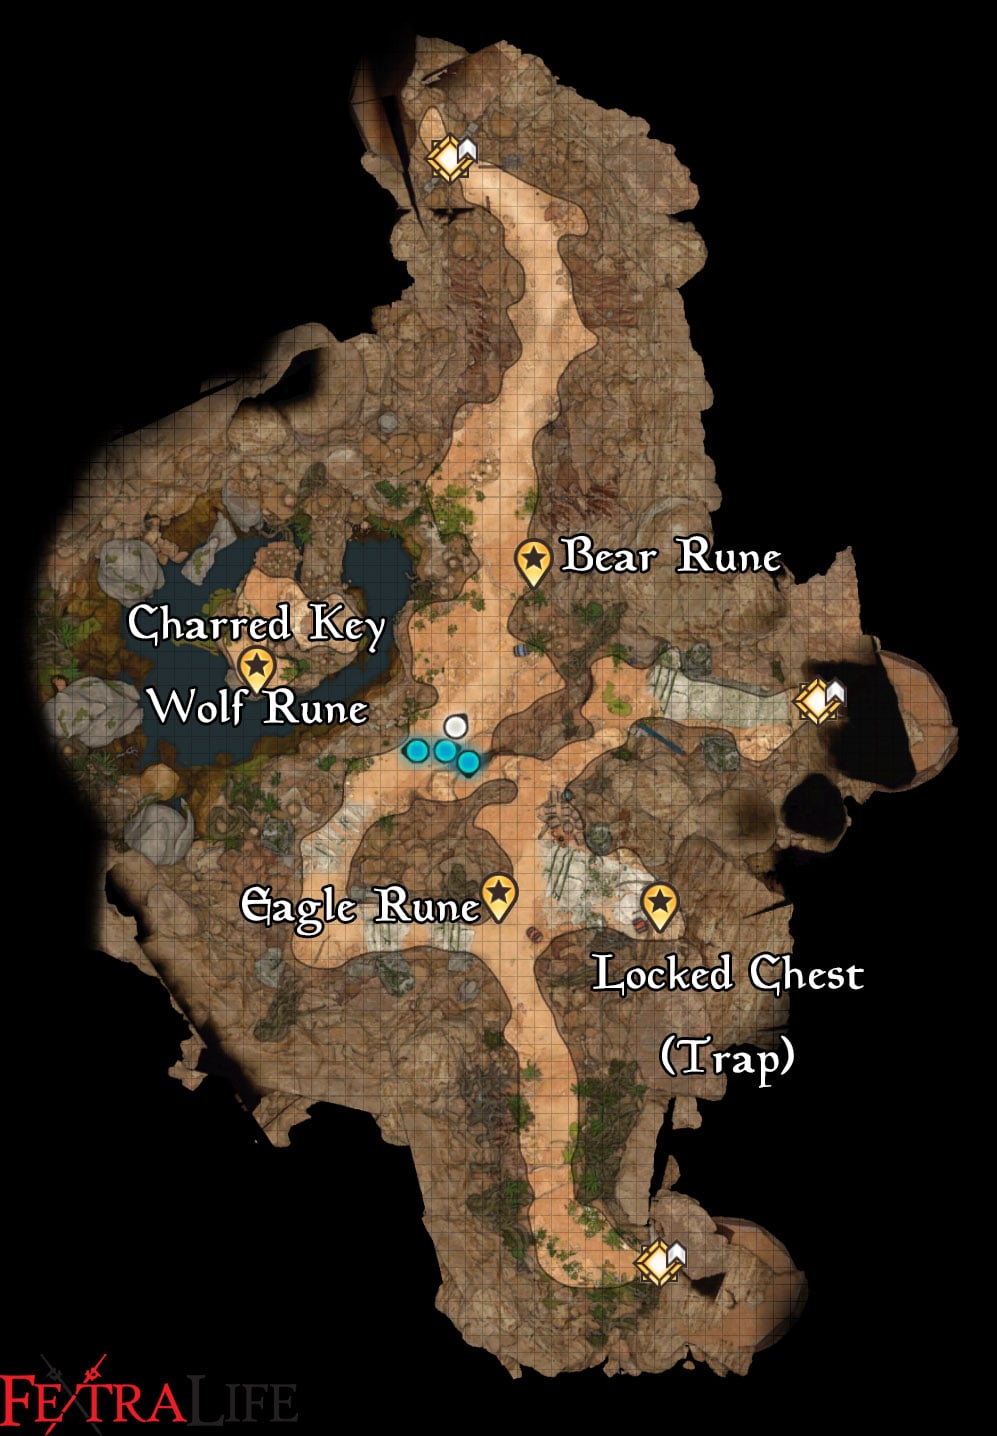
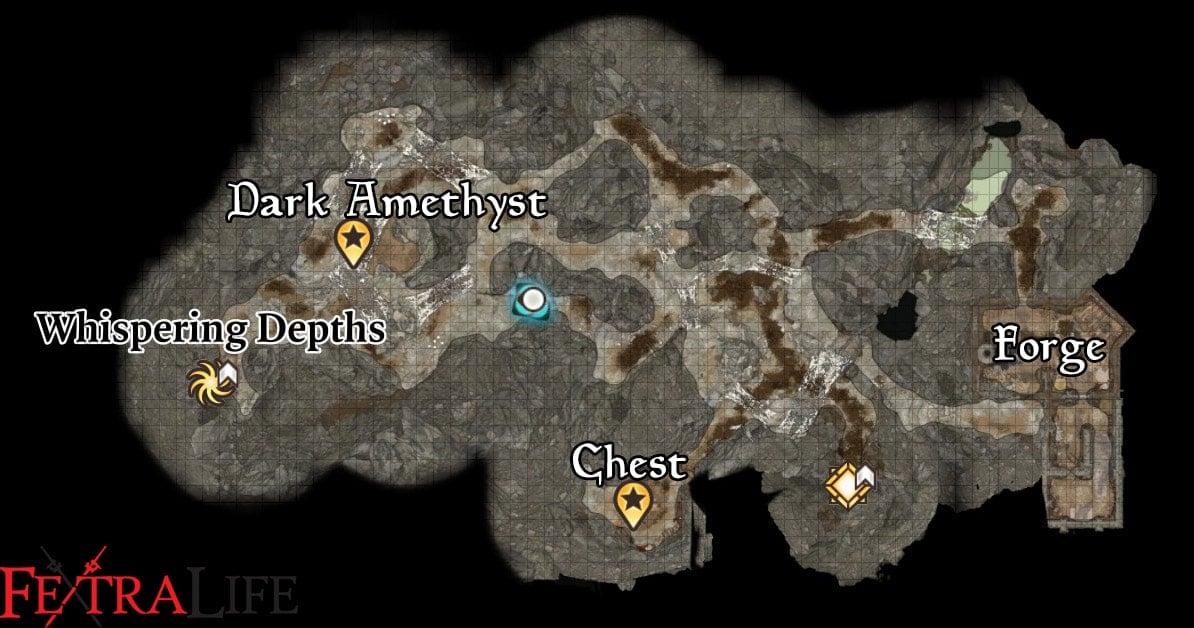

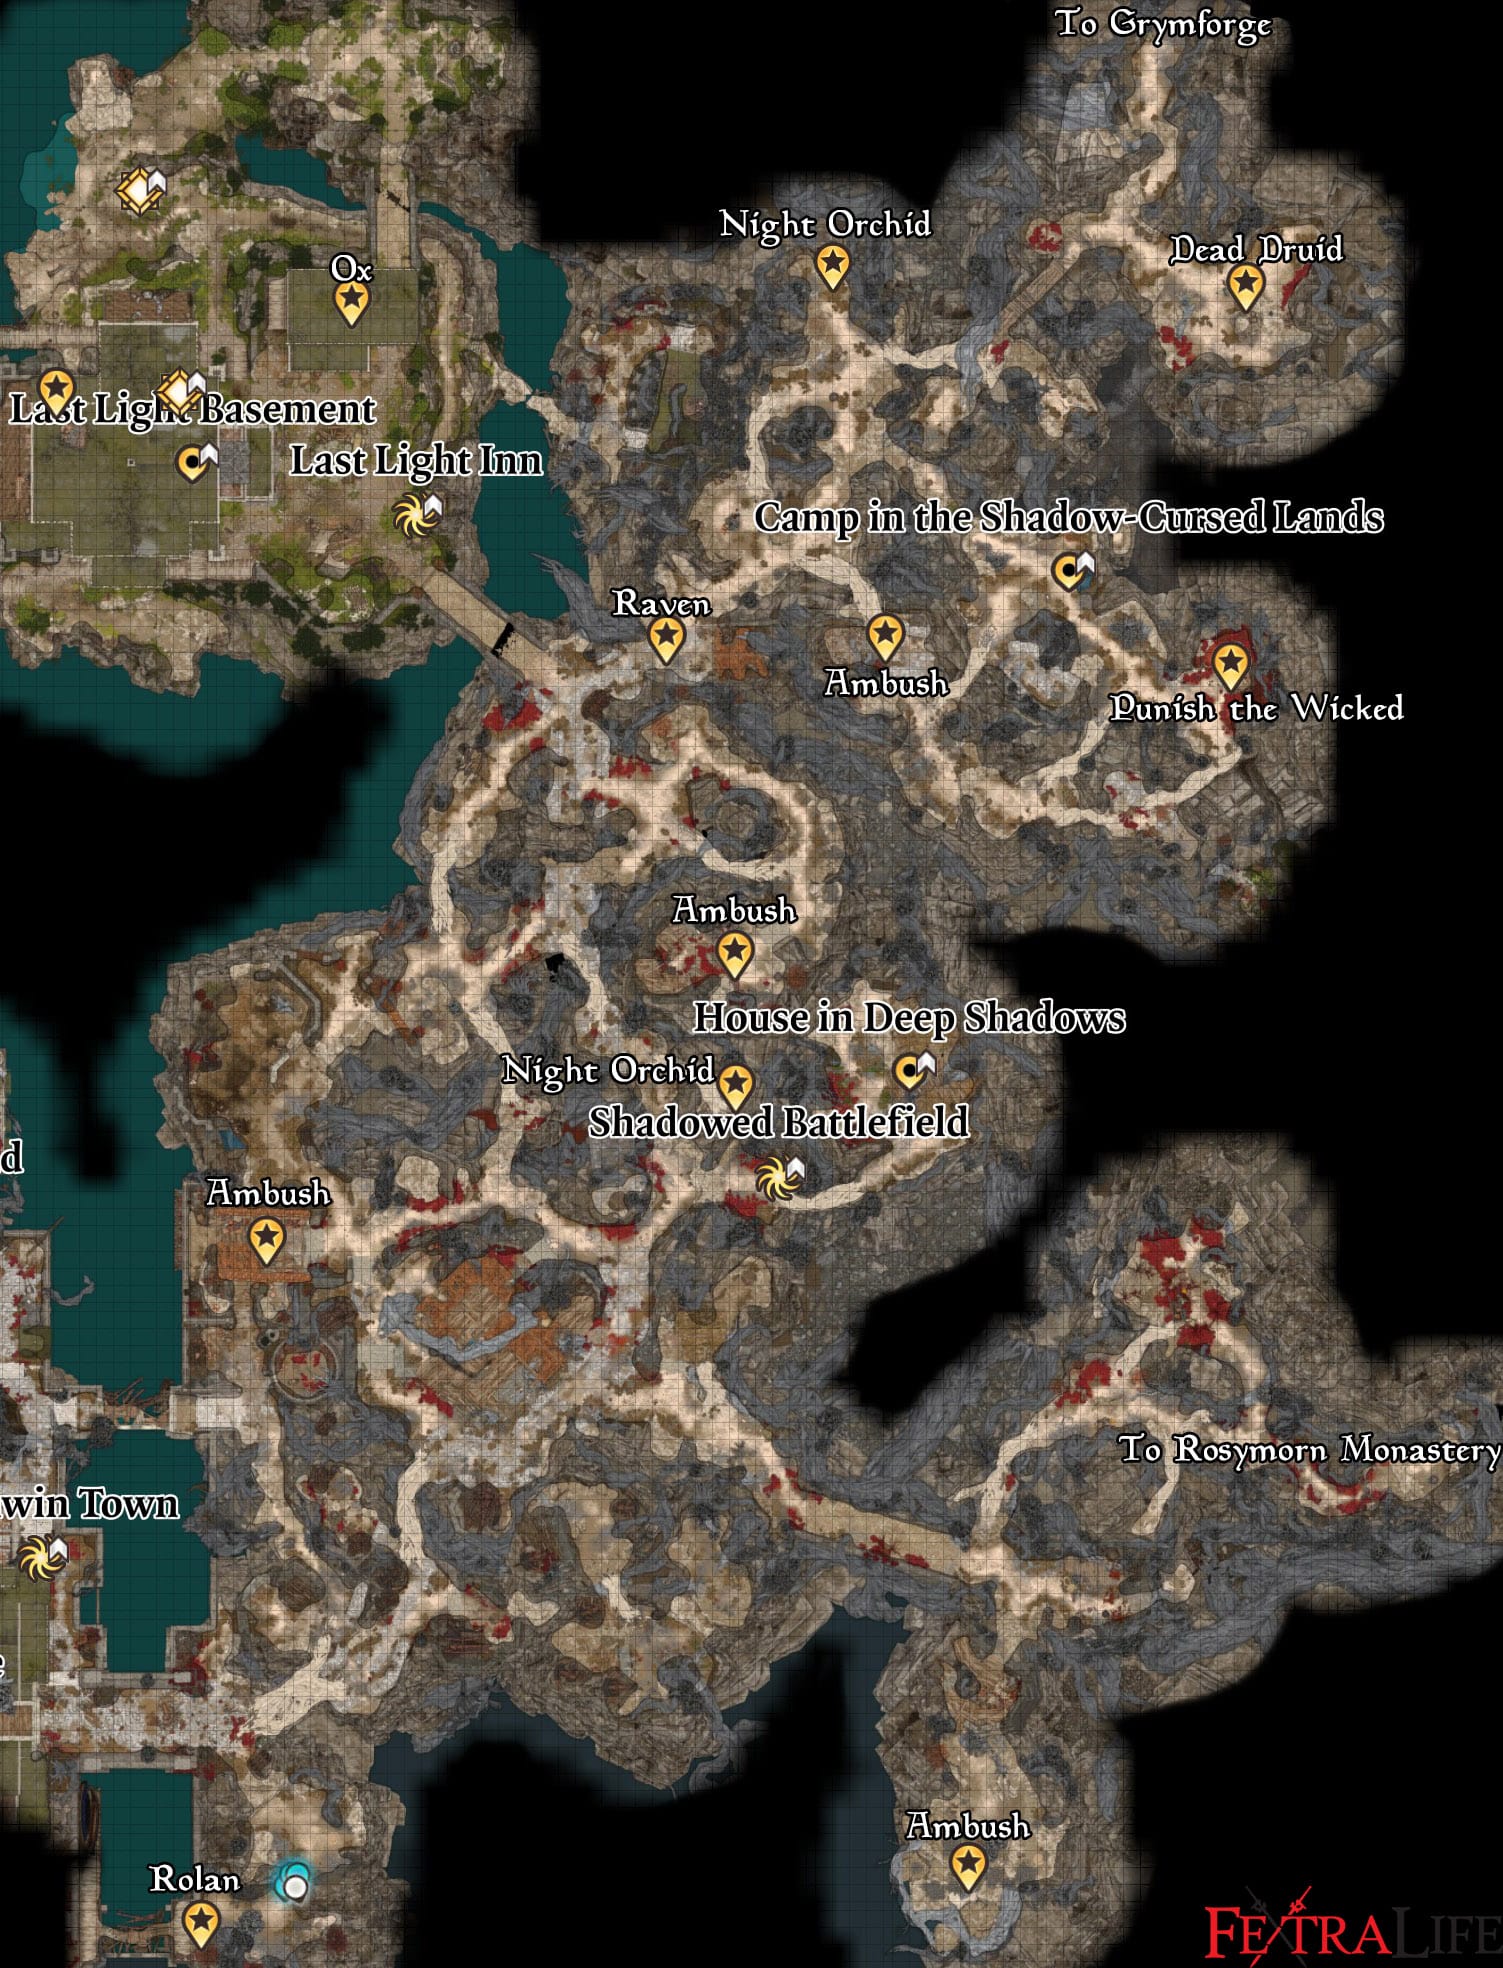
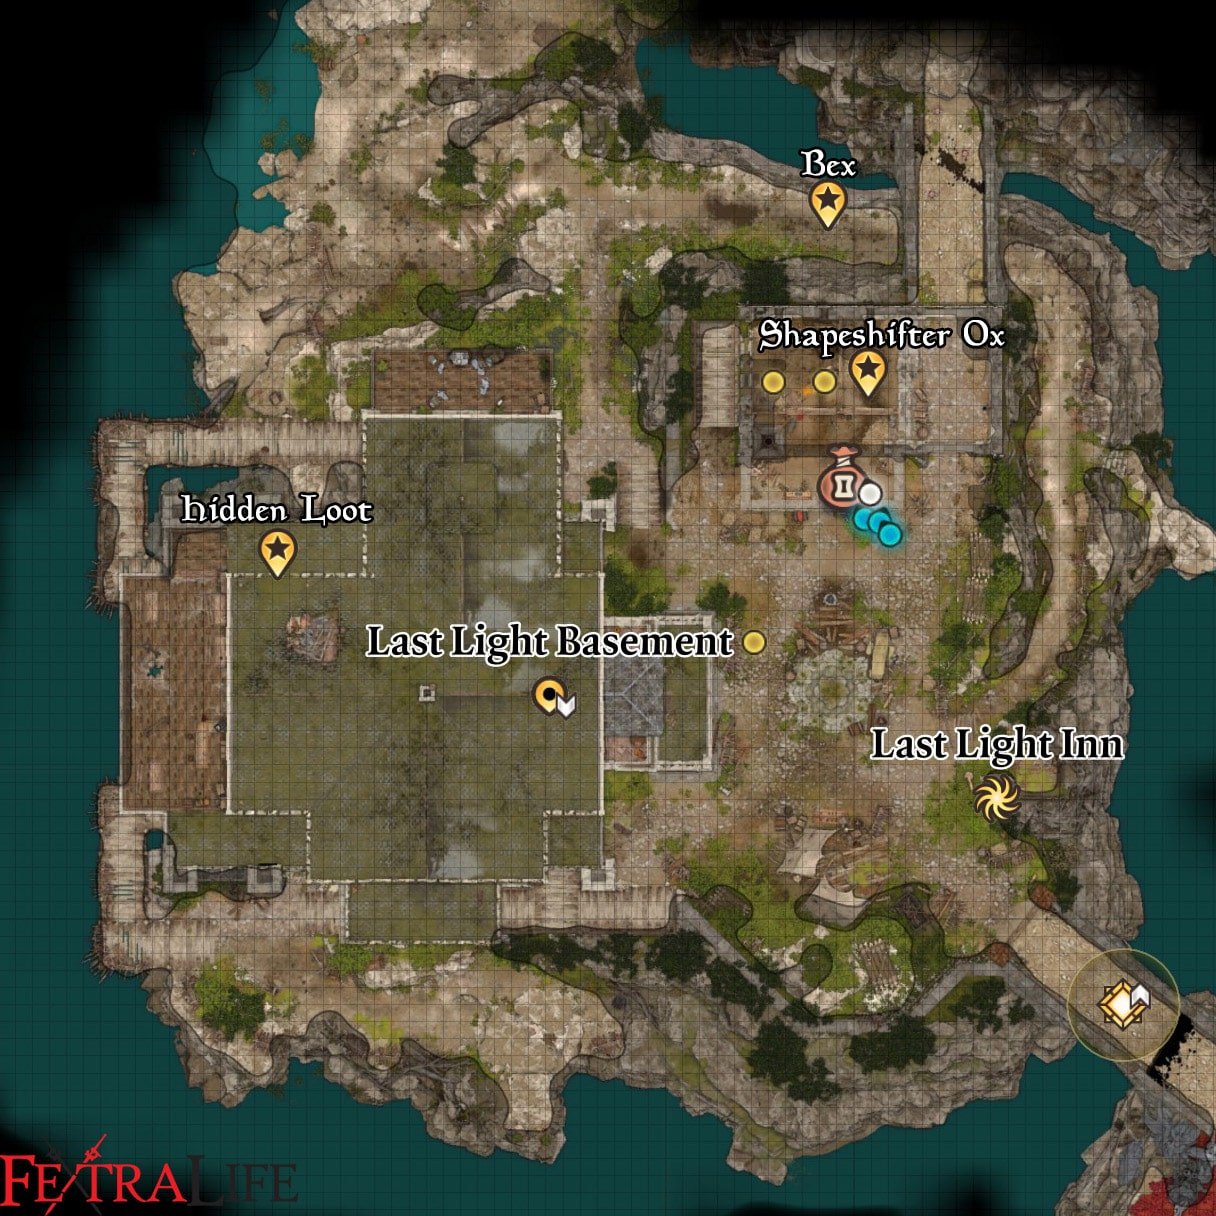
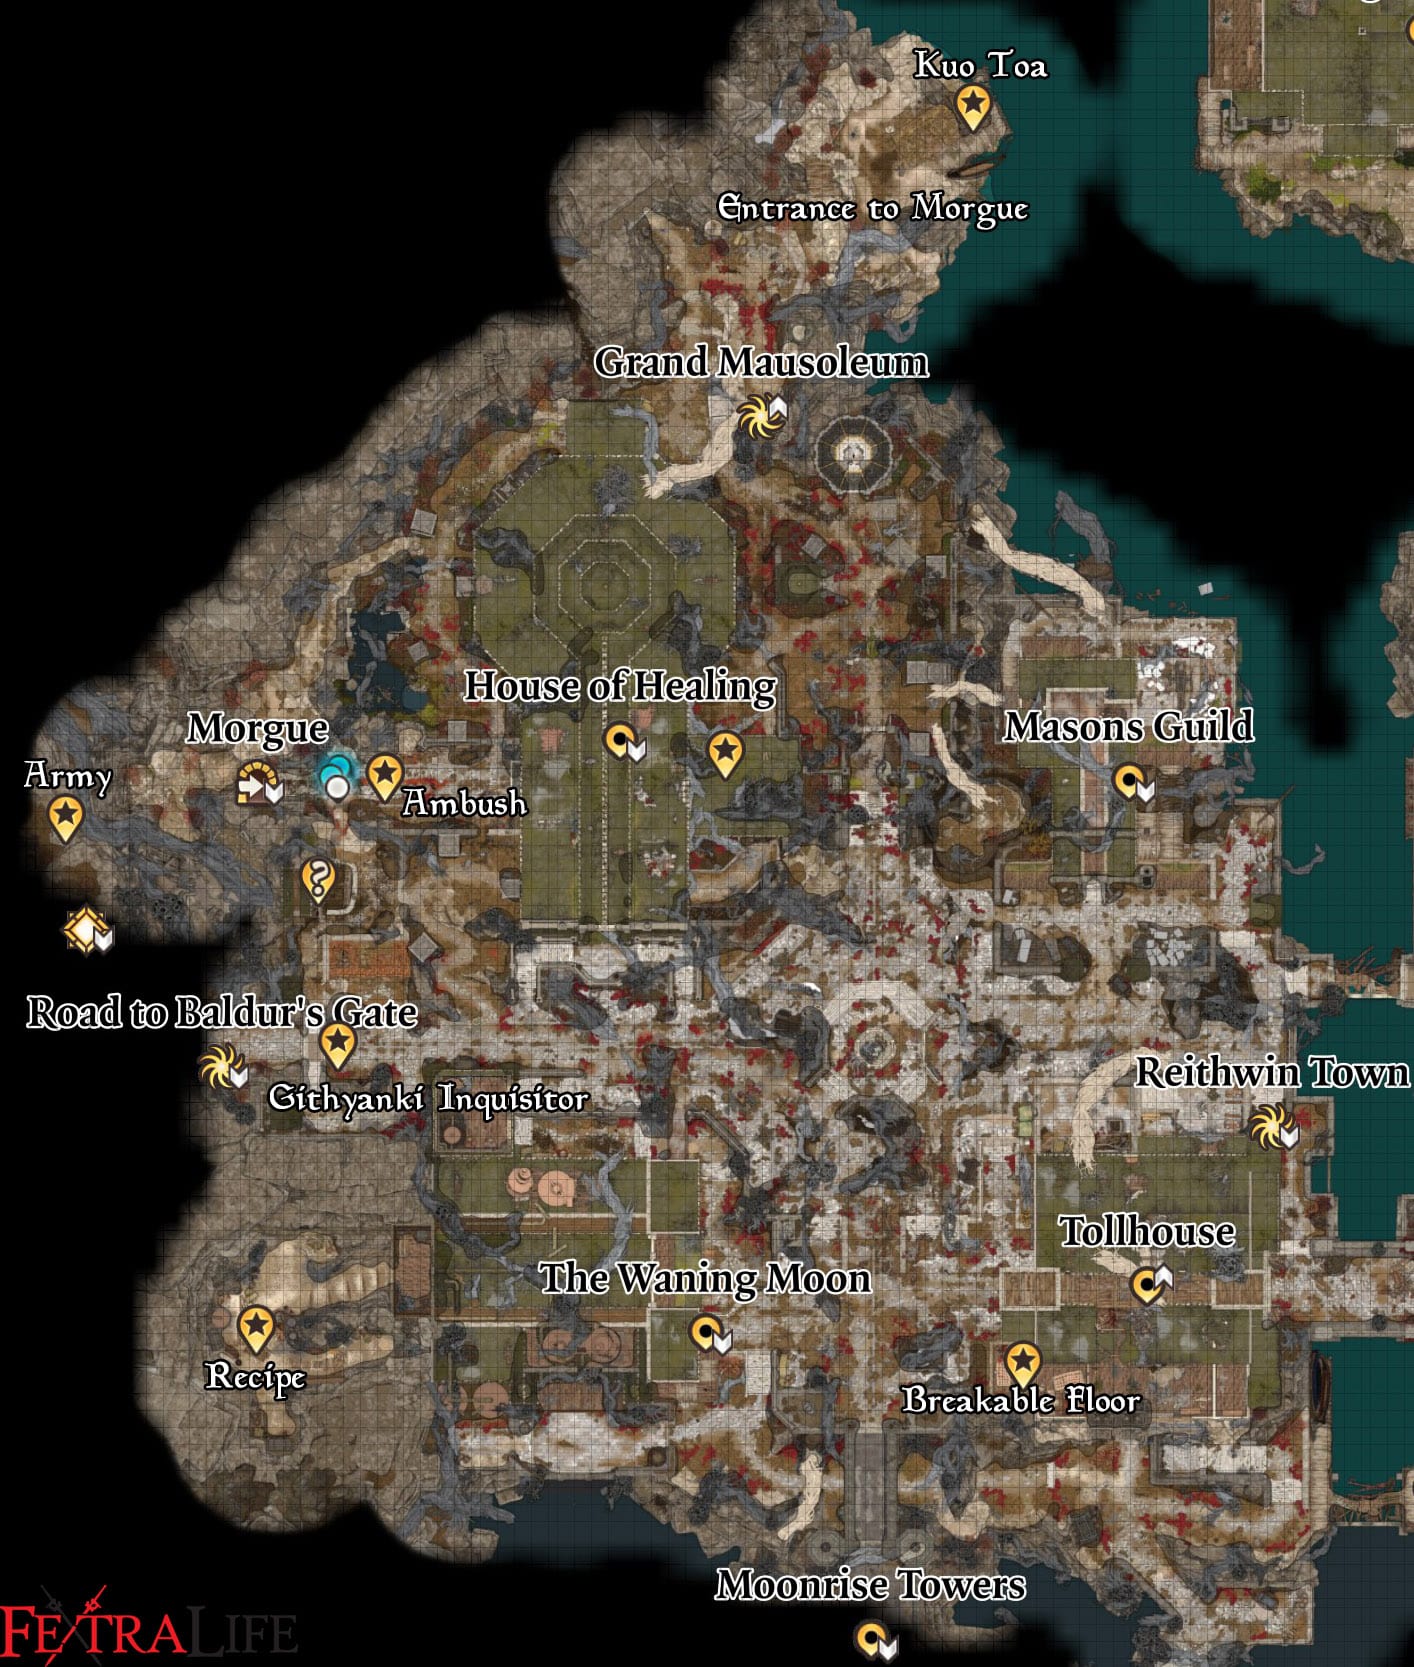



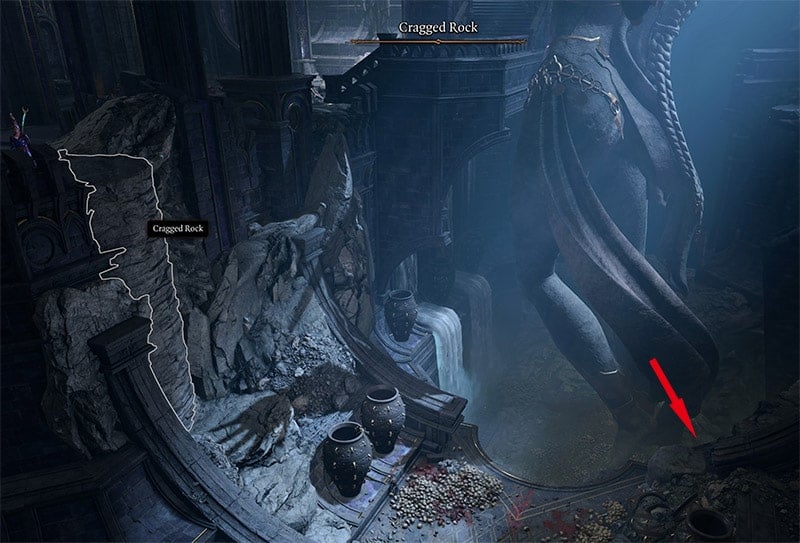

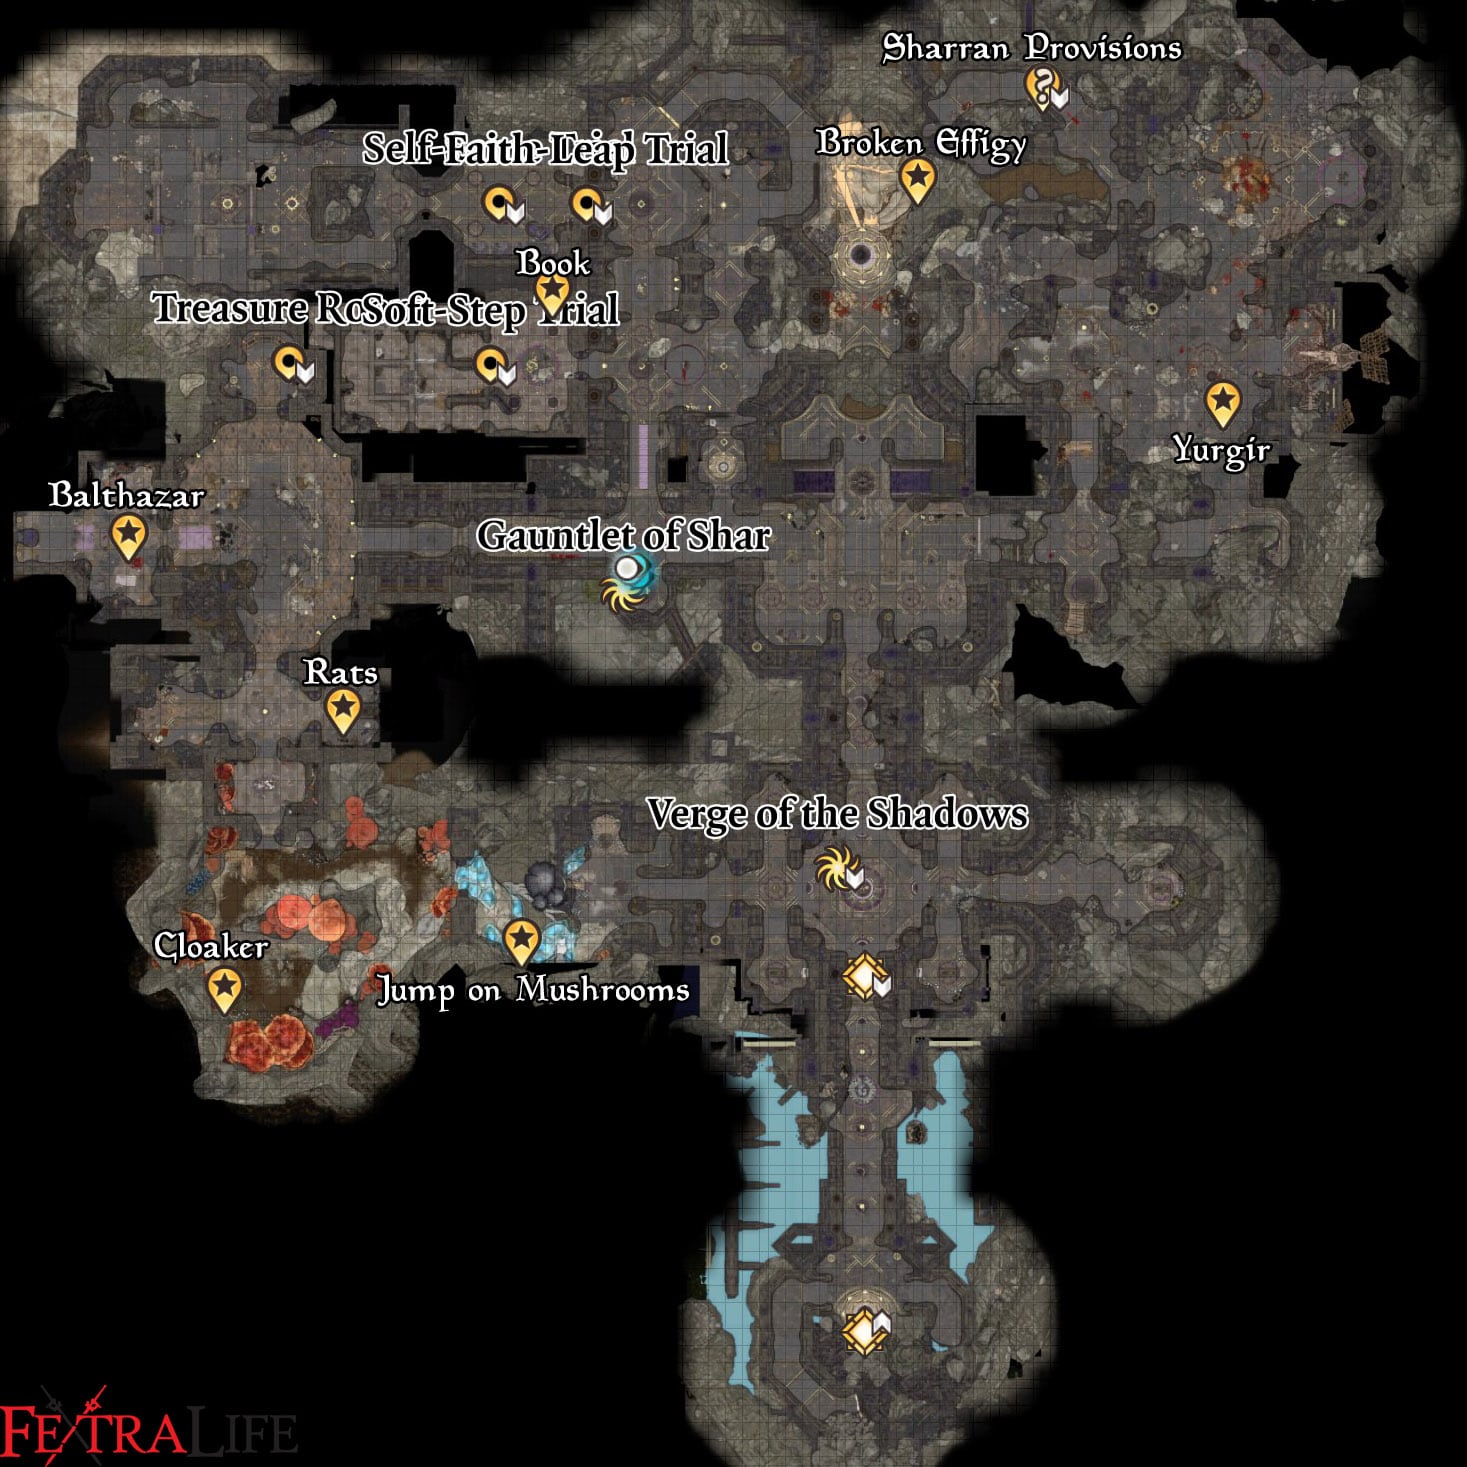
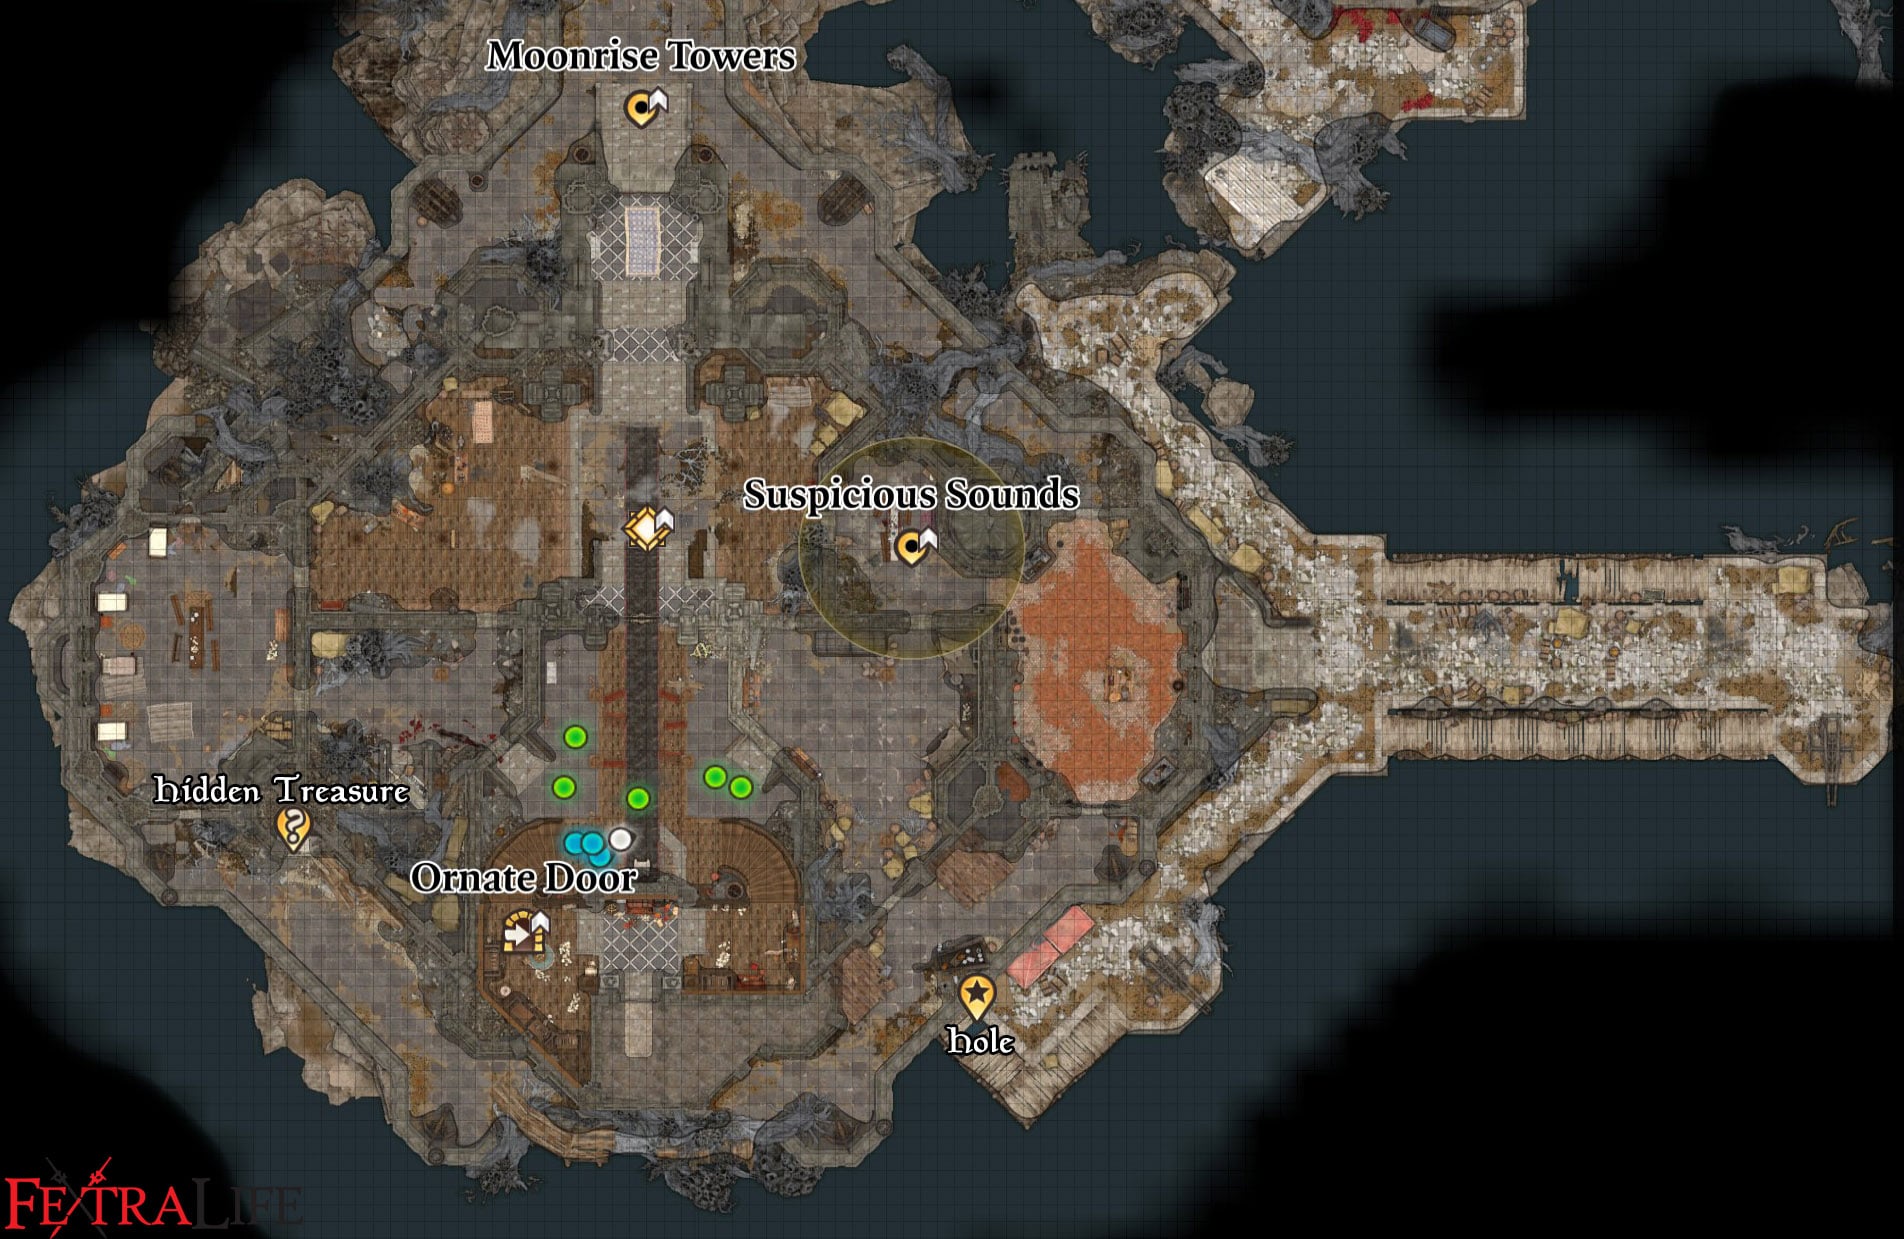
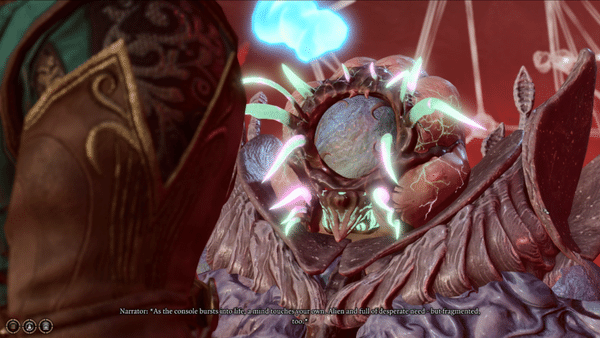
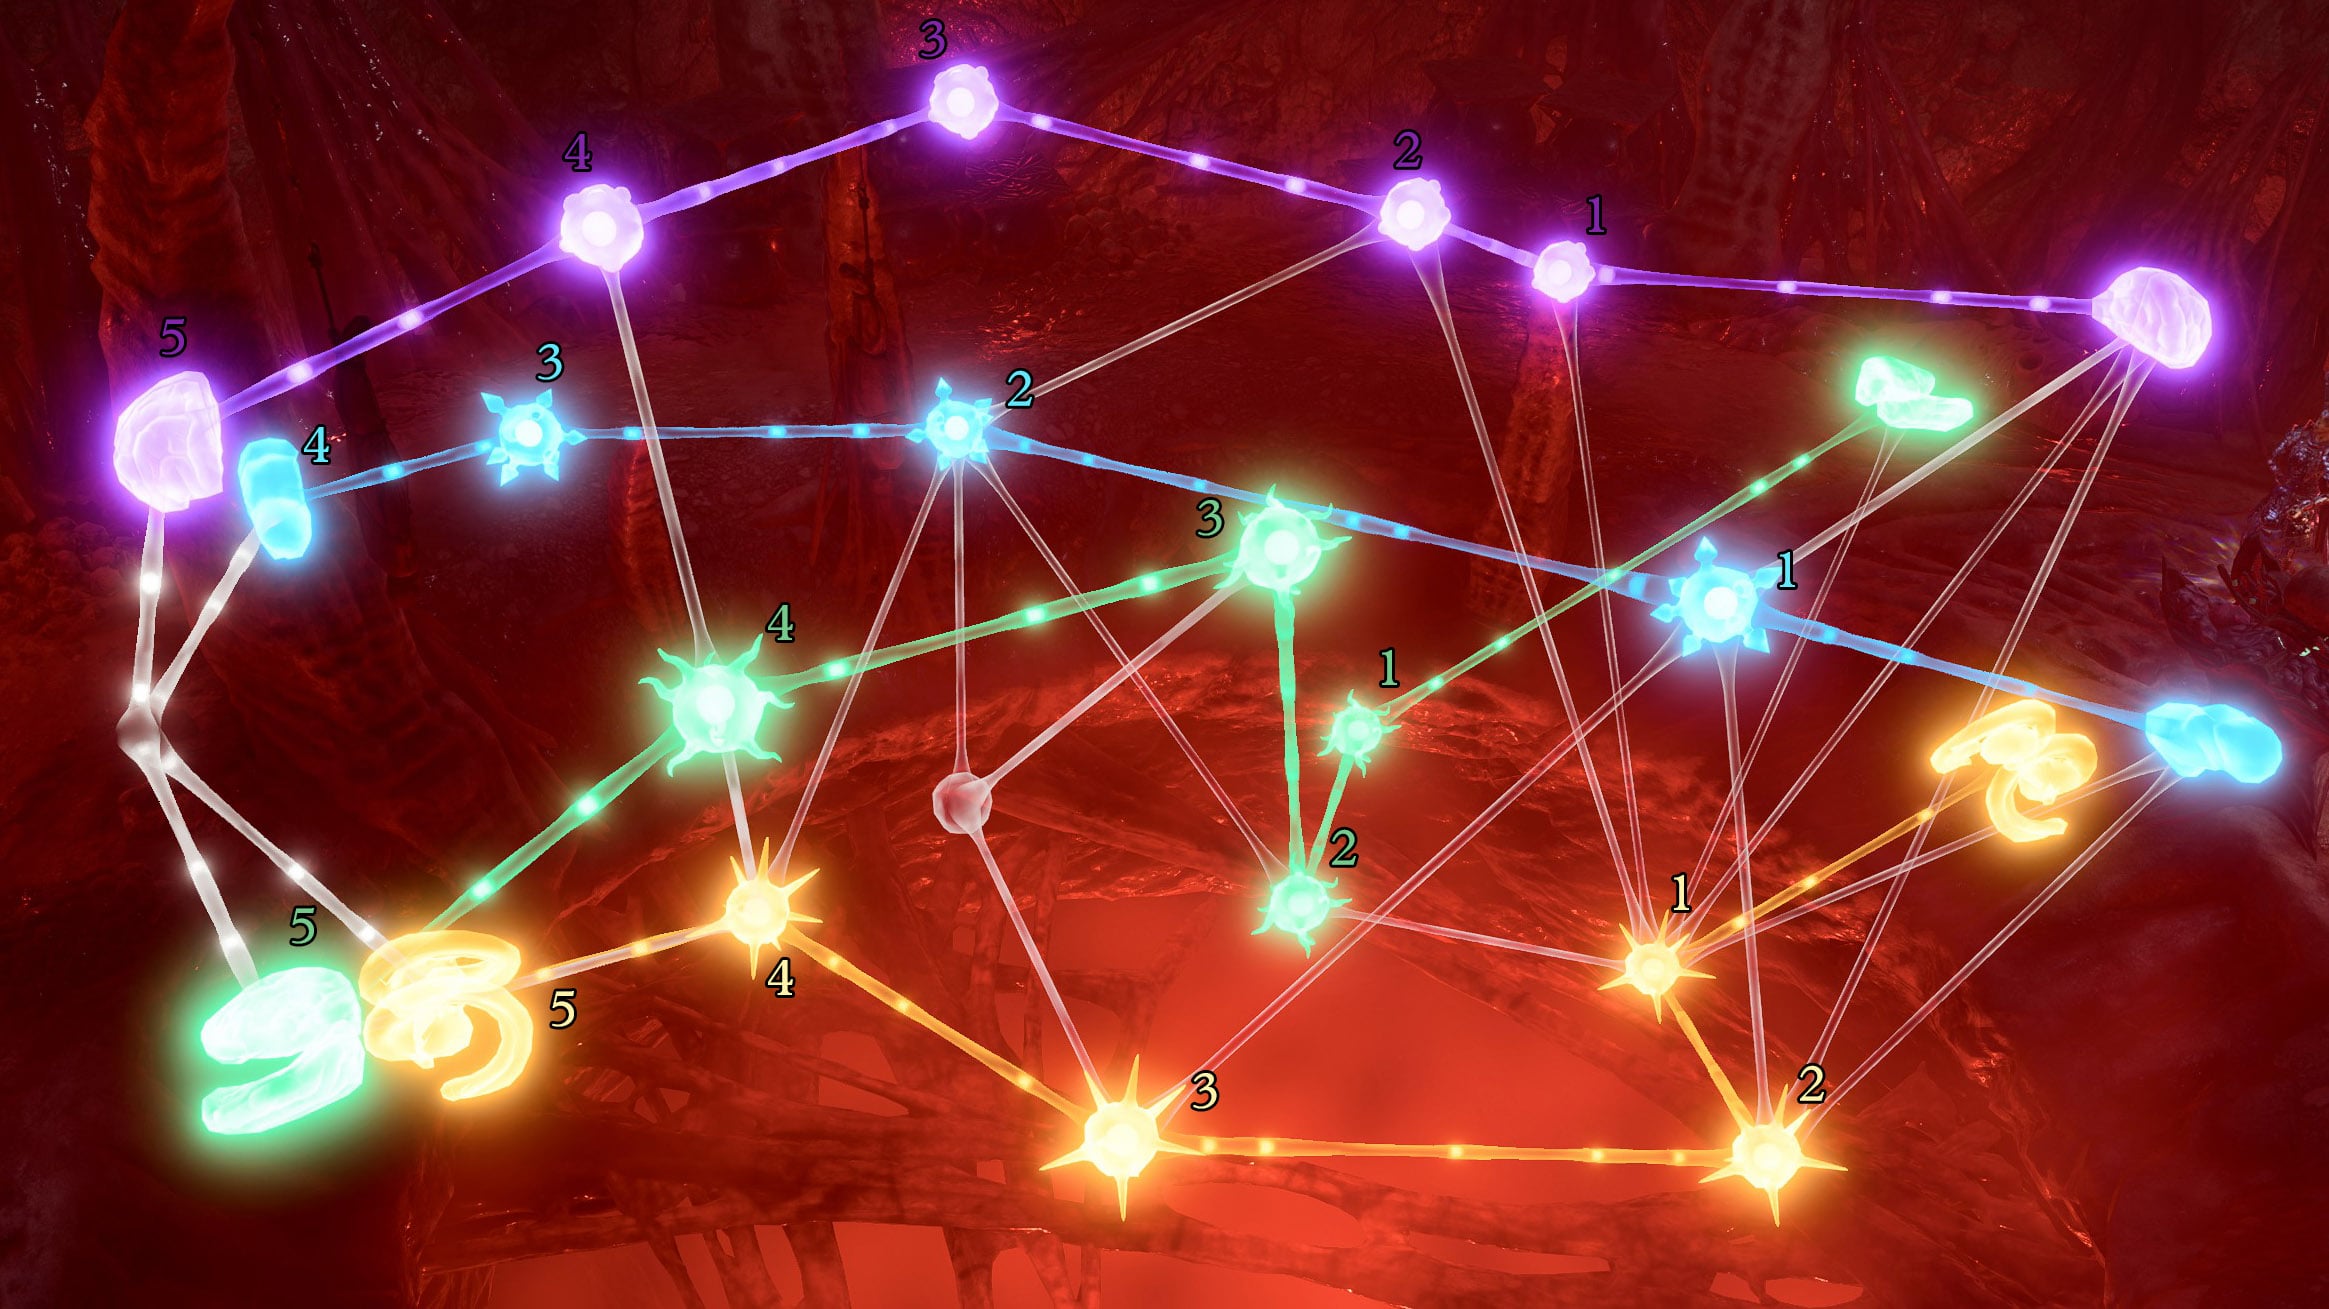
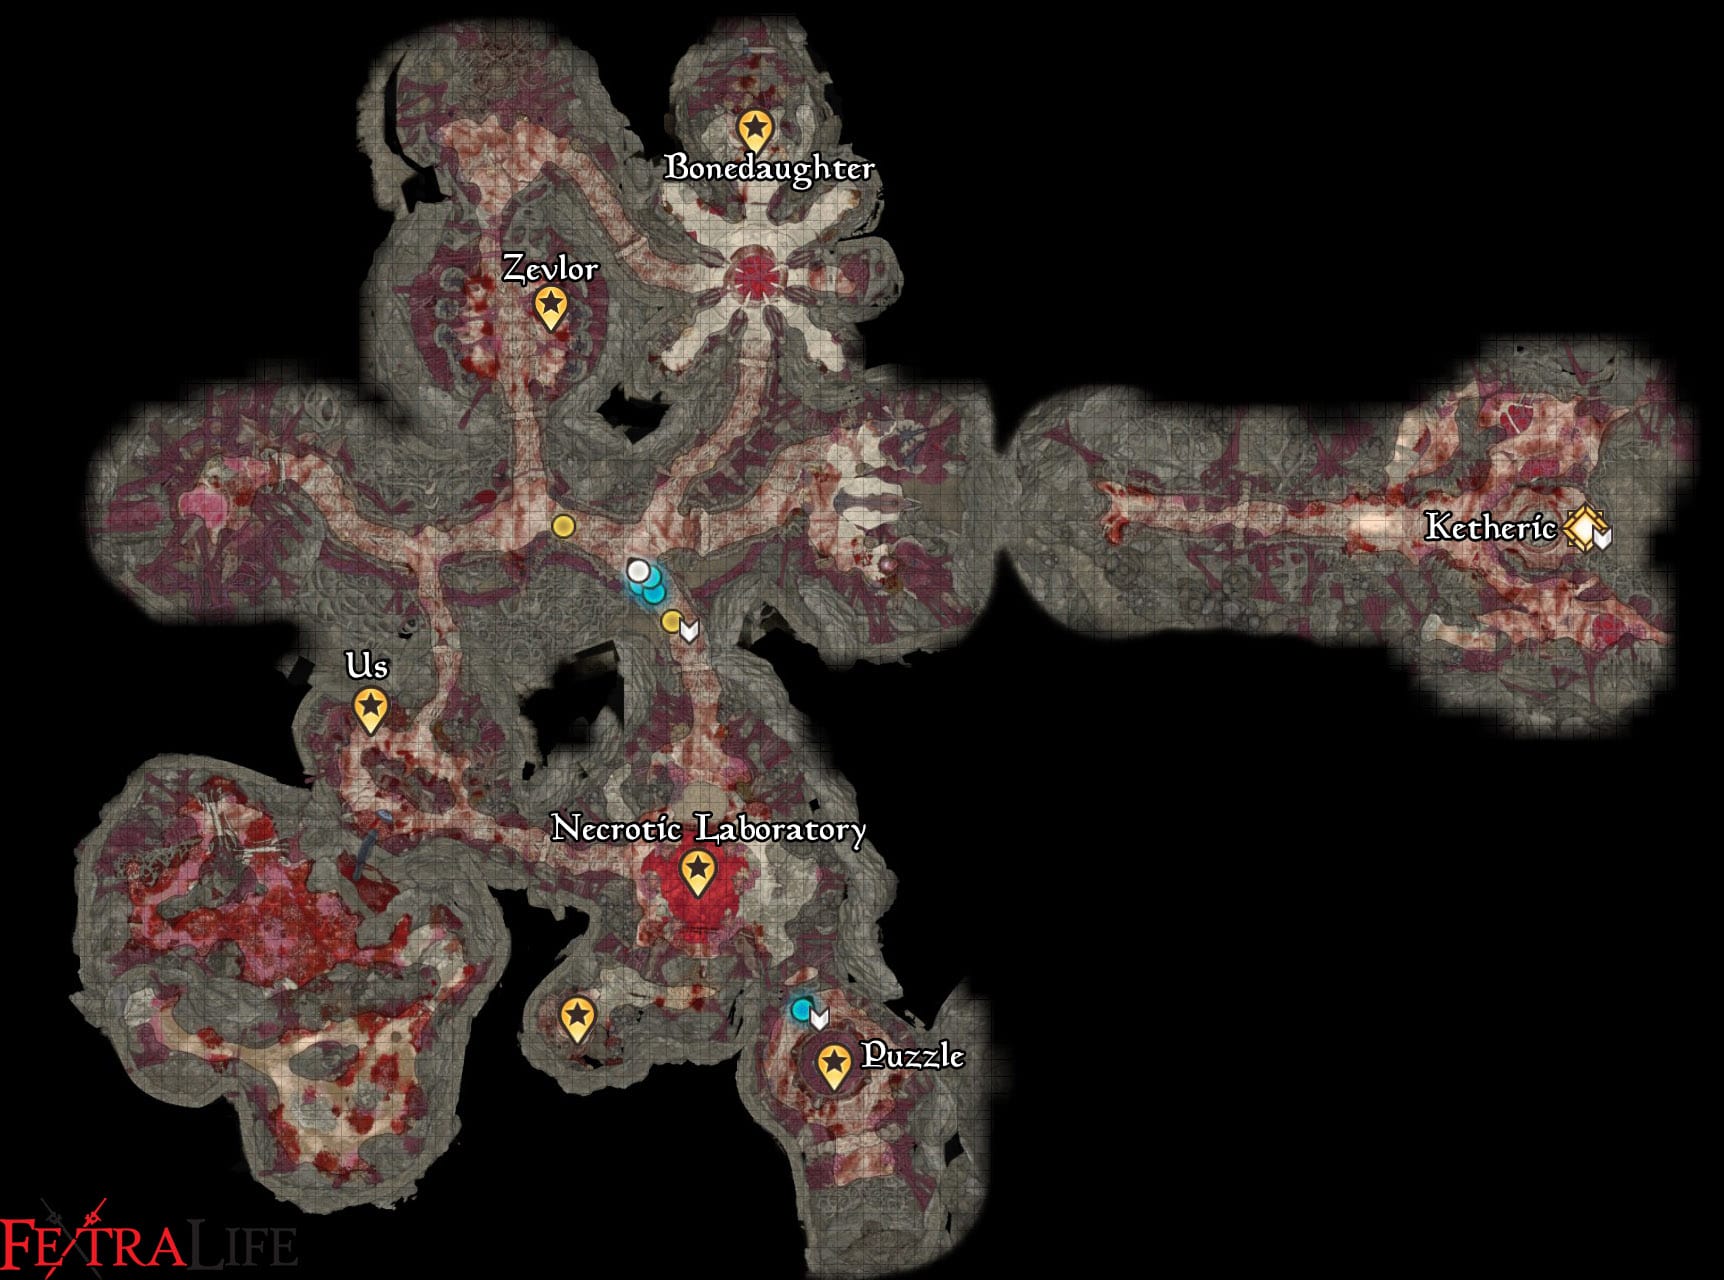
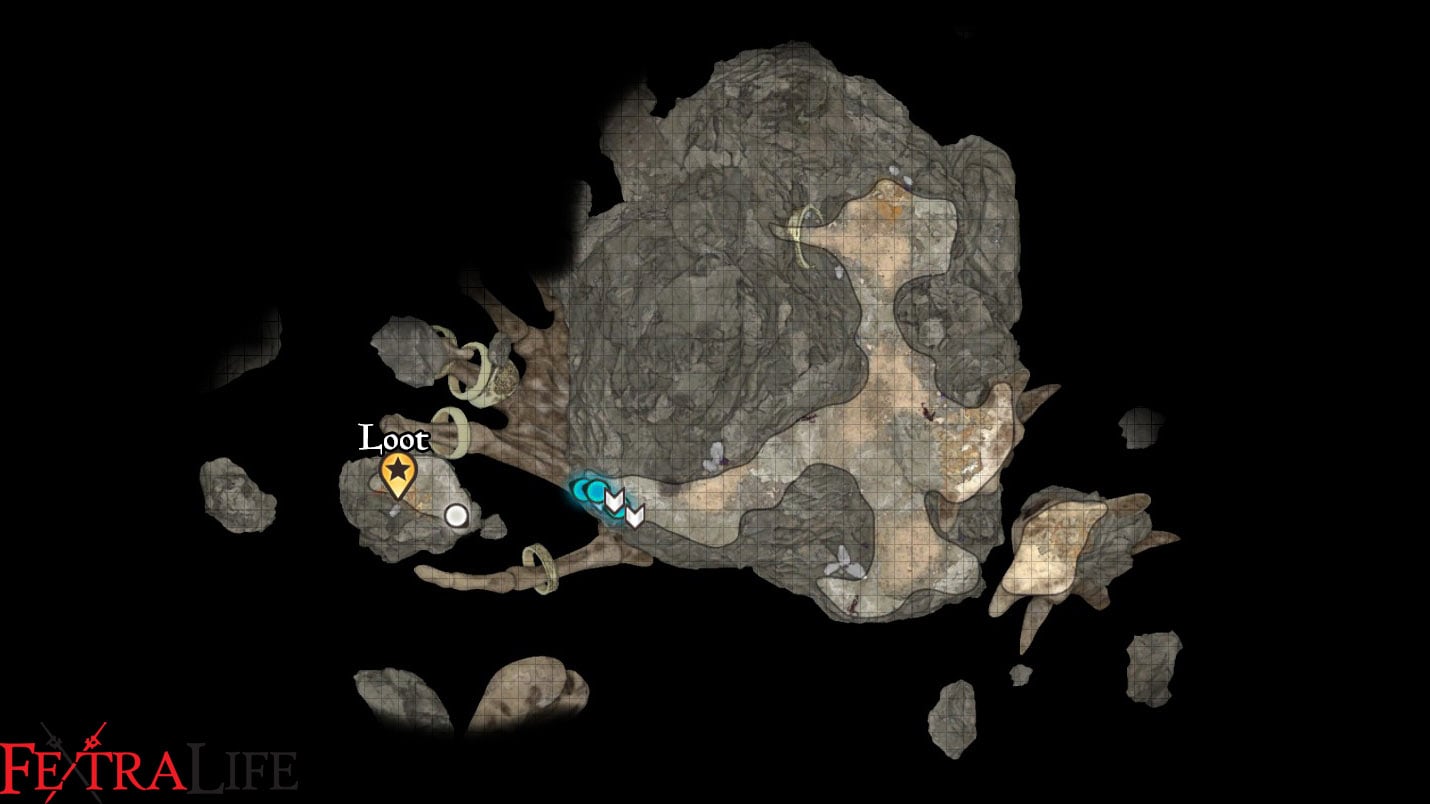
If you use Speak with Animals to talk to the Elder Roethe in the Grymforge (just beyond Stonemason Kith), it has some very interesting things to say about the history of the fortress.
1
+10
-1