Reithwin Town |
|
|---|---|
| [IMG] | |
| ACT | 2 |
| Location | RUINED BATTLEFIELD |
| Suggest Level | 6-8 |
Reithwin Town is a location in Baldur's Gate 3. On this page, you can find related information about the map, quests, enemies, notable items and other useful tips about Reithwin Town.
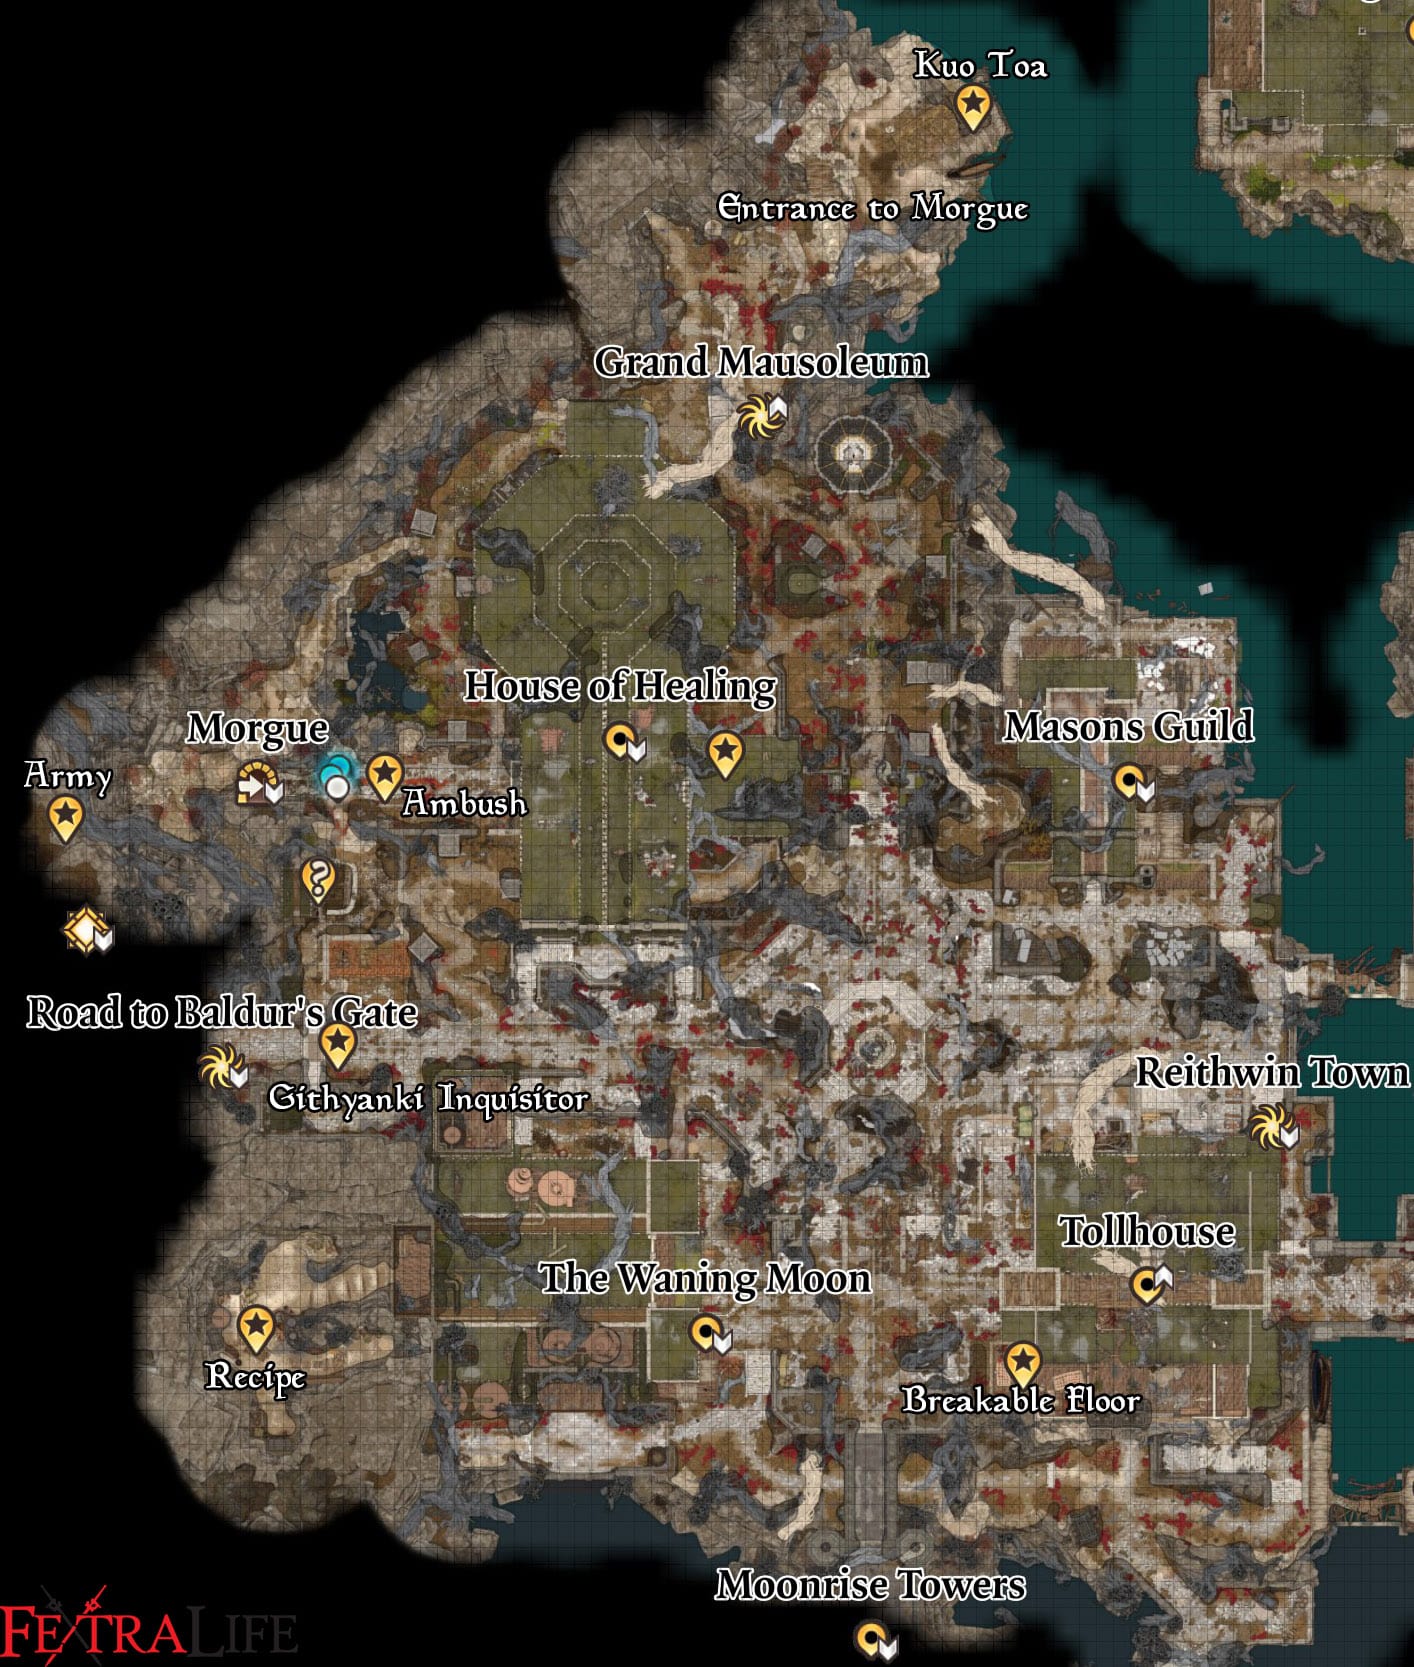
Reithwin Town Map
Reithwin Town Sub-Areas in BG3:
- Grand Mausoleum
- House of Healing
- House of Healing - Morgue
- Mason's Guild
- Reithwin Tollhouse
- Sharran Sanctuary
- The Waning Moon
BG3 Reithwin Town Notable NPCs and Merchants:
- Arabella
- Blighted Patron
- Blighted Troubador
- Gerringothe Thorm
- Raphael
- Sister Lidwin
- Sister Sinda
- Thisobald Thorm
- Visage of Greed
- Visage of Guilt
- Visage of Heartlessness
- Visage of Obedience
- Visage of Regret
Items in Baldur's Gate 3 Reithwin Town:
- Arrow of Beast Slaying
- Barkskin Recipe
- Bided Time
- Boots of Apparent Death
- Crystalline Lens
- Eversight Ring
- Fireheart
- Firzu's Ring of Trading
- Fleshmelter Cloak
- Gloves of Battlemage's Power
- Helmet of Arcane Acuity
- Icebite Robe
- Ichorous Gloves
- Ironvine Shield
- Karabasan's Poison
- Key
- Lush Burgundy
- Madeline's Ledger
- Necrotic Laboratory Spare Key
- Poisoner's Gloves
- Protective Plate
- Punch-Drunk Bastard
- Rat Bat
- Ritual Dagger of Shar
- Strange Tendril Amulet
- Soul Coin
- Supply Pack
- Surgeon’s Subjugation Amulet
- Tollhouse Master's Office Key
- True Love's Caress (X-151, Y43 and X-208, Y-1)
- Twist of Fortune
- Vivacious Cloack
- Worn Key
Baldur's Gate 3 Reithwin Town Quests:
- Infiltrate Moonrise Towers
- Find Arabella's Parents
- Find Ketheric Thorm's Relic
- Kill Raphael's Old Enemy
- Punish the Wicked
- The Chosen of Shar
- The Pale Elf
Baldur's Gate 3 Reithwin Town Walkthrough
BG 3 Reithwin Town Walkthrough Quick Navigation
Click to jump to a specific section of the page
Masons Guild ♦ House of Healing - Morgue ♦ House of Healing ♦ Sharran Sanctuary ♦ Reithwin Tollhouse ♦ The Waning Moon ♦ Grand Mausoleum
Masons Guild
Coming from the eastern entrance, from the Ruined Battlefield, head north along the walls first. In the end, you should be able to find a ladder that will let you climb up and reach a Heavy Chest at (X:-112, Y:0), which contains some potions and valuables. Climb back down and head back toward where you came from, but turn right to enter the paved area at (X:-114, Y:-12). Head inside the door here to a building that has some statues lined up. The table to your immediate right should have a Barkskin Recipe for you to read. If you move forward, there’ll be a pile of bones on top of some concrete. Investigating the plaque below it will inspire you if you have picked the Guild Artisan Background. Head through the door past it to the north and then head to the west side to find an Ornate Wooden Hatch. Enter it to enter the Masons' Guild.

Down here, head up the stairs to the left to circle around the room. At the end of the room, a successful Perception check will reveal a Keyholed Herald on the wall. You can either lockpick the keyhole or use a Tower-Shaped key to open a path in the wall. Follow the path to a Reinforced Gilded Chest. Another successful Perception check will reveal that it’s trapped, but don’t bother ‘cause it’s empty. Move forward and go through the wooden doors to a large chamber with a dining table. Exploring this area will put you in a combat engagement against five Shadows led by a Wraith. The fight shouldn’t be too hard, but be wary of the Wraith. At the southern end of the hall is another Gilded Chest that’s trapped. Its disarming DC is 21, and its lockpicking DC is 14. It should contain the Helmet of Arcane Acuity. On the east side of the chamber on the upper level is a button you can only find by passing the Perception check. Clicking it will reveal another hidden room behind the wall. Inside will be two Armored Chests with some scrolls and potions.

Head all the way back to where you landed upon entering the hatch. Interact with the stone slab connected to the elevator to head up. Up here, cross the bridge of vines to head to the west to a small graveyard. Turn to the left and open the gate. If you were able to save Arabella at the grove, you’ll see a cutscene with her if you talk to her here. It seems touching the idol back then gave her some power over nature. If you ask her where her parents are, she’ll recount how they got separated by the cultist ambush. Afterward, if you tell her you’ll find her parents, you’ll gain approval from Karlach and Shadowheart. Shadowheart will also approve of allowing her to stay at your camp. Move forward to the northeast for a Perception check. If you pass it, you’ll find the True Love’s Caress among the pile of bones nearby. There are Grated Iron Doors to the north that you can lockpick with 10 DC. Inside is a sarcophagus hiding the Boots of Apparent Death. There’s another chamber to the north with two sarcophagi inside, containing the Icebite Robe and some minor items. If you head out and continue your journey west from here, you’ll find a locked oak door. If you ignore the door and head north you’ll come across some Dark Justiciar corpses. Continue along the path to eventually find Raphael. He’ll start you off with a warning in the form of a rhyme, to which you can call out his worry over you. Afterward, you can ask him what dangers he’s warning you about. If you ask him for specifics, he’ll explain that there’s an ancient demon ahead lost to time, and approaching them risks awakening their plague onto the world if you don’t manage to kill it. If you want him to be more specific, you can try to pass a Persuasion check. Afterward, you can do an Insight check to see if he’s hiding anything else from you. Upon further probing, you’ll learn that it’s an Orthon you’re after. Telling him that he’s afraid of this target will have him warn you not to underestimate it. Finally, he’ll assure you that he hasn’t forgotten his end of the bargain about translating the scars on Astarion’s back. Behind him, to the southwest is the entrance to the Grand Mausoleum.
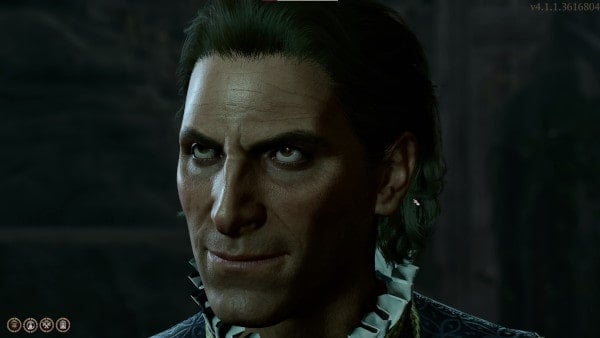
Head to the east after your conversation to find some graves you can loot for some gold, valuables, or maybe even Scrolls. You can go down the ledges past the graves onto a bridge going north. As you climb down the crevices here, you'll do a Perception check. Passing it will make you aware of the Cursed Kuo-Toas who are hiding and waiting for the right time to strike. Prepare accordingly and then surprise them and enter a combat engagement against thirteen Enemies in total, led by a Cursed Kuo-Toa Chief. The minor Enemies won't really be too hard to take down with their small health pools, but the Chief will have a health pool closer to your party's. Take care of the little ones as quickly as you can so you can begin focusing on their leader. After defeating them, loot as much as necessary before you move on. There's a Wooden Chest inside the hut with a substantial amount of gold.
When you're done, head to the south and enter the Ominous Crevice at (X:-150. Y:105), which will bring you to the House of Healing - Morgue.

House of Healing - Morgue
Follow the path down and jump the gap to find a Gilded Chest, with a lockpicking DC of 14, containing the Fleshmelter Cloak. Jump back and then follow the path east to go down to the lower area. Be ready for a fight, as you'll be ambushed by three Fetid Oozes and a Hollow Armour when you reach the lowest level. This fight shouldn't be too hard, but be careful not to have whoever deals the finishing blow on the Hollow Armour be too weak, as the Enemy gets replaced by a Shadow when you defeat it. After the fight, you can loot the Hollow Armour for a Protective Plate.
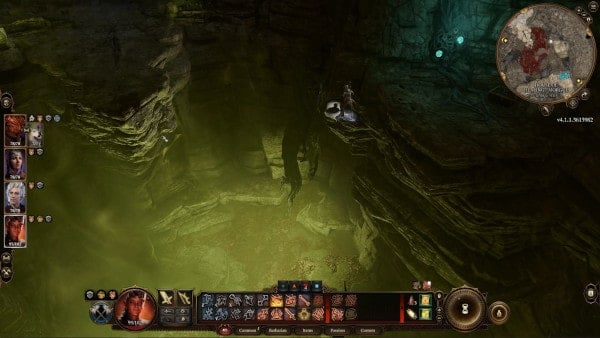
After the fight, you can head back up to the Gilded Chest, and then if you or anyone in your party has a Spell or item that can help them jump to the ledge to the southeast, you can explore the actual morgue to the south. After jumping the gap, head up the stairs and click the button below the statue to the right to open the metal door. When you enter the actual morgue, a combat engagement will start against three Zombies and three Greater Zombies. This shouldn't be too difficult either, but watch your health because poison gas will spread across the room as the fight continues unless you disarm each and every vent.
After you defeat them, head to the south side of the room to find double doors. The Wooden Caskets inside are empty, but the Heavy Chest, with a lockpicking DC of 14, contains the Bided Time. The Research Notes on the desk will show some thoughts on how to possibly dispel the shadow curse. You can loot the corpse nearby for the Necrotic Laboratory Spare Key, along with some valuables. Reading Olam's Journal on the other desk will inspire Shadowheart. When you're done, exit this room and head to the far west side of the morgue.
The door here will open with the key you just picked up. There's Karabasan's Poison on the desk to your left, and a successful Perception check here will reveal a lever in between the two desks. The Tissue and Organ Register will reveal the head surgeon to be Ketheric's uncle. The shelves ahead will have a variety of potions for you to pick up. Finally, there's a trapped Opulent Chest in the northwest corner of the room. Both its disarming and lockpicking DCs are 14, and it contains the Eversight Ring.
To exit the morgue, you can either go back the way you came or head first to the eastern edge of the larger room. Exit through the double doors, and then head up the short staircase. A successful Perception check will reveal a button on the wall. Pressing it will reveal a hidden room in turn, as the wall slides away. The charred corpse to the right is carrying Firzu's Ring of Trading, while the chest ahead of you contains the Strange Tendril Amulet. When you're done, you can head up the stairs to the east to exit the morgue.
House of Healing
When you're done with the Morgue, teleport to the Grand Mausoleum Waypoint, or exit the way you first came in. Head west past where you talked to Raphael, and then you can head back to the locked oak door, which is an entrance to the House of Healing. It will have a lockpicking DC of 10. Inside should be a Key on the table. The Painted Chest on the right should have a pair of Poisoner’s Gloves. You can open the door to the west with the Key you just picked up. Head through the double doors to the south and down the stairs for a scene.
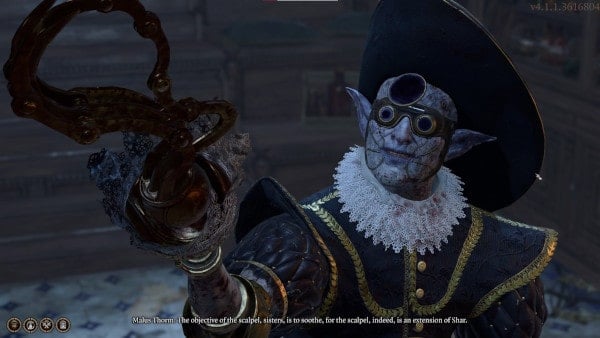
You’ll walk in on Malus Thorm teaching his nurses. He’ll bid you to come forward and feel free to take in his lessons as well. You will have the following options to respond, with possible minor differences based on Class:
- I don’t wish to study, only to lift the curse on this land.
- A student, yes. Do please enlighten me.
- You will stop this sick spectacle at once.
- What wrong has this man done to deserve such torture.
- Attack.
All above dialogue options will eventually lead to the below choices, again with possible differences based on Class. After his ode to Shar, he’ll offer to cure you to, to which you can respond with the following:
- [INVESTIGATION, DC 14] Examine the sisters and their implements. (Rogues will have advantage on this check)
- [RELIGION, DC 16] Recall what you know of Shar’s teachings. (Shadowheart: The Goddess has greater plans for me than to submit to your scalpels.)
- [PERSUASION, DC 16] The sisters aren’t ready. They’ll make me sick instead of curing me.
- Attack.
A successful check on any of the above will lead to Malus pondering how to better train the nurses. If you have NOT read the book "Surgery and Physiology: A Sharran's Primer" found in the small room at the rear of the House of Healing (X: -199 Y: 78) you will have the following choices:
- [PERSUASION, DC 21] The sisters require a willing volunteer, a master of the art. - Outcome: Nurses kill Malus (Nurses will be neutral)
- [PERSUASION, DC 21] Why not have them hone their skills on each other? - Outcome: Malus orders nurses to kill each other.
- [ROGUE][PERSUASION, DC 21 + Advantage] Practice - that's how I got good with a blade. They should spar with each other. - Outcome: Malus orders nurses to kill each other.
- Attack
If you HAVE read the book "Surgery and Physiology: A Sharran's Primer" found in the small room at the rear of the House of Healing (X: -199 Y: 78) it will unlock a different conversation path:
- [INTIMIDATION, DC 18] I have read your treatise. Initiate the final lesson, or die by my hand. Outcome: Nurses kill Malus (Nurses will be neutral)
- [PERSUASION, DC 18] "Only with sacrifice is mastery gained." For the sisters to learn, you must submit. Outcome: Nurses kill Malus (Nurses will be neutral)
- [PERSUASION, DC 21] Why not have them hone their skills on each other? - Outcome: Malus orders nurses to kill each other.
If you successfully persuade Malus to have the nurses turn on each other, he now wishes to acquaint you with Shar. There will be a final dialogue check, again, different based on Class which all result in Malus killing himself, if successful:
Shadowheart: [CLERIC][DECEPTION, DC 21 + Advantage] You do me an honour, but I am not worthy. Show me the way of Shar - I beg of you.
Sorcerer: [SORCERER][DECEPTION, DC 21 + Advantage] My magic has blinded me - I see now that Shar is the only path. Show me how - I beg of you.
General/Default: [PERSUASION, DC 21] I would rather acquaint myself - if you show me how
Failing any of these checks will result in the start of a combat engagement against Malus and the sisters. This can be a difficult fight, and they’ll all have a sizable amount of health points, so be strategic. Defeating Malus will reward you with the Surgeon’s Subjugation Amulet from his lifeless corpse. If you head upstairs and to the southern end of the hall, you’ll spot a button to activate a narrow elevator. The door leading to the library will have a lockpicking DC of 10.
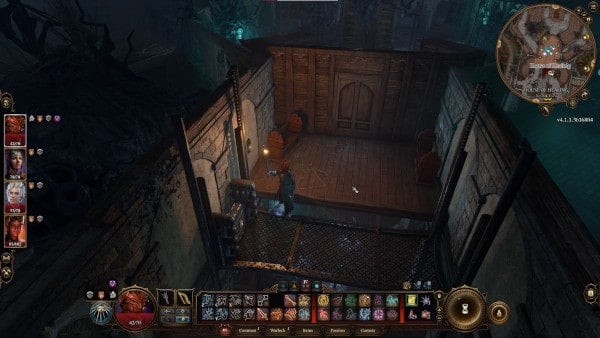
Head to the left first to a Gilded Chest hidden behind the corrupted flora. It has a lockpicking DC of 10 and contains valuables and potions. Follow along the circular path to spot another Gilded Chest with the same DC containing some materials, valuables, and notably a Crystalline Lens. You can then exit out a window in the northwest corner of the room. Up on the roof, move some distance along the right and then enter the compound and to a hall-like structure to the south. Hop on the planks and then move along the wooden purchase until you find a ladder on the east side.
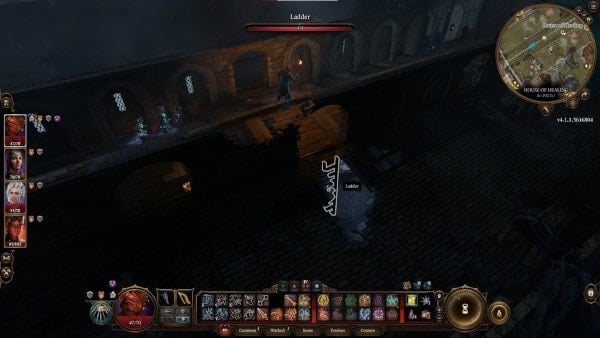
Down here, at the southwest area of the large room, you can find Sister Sinda. Look for a door at (X:-184, Y:11) at the east side of the chamber. Inside you can find Sister Lidwin, seemingly tending to two Tieflings. Unfortunately, if you have the Quest Save Arabella’s Parents active, you’ll recognize them to be Arabella’s mother and father. If you talk to Sister Lidwin, you can ask her why she’s treating dead people, and she’ll clarify that they’re just medicated. You can do a Sleight of Hand check to poke them and see how she reacts. The slight movement will make her think they’re alive, confirming the nurse to have already lost her wits, and that the parents are indeed dead. If you’d like to, you can purchase supplies from her though. She’ll have the following among her wares:
- Purple Worm Toxin
- Potion of Invisibility
- Karabasan’s Poison
- Wyvern Toxin
- Remedial Potion
- Drow Poison
- Various other minor items
From here, you can head all the way to the south and exit the House of Healing that way.
Sharran Sanctuary
Once you exit the House of Healing, head to the east and look for a structure that looks like a small crypt, lying in the central area of the Reithwin Masons' Guild, in the middle of the House of Healing, Reithwin Tollhouse, Masons Guild, and The Waning Moon. Once you go near it, you’ll start a combat engagement with three Shadows, and some corrupted harpers guarding it. Defeat them and then loot them as needed. As you approach the structure you’ll notice something clicking underneath the plaque nearby. Successful Perception checks here will reveal the same thing about the rest of the plaques around the structure. For this puzzle, you’ll have to click the three plaques in the right order, in order to fully form the broken words that they show. First, you’ll want to click on the plaque to the north, then to the west, and finally the one in the east. The full line should read: “OUR LADY OF LOSS MISTRESS OF PAIN WHEN NIGHT FALLS THORM SHALL RISE.” Successfully solving the puzzle will open a pathway into the structure, leading into the Sharran Sanctuary. Note that this area will grant you bonuses that will only last until you take a Long Rest. The boons can help when exploring Reithwin Masons' Guild, or it can help with the story events, so tackle this whenever strategically beneficial for you.

After heading down the stairs, examine the first plaque below a statue of Shar holding twin blades. It’ll ask if you’re ready to take on a test of intellect. You’ll have to pass an Intelligence Saving Throw here, but if you do you’ll get a free +5 bonus to your Intelligence, active until you take a Long Rest. The next plaque will ask you to do a Wisdom Saving Throw to get a +5 bonus to your Wisdom, also active until you take a Long Rest. Finally, the plaque under the central statue will ask you to do a Charisma Saving Throw to get a free +5 bonus to your Charisma until you take a Long Rest. If you are a Warlock, you’ll gain Advantage on this roll. If you brought Shadowheart with you here, she’ll be inspired by you honing the darkness.
Being successful in all three Saving Throws will open an arch to a room on the east side of the chamber. Examining the Shar Altar at the end will have you do a Religion check. Passing it will give you the option to carry out a short Sharran ritual, that’ll allow reward you with some scrolls, potions, and elixirs. Trying to take the Ritual Dagger of Shar for yourself will initiate a combat engagement against three Sharran Sentinels. If your character is of the Guild Artisan Background, they will get inspired by this act.

The three sentinels can be quite formidable, but the Enemies don’t increase in number so the fight shouldn’t be too difficult. The Intelligent Sentinel will be the easiest to take out and can cast Spells from afar, so if you can focus on them first, do so. Eventually, they’ll fall and you’ll be free to pick up your reward for undergoing the Sharran ritual.
Reithwin Tollhouse
Head up the stairs to exit out of the sanctuary. From here, head to the east looking toward the south for an arch covered with red flora. You can enter the arch to enter the Reithwin Tollhouse from its northern side. The Reithwin Tollhouse can be found in the southeastern area of the Reithwin Masons’ Guild. You can also get to it by going to the southwestern corner of the Ruined Battlefield and entering from there. Passing the arch here will have you enter the northern entrance of the tollhouse.

Continue down a short set of stairs to the east to reach some double oak doors. Inside will be a large spacious hall. There will be some gold scattered around, along with some floating skulls called visages that you can talk to if you want. When you’re done exploring, you can head for the makeshift bridge made out of large vines, connected to some stairs at (X:113. Y:-64) that lead to the upper floor. Once there you’ll see the corrupted toll collector, Gerringothe Thorm, skulking about and looking for gold. When you get close, she’ll ask if you brought anything to pay the toll. You’ll have the following options to respond with:
- Who are you?
- What do you require?
- I will bring an end to the curse that shrouds this land.
- I bring… wine?
- I bring you death.

Choosing the second option will have her answer that she requires gold. You’ll then have the other options to converse further:
- It seems to me you have enough.
- If I give you gold, what do I get in return?
- Toss the creature a gold piece.
- Attack.
- Leave.
Choosing the first option will just have her reaffirm that you have to pay anyway, and the option will be replaced by an option to say that you do not have any more gold. If you ask what you get in return for gold, she’ll say she’ll allow you to pass, and then you’ll have the remaining options to pick. If you toss her a gold piece, she’ll consume it into herself, but she’ll want more than that. You’ll have the following options to proceed:
- Toss the creature another gold piece.
- How much do you want, exactly?
- I don’t hand out so much gold for so little in return.
- Attack.
- Leave.
If you choose the first option, she’ll want more again. If you choose the second option, she’ll say that she wants all your gold. The first two options will then be replaced by giving her all your money, which Astarion, Shadowheart, and Karlach will disapprove of. If you give her a minimum of 5000 gold (not counting the gold pieces you throw to her), she will state that you may pass, and you will be awarded experience equal to the amount you get for defeating her and her visages, as well as a Signed Trade Visa. If you do not pay her at least 5000 gold, and defeat her, she will drop an Unsigned Trade Visa which cannot be used. If you have any less than 5000 gold, you will be put into a combat engagement against her and all the visages in the tollhouse.

If you give her over 5000 gold and she doesn't attack you, your gold can then be pick-pocketed from her, with a DC20 sleight of hand check. Note that she will also drop some of your gold while she is walking, and might also put some of it into the safe with the broken door.
If at any point you fight her, she will likely start at the top of the turn order due to her alert feat, and cast a spell which deals damage to you based off of how much gold you are carrying, making it more practical to take your gold off of her body instead of stealing it back first. She also has a very large health pool which can be reduced by killing the nearby visages, each one causing a fragment of her armor to break, and making her drop a maximum of 100 gold per piece, reduced by the amount of damage you do to her prior to breaking it. Once all visages are killed she will be left with 7 hp.
If you instead say that you’ll get so little in return for all this gold, she’ll restate that she can let you pass if you pay her the gold, like a broken record. However, this will give you the following new options to respond with:
- Fine. Take it all.
- Toss the creature a gold piece.
- I’ve already paid.
- You’re a toll collector. Or you were, anyway.
- [PERSUASION] Why stay in this rotted building? Take your gold and be free.
- [ROGUE] [PERSUASION] The ‘toll collector’ scam is old and uninspired. Give it a rest - figure out a new trick.
- [WARLOCK] [PERSUASION] Gold is such a limited desire. With the right help, you could become so much more.
- [DECEPTION] I’m here to replace you as toll collector.
Choosing the sixth option if you’re a Rogue or if you have Astarion speak with her will give you the following options after she denies it is a trick:
- [DECEPTION] Yes, a trick - you’re a trickster! You don’t deserve the gold!
- [PERSUASION] Look, I’ve run this scam myself - I know it’s a trick. A basic one at that.
- [INTIMIDATION] I require passage - or your throat will be cut.
Choosing the first option and passing the Deception check will have her come undone and collapse in the weight of her debt as she process having tricked people for all her gold.

Choosing the sixth option if you’re a Warlock will give you the following options after she claims that the gold is for the toll and not for her:
- [PERSUASION] Says who? Seems to me there’s no one here to oversee you.
- [DECEPTION] Haven’t you heard? The local authority has decreed the gold belongs to the toll collector - you.
- [INTIMIDATION] Not anymore.
Choosing the first option here and passing the high DC Persuasion check will have her repeat the word “gold,” a few times before just giving up and claiming that she’ll pay all the gold back. Choosing the seventh option from the previous choices and being successful on the Deception check will give you the following options to follow up with after she says no:
- [DECEPTION] You’ve been promoted! You’ll collect gold from a much better tollhouse.
- [PERSUASION] You’ve done a great job here. Really set the standard. But I’ll take it from here.
- [INTIMIDATION] You dare to question their decision? Leave this place at once!
Choosing the second option next will have you risk a Persuasion check with a whopping 21 DC. However, if successful, it will have Gerringothe self-combust as she tries to come to terms with being on the other side of the business and having to pay back all her gold. Choosing the third option here and passing the steep Intimidation check of 21 DC will have the added bonus of Astarion’s approval as she buys the act and pays all her gold back. Regardless of which path you took, your efforts will gain Karlach’s approval, and you can now loot her body for your reward - all her gold, the Twist of Fortune, and the Tollhouse Master’s Office Key. She’ll also drop a lot of gold on the floor all around her so make sure to get those before moving on.
The Stuck Safe Door near her will open if you pass a Strength check and will contain a large sum of gold. A bit past her at (X:-112, Y:-92) will be some double doors which you can use the Tollhouse Master’s Office Key to unlock. If you move forward and are successful with the Perception check, the floor ahead of you will be revealed to be rotten. Before you do anything to it, the Heavy Chest to the left will have some gold and the Ironvine Shield. If you’re of the Guild Artisan Background, you’ll be inspired by the craftsmanship of the shield as you take it.
Attack the rotten floorboards to drop down to a lower level where there’s a Wooden Chest containing some more gold and some alchemy materials. The Gilded Chest beside it has an Arrow of Beast Slaying and an even bigger amount of gold. Behind you and as you turn the corner to the right, a successful Perception check will reveal a button on the side of the wall. Clicking it opens up the wall to a curious dead end. Head back out of this room and then cross over to the east side of this second floor to some double oak doors. Pick its lock open to get to an Opulent Chest with a lockpicking DC of 10 containing the Gloves of Battlemage’s Power. Head back out and then keep going to the north to find an open room to your right will two Traveller’s Chests which contain some materials and more gold. Head out of the room and then continue to the north to find another Opulent Chest containing more gold.
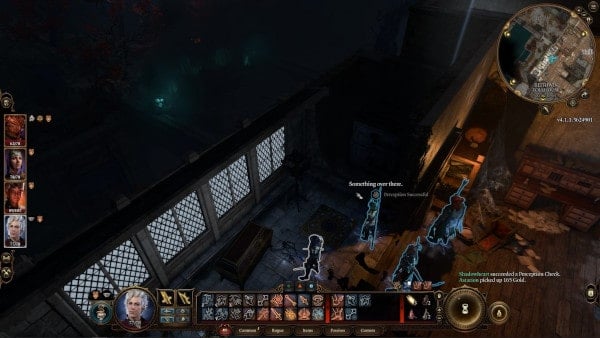
To its immediate right is a safe hidden in the corner. A successful Perception check here will reveal a note tucked in between the bricks which reveals that someone attempted to hide in the safe, leaving the combinations for it in the note. You’ll then be able to easily open the safe and find the bones of the note’s author, along with their puch containing a Supply Pack. Turn around and head back to the south, and then turn right when you reach the middle of the tollhouse.

You’ll eventually reach a ladder. A successful Perception check will highlight a plaque that says there’s an inventory room blocked off by the roots. To get there, head up the ladder and then a short distance to the west. Another successful Perception check will reveal the collapsed floorboards. Hit it with any attack and then drop down to the inventory room. You’ll find a Greateaxe +1 along with a scroll or two. The locked Heavy Chest can be lockpicked for 14 DC and will contain the Fireheart. From here, you’ll have to get down to the ground outside and then head back inside the building. Look for the door leading to the southern exit and then go down the stairs.
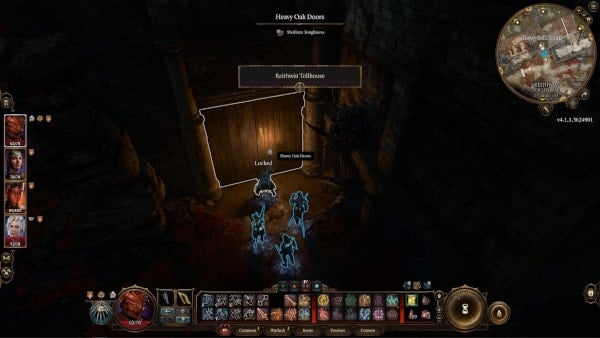
Follow the path to the west and eventually, you’ll find some heavy oak doors at (X:-106, Y:-104). It’ll have a lockpicking DC of 12 and will lead to an area underneath the tollhouse building. The Heavy Chest on the cart will have some Lush Burgundy and gold. If you move forward, a successful Perception check will reveal a button on the left wall. Pressing it will reveal a path through the bookcases. You can read Gerringothe’s Logbook for a short note revealing her overpriced toll business was taking a hit because people were getting scared of Ketheric and the war. There’s plenty of valuable on the other desk, including a Soul Coin. The Gilded Chest contains an assortment of liquids and some gold. You can head down the roots to a lower area for some alchemy materials, and a few coins if you’d like. Otherwise, there’s nothing else for you at the Reithwin Tollhouse. The path further down south here leads to a side entrance to the Moonrise Towers.
The Waning Moon
Head back north into the tollhouse building, and then exit it to the west. If you head south on the paved path, you’ll find the Waypoint for the Moonrise Towers, as well as the path that will take you into the area. From here you can head to the west to find The Waning Moon, which can be found in the northwestern area of the Reithwin Masons’ Guild. It is an old brewery within the guild’s grounds that has been corrupted by the shadows, as with everything else on the grounds. When you enter, you’ll see a few corrupted people but they aren’t hostile and won’t engage you in battle. Behind the bar is the Wretched Distiller Thisobald Thorm. You can approach him to start a conversation. He’ll bid you to drink the drink he’s put in front of you and tell your story as if it were a normal bar. You’ll have the following choices to respond with:
- What in all Nine Hells are you?
- What is it that you’re serving?
- I already drank some wine earlier, thank you.
- Attack.
If you choose the first option, he’ll introduce himself as Ketheric’s son. Afterward, you’ll have the following choice of actions:
- Pick up the tankard.
- No. I will not drink.
- Attack.
If you choose the first option, you’ll have the chance to observe him carefully. He’ll then propose a toast. You’ll have the following choices with what to do with the drink:
- [SAVING THROW] Drink with the Brewer.
- [SLEIGHT OF HAND] Mime drinking.
- No. I will not drink.
- Attack.
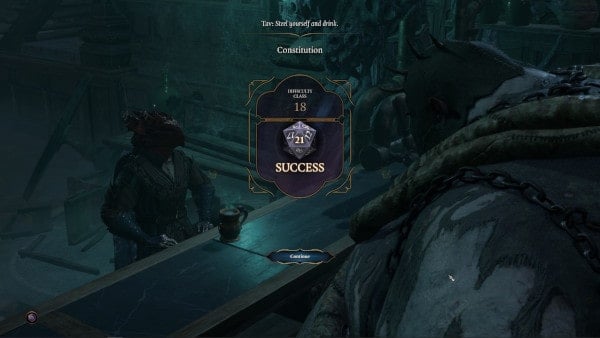
Choosing the second option will have you try for a Sleight of Hand check with a bit of a steep DC of 18 to fool him into drinking alone. Astarion and Karlach will approve of this choice. Note that if you fail any checks from this point on, it will result in a battle against the corrupted brewer, along with the other corrupted people in the brewery, which will be very difficult. The DC for each round will also go up bit by bit. After this first round, he’ll comment on how little you drank and then ask you to tell him a story. You’ll have a number of choices, depending on the events that you’ve let your character experience so far, which will all entail a Performance check. Additionally, you’ll have the option to talk about your pact as a vessel for your patron if your character is a Warlock, which will require a Persuasion check instead. Finally, you’ll also have the option to not share any stories. Astarion and Karlach will approve of succeeding the Persuasion check. He’ll be quite amused at your drinking and storytelling skills and will ask you to do it again. You’ll have the following choices for your next course of action:
- Who placed the curse on this land?
- How did you become… what you are now?
- [SAVING THROW] Do as he says. Drink.
- [SLEIGHT OF HAND] Mime a sip of your drink.
- No. I will not drink.
- Attack.
If you ask how he became this way, he’ll say that it was his dad’s laughter. Asking about the curse will reveal that it was indeed Ketheric’s doing and that he’s also responsible for keeping the curse active. He seems to have a tiny moment of clarity and hushes the conversation for fear of being heard, and then you’ll just be left with the remaining options. Successfully passing a Constitution check to drink will gain approval again from Astarion and Karlach. Afterward, he’ll ask for another round of stories, which you’ll need to succeed another Performance check to do. Astarion and Karlach will once again approve of being able to do this. He’ll invite you to ask questions again afterward, along with the rest of the choice for another drink. If you ask how Ketheric keeps the curse active, he’ll cryptically answer with the spirit of the land. If you ask about Ketheric himself, he’ll just reaffirm his immortality, but also that he’s not. Unlike the previous round, you can ask the additional question of Ketheric’s weakness. He’ll slip and mention a “her” that he should not be talking about. After that, you’re back to either drinking with a Saving Throw, pretending to drink with a Sleight of Hand check, or probably ending up in a fight against him. Either of which, Astarion and Karlach will again approve of. He’ll finally recognize you as someone dangerous after this round, but he will have drank too much already and burst all on his own. If you brought Astarion along, he’ll be inspired by your antics if you tricked the brewer in even one of the rounds. Karlach will also be inspired if you actually drank at least once. Those of the Guild Artisan Background will also be inspired by the risk your they took with the whole endeavor.

You can loot his corpse for some money, Camp Supplies, and a Worn Key. South of the bar, near the shelves of bottles at (X:-223, Y:77) you can find a Rat Bat. A successful Perception check will also reveal a loose plank on the floor hiding Madeline’s Ledger, which you'll need to turn over for the Quest Punish the Wicked. The Worn Key should be able to open the Metal Door to the west leading to the back of the brewery. There’s a locked Heavy Chest to your right as you go up here, with a lockpicking DC of 10, containing Ichorous Gloves and some alchemy materials. Deeper in will be poisons and potions spread out on the floor and a Wooden Chest. The Research Notes on the desk will tell the story of Thisobald’s endeavor to create a deadly poison, but its remaining ingredient is yet to be acquired, although it was sent to a certain location. An Intelligence check at the end will allow you to decipher this location. Reading the notes unlocks the recipe for Thisobald’s Brewer-Up Bellyglummer.
Going near the bars initiates a Perception check. Passing it reveals a trap in the middle section of the bar, and will have whoever passed it remind the group to be vigilant. The Wooden Chest contains a hefty amount of gold, the Punch-Drunk Bastard weapon, and a book that unlocks the Serpent Fang Toxin recipe when read. The three Rustic Chests behind the trapped bars contain more alchemy materials. Head back to the brewery and look for the northern exit on the first floor at (X:-195, Y:-48). Follow the path west to reach some stairs. There’ll be a Wooden Chest at the landing which has some more alchemy materials. Head up the next set of stairs and then keep doing to the west. There should be a path going upwards on your left eventually. Head up there and cross the bridge to the north. As you cross, you should be able to unlock the Waypoint here for the Road to Baldur's Gate. Note that if you ever try to take this road before finishing the story events in the Moonrise Towers, you'll get captured by Ketheric's army and end up in the Moonrise Towers' prison cells, which is a viable way to infiltrate when you're ready.
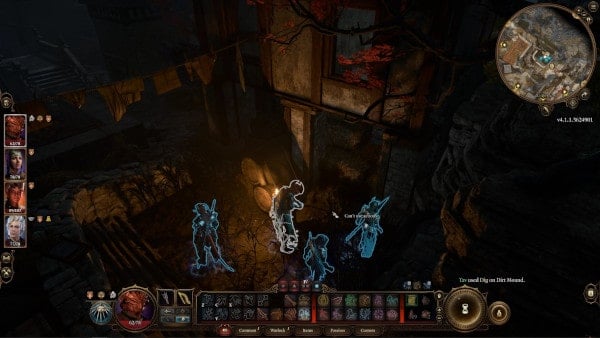
As you move forward, to your left should be a ruined building, with a clothesline connected from where you are. Passing a Survival check down near the house will reveal a dirt mound. Use a shovel on it to reveal a chest containing the Corpse Roses that Thisobald Thorm had acquired. Head back up to the path and then continue north. There’ll be a fight waiting for you here against two Shadows, a Wraith, a Shadow Mastiff, and three corrupted Harpers.
Grand Mausoleum
If you're ready to move forward with the story, you can follow the path all the way to the north to the Grand Mausoleum or teleport there if you've managed to unlock its Waypoint. The mausoleum’s entrance can be found in the northwestern area of the Reithwin Masons’ Guild, at the graveyard. When you enter through the iron fence, you’ll hear a talking skull telling you to beat it, but it won’t do anything else if you interact with it. A part of Ketheric Thorm’s diary sits near his diseased wife’s coffin. Other parts as scattered around this area if you want to look into his past. In the eastern area of this first area, you can find a locked Traveller’s Chest at (X:-259, Y:-882). It has a lockpicking DC of 14, and contains the Vivacious Cloak, some alchemy materials, some valuables, and possibly a potion or two.
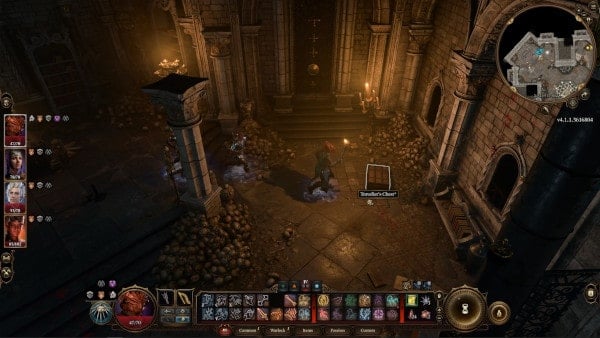
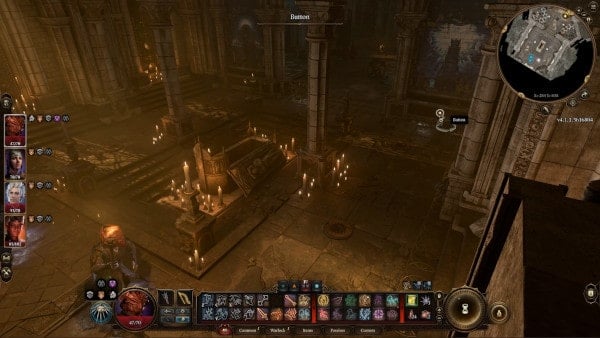
Loot the rest of the area as much as you’d like, and then head over to the northern section. The plaque here reveals that Isobel is Ketheric’s daughter and that the tomb here belonged to her. Successful Perception checks here will reveal traps on the vents and various tiles on the floor, as well as gargoyle heads on the walls, all around the room. To move forward from here, you’ll have to press the buttons below the three paintings around the room in the right order. Start with the button below the Moonrise Towers painting first, and then the Grief painting beside it, before finally pressing the last button under Ketheric Thorm’s painting. Getting the order correctly will open up the walls beside the last painting and allow you to pass through. Interact with the Traversal Gem here to travel down and get to the Gauntlet of Shar.
BG3 Reithwin Town Notes & Tips:
- Notes & Tips go here.
 Anonymous

If anyone has found out if you are able to interact with the skeleton inside the safe? Says I can't reach even when standing on top of the skeleton. Was just after a fluff line by my character :(
0
+10
-1