Infiltrate Moonrise Towers |
|
|---|---|
| Type | Quest |
| Chapter | Act 2 |
| Location | Last Light Inn |
| Reward | tba |
Infiltrate Moonrise Towers is a Quest in Baldur's Gate 3. Infiltrate Moonrise Towers can be acquired during Act 2. Completing Quests allows players to learn more about the world and characters in Baldur's Gate 3, as well as earning more loot and experience to become more powerful.
Baldur's Gate 3 Infiltrate Moonrise Towers Objectives
Reach Moonrise Towers
- We found a Moonlantern that will protect us from even the deepest parts of the shadow curse. With it, we can safely reach Moonrise Towers.
- Last Light Inn and its occupants were consumed by the shadow curse. It is no longer safe.
- We met Marcus, a True Soul instructed to abduct the cleric Isobel from Last Light Inn and take her to Moonrise Towers.
- Harpers the trying to discover how the Absolute's cultists safely traverse the shadow curse. If we help them, we might find a way to reach Moonrise Towers.
- Jaheira, the Harpers' leader, told us to go to Moonrise Towers and infiltrate the ranks of the cult of the Absolute.
- We reached Last Light Inn, a safe haven in the shadow-cursed lands. Jaheira, the Harpers' leader, let us in after we gained her trust. We should see what we can learn from the occupants about the Absolute.
- We met a group of Harper scouts travelling through the shadow-cursed lands, and defended them against shadows. Grateful, one of them showed us where to find a safe haven nearby.
- We reached the shadow-cursed lands. The Dream Visitor told us to go to Moonrise Towers and infiltrate the cult of the Absolute. The cult's secrets may teach us how to free ourselves of these parasites.
Infiltrate the cult of the Absolute
- We found Balthazar in the temple below the Thorm Mausoleum. He asked us to help him find the relic for Ketheric.
Defeat the cult of the Absolute
- We defeated the necromancer Balthazar, failing to assist him in his mission to retrieve a relic for Ketheric. The relic is clearly important for the Absolute. Finding it ourselves may help us against the cult.
How to unlock Infiltrate Moonrise Towers
- Infiltrate Moonrise Towers is given by The Dream Visitor when you reach the Ruined Battlefield if you take a Long Rest before getting to the Last Light Inn.
- If you don't take a Long Rest before getting to the inn, Jaheira will unlock this Quest in the Last Light Inn.
Infiltrate Moonrise Towers Rewards
- N/A
Baldur's Gate 3 Infiltrate Moonrise Towers Walkthrough
Ruined Battlefield
After you head up the elevator within Grymforge, you’ll find yourself in a place that looks like the ruins of a part of Grymforge. The plaques here have some writings pertaining to the Shar, and moving straight ahead to the west brings you to a locked Absolutist Expedition Trunk with lockpicking DC of 10, containing some potions and/or elixirs. Heading up the stairs and following the path around will have you bump into Elminster Aumar. He’ll call you over to ask about Gale. If you don't have him in your party, you'll get automatically transported to camp where you'll talk to him to hear a message Mystra herself charged him to deliver. It seems Gale will be forgiven for whatever wrong he did to Mystra, provided he put an end to all your problems by finding the Heart of the Absolute, and blowing it up with the orb he has inside, along with himself.

Exit the camp to find yourself back at the castle ruins. Past where Elminster was is an Absolutist Expedition Key, in case you aren’t able to pick the lock of the previous chest. Head to the west to a hall filled with overgrown roots. On the broken pillar to your right is a Broken Moonlantern. The corpse on your left should have some scrolls as well as Orders. It seems this particular adept was killed by her own explosives. Head further west to the end of the hall to finally enter the Shadow-Cursed Lands, specifically the Ruined Battlefield.
Exit the camp to find yourself back at the castle ruins. Past where Elminster was is an Absolutist Expedition Key, in case you aren’t able to pick the lock of the previous chest. Head to the west to a hall filled with overgrown roots. On the broken pillar to your right is a Broken Moonlantern. The corpse on your left should have some scrolls as well as Orders. It seems this particular adept was killed by her own explosives. Head further west to the end of the hall to finally enter the Shadow-Cursed Lands.
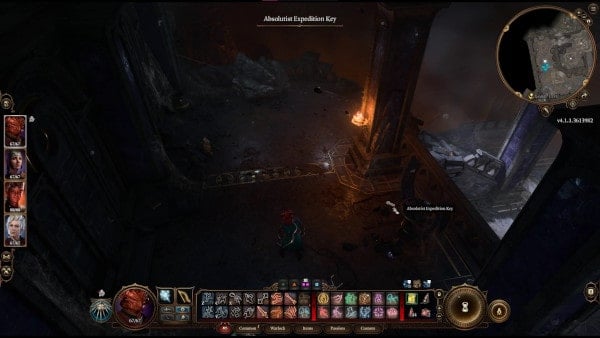
After the short scene, follow the path to the south. You’ll eventually have to cross some shadow-cursed ground, which will cause you to be afflicted with the Shadow Curse as well. Use a Torch or cast anything that can light your way in order to prevent yourself from being afflicted. Shadowheart seems to be immune to the curse, as a chosen of Shar. If you ignore the bridge to the southwest first and turn left to the south, you’ll come across some barrels and boxes with some miscellaneous items. You can find a campfire that was used by a Druid, now just a skeleton. Reading his Dead Druid’s Journal will have you do a Nature Skill Check.
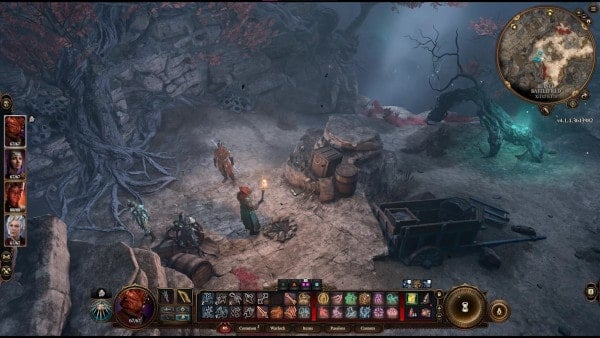
Head back north and then cross the bridge now to the southwest. The path up to the structure further south leads to a dead end and a skeleton you could loot for some jewelry and an Unsent Letter. Before you go down, you might want to light the brazier to give you a boost for later. Head down to the west to bump into the Harpers. Despite your best efforts at subterfuge, their leader Lassandra will spot you and ask who’s there. You’ll have the following choices to respond with:
- Lower your weapon first.
- My name is Tav. Who are you?
- A nightmare in the dark.
- Back away from them, palms up
Choosing the first and second choice will have them ask you to come forward with your hands up. You’ll roll a Perception check to see that it’s safe to do so. Unfortunately, one of them fails to move close enough with the torchers and gets taken by something in the dark. He emerges afterward, corrupted by the shadows. You’ll have the following dialogue options to choose from form here:
NOTE: Some dialogue interactions will have additional options depending on the Race or Class of your character.
- Move. I’ll take care of this.
- Get ready to fight.
- [WARLOCK] His soul… consumed by darkness. Not a good sign.
- Run

Choosing any of these options aside from the last one will initiate a combat engagement. You’ll be up against seven Enemies - six Shadows, and a corrupted Yonas, and will have the help of the Harpers. They shouldn’t be too hard but just don’t forget that you’ll get afflicted with the curse if you aren’t near a source of light. Any ranged allies can safely fight from the lit brazier in the higher structure back to the south. There will be a Shadow there though, so they will still have to be careful. After the fight, Lassandra will show you where you can go that’s safe from the curse. You’ll have the following choices to reply with:
- ‘Safe place’? You mean somewhere the shadows can’t penetrate?
- I’ll follow in a moment.
- Thanks, but I’m heading to Moonrise Towers.
Choosing the first will have her explain that the place she mentioned is an inn that’s magically protected. It also seems like traveling deeper in won’t be safe anymore with just torches and light Spells.

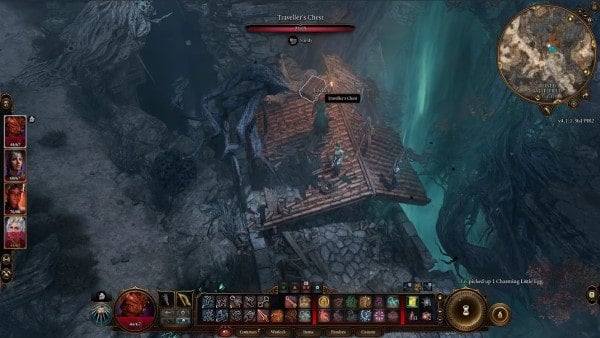
Follow the path to the southwest to move further along. You’ll eventually spot a raven on the ground. Your party will roll Arcana checks to see that the raven has been claimed by the shadows. Interacting with it will start a combat engagement against twelve Shadow-Cursed Ravens. They shouldn’t be too hard to get through but you will have the added handicap of being Surprised. After the fight, you can loot the original raven’s body for a note marked “HELP!” There should be a locked Traveler’s Chest atop the roof of the nearby dilapidated house with a lockpicking DC of 10 if you’d like to jump up and get it. Otherwise, continue southwest.
Last Light Inn
You’ll eventually get to an intersection. The path on your right to the northwest will lead to the Last Light Inn that the Harpers pointed you toward. In fact, you’ll find them at the entrance to the place so move toward them for a cutscene. They’ll allow you in and you’ll be able to meet Jaheira for the first time. She’ll use some nature magic to root you in place, to which you have the following options to respond with:
- Just this once, I wish people would simply say hello.
- Jaheira, is it? I’m Tav, and I assure you none of this is necessary.
- You have to the count of five to let me go.
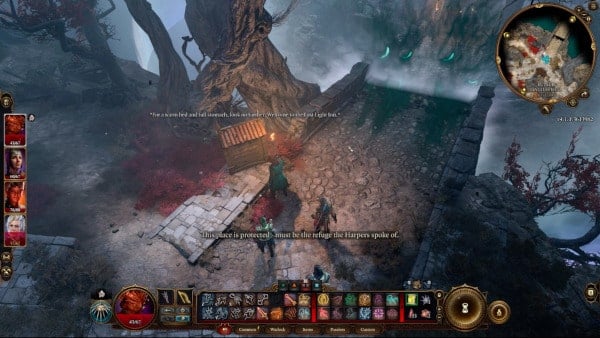
Choosing the second option will just make them push further. You’ll have the following options to respond with next:
- Easy. Give me a chance to earn your trust.
- I saved your soldiers and this is the thanks I get?
- Could you at least explain to me why you’re doing this?
- Back off. Now.
It seems she is mainly suspicious of you because she has a captured tadpole reacting to the tadpole in your brain, which makes them think you’re a True Soul. You’ll have the following options to respond with:
- I am not… a True Soul…
- Look to the Harpers you saved.
- Accept your fate.
- [STRENGTH] Rage against the vines.
- [WARLOCK] Beseech your patron to help you.
If you choose the fifth option, Mol will intervene and vouch for you. Jaheira will then question how you could have a tadpole but not be a thrall. You’ll have the following choices to answer the question:
- Because of this artefact. (Show Jaheira)
- I work in mysterious ways.
- You’ll just have to take my word for it.
- Attack
Karlach will approve of the first option. The tadpole she has will react negatively to the artefact as you take it out. Jaheira will question what exactly you are showing her, to which you’ll have the following choices to respond with:
- Tell Jaheira everything you know about the artefact.
- So far it’s been a life-saver. Here’s hoping you agree.
- Your guess is as good as mine.
If you choose the first option, they’ll finally ease up on you and ask why you’re there. You’ll have the following options to reply with:
- To destroy the Absolute in its lair: Moonrise Towers.
- I just want a cure for the parasite in my head. Moonrise Towers is my only lead.
- I’m here on holiday.
- My intentions are my own.
Choosing the second option will finally have them let you off to your own devices, before inviting you for a drink in the inn. Karlach will have an exclamation point over her here if you brought her along. If you talk to her she’ll fangirl over Jaheira. You’ll have an extra choice for dialogue here if you chose Background as a citizen of Baldur’s Gate. Choosing it or asking her if she knows her will have her explain to you the stories of Jaheira’s bravery.
NOTE: Some dialogue interactions will have additional options depending on the Background, Race or Class of your character.
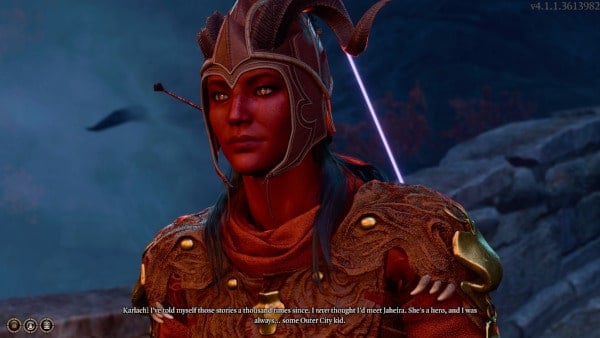
Afterward, move forward and examine the runes on your right to activate the Waypoint for the Last Light Inn. Head down the path further in toward the opening at (X:51, Y:143) that leads to the actual inn. There will be a realistic bear statue on your left as you enter. Your character will do a Nature check as you enter to ascertain what it actually is. Head inside and find Jaheira at (X:67, Y:139) and talk to her. She’ll propose a toast to your health. You’ll have the following options to choose from in response if you have Karlach with you:
- To your very good health.
- [MEDICINE] Smell the wine first.
- You’ll have to pardon my friend Karlach. She’s very excited to meet you.
- I’m not thirsty.
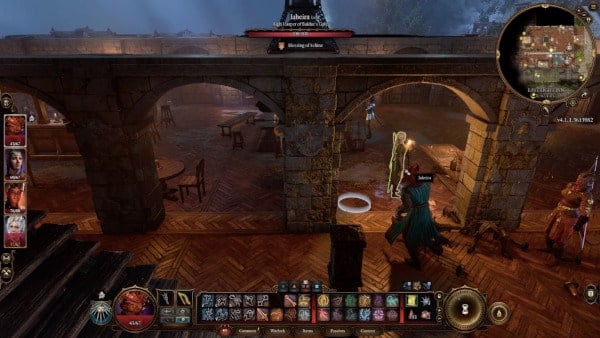
If you choose the second option and pass the Medicine check, you’ll discover that she’s laced the drink with an herb that acts like a truth serum. You’ll have the option to express your trust wavering as a result afterward, but then you’ll still have to choose whether you’ll drink it or not. Drinking it will gain disapproval from Astarion and Shadowheart, but will gain approval from fangirl Karlach, if you’ve brought any of them with you. Jaheira will then ask if the parasite is affecting you or not. You’ll have the following choices to answer the question with:
- I see now why you’ve spiked my wine.
- Yes. The parasite is giving me powers I never had before. It’s changing me for the better.
- It’s trying to change me, trying to win me over, but I’m resisting its temptations.
- [SAVING THROW] Despite knowing you’re under the effects of a drug, try to deny the tadpole has any influence over you.
The first option will just have her press you for a different answer. Choosing the fourth choice and being successful will have her be satisfied with your answer, but explain why she has to be cautious. She will say that tracking the parasites led her to someone who should’ve been dead for over a century. If you ask who it is, she’ll reveal it to be General Ketheric Thorn, the leader of the Absolutist cult. It seems that not only is he not dead, he’s also currently unkillable. They had an encounter with him as he and his army were marching to Baldur’s Gate. Suffice it to say, he defeated them and had them chased all the way to this inn. However, she seems to have some hope in you. You can respond to this with the following choices:
- What do you have in mind?
- You think I can kill him?
- I don’t think so.
Her plan is to have you infiltrate his base as a True Soul and find out how to deactivate his invincibility. You’ll have the following options to reply with:
- Ketheric’s days are numbered. I’ll make sure of it.
- You want to make use of my infection - I want to be cured of it.
- Seems like I’ll be doing most of the heavy lifting.
- I’m not doing this.
Choosing the second option will have her explain that you’ll probably find a means to cure yourself in the Moonrise Towers anyway. You can then ask her how to get there past the debilitating shadows. She’ll explain that Isobel, a Cleric of Selune, protects the inn with her light, and will be the key that’ll let you protect against the darkness. She bids you go upstairs at her recommendation.
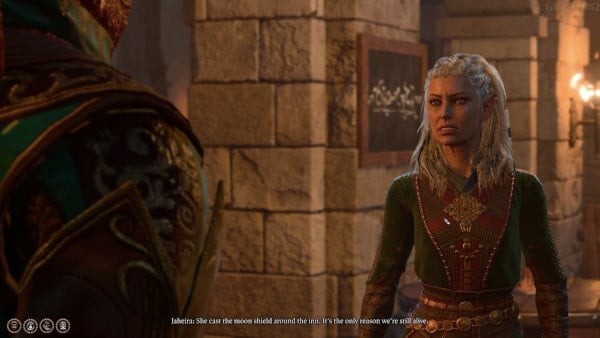
Head up the stairs at (X:71,Y:134) to get to the second floor. Harper Mijah’s on the eastern side of the building patrolling along the balcony. Isobel’s room is to the north but she’s actually further along on another balcony, which you can reach through a door at (X:64, Y:168). You’ll see the shielding spell take its toll on her before she notices you. Choosing the first choice will have her express that she’s full glad to have you as their little miracle against the darkness. She’ll proceed to enchant you and your party with the same shield she’s cast around the inn but will warn you that it won’t be enough to protect you when you reach the depths of the Shadow-Cursed Lands, though it should be enough to reach Moonrise Towers. If you’ve brought Shadowheart along with you, she’ll get stung by the Spell, and ask her lady Shar for forgiveness. As she gives you advice on how to best Ketheric, you get interrupted by Flaming Fist Marcus, a former brave ally of theirs, now turned by the Enemy in exchange for a pair of wings. You’ll have the following options to react with:
- What are you?
- Isobel, do you know this man?
- I say we follow the winged freak.
After she introduces him to you, he’ll reveal himself as a True Soul and try to telepathically order you to take Isobel back to their home base. You’ll have the following options to respond with:
- [WISDOM] Probe his thoughts for more information.
- What does he want with her?
- Sounds like fun - I’m with you.
- I’m not like you - I don’t take orders from the Absolute’s cronies.
- Touch her and I’ll kill you.
Choosing the first option and passing the Wisdom check will allow you to see Ketheric give the order to Marcus. Isobel will question your telepathic interaction, to which you’ll have the following options to respond with:
- Marcus is trying to kidnap you, Isobel. We’re going to need to fight our way out of this one.
- Say nothing.
- You’re going to meet Ketheric - face-to-face.
If you’ve brought them along, Astarion will disapprove of the first option, while Shadowheart and Karlach will approve of it. Choosing it will reveal your allegiance. Marcus will let out a roar to call out more minions, and you’ll enter a combat engagement. If you brought Shadowheart along she’ll gain inspiration from having a Selunite spell cast on her. For this fight, you’ll have to attempt to defeat Flaming Fist Marcus and six Winged Horrors. All of them are going to do their best to go straight of Isobel. Your best bet for a small chance of winning here is to use a protection spell on Isobel, while you dish out as much damage as you can on Marcus before he knocks Isobel out. Chances are, however, you’ll lose this fight due to Marcus’ sheer bulk and power. After he knocks out Isobel, all hell will break loose in the inn, resulting in the death of most of its inhabitants.
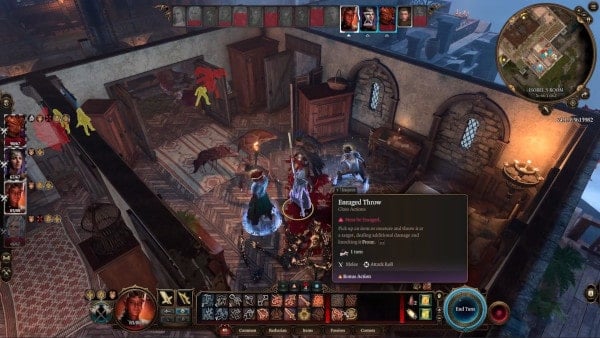
The shields will disappear, allowing the shadows to enter the inn and turn some into Enemies, while the others die to the horrors that enter. Outside, Jaheira will see the shields melt and ask you what happened. Choosing the first choice will have her restate your mission to figure out Ketheric’s invincibility. Before you get out of here to do that though, you’ll have to clear the area of allies turned to foes. This won’t be difficult by any means, other than the fact that they used to be innocents. There’ll be another group waiting for you on the bridge to the southeast, which is also bring in some Creepers.
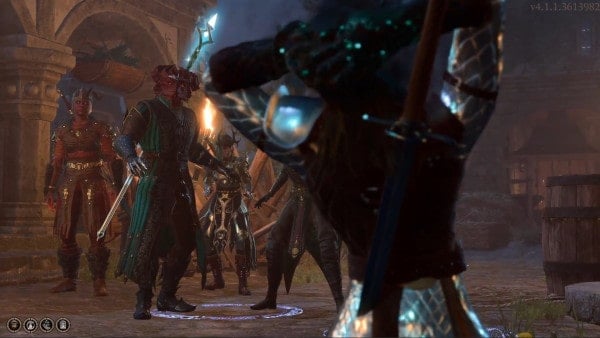
After the fight, loot as much as you need and then proceed back to the bridge at (X:-11, Y: 120) to head back to the Ruined Battlefield.
Return to the Ruined Battlefield
After crossing the bridge, head straight ahead to the path at (X:11, Y:9), toward the southeast. When the path splits three ways, head to the southwest first, to your right. You’ll come across the bodies of cultists and refugees alike. Loot as necessary. This must be where the ambush happened. The path splits three ways here again, so head first to the path going up to the west. You’ll notice some standing torches. A successful Arcana check will tell you they’re continual flames that can’t be put out. Follow the path out of this small camp to the southwest. You’ll come across a dilapidated storehouse right after an arch formed by a tree. Passing a Perception check here apprises you of a movable brick by the storehouse’s entrance. If you look closely inside, however, there are invisible meazals waiting to ambush you. Deal with the meazals however you see fit. If you brought Karlach along, she’ll gain inspiration from being attacked by invisible foes lying in wait. Loot as necessary as you explore the storehouse. Head back to the entrance and jump on a ledge to the left of the storehouse to then get to the roof. Cross the roof to the far end of the storehouse, where there’s a locked Potter’s Chest with a lockpicking DC of 14 containing a pair of Luminous Gloves.

Head back to the entrance of the storehouse and head up the stairs to the southeast. You should see some wooden stairs on your left as you go so head up there head into the ruined house. A cutscene will ensue as you watch some cultist pass by, led by the drider Kar’niss. One of them will notice you in the shadows who yells at you to reveal yourself. You’ll have the following options to react:
- Clear your throat to make yourself known.
- Stay hidden, keep watching.
- Attack!
If you choose to stay hidden, there’ll be an internal squabble, resulting in Kar’niss slaughtering the goblin that noticed you, so you’ll have one less to kill. After that, you can either clear your throat and reveal yourself, or do a Stealth check to wait for them to pass. Choosing the first option will have the drider recognize you as a True Soul and ask how you’ve survived the shadows without protection. As per your current objective of finding the answer to the same question, you can ask him in return how he has survived thus far. He’ll reveal that the lantern he carries is the key. You’ll then have the following courses of action to choose from:
- [INTIMIDATION] The Absolute has asked me to carry the lantern. Hand it over.
- Thank you - let’s go.
- Or I could kill you and take that light.
Naturally, choosing the third option will result in a fight, but there’s no telling if he’ll give the lantern over anyway. Kar’niss will likely start the fight with Sanctuary. If anyone in your party has Counterspell as a reaction, you can stop this. Otherwise, it’s not a bad thing to let it happen as might want to take care of the Enemies with lower health points anyway. Thanks to your antics, you’ll have to clear out the drider, two goblins, and two Half-Orcs. Kar’niss has a massive amount of health, but you should be able to whittle him down easily especially once he’s alone.
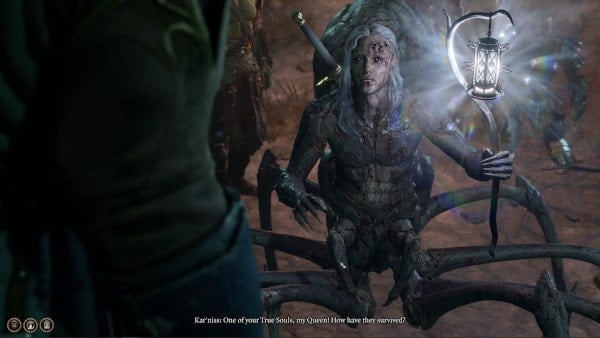
Looting him afterward will net you his Moonlantern and the Cruel Sting longsword. Taking the Moonlantern will reveal a pixie trapped inside that’s responsible for the light that protects against even the deeper shadows. A successful Intelligence check will tell you that they can be playful and even malicious. Dolly Dolly Dolly, the pixie will claim that she’s in constant pain inside the lantern as it’s the only way to get the light shining constantly. You’ll have the following options to respond with:
- Who are you?
- You’re fuel for the lantern? How does that work?
- What’s this mechanism at the base of the lantern?
- Release the pixie.
- Ignore the pixie. You’ll be needing this lamp.
Choosing the first option will have the pixie formally introduce itself as Dolly Dolly Dolly, and ask you to free her. Afterward, the first option will be replaced by a proposal to help you travel through the shadows in exchange for freeing her. If you choose that option, it’ll seem to wholeheartedly agree to it. Asking about the mechanism will have it claim that it’s dangerous for her to even talk about it. If you choose to release it, you’ll gain approval from Astarion and Karlach if you brought them along. She’ll then ask how she can repay you, and you’ll have the following options to answer with:
- I need to get through this shadow curse. Can you help?
- What’s on offer?
- Nothing - my help doesn’t come with strings attached.
Choosing the first option will have her toy with you for a bit but ultimately give you a magic bell, called the Filigreed Feywild Bell, that you can ring for the protection you asked for. Continue looting as necessary. One of the goblins will have some Thermoarcanic Gloves you can cop. Note that the pixie already has you blessed so there’s no need to actually use the bell yet. There’s a locked chest on the southwest side of the house that you can lockpick, or you can get the key for it on the roof, which you can get to with the ladder.
Depending on whether or not you’ve got Wyll in your party if you rest at camp now, Mizora will come for a visit. She’ll tell you that one of Zariel’s devils has been captured by the cultists and brought to Moonrise Towers. Wyll’s next task, as per their pact, is to free this devil. You’ll have the following options to respond to this with:
- And this is our problem how, exactly?
- Forget it. This ‘asset’ can rot in the Towers for all I care.
- If this devil is so powerful, how did they manage to get captured?
If you choose the first option, she’ll do her usual referencing of their contract. Before she leaves, you’ll do a Perception check here to see if she’s hiding anything behind her usual attitude, and blurry appearance.

If you did choose to take a long rest, you’ll be visited by your Dream Visitor again as you sleep. They’ll comment on how strong the Absolute’s influence is where you are, and then commend you for saving the refugees at the grove. You can respond with the following options:
- It wasn’t even a choice. They needed my help.
- It doesn’t seem like my help did them much good. The cultists caught up with them.
- It was a waste of time. I regret it now.
- I didn’t do it for them. The goblins were in my way, so I killed them.
Choosing the first option will have them say it’s not a choice just anyone could make, before wincing in pain. A successful Perception check will tell you that they’re hiding their struggle to protect you. You’ll have the following options to react with:
- What is it?
- Are you all right?
- Focus! Don’t you dare drop my protection.
- Say nothing.
A successful Insight check this time will tell you that despite her disciplined, strong demeanor, she also needs some comfort. You can choose to do the following:
- Say nothing. Wait.
- Hold (them) tight.
- You look terrible. Do you need a hug?
- Pull yourself together. We’ve got work to do.
They’ll appreciate the gesture if you choose to hold them and mention that it’s been quite a while since they’ve been held by someone. If you ask them who it was that used to hold them, they’ll reveal the name Belynne who they were very close to. They’ll tell you how the Absolute’s mental attacks to transform you have been relentless, but they’ll reaffirm her resolve to protect you for as long as they can.
Before leaving camp, you can talk to Wyll who’ll be quite pissed at his new task. You can ask him if this task violates their contract, as he was supposed to be killing devils, not rescuing them. Knowing how Mizora thinks, however, he confirms that the contract doesn’t say anything about saving a devil so the task still stands. You can continue the conversation which will end with the resolution to complete the task so he doesn’t get turned into a lemure.
Back to the ruined house where you fought the drider, head to the southeast, and turn left at (X:31, Y:-13). You’ll pass by another house with a chest containing a book and some valuables. If you look out on the cliff toward the north, you’ll see the Waypoint for the Ruined Battlefield below you. Get to it by heading back toward the southwest and then turning right at the fork.
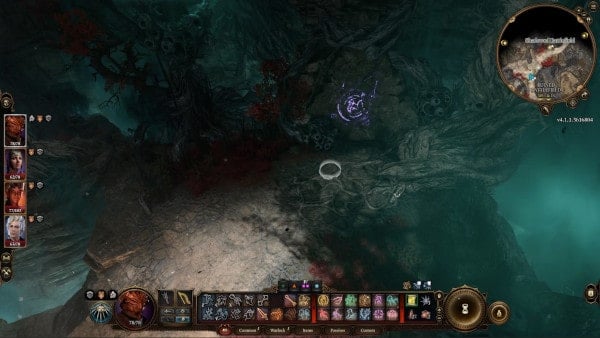
From the Waypoint, follow the path west all the way to the end. You should find yourself back at the ruined storehouse where you fought some meazals. Enter the building and then turn left at the end this time, toward the south, at (X:-50, Y:3). As you follow the path, there should be a ruined tower on your left. Be careful going in, as a successful Perception check will reveal an explosive trap at the entrance. Inside, there should be a locked Traveler’s Chest under the shelf among the pots, with a lockpicking DC of 10, containing a Ring of Twilight. If you head to the west there’ll be a short, messy wooden bridge leading to some stairs with a thick layer of shadows. This is the entrance to the Reithwin Mason’s Guild.

Reithwin Masons' Guild
Coming from the eastern entrance, from the Ruined Battlefield, head north along the walls first. In the end, you should be able to find a ladder that will let you climb up and reach a Heavy Chest at (X:-112, Y:0), which contains some potions and valuables. Climb back down and head back toward where you came from, but turn right to enter the paved area at (X:-114, Y:-12). Head inside the door here to a building that has some statues lined up. The table to your immediate right should have a Barkskin Recipe for you to read. If you move forward, there’ll be a pile of bones on top of some concrete. Investigating the plaque below it will inspire you if you had picked the Guild Artisan Background. Head through the door past it to the north and then head to the west side to find an Ornate Wooden Hatch. Enter it to enter the Masons' Guild.

Down here, head up the stairs to the left to circle around the room. At the end of the room, a successful Perception check will reveal a Keyholed Herald on the wall. You can either lockpick the keyhole or use a Tower-Shaped key to open a path in the wall. Follow the path to a Reinforced Gilded Chest. Another successful Perception check will reveal that it’s trapped, but don’t bother ‘cause it’s empty. Move forward and go through the wooden doors to a large chamber with a dining table. Exploring this area will put you in a combat engagement against five Shadows led by a Wraith. The fight shouldn’t be too hard, but be wary of the Wraith. At the southern end of the hall is another Gilded Chest that’s trapped. Its disarming DC is 21, and its lockpicking DC is 14. It should contain the Helmet of Arcane Acuity. On the east side of the chamber on the upper level is a button you can only find by passing the Perception check. Clicking it will reveal another hidden room behind the wall. Inside will be two Armored Chests with some scrolls and potions.

Head all the way back to where you landed upon entering the hatch. Interact with the stone slab connected to the elevator to head up. Up here, cross the bridge of vines to head to the west to a small graveyard. Turn to the left and open the gate. If you were able to save Arabella at the grove, you’ll see a cutscene with her if you talk to her here. It seems touching the idol back then gave her some power over nature. If you ask her where her parents are, she’ll recount how they got separated by the cultist ambush. Afterward, if you tell her you’ll find her parents, you’ll gain approval from Karlach and Shadowheart. Shadowheart will also approve of allowing her to stay at your camp. Move forward to the northeast for a Perception check. If you pass it, you’ll find the True Love’s Caress among the pile of bones nearby. There are Grated Iron Doors to the north that you can lockpick with 10 DC. Inside is a sarcophagus hiding the Boots of Apparent Death.
There’s another chamber to the north with two sarcophagi inside, containing the Icebite Robe and some minor items. If you head out and continue your journey to the west from here, you’ll find the door to the House of Healing. If you ignore the door and head north you’ll come across some Dark Justiciar corpses. Continue along the path to eventually find Raphael. He’ll start you off with a warning in the form of a rhyme, to which you can call out his worry over you. Afterward, you can ask him what dangers he’s warning you about. If you ask him for specifics, he’ll explain that there’s an ancient demon ahead lost to time, and approaching them risks awakening their plague onto the world if you don’t manage to kill it. If you want him to be more specific, you can try to pass a Persuasion check. Afterward, you can do an Insight check to see if he’s hiding anything else from you. Upon further probing, you’ll learn that it’s an Orthon you’re after. Telling him that he’s afraid of this target will have him warn you not to underestimate it. Finally, he’ll assure you that he hasn’t forgotten his end of the bargain about translating the scars on Astarion’s back. Behind him, to the southwest is the entrance to the Grand Mausoleum.

Grand Mausoleum
After entering, when you go through the iron fence, you’ll hear a talking skull telling you to beat it, but it won’t do anything else if you interact with it. A part of Ketheric Thorm’s diary sits near his diseased wife’s coffin. Other parts as scattered around this area if you want to look into his past. In the eastern area of this first area, you can find a locked Traveller’s Chest at (X:-259, Y:-882). It has a lockpicking DC of 14 and contains the Vivacious Cloak, some alchemy materials, some valuables, and possibly a potion or two.
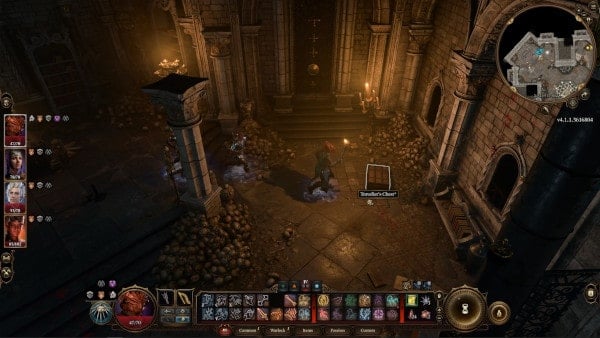
Loot the rest of the area as much as you’d like, and then head over to the northern section. The plaque here reveals that Isobel is Ketheric’s daughter and that the tomb here belonged to her. Successful Perception checks here will reveal traps on the vents and various tiles on the floor, as well as gargoyle heads on the walls, all around the room. To move forward from here, you’ll have to press the buttons below the three paintings around the room in the right order. Start with the button below the Moonrise Towers painting first, and then the Grief painting beside it, before finally pressing the last button under Ketheric Thorm’s painting. Getting the order correctly will open up the walls beside the last painting and allow you to pass through. Interact with the Traversal Gem here to travel down and get to the Gauntlet of Shar.
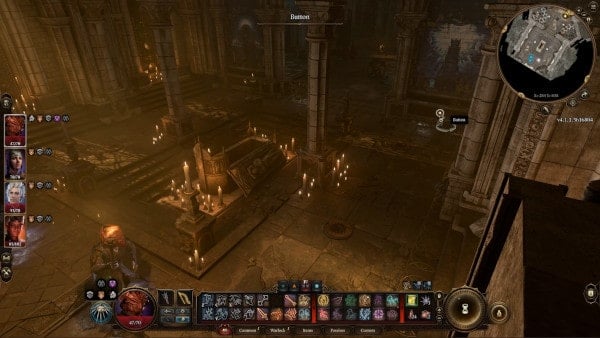
Gauntlet of Shar
Once you've reached the Gauntlet of Shar, continue heading north and go through the first Stone Door to enter the first chamber. In this area, there is a small statue holding an orb. You'll get pushed back if you attempt to approach it. In order to solve this puzzle, you need to explore the side rooms and pull the levers to lower all the lanterns. Do note that all rooms with levers will have traps. Once you've pulled all the levers, interact with the lowered lanterns to extinguish the light. When the room is completely shrouded in darkness, you'll see the pattern on the floor. Use only one character to crouch-walk and avoid the glowing lines to prevent your character from being blasted away. Once you touch the orb, you will open the door leading to the next area. For an easy way to reach the orb in the middle of the forcefield, you can use any sort of teleportation. simply teleport directly next to the orb and then click the Umbral Gem.
Now continue heading west and on the left side of the room (X:-775 Y:-853), you can jump across the platforms that'll lead you to the next area. All of your characters should be able to make the jump as the platforms are relatively close to each other. You can then go down through the cragged rock (X:-801 Y:-850). As you move forward, you'll see a Cloaker in the area. If you pass the perception check, you'll notice you're going through an area that's perfect for an ambush, then you'll initiate combat. The Cloaker can summon Phantasms which are basically clones of itself. It is recommended that you aim for the main body, as killing the Cloaker will make the Phantasms disappear. There's a chest at (X:-824 Y:-866), you can loot its treasure. Now head north and you'll see a giant locked door. You can lockpick or attack it until it breaks down. Now head to the room located east and interact with the Altar to Shar (X:-807 Y:-816). You can then either pray to the altar or leave. If you choose to pray, you'll need to pass an Intelligence check in Religion with DC 14. If you successfully passed the skill check, you will gain Nightsinger's Favour, you will be resistant to any type of necrotic damage until your next long rest. In the room located west, there's a traveler's chest, and a Key on a Skeleton you can loot (X:-839 Y:-813).
Now go to the middle and pull the level on the left side to open the door ahead. As you enter the room, you will find three undead skeletons. As you approach them, the one in the middle asks if you are a friend, a foe, or a thief. Then it will say you're a friend, but you were uninvited as he did not request help. Your next set of choices will look like this:
- Who am I really speaking to?
- I'm no friend of yours - whatever you are.
- Attack.
If you choose the first option, it will tell you to join him and find out. The camera then cuts to the lantern above shaking, suddenly the whole place is shaking. A portal opens up next to you and a Justiciar Avenger comes out. You'll then initiate combat after the cutscene. This can be a difficult combat encounter as the Umbral Tremors can keep appearing throughout the battle. Once you've slain all the Justiciar enemies, go inside the room located west and you'll meet Balthazar (X:-851 Y:-786). You'll then be presented with these options once you interact with him:
NOTE: Some dialogue interactions will feature additional options depending on the Race or Class you've chosen.
- Who are you?
- I fought a battle right under your nose - whoever you are, some help would have been useful.
- True Soul? Bold of you, to assume I'm a comrade.
- Naturally-born? That's a strange thing to hold against someone.
- [WARLOCK] Well, I'm not just a True Soul. I have some extraplanar help, so to speak.
- Attack.
If you choose the WARLOCK option, he'll say you're a leech and says there's always room for improvement when it comes to the flesh. Your next set of choices will look like this:
- Who are you?
- Your creations? Mindless undead minions, from what I've seen.
- You're assuming I'm an ally. Unwise, perhaps.
If you ask him who he is, he'll introduce himself as Balthazar, the Chief Advisor to General Thorm and he's here because he was entrusted with an important mission. He then asks you if you know what's at stake at the moment. Your next set of choices will look like this:
- Enlighten me.
- Judging by how you're cowering in here, your survival?
- [HISTORY] The name Balthazar seems vaguely familiar, but from where?
If you choose the HISTORY option, you'll need to pass an Intelligence Check with DC 14. If you failed the skill check, you'll be presented with the same options from before excluding the one you just picked. If you choose the first option, he'll say he's been sent here to collect a Relic for General Thorm. He says you will help him as you've shown some prowess in scouting in combat. You'll realize he has General Thorms trust and this could gain you access to him if you play your cards right. Your next set of choices will look like this:
- So you need my help - what would I have to do?
- [WARLOCK] [PERSUASION] I'm not the type to make a deal without the details. What exactly am I looking for?
- As much as I enjoy you flattering me, this isn't my problem.
If you choose the second option, you'll need to pass a skill check with DC 14. Successfully passing the skill check will reveal to you that this relic gives General Thorms his strength and invulnerability. He says it must be recovered before his enemies attempt to exploit it. Your next set of choices will look like this:
- You need my help?
- This sounds like your problem, not mine.
- I think I'd rather exploit this relic - after I've gotten rid of you.
If you choose the first option, he'll reveal that the relic is close by but he needs you to clear the way for him. he says he'll remain in that area whether you succeed or fail. Shadowheart will then make a comment that it's better to play along for now. Your next set of choices will look like this:
- I'll see what I can do.
- What exactly will you be doing while I'm out risking myself?
- [PERSUASION] You have resources to spare - give me something to aid my search/
- This sounds like your problem, not mine.
If you choose the PERSUASION option, you'll need to pass another Charisma check with DC 14. Successfully passing the skill check will gain you Astarion and Shadowheart's approval. Balthazar will also assign someone to aid you as you clear the way. He'll offer you the bell that can summon his brother. You can either take the bell, attack, or extend the conversation. If you choose to take the bell, you'll receive the item Summon Golem Bell. This item will summon Balthazar's brother and can only be used in combat while in the Gauntlet of Shar.
You can also decide to kill Balthazar and successfully doing so, you will achieve the Acolyte: Those for Whom the Bell Tolled.
Infiltrate Moonrise Towers Notes & Tips
- Notes & tips go here
 Anonymous
Is there no way to destroy the lanterns protecting the Moonrise Towers? I think that would have been perfect way to cause chaos would have been a way to either destroy the lanterns or talk to the "moon fairies" inside them to free them, making the towers vulnerable to the Shadow curse.

 Anonymous
Following this guide will make you miss out on rescuing some of the prisoners in moonrise towers, you need to infiltrate the tower and do the prison break before finishing the gauntlet of shar.

 Anonymous
Love how this page for the quest of Infiltrate Moonrise Tower gives us a massive list of info on absolutely everything EXCEPT the actual quest of infiltrating the tower.


Why would a guide focus on the dialogue options you have (and assume you use) for one specific class? Maybe explain what happens when you choose the options that are available for all classes? Or at least cover those on top of the class you (author) happened to pick?
6
+10
-1