Find a Cure |
|
|---|---|
| Type | Quest |
| Act | 1 |
| Location | Ravaged Beach |
| Reward | N/A |
Find a Cure is a Quest in Baldur's Gate 3. Find a Cure can be acquired after completing the Prologue: Escape the Nautiloid. Find a Cure tasks you with looking for a way to remove the parasite living within your brain. Completing Find a Cure will progress the story forward.
Baldur's Gate 3 Find a Cure Objectives
Find a way to remove the mind flayer parasite
- We've escaped the Hells on the nautiloid and crashed somewhere back in the Material Plane. We need to explore the area and find a healer.
Find the healer Nettie
- There's a camp nearby where someone named Nettie can supposedly heal any wound. She might be able to help remove the parasite.
Find Zorru
- Lae'zel told us that the githyanki should be able to cure us, if we can find one of their crèches. Someone named Zorru should know more.
Get Auntie Ethel's help
- We met an eccentric old lady in the Emerald Grove. She's confident she can remove our parasites and invited us to her teahouse.
Rescue the Druid Halsin
- Search for Halsin in the Goblin Camp.
How to unlock Find a Cure
- Find a Cure is the first Quest in Baldur's Gate after completing the Prologue: Escape the Nautiloid.
Find a Cure Rewards
- N/A
Baldur's Gate 3 Find a Cure Walkthrough
Find a way to remove the mind flayer parasite
As you begin the quest, you'll find yourself at the Ravaged Beach. Continue following the path ahead and you'll find Shadowheart unconscious on the ground( X:271 Y:217). Interact with her and you will have three options to choose from:
- Wake her.
- Reach for the artefact.
- Leave.
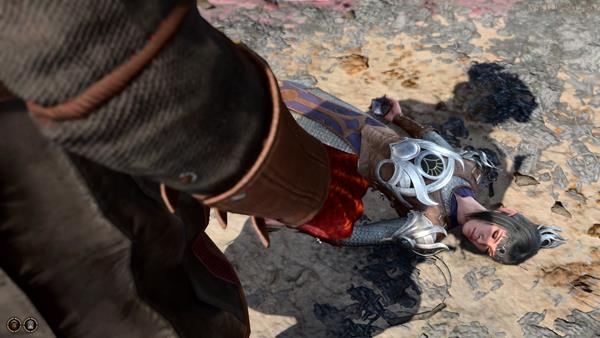
Choosing the first option will wake her up, she'll then ask how it's possible you're both alive. From here, you have two options to choose from:
- I was hoping you might know that.
- Doesn't matter - we made it.
Choosing the first option will prompt her to say that she only remembers the ship and falling down from the ship, and then nothing. You will then have to choose among three responses:
- Now what?
- Do you have any idea where we are?
- What happened to our gith friend?
If you choose the second option, she'll say that she doesn't recognize the place. She'll then go on to say that you first need to find supplies, shelter, and most important of all, a healer, for the monsters living inside your head. This will prompt 3 more dialogue options:
- 'We'? You want to stay together?
- What happened to our gith friend?
- Indeed, I'd better get moving then. Farewell.
Choosing the first option will make her say that you both need each other and she can't think of a better company. And then you will have the option to go together or part ways with the dialogue options that will appear:
- All right, let's get moving.
- No. This is where we part ways.
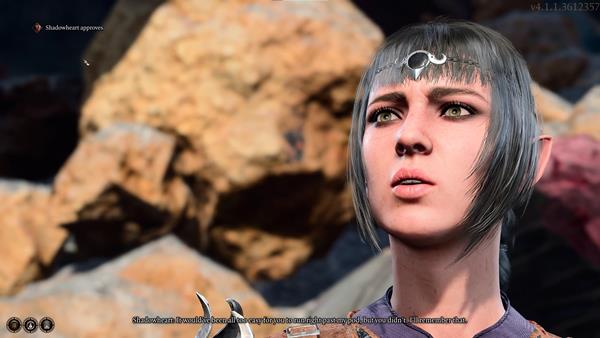
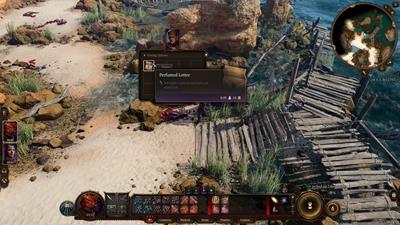
Choosing the first option will allow you to have Shadowheart accompany you, but before you continue with your journey, she thanks you for freeing her from the pod back in Nautiloid. You'll then get an approval up from her. Continue following the main path ahead and loot some items you can find on the ground, like barrels, a pouch, and a backpack that could contain some cosmetic or useful items. Just up ahead you'll find a book named Shanties for the ***** Queen, located on the broken bridge on the right side (X:304 Y:265). On the left side just beside the broken bridge, there's the Perfumed Letter you can loot from the Mangled Fisher on the ground (X:294 Y:268).
As you proceed, you'll find an Ancient Sigil Circle on the wall (X:285 Y:296), just beside the Ancient Door in the Overgrown Ruins. When you interact with the Ancient Door, it won't open, Shadowheart will suggest looking for another entrance.
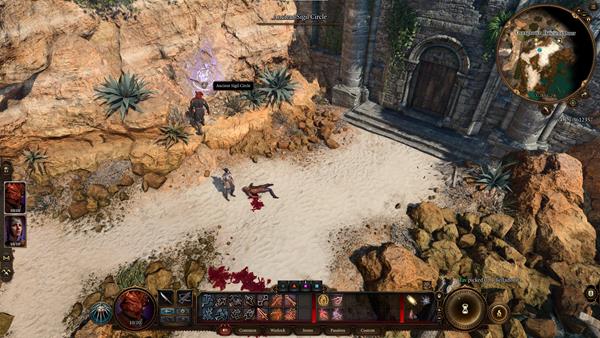
Head west and you'll a couple of Intellect Devourers in the area (X:259 Y:279). Try to keep your distance throughout the fight to make quick work of them, these are low-level enemies but can be dangerous once you're surrounded by a group of them.
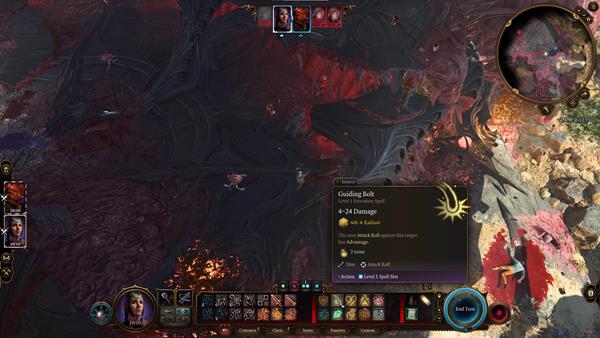
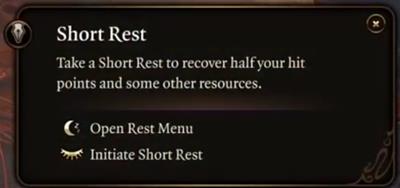
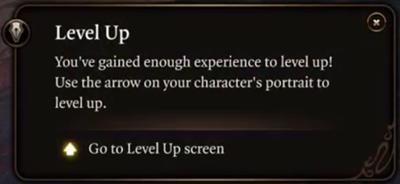
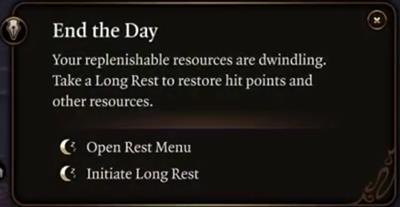
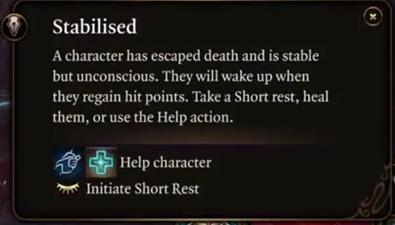
Once you've slain all the Intellect Devourers, a few tips will pop up on the screen. Using a Short Rest is the best way to recover HP and other resources and can only be used outside of combat. Gaining enough experience points will give you the option to level up. Using a Long Rest will end the day and recover all HP, Spells, and Actions used. It will also recover the Short Rest you can use since you can only use Short Rest twice before doing a Long Rest. When a character is down or unconscious, they can wake up once their HPs recovered. You can either take a short rest, heal them, or use the Help Action.
Explore the area and loot what you can then head west. Continue following the main path and you will come across the destroyed Nautiloid wreck, then slightly up a hill, you'll find Astarion, a High Elf vampire and a potential Companion, calling for help (X:176 Y:284). He says he's cornered one of the Intellect Devourers hiding in the grass. He then asks if you can kill it just like how you killed the others. From here, you will have three options to choose from:
- Easily. Stand back.
- Kill it yourself - you look capable enough.
- Leave.

Choosing the first option will reveal that this was just a trap, the boar comes out of the grass and Astarion suddenly takes a stance with his dagger. You will have three options to choose from:
- Put it away. We don't need to fight.
- If this is a robbery, you're off to a bad start, elf.
- One more step and I'll make you eat that knife.
Choosing the first option will make Astarion suspicious of you as he says he saw you get out of the ship of the mind flayers, before being interrupted by the worms in your brains. He asks what happened, and you will have to choose from these options:
- It's the mind flayer's worm - it connected us.
- Honestly? I have no idea.
- Put the knife away and I'll tell you everything.
Choosing the first option will make Astarion calm down and get ahold of the situation. He then apologizes, you now have three dialogue options to choose from:
- Apology accepted. I might have done the same were the roles reversed.
- Glad to see we're all caught up now.
- You'd better have more to offer than 'apologies'.
If you choose the second option, Astarion will then introduce himself and say he was in Baldur's Gate when those mind flayers snatched him. You then have three dialogue options to choose from:
- [BALDURIAN] Introduce yourself - you're a Baldurian too.
- Tell him your name and your story.
- Nod.
You can choose any of the options above, he'll then ask if you know anything about the worms. You have three options to choose from:
- Yes, unfortunately. They'll turn us into mind flayers.
- I know we don't want them in our heads.
- You know as much as I do.
You can choose any of the options above, and then he'll suggest that maybe if you can find someone who can control these things, there might still be time. You then have four options to choose from:
- Control it? We need to get rid of it.
- You should travel with me. Our odds are better together.
- I need to get moving, but you can shelter at my camp.
- I've wasted enough time here. Farewell.
Choosing the first option will give you the same three options from above:
- You should travel with me. Our odds are better together.
- I need to get moving, but you can shelter at my camp.
- I've wasted enough time here. Farewell.
If you choose the first option, he'll tag along and accompany you as you proceed. Go back down where you came from and you'll see the boar that came from the grass, if you interact with the scared boar, you will have four options to choose from:
- Observe the boar to see what it does.
- [ANIMAL HANDLING] Raise your palms to calm the boar.
- Attack.
- Leave.
If you choose the second option, you will have to pass a skill check of DC 10, failing the skill check will scare the boar away and flee from the area.
Now head northeast to the crash site, you'll notice footprints in the area, there are dead goblins on the ground and you can loot some items and supplies from their corpses. Continue following the path then head southwest, you'll encounter an injured mind flayer in the area (X:180 Y:325). Interact with it and you'll have three options to choose from:
- Give in to the emotion.
- This isn't right. Step away.
- No. You should be furious... shouldn't you?
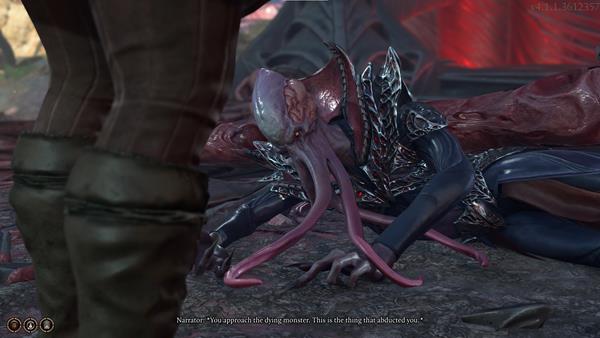
Choosing the first option will give you two more options to choose from:
- [INTELLIGENCE] Concentrate on its thoughts.
- Take advantage of the lapse - break free.
Choosing the first option and succeeding the skill check will reveal that you can offer yourself to the mind flayer for sustenance, this will give you another two dialogue options:
- Submit to the feeling - lean in, as for a kiss...
- [WISDOM] Resist the intrusion with everything you have.
Choosing the second option and succeeding the skill check will prevent you to give yourself in. Now you notice the mind flayer exhausted and its eyes radiate with malice. You now have two options to choose from:
- Close those eyes forever.
- Leave it to die - slowly.
Choosing the first option will make your character stomp the mind flayer's head and kill it. You can then loot its corpse for some items.
Now head north then climb the platform, and continue following the road uphill, your character will then make a remark that you heard shouting up ahead. Shadowheart will follow up with a comment that we should check it out. Along the way, you'll come across a dirt mound with a shovel sticking out. You can dig it and uncover a chest, you can loot the items inside the chest if you wish to do so. As you move forward, you'll find Lae'zel trapped in a wooden cage and two Tieflings discussing whether to kill her or leave her to the goblins (X:242 Y:357). You are able to communicate with Lae'zel even without actually speaking to each other via the monsters inside your head. Lae'zel tells you to get rid of the Tieflings, you will have to select from these options:
- Why should I help you?
- Don't worry - I'll get them out of here, one way or another.
- [DECEPTION] This creature is dangerous. Get out of here - leave it to me!
- [PERSUASION] Shoot the trap down. We must kill it before it harms someone.
- Attack the tieflings.
- Leave.
Choosing the second option will make Lae'zel communicate with you telepathically and tell you she knows a cure for the things living inside our heads. Shadowheart then reminds you that Lae'zel was keen on leaving her to die when you were all within the Nautiloid and that you can't trust her. You will have to choose among these four choices:
- [DECEPTION] This creature is dangerous. Get out of here - leave it to me!
- [PERSUASION] Shoot the trap down. We must kill it before it harms someone.
- Attack the tieflings.
- Leave.
Choosing the first option will require you to pass a skill check, successfully doing so will make the tieflings agree with you. Damays will then mention something about checking the blast. You can either ask about it or leave:
- A blast? I could use more specifics.
- Leave.
Asking for specifics will make Damays reveal that the blast shook their camp and that's why they went out, to take a look. Now you can use Persuasion to ask where the camp is, or leave:
- [PERSUASION] I'm in dire need of healing. Where is this camp?
- Leave.
Choosing the first option will require you to pass a skill check, successfully passing the skill check will make Damays tell you the location of the camp. He says it's located northwest and once you make it there, look for Nettie. Nymessa then joins the conversation by telling you to be careful as there are goblin traps everywhere. Once the tieflings leave, Lae'zel demands you to set her free, and your next set of choices will look like this:
- Now that they're out of earshot, sure.
- Say 'please'
- Leave.
Choosing the second option will not make Lae'zel say the word. Astarion and Shadowheart will approve of this decision. You can then attempt to free her after the dialogue.
Find the healer Nettie
After freeing Lae'zel, interact with her to initiate conversation. She then says the longer we wait, the more the parasite consumes. She also says that her people possess the cure for this infection and she wants you to join her in looking for a Crèche. Shadowheart steps in the conversation and tells you to be careful, she warns you to not let her take advantage of you, as she sees your kindness as a weakness. Your next set of choices will look like this:
- And what exactly is a crèche...?
- A simple 'thank you' wouldn't go amiss.
- All right, we journey together. Let's find this crèche.
- We'll go our separate ways, I think.
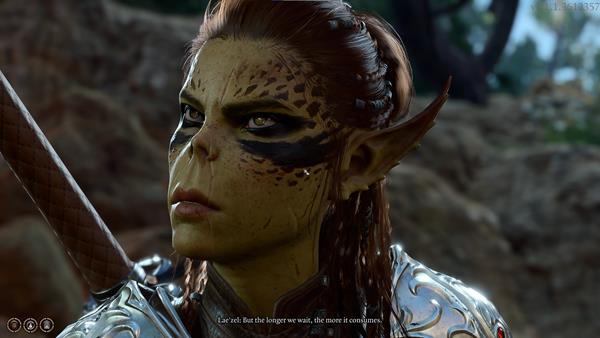
The two choices that will matter are choices 3 and 4. The first two choices will only extend the conversation. When asked about a crèche, Lae'zel explains that it is many things, it is a hatchery, a training ground, and a shelter. She also explains to you about the Githyanki protocol. Choosing the second option will make her say that the cure will suffice as thanks. Now you must decide whether or not to journey with her or go your separate ways. If you choose to join her, Shadowheart will disapprove of this decision. She then says that she trusts your judgement, but she doesn't trust Lae'zel yet. Lae'zel then explains that since the tieflings mentioned a camp, there's one tiefling named Zorru, who has seen githyanki. She suggests we ask Zorru where he has seen the other githyankis.
NOTE: The section below of this walkthrough takes place once you've entered Emerald Grove.
Within Emerald Grove, make your way to this location and interact with Zevlor (X:206 Y:477). He thanks you for your assistance earlier during the goblin attack, then he starts introducing himself. Your next set of choices will look like this:
- I'm Player's Name
- What is this place?
- I take my thanks in coin.
Choosing the first option will make him warn you that visitors are no longer welcome in Emerald Grove. He then says whatever your business is with this place, he wants to see to it quickly, since the druids are forcing everyone out and this attack will only strengthen their resolve. Your next set of options will look like this:
- I have no quarrel with druids.
- Why are they forcing you out?
- Those goblins - have there been many attacks like that?
- I won't be staying long - I just need to find a healer.
Choosing the third option will reveal to you that there have been several attacks by different monsters but the druids are blaming them "outsiders" for drawing them there, that's why no one's welcome anymore. He says they can't stay but leaving isn't an option either since they'd be slaughtered. Your next set of choices will look like this:
- This ritual - is there no way to convince the druids to stop it?
- I need a healer.
- What brought you here?
- Leave.
Choosing the first option will reveal that he already tried and that their new First Druid, Kagha, won't even see him. He then asks if you could persuade Kagha, even if it's not your business. He thinks you can persuade her since she owes you for saving this place. Your next of choices will look like this:
- I'll see what I can do.
- I'm sorry. I've got my own problems.
- I have my own temporal concerns. I need a healer.
- What are you offering for my aid?
Choosing the third option will reveal that you can find healer Nettie within the inner grove with the other druids. Your next set of options will look like this:
- I'll find her. And I'll speak to Kagha while I'm there.
- Enough about the ritual. I have my own problems.
- Leave.
You will receive a disapproval from Astarion if you choose the first option. Zevlor then says he owes you a great debt and asks that you talk some sense into the druids, before more lives are lost. The conversation will end here and you can proceed.
NOTE: This section below will take place within Emerald Grove after you've already spoken to Kagha.
After your conversation with Kagha, go to the Druids' Chambers (X:-443 Y:-6) and you'll find Nettie trying to patch up an injured bird. Once you interact with her, she'll tell you to give her a moment.
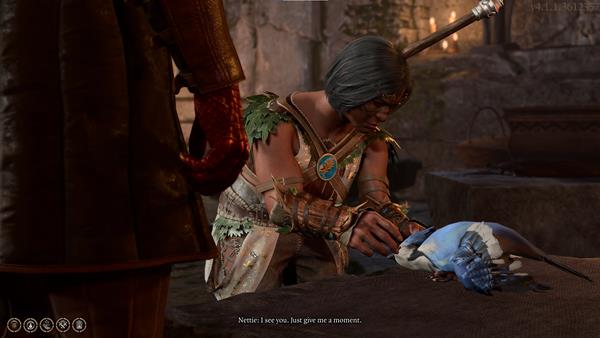
Your next set of choices will look like this:
- Is there anything I can do to help?
- Wait patiently.
- Excuse me? I'm more important than some bird.
- Leave.
If you choose to wait patiently, you'll see her perform a spell that will heal the bird instantly. She'll then ask what you need. Your next set of choices will look like this:
- I'm looking for Nettie.
- I need help. Now.
- Healing. Looks like I came to the right person.
Choosing the first option will make her reply that you found her, but she still doesn't know what she can do for you. Your next set of choices will look like this:
- Healing. As soon as possible.
- Do you know anything about mind flayers?
- I hear Halsin's the best healer around. I need to find him.
If you say you need healing, she'll give you a look and say you seem healthy enough. Your next set of choices will look like this:
- No good way of putting this. I... uh... have a tadpole in my head.
- More than tired. Something crawled into my eye.
- Right. Yes, I'm... very tired indeed.
If you tell her about the tadpole, you'll be presented with these choices:
- You know of them? Can you help me?
- What other kinds are there? It's not like a frog hopped in my eye.
- Actually, never mind. I'll get help elsewhere.
If you choose the first option, she'll say she'll do what she can and she might be able to help. Now you need to follow her inside the Enclave Library. You'll then see a dissected drow on the table. She says it had the same problem as you, and that this drow attacked her in the woods with some other goblins, and then a tadpole crawled out of his head soon after. Your next set of choices will look like this:
- The drow and I have the same kind of parasite?
- I'm hoping for a less grave cure.
- So you killed him and laid him out on the table?
- Is everyone being captured by mind flayers these days? Didn't think it was a common experience.
If you choose the first option, she'll say that you do have the same parasite. She'll also mention that Halsin has greater knowledge about these things as he studied them, and that's why he joined the adventurers on their expedition. She then says she'll see what she can do. Your next set of choices will look like this:
- Thank you, I'll take anything that can help.
- What's that plant? Will it help?
- Just hurry up and cure me. I don't have time to chat.
If you choose the first option, she'll ask you about what's happened so far and if there are any symptoms. Your next set of choices will look like this:
- I can merge my mind with anyone else that's infected.
- I fell from a ship in the sky, but something caught me. Saved my life.
- An intellect devourer spoke to me as if I were one of its own.
- No, nothing strange, I just want it out of my head.
Choosing the first option will make her ask you how you picked up the parasite. Your next set of choices will look like this:
- On a mind flayer ship - I was kidnapped and infected.
- I don't know. I just woke up with it.
- You're asking a lot of questions.
- Look, are you going to cure me or not?
If you choose the first option, she'll say you're dangerous, but you have a good soul. She then tells you to swear to her that once you feel any symptoms, you'll swallow the Wyvern Poison she's about to give you.

Your next set of choices will look like this:
- I thought you could cure me? What about that branch of yours?
- I swear.
- All right. Hand it over.
- No. I'm not taking poison from a woman I can't trust.
If you ask her about the branch, she'll say it's coated with a fatal toxin and it was just a last resort in case she couldn't trust you. She says she doesn't have a cure, only a way out. She then apologizes for misleading you. You'll then be presented with the same set of choices as before excluding the one you just picked. If you swear to take the poison if you ever show any symptoms of changing into a mind flayer, you will gain Lae'zel's approval, but get Shadowheart's and Astarion's disapproval. Nettie hopes it doesn't have to come to that but she thanks you, then hands you the Wyvern Poison. She then goes on to say that she's been treating people all her life and never encountered a mind flayer infection, and there are suddenly dozens of people like you. And what she finds weird is that the ones infected should be changing into a mind flayer and there should be an army of them by now, but the infected ones seem perfectly normal. Your next set of choices will look like this:
- What do you mean 'should' be changing?
- You must've learned something from studying them.
- Just tell me if there's a cure or not.
If you choose the first option, she'll explain that mind flayers reproduce by infecting someone with their parasite, and after seven days, the victim will transform, and a new mind flayer is born. The one residing inside your brain is different from their records, as it gives you telepathic powers and doesn't turn you into one of them. Your next set of choices will look like this:
- So you think it's only a matter of time?
- That's... good news?
- You said you were tracking other victims. Did they change?
If you choose the first option, it'll reveal that people infected like you were converging on an old temple in Selune, and this is what led Halsin to join the adventurers, and whatever he found there, he didn't make it back. Your next set of choices will look like this:
- What do you want me to do?
- So? Go and get him.
- You think he's still alive?
If you choose the first option, she'll say she's already sent birds to find Halsin, but the place is overrun by goblins and no one can get close. But you could maybe go there as she says they wouldn't kill someone carrying their parasite. She says if you can find and rescue Halsin and discover what he's learned, there's a chance it could save your life. Your next set of choices will look like this:
- All right. I'll find Halsin.
- It sounds like you're making a lot of assumptions that could kill me.
- You're sure he can cure me?
- That sounds like suicide. I won't do it.
If you choose the first option, she'll thank you as it would mean everything to the grove and to her. She wishes she could tell you more but only those adventurers that went with Halsin know what happened. She then reminds you of the oath you took before bidding farewell
Find Zorru
From the area where you freed Lae'zel (X:242 Y:357), continue heading south, then head west, you'll see an unstable rune on the wall (X:224 Y:324). Interact with it, you can then touch it or leave it be:
- Touch the sigil.
- Leave.
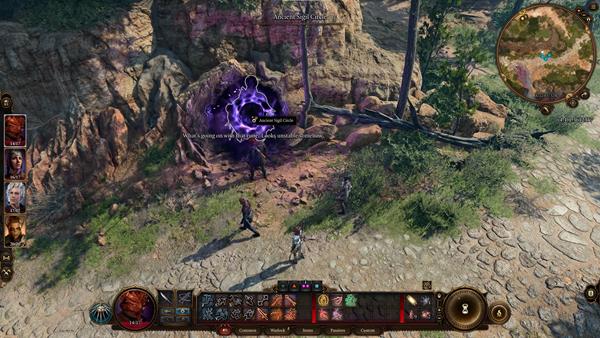
Choosing the first option will make your character try to touch the sigil, but then a slight shock would prevent you from doing so. An arm then extends out, asking for help. Your next set of choices will look like this:
- Who are you?
- Slap the hand.
- [STRENGTH] Grab the hand and pull.
- [WARLOCK] [CHARISMA] Attune yourself to the sigil's magic, then bid it to quiet down.
- It's far too dangerous. Leave him to his fate
The first two options can be chosen without affecting anything. Choices 3-5 are the ones that will affect the story. Choosing the third or fourth option will require you to pass a skill check in order to get him out of that portal.
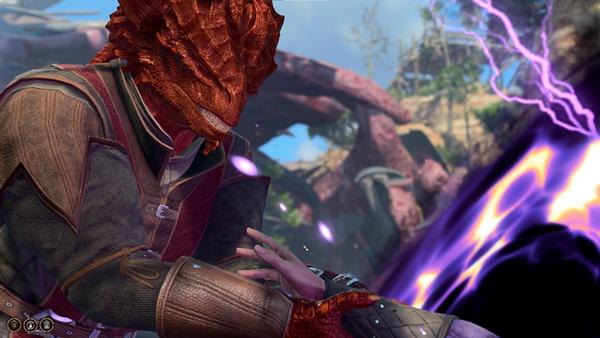
After successfully pulling him out of the portal, he will introduce himself. This is Gale, a Human Wizard and a potential Companion. After the introduction, he says he remembers you from the Nautiloid. From here you will have three choices:
- I was, yes.
- Never mind the nautiloid. How did you get stuck in that stone?
- You don't trust this man. Draw your weapon.
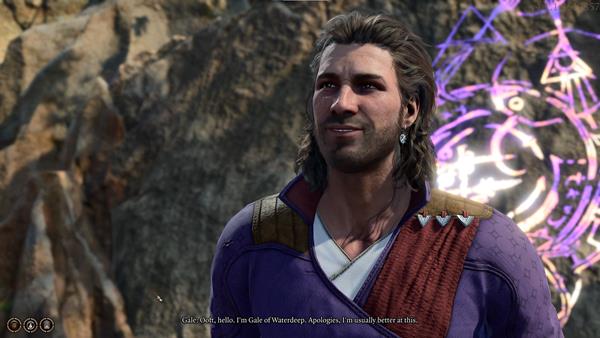
Choosing the first option will make him say that he assumes you were also infected with the parasite inside your brain. You can choose to extend the conversation or tell him it's none of his business. These are the options you have to choose from:
- Go on...
- Couldn't have phrased it more repellently myself.
- That's hardly any of your business.
Choosing the first option will reveal that the process you and your current companions are going through is called Ceremorphosis, where after a certain period of time, the parasite that entered our brain will turn us into mind flayers. He then asks if you happen to be a cleric. You have these options to choose from:
- I was going to ask you the same question.
- Can't say that I am.
- [WARLOCK] My patron offers me many gifts, but tadpole extraction is not one of them. I can't cure our parasites.
Choosing the third option will then make him say that you should look for a healer together. you have two choices here:
- Sounds like a plan. You're welcome to join me.
- No, thank you. I'm not looking for another travelling companion.
Even if you choose the first option, Gale would not join you right away and says that you have plenty of company already. He says that he can join you later and meet you at your camp.
NOTE: The section below of this walkthrough takes place once you've entered Emerald Grove.
Inside the grove, you'll find a tiefling named Zorru at this location (X:205 Y:568). Interacting with him will gain you Lae'zel's approval. He starts off being scared of Lae'zel and says "My f-friend's blood not enough? Come to rip me open, too?" Lae'zel then says that in Crèche K'liir, a formal greeting starts with a bow. Zorru then asks you if this "monster" is with you. Your next set of choices will look like this:
- Yes. And I suggest you do as she says.
- [DRAGONBORN] Give the tiefling a menacing glare.
- Hold it, Lae'zel. I'll see to this one.
Choosing the second option will gain you the approval of Astarion, Lae'zel, and Shadowheart. Upon staring at him, he slowly lowers his head, but Lae'zel wants him to lower his head even further. Your next set of choices will look like this:
- Wait for the tiefling to obey.
- [DRAGONBORN] On your knees. She won't say it again.
- That's enough, Lae'zel. I'll take it from here.
Choosing the second option will gain you another approval from Lae'zel. Zorru bows down and gets on his knees. Lae'zel asks where Zorru saw another githyanki. Zorru replied and said near the mountain pass on the road to Baldur's Gate. He also says it saw them before they saw it and jammed its blade through his friend, Yul. Lae'zel then asks him to show it to her on the map. Once Lae'zel's request has been granted, Astarion interrupts and says he was hoping she'd kill him. Lae'zel says to him to cool his blood and he'll indulge him soon enough. Your interaction with Zorru ends.
An exclamation mark will then be seen on top of Lae'zel, interact with her to start a conversation. She'll start off by saying "The locals prove complaint. A useful trait.", then Shadowheart joins the conversation and says she warned you about keeping Lae'zel around, she's worried Lae'zel would cause real trouble soon. Your next set of choices will look like this:
- Do you plan to be that rough with everyone we meet?
- You're a dab hand at interrogation - we might need that skill again.
- What comes next?
Choosing the first option will gain you Shadowheart's approval, but gain Lae'zel and Astarion's disapproval in the process. Lae'zel then replies "When the tentacles sprout from your lips, will you still cry that I was rough?". Your next set of choices will look like this:
- Enough. Just tell me what's our next move.
- All right. You made your point.
- Leave.
Upon choosing the first option, she says if what Zorru said was true and if there are githyanki west of here, that must be our current objective. Your next set of choices will look like this:
- Heh - did you say 'teeth-ling'?
- What do you mean 'purification'?
- Leave.
Lae'zel says that the crèche holds the zaith'isk and it will cleanse us of the parasite upon choosing the second option. You will then be presented with the first dialogue option again and you can choose to extend the conversation or leave.
Get Auntie Ethel's help
NOTE: The section below of this walkthrough takes place once you've entered Emerald Grove.
Inside the grove at this location (X:193 Y:548), you'll find an old lady named Auntie Ethel. Interact with her and she'll start off by saying you're the talk of the camp, as she continues talking, she notices something wrong about you. She asks you what you need as she can sort it out, she's got a lot of potions at her disposal. Your next set of choices will look like this:
- There's no need. I'm fine, really.
- I'm just here to trade.
- Let her fuss over you.
- What are you, an alchemist?
- Leave.
You'll see what she has to offer by choosing the second option. This is what she has at her disposal:
- Corellon's Grace
- Spellthief
- x3 Potion of Hill Giant Strength.
- Balsam Bundle
- x2 Mergrass Bundle
- Potion of Invisibility
- Potion of Fire Resistance
- x4 Potion of Healing
- Potion of Greater Healing
- x5 Water
- Wispweed Bundle
You can start a conversation again once you interact with her after trading goods. Your next set of choices will look like this:
- I need help. I've been infected by a mind flayer parasite.
- What harm? Show me your wares.
- Nothing for now.
Choosing the first option will gain Astarion's approval, but you'll also get Shadowheart's disapproval. As you tell her your story, she nods along. She then says her heart goes out to you, and she sees no sign of tentacles yet, but that could change in an instant, and that you need serious help immediately. She then remembers she might have something at her home that could help. Your next set of choices will look like this:
- Such as?
- My time could be running short. I can't afford to spend it paying you a house visit.
- [WARLOCK] There is something strange about you.
Choosing the WARLOCK option will give you three more Warlock responses:
- [WARLOCK] You have a certain bearing. An almost fey-like quality.
- [WARLOCK] I detect something devilish, I think.
- [WARLOCK] Might you hail from Thay, perhaps?
Choosing the first option will make her shrug off the idea, and she's just an old woman who loves tea and potions. She then says she'll be going home shortly, and marks her home on your map if you ever decide to visit her. This will end your conversation.
Setting up Camp
If you go to your Camp, a pop-up will appear on the screen giving you tips about the Camp. The camp is where you can take a Long Rest and fully heal your party. You can also manage your Companions at the Camp, and even advance relationships with some of them if you wish to do so, you can also store items, eventually change your character, and recruit more NPCs. See our Camp page to view a more detailed guide about the camp.
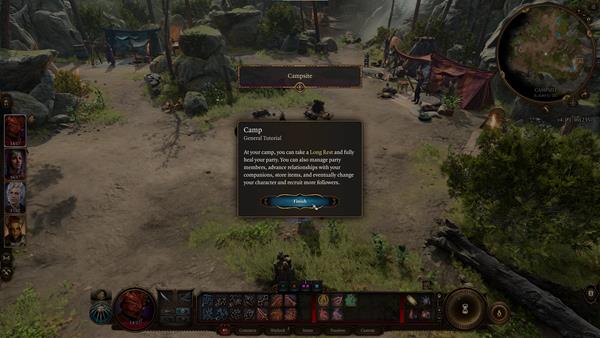
Within the camp, you can interact with all of the Companions you've acquired so far. Listed below are the possible dialogue interactions with each companion:
NOTE: Some dialogue options will depend on the Race and Class you've chosen. For this playthrough, the race chosen is Dragonborn and the class is Warlock.
Astarion
Upon approaching Astarion, he'll initiate the conversation by stating that we've picked up a wizard who managed to get stuck in his own portal. You have three dialogue choices to choose from:
- Tell me about yourself.
- I think it's better if you stay here in camp for a while.
- Leave.
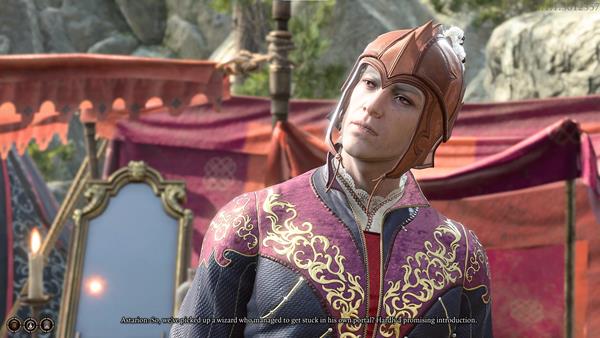
Choosing the first option will reveal that he was a magistrate back in his city. Choosing the second option will make him stay within the camp.
Lae'zel
Once you approach Lae'zel, she'll start by saying that finding the wizard was somehow useful and hopes that he is as powerful as he is verbose. You have four dialogue options to choose from:
- You look so... unusual. Githyanki are rare in these parts.
- Do you know much about mind flayers?
- Wait for me in camp.
- Leave.
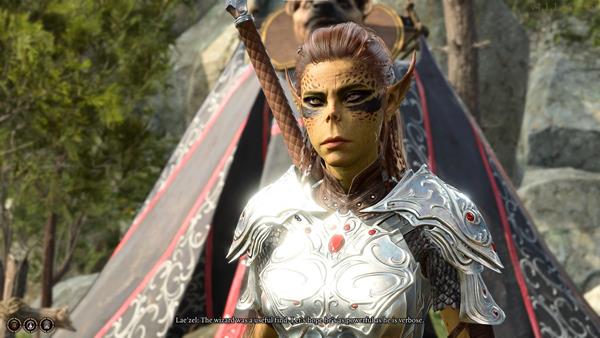
Choosing the second option will make Lae'zel say that it is imperative that we locate a crèche and that you should observe more and question less. You will be given the same set of dialogue options but the second option is changed:
- You look so... unusual. Githyanki are rare in these parts.
- Do you know what happens if we don't find a cure?
- Wait for me in camp.
- Leave
Choosing the first option will prompt three new dialogue options. She expects that she is your first Githyanki encounter:
- I'd never heard of your kind until my capture.
- I know of githyanki, but I've never met one.
- I've crossed paths with githyanki before.
Choosing the second option will make her provoke you by mocking your appearance. Your next set of choices will look like this:
- Come on now. Are they really that bad?
- Better to be scaled than noseless and covered in spots.
- Really? Thanks for noticing!
- Be silent in the face of her goading.
Choosing the first option will make her mock your appearance even more. She then says that she doesn't intend to keep her eyes on you for longer than necessary. Your next set of choices will look like this:
- Do you know what happens if we don't find a cure?
- Wait for me in camp.
- Leave.
Choosing the first option will explain how the parasite within your brain will start to corrupt you. She goes into great detail that it starts with a fever and memory loss. She then goes on and explains the process of turning into a mind flayer. Your next set of choices will look like this:
- That sounds awful. How are you so calm?
- Try to suppress your rising panic.
- [DRAGONBORN] A loathsome fate, and one I intend to avoid.
- Leave.
Choosing the third option will give you an approval up and she hopes that your actions express the same tenacity. She then goes on to say that the first symptoms should have shown already. You have three dialogue options to choose from here:
- You're worried we haven't changed? This is good news.
- On to other matters.
- Leave.
Choosing the first option will extend the conversation. Options 2 and 3 will make you leave the conversation.
Shadowheart
Once you interact with Shadowheart, she'll start the conversation by bringing up that we managed to recruit an interesting wizard. Your next set of choices will look like this:
- What's the story with that odd little artefact you have?
- What do you think of all that's happened to us so far?
- We should get to know each other a little more.
- We should journey separately for now. I'll look for you here if I need you again.
- Leave.
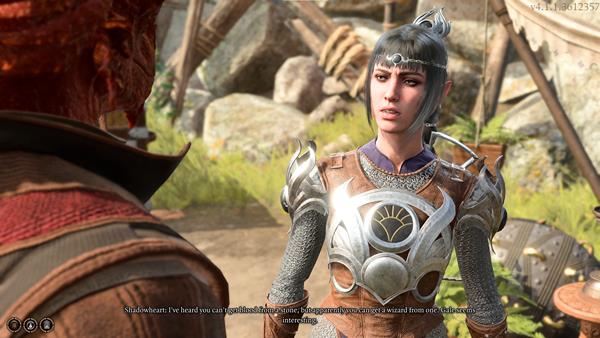
Choosing the first option will make her a bit irritated, saying that you're not entitled to hear anything about it, she also asks that you forget you ever saw it. Your next set of choices will be similar to the previous one, but the first option is now removed:
- What do you think of all that's happened to us so far?
- We should get to know each other a little more.
- We should journey separately for now. I'll look for you here if I need you again.
- Leave
Choosing the first option will make her say that we haven't even gotten that far yet, and she asks what exactly are you referring to. Your next set of choices will look like this:
- You must have thoughts about our little stowaways.
- What will you do, if we actually manage to remove the tadpoles?
- How am I holding up in your estimations?
- Turn to other matters.
Choosing the second option will reveal that we'd go our separate ways once we get rid of the parasite infecting our brains. You will have two dialogue options to choose from here:
- No reason for us not to stay together if we get on well.
- Where would you go?
Choosing the first option will make her say that she needs to get to Baldur's Gate because someone's waiting for her there and she needs to reach them as soon as possible. You will have two dialogue options to choose from here:
- Family? A friend? A lover?
- Seems personal. I won't pry, if it's not something you want to talk about.
Choosing the second option will make her appreciate your decision not meddling with personal matters. Now this will give you the same dialogue options from before but one being removed:
- You must have thoughts about our little stowaways.
- How am I holding up in your estimations?
- Turn to other matters.
Choosing the second option will reveal that you're not the type of company that she'd keep willingly but all things considered, you'll do for now. She also reminds you that she hasn't forgotten about you saving her life from the Nautiloid and hopes she can return the favor at some point. Now you will have two options to choose from:
- You must have thoughts about our little stowaways.
- Turn to other matters.
Choosing the second option will give you the same dialogue options from the first interaction, except for the first one:
- I want to talk about all that's happened to us.
- We should get to know each other a little more.
- We should journey separately for now. I'll look for you here if I need you again.
- Leave.
Choosing the second option will make here say that we don't necessarily need to, and there's no harm in a little mystery. This will open up four new dialogue options:
- You don't want to talk about yourself?
- We have to rely on each other. Easier if we knew each other as well.
- Just looking to make conversation.
- If you're not comfortable, I won't press you.
Choosing the second option will make her say that easier is less interesting and we already have plenty of reason to rely on each other. She also says you can't just confide in anyone about the parasite living inside your brain. This will give you three dialogue options to choose from:
- Maybe I'd like to get to know you better.
- You're deflecting - are you hiding something from me?
- If you're not comfortable, I won't press you.
Choosing the second option will make her irritated again, and asks if you think your blunt approach would make her confess. Two new dialogue options will be available for you to choose from here:
- I suppose not. We can let the matter rest for now, if you'd rather.
- Blunt's all I have if you keep being so evasive.
Choosing the first option will make you both drop the conversation about personal matters. She also says she likes you since you saved her life and wouldn't want to sour things between you while you still both need each other. Now you'll have three dialogue options to choose from here:
- I want to talk about all that's happened to us.
- We should journey separately for now. I'll look for you here if I need you again.
- Leave.
You can extend the conversation by choosing the first option. Options 2 and 3 will make you leave the conversation.
Gale
Once you approach Gale, he will immediately question you about your magic skills. You will have three dialogue options to choose from here:
- I'm not, why do you ask?
- [WARLOCK] Not versed in magic? With the powers my patron grants me, I could write an epic.
- Pester me another time.
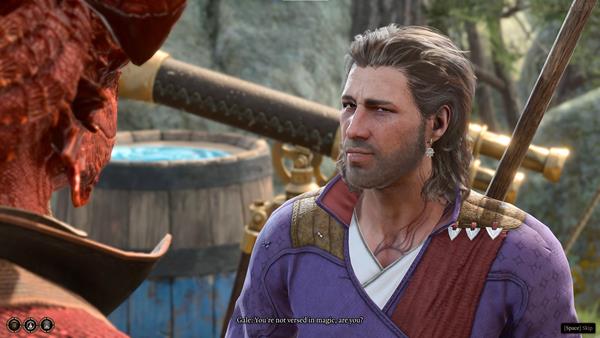
Choosing the second option will make him apologize and what he meant to ask was if you are a wizard. He also says to let him know if you ever encounter any elder wizards, he wants to seek advice from a master.
Ending the Day
Once you end the day, the time will advance and it will be nighttime. You can then interact with your Companions and have a new set of dialogue interactions.
Gale
Once you approach Gale, the first words he utters will be "Go to Hell", you have three dialogue options to choose from:
- And good evening to you too.
- Was there anything in particular I did to deserve such a greeting?
- Watch your damn mouth!
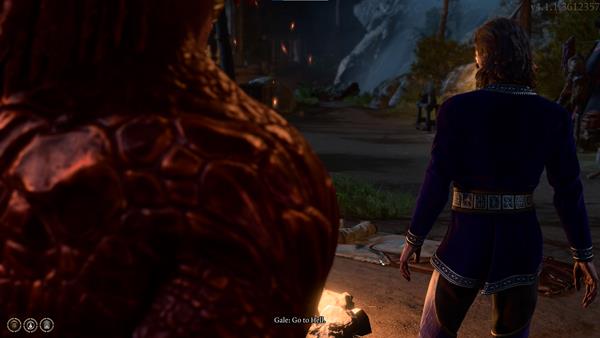
Choosing the first option will give you an approval up from him, as he says you're a good sport. Says the "Go to Hell" expression is so trivial it seems meaningless. But he follows up that we've seen hell, it's real, and it isn't trivial. Your next set of choices will look like this:
- What's on your mind, Gale?
- Watch the flames in silence.
- You sound a tad more dejected than when we first met.
Choosing the first option will make him speak up about what's on his mind, then goes on to say that now we have those parasites living inside our brains. Your next set of choices will look like this:
- I'm not too worried. We'll find someone who can help us.
- Perhaps you should get some rest.
- Brooding will get us nowhere. Action will.
- What can I say but that you're right? We're in deep you-know-what.
Choosing the first option will make him say you're right, and it's best to find a healer as soon as possible. That will end your conversation with Gale, but if you wish to interact with him again, he'll ask how can he be of help, and your next set of choices will look like this:
- Tell me a bit more about yourself.
- Join me, why don't you? There's plenty of adventure to be had.
- Leave.
He'll start saying where he came from once you choose the first option, saying he's from Waterdeep, the City of Splendours. He also says that he's a wizard of considerable acclaim and a scholar of exceptional accomplishment. Goes on to say about having a cat and a library, his weakness is a good glass of wine, and when he's in the mood, he does a bit of poetry. Your next set of choices will look like this:
- Don't stop there. You must have many stories to tell about your adventures as an arch mage...
- I want to know about more than your hobbies. Can't you tell me something about the real you?
- Change the subject.
Choosing the first option will make him say didn't that paint enough of a picture. Now you have two options to choose from:
- [WISDOM] Try peering into his mind. If he won't open up, you'll sneak in.
- Change the subject.
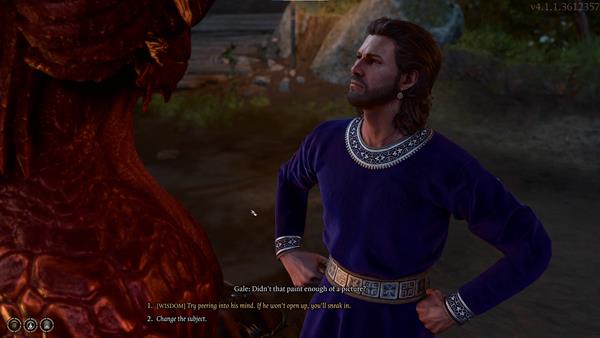
Choosing the first option will require you to pass a skill check with DC 15. Failing this will give you a disapproval from him. Also saying that he has a disciplined mind and that those tricks won't work on him. He then goes on to say that don't try that again unless he invites you to. Now you'll have two more options to choose from:
- Join me, why don't you? There's plenty of adventure to be had.
- Leave.
Choosing the second option will end the conversation.
Astarion
Upon approaching Astarion, he'll start saying that Gale seems to be dour tonight. He then says that curling up in the dirt and resting is a little novel. Your next set of choices will look like this:
- Give it a try. We'll need to be fresh tomorrow.
- Rest or don't. It's up to you.
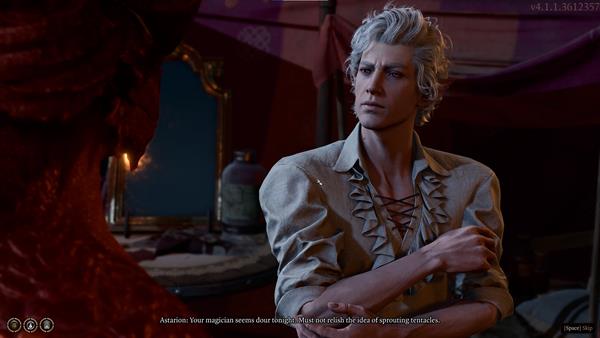
He'll then say that he's in no place to rest yet if you chose the first option. And that today has been a lot and he needs time to process what's happened so far. He then says you can sleep and he'll keep watch. Your next set of choices will look like this:
- Thank you. I'll sleep better for that.
- I'm not tired yet. I'll sleep later.
- We'll both stay up. I'm not ready to turn my back on a stranger.
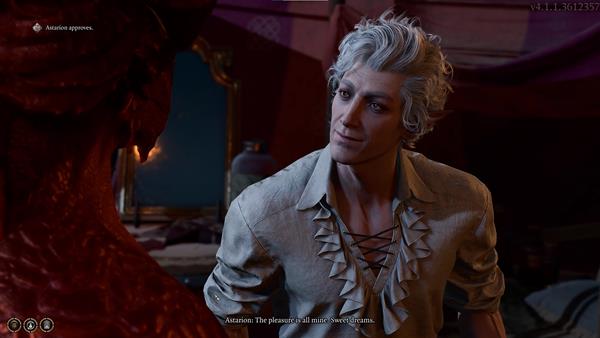
Choosing the first option will give you an approval up and he'll say that the pleasure is all his. This will end the conversation.
Lae'zel
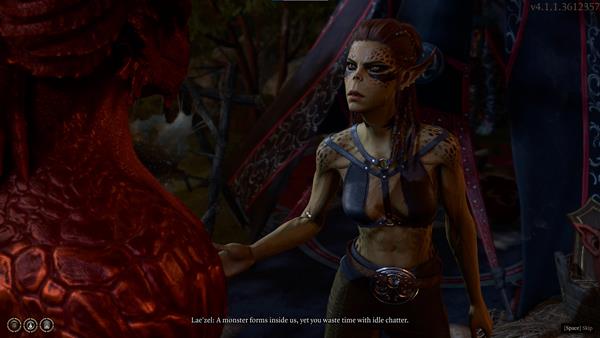
When you approach Lae'zel, she'll start off by saying there's a parasite that forms inside our brains but you waste time with idle chatter. This will immediately end the conversation.
Shadowheart
Once you approach Shadowheart, she'll say you'd better get some rest. She'll then ask what were you two talking about. Your next set of choices will look like this:
- What do you mean?
- If that was any of your business, we'd have called you over.
- We were just discussing the next steps.
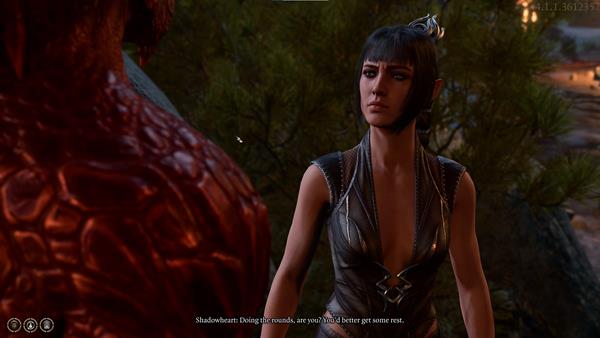
Choosing the first option which is asking her what she meant, she's talking about your conversation with Gale. You then have three options to choose from:
- No, you've lost me. No idea what you're talking about.
- If that was any of your business, we'd have called you over.
- We were just discussing the next steps.
She'll then say that she would be careful with Gale upon choosing the third option. Your next set of choices will look like this:
- You don't trust Gale?
- You like to stir things up, don't you? Stop looking for trouble and stay focused.
- I wasn't confiding in anyone. I was just talking.
- If anyone has me concerned, it's you. You haven't exactly been open about yourself.
Choosing the fourth option will give you an approval down from her. She then explains she has her reasons for not being open about herself and it doesn't concern you. She still tells you to be careful, since you never know what someone is capable of in order to solve this problem we have. She goes on by saying you seem reliable and she thinks you know how important it is to find someone who can fix our problem, and it's best that we focus on that.
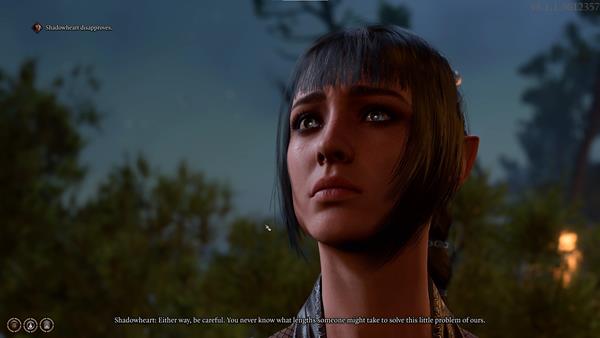
Your next set of choices will look like this:
- Agreed. The sooner we find someone to help us, the better.
- It's late. We can talk about this in the morning.
- Let's not abandon all caution. This is unfamiliar territory.
Choosing the first option will give you an approval up from both Gale and Shadowheart. This will then end the conversation.
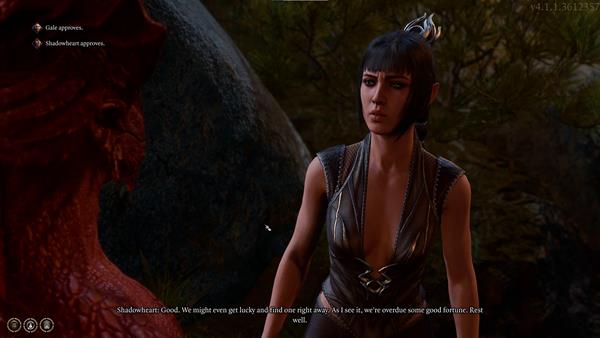
Once you're done and satisfied with interacting with all your Companions, you can interact with the bed near the campfire to take a Long Rest. This will restore your Hit Points and Spell Slots, you will need to have the required amount of camp supplies to fully rest.
Now head southeast of Roadside Cliffs, and you'll reach the Chapel Entrance (X:272 Y319).
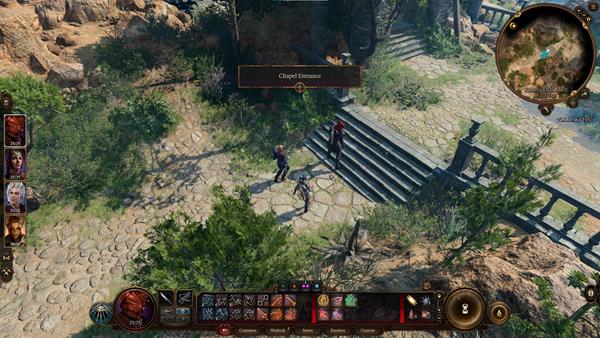
At the southeast corner of the entrance, you'll find a dirt mound you can dig through (X:289 Y:314) if you successfully passed the survival check and if you're currently carrying a Shovel, it'll reveal a wooden chest with Scroll of Magic Missile, Scroll of Mage Armour, and Scroll of Expeditious Retreat inside.
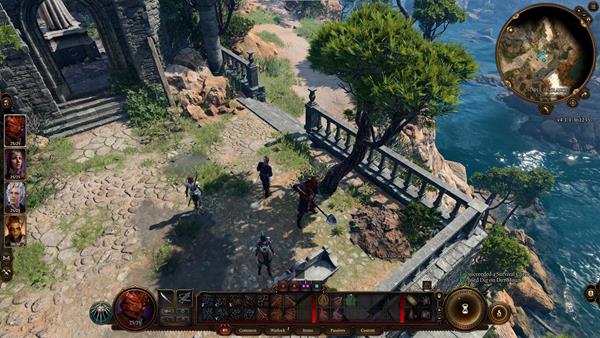
Now head north and enter the chapel ruins, you'll see a headless statue there, continue moving forward, and you'll encounter a Gnome (Gimblebock) arguing with a High Half-Elf (Taman) (X:286 Y:339). When you start approaching them, they'll end their conversation and make you stop.
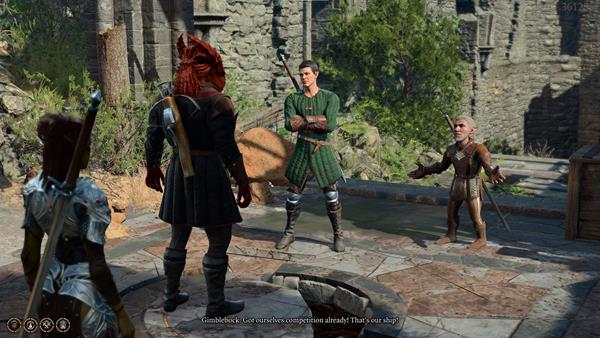
Your next set of choices will look like this:
- I mean no harm - I'm just looking around.
- [PERSUASION] That ship is full of monsters. I wouldn't go near it.
- [DECEPTION] I think that ship's an invasion force. Run while you can!
- [INTIMIDATION] The only thing you own is your life. Leave before I take that, too.
- [WARLOCK] That ship's full of poisonous vapours. Probably demonic. I'd stay away.
- Attack.
Choosing the WARLOCK option will make the two leave, and Shadowheart will approve of this decision.
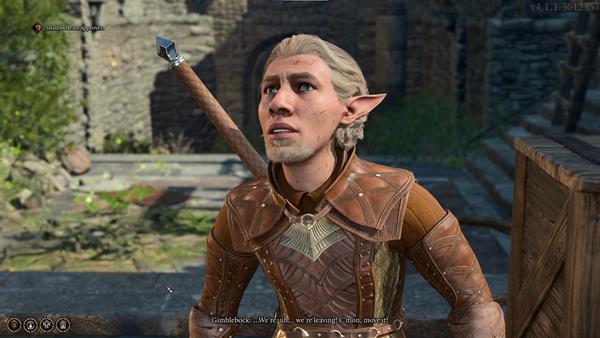
If you head straight from where the crack is (where Gimblebock and Taman were previously standing), there's a locked door (X:286 Y:360). You'll then hear a muffled voice speaking through the door once you interact with it, thinking you're Gimblebock and asking if everything's alright.
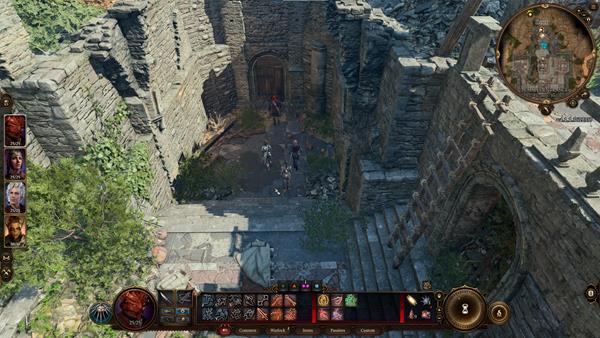
Your next set of choices will look like this:
- Let me in, now.
- Gimblebock ran. Your friends abandoned you.
- [PERFORMANCE] Yes, it's me. Let me in!
- [DECEPTION] Gimblebock triggered some trap. He needs help - now!
- Leave.
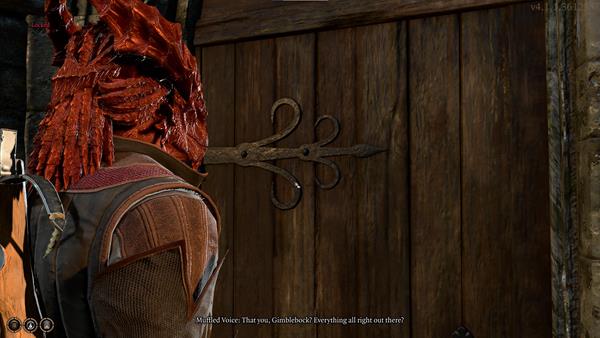
Choosing the fourth option will require you to pass a skill check with DC 10, successfully passing the skill check will fool the person inside and let you in. You'll then achieve Charlatan: Cheese Your Way Through and will inspire Astarion.
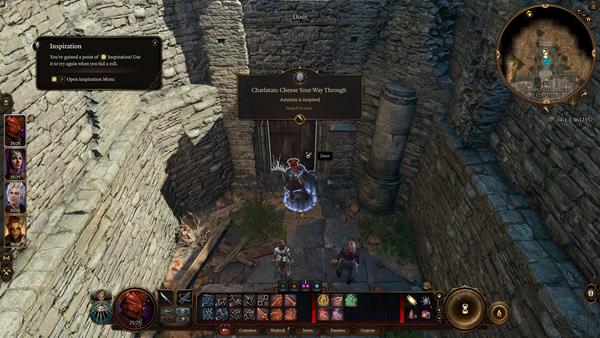
Now go through the door and you'll find yourself within the Refectory. Upon entering, your enemy will be Surprised, once you surprise an enemy, they cannot take actions, reactions, or move on the first round of combat. If you surprised an enemy with an attack, your Action has been used for the first round. Now deal with the bandit and loot some items from its corpse. You can get the Bandit's Key, Leather Armour, and other misc items.
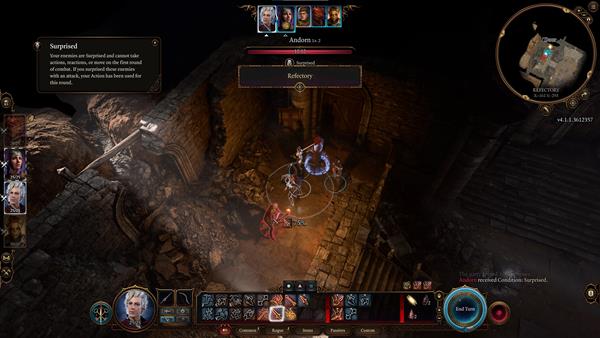
A pop-up will appear on the screen giving you tips about Darkness, in dark places like this, you would need to use a light source to see in the dark. You can use a torch or a Light spell to clearly see through the dark, but some creatures with Darkvision won't need an external light source to see through the dark. Down the hall at the table, you can loot some supplies and other items if you wish to do so.
Now head outside, from where the two bandits left, you'll notice a crack in the ground and a giant rock hanging by a coiled rope above (X:288 Y: 345). You can shoot the coiled rope to drop the rock, making a giant hole in the ground. You can then drop down the hole and have access to the Refectory via a different entrance.
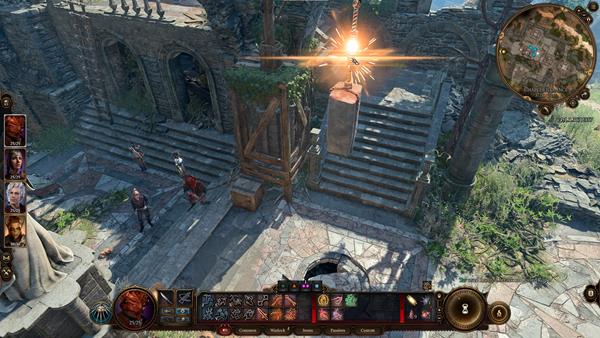
Once inside, you can go through the door in front of you(X:-162 Y:-317) but be careful, as you will face five enemies in the area.
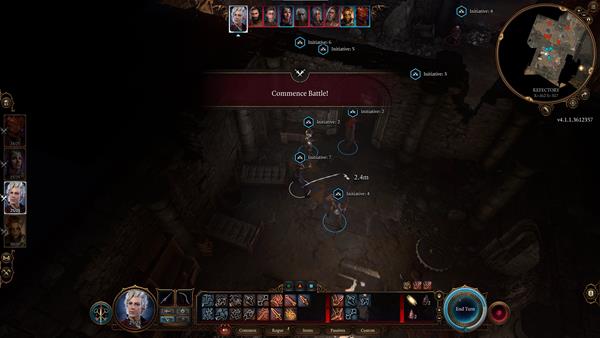
Deal with them as you see fit, then you can loot the book named Journey Through The Jungle from the enemy Cefrey. The door on the south side will lead you to the library, and on the statue, you can loot the book named Chapel Records. There's also a book called The Unclaimed on the left side of the library. You can then loot other items from the library if you wish to do so.
On the westmost corner of the Refectory, there's a door leading to the Dank Crypt (X:-189 Y:-322).
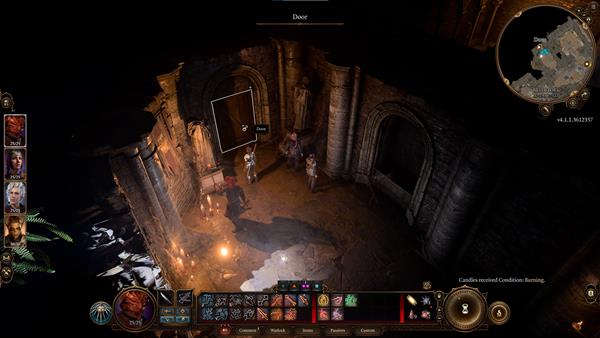
Upon entering the crypt, you'll immediately two Opulent Chests, the one on the right side contains a Peridot Ring.
Now you need to retrieve the Engraved Key located inside a sarcophagus. To open it, you have to solve a puzzle involving pressing switches. Now use the Engraved Key to open the Heavy Oak Doors (X:-294 Y:-286).
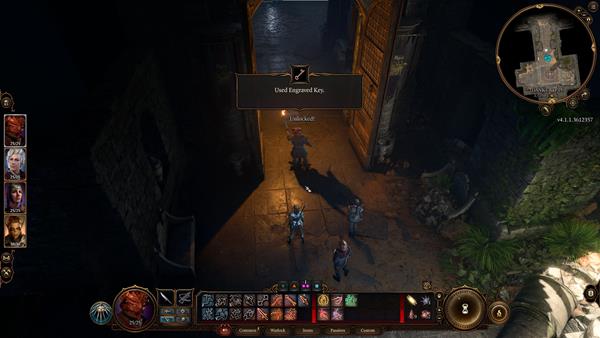
Go through the door, and just ahead you'll come across an Entombed Scribe, you can loot a Scroll of Burning Hands and other items (X:-292 Y:-261).
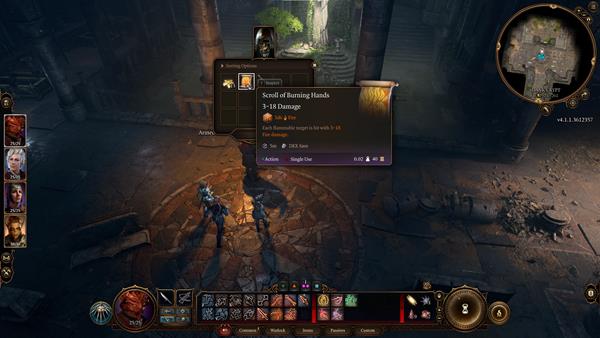
There's a door on the far right, inside you'll see the Book of Dead Gods (X:-321 Y:-270).
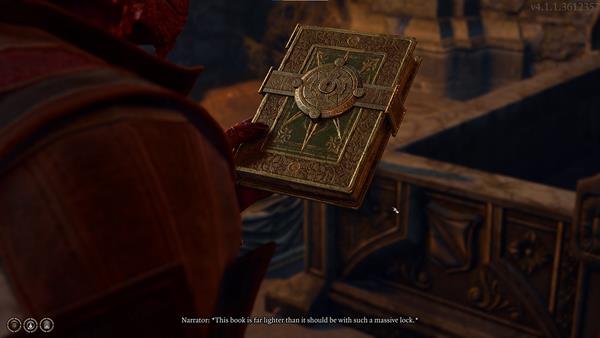
Interact with the book and you'll have a few options to choose from:
- [ARCANA] Search for an arcane rune to sabotage.
- [STRENGTH] Smash the lock open.
- [WARLOCK] [CHARISMA] Channel your patron's strength into the lock.
- Leave.
Choosing any of the three options will require you to pass a skill check with DC 10, successfully doing so will release the lock and open the book. Your next set of choices will look like this:
- [RELIGION] Examine the book more closely.
- Leave.
Choosing the first option will require you to pass another skill check with DC 10, successfully doing so will give you an approval up from Shadowheart, you will also achieve the Acolyte: Divinity Undone and will inspire Shadowheart as well.
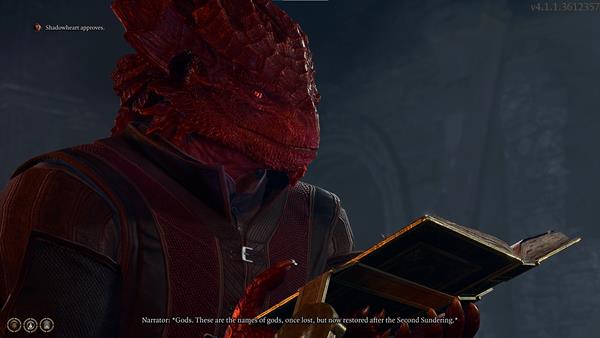
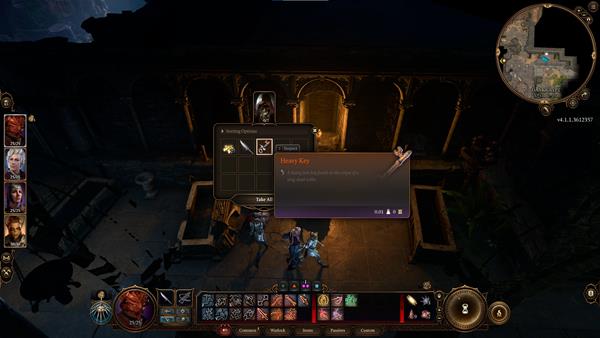
You'll also find a Heavy Chest and a Sarcophagus inside the room that you can interact with and loot other items. Now go outside the door you came from, stick to the left side and you'll see another Entombed Scribe (X:-311 Y;-252), you can loot a Heavy Key, which can open the Ancient Door within the Dank Crypt.
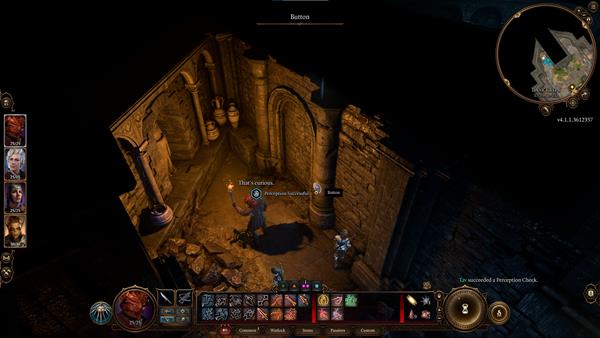
Now head up the stairs on the left side (X-298 Y-232) and you need to pass the Perception check to interact with the button on the wall to open a secret passage.
A short cutscene will play and then you'll immediately engage in combat with Entombed enemies. Deal with them as you see fit. Once you've taken care of all the Entombed enemies, go inside the secret room, and open the Heavy Chest, you'll find The Amulet of Lost Voices (X:-292 Y:-235) and other loot. Now interact with the Richly Adorned Sarcophagus (X:-289 Y:-230) and Withers will arise from it.
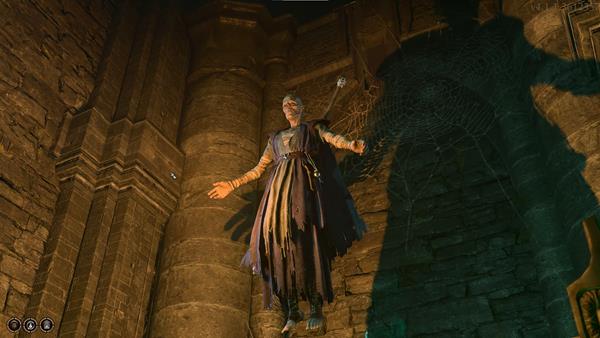
He then asks you a question, "what is the worth of a single mortal's life?", you can choose your answer among the following choices:
- Quite the question. What's the reason for it?
- 'So he has spoken'? What 'he' are you talking about?
- Little spooked by the crawling out the tomb bit. What are you?
- A peaceful undead. Interesting. Why aren't you attacking me?
- Attack.
If you choose the first option, he will reply with it was just curiosity and nothing more. Then he will ask if you will answer his question, Your next set of choices will look like this:
- Yes. Ask away.
- I don't owe you answers.
- Attack.
- Leave.
Choosing the first option will give you the same question as the first one, but you will have a few more answers you can choose from:
- No one life is worth more than any other. We are all equal.
- That depends on a person's deeds.
- Life's only value is as currency. Doesn't matter to me otherwise.
- Each life is of infinite value and merits sacrificing everything for.
- The only life that matters is mine.
- Depends on the mortal.
Choosing the second option will satisfy Withers, although as of this writing, it is speculated that you can choose any answer and this is mainly a role-play that will affect how Withers will speak to you in the future. After your conversation, he will leave the ruins. Now head outside the secret room and make your way to the rightmost part, where you'll see a lever, pulling this lever will drop down a ladder (X:-248 Y:-270).
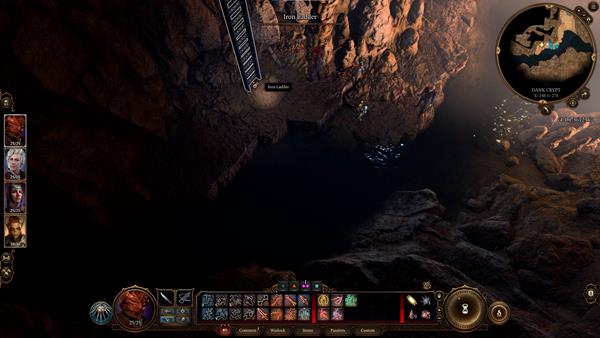
Interacting with the ladder will get you back to the Chapel Entrance area, where you'll see a hatch where you just came from.
Rescue the Druid Halsin
Still, on a quest to find a cure and remove the mind flayer parasite living within your mind, you will go on a search-and-rescue for a Druid named Halsin who has been taken by the goblins. This quest first begins as you infiltrate the Goblin Camp and eventually find your way into Shattered Sanctum, a guarded area within the camp. The objectives involve freeing Halsin who was last seen transforming into a bear, and then eventually killing all three leaders of the goblins: Dror Ragzlin, True Soul Gut, and Minthara.
Inside the Worg Pens (X:393 Y:-60) where you will find a caged bear that is being hurt by Brawler Birka. The bear asks for your help and you can decide to interfere with them and offer your assistance to the bear. Agreeing here will cause the bear to attack the gate and the battle begins. Your goal here is to not let any of the witnesses escape as you help the bear. After winning the battle, the bear transforms into Halsin, the Druid that you were looking for.
Seek his help to remove the parasite and he acknowledges that you are different from the others, and not bowing down to the powers of the True Absolute. He informs you of what he knows about the parasites and is aware that someone is using powerful magic to modify the tadpoles, he then explains that he can't cure you, but still offers to help. He tells you that these powers come from Moonrise Towers and that it's possible to find a cure there.
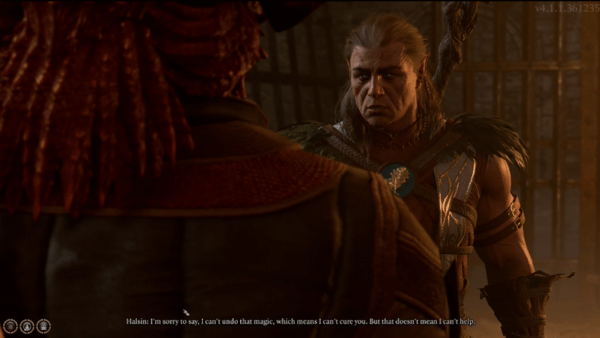
He claims that killing the three leaders will restore order. He asks for your help and offers to help you out after he is secure the safety of his grove. In this next selection you can choose how to go about tackling this:
- Having a shapeshifting bear-druid at my side might make things easier.
- I'll deal with this. You get to safety.
- The grove isn't my problem. I have to concentrate on saving myself.
- You ask too much of me. I can't help you.
Choosing the second option here that lets Halsin leave will grant the approval of Astarion but the approval down of Shadowheart. After this conversation, you will find a locked Grated Iron Doors at (X:410 Y:-32) and have Astarion unlock it for you. You will find a corpse of an elf on the wall. Attempting the Investigation check here will require a DC score of 5. Pulling out the body reveals a tunnel that can possibly lead to another area.
Return to Dror Ragzlin's throne where you first encountered him. This time, there are no rituals but he is seated on his throne. For a better chance of surviving this battle, you will want to take out the Narvass, the Novice of the Absolute who is alone above the throne behind Dror Ragzlin.
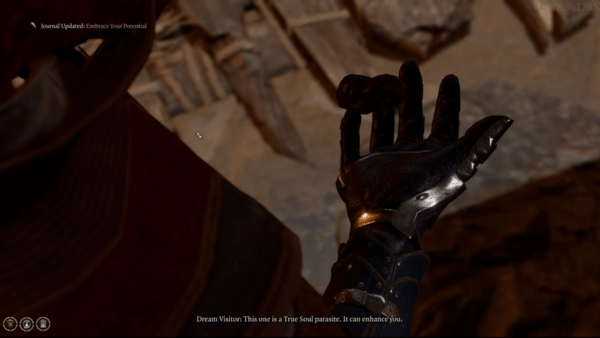
An enemy will detect this, however, but you will have an advantage now that you were able to take out one of them. Be careful not to get anyone killed in your party, but if you end up having one of your allies dying, you can use Scroll of Revivify on them. When the battle is over, go to Dror Ragzlin's body and recover his key and the Mind Flayer Parasite Specimen. Your thoughts get interrupted as the dream visitor speaks to you in your mind. It commands you to absorb its potential which can enhance you. Rejecting the tadpole here will not gather any approval or approval down from the current party.
However, if you decline, Astarion offers to at least let one of the party members try it than just let it sit in your pack. This will update your journal under Personal Quest if you prefer to Embrace your Potential by harvesting the parasite's memories. With the key that you recovered from Dror Ragzlin, you can unlock the Iron Gate right on the balcony behind his throne to get valuable items such as Amulet of Selune's Chosen, Infernal Iron, Springstep Boots, and other items.
Proceed to the locked Heavy Oak Doors at (X:310 Y:-25). Be careful as opening this door will launch enemies into attacking you and your party. This will be a long battle and you must be well prepared for it. After winning this, you should by now, have killed all of the leaders of the goblins. This is an event that will inspire Lae'zel.
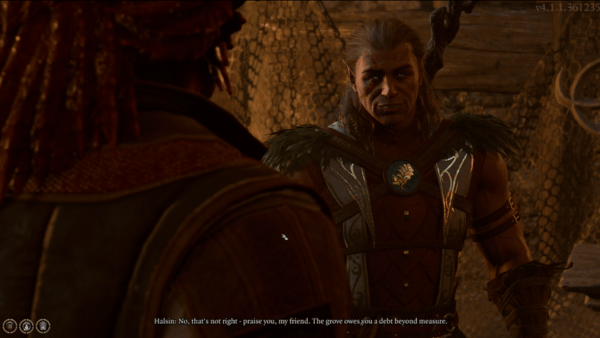
Next, return to Halsin who has asked for your help in defeating the goblins to restore order and protect his grove. You will find him at (X394 Y:-31)., inform him that you have slain all three of the leaders. Now you can invite Halsin to join your party and help you on your quest to get to Moonrise Towers. After this area, return to Druid Grove by using the Waypoints that you have unlocked. The closest will be Emerald Grove Environs and you begin traveling from there to continue your quest with Halsin.
Find a Cure Notes & Tips
- Notes & tips go here.
 Anonymous
i come looking for some clues about the mention of the friendly ilithid in the underdark telling me to search for a witch tower to buy 2 herbs, but isnt a single mention on it

 Anonymous
This is a detailed walkthrough for the entire Early Acess content. Not a write-up on the options and consequences specifically relating to the "Find a Cure" quest. This is in need of a major revision


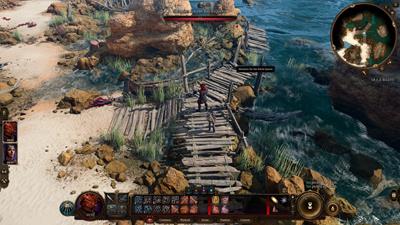
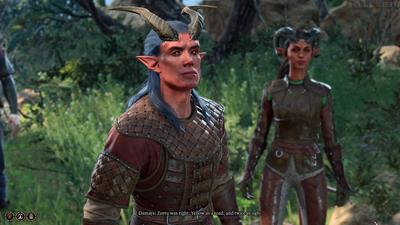
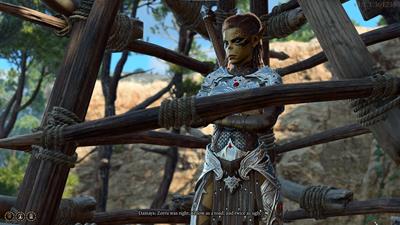
I'm already at act 2 and the quest where you go to camp to celebrate and talk to the druid never check off. The druid is in my camp doing the cure the shadow curse quest and now after leaving the shar area the Find the Cure quest is mark "Our chance of finding the cure to the tadpole diminish", "We leaving without consulting Halsin". Insane bug.
2
+10
-1