Search the Cellar |
|
|---|---|
| Type | Quest |
| Act | 1 |
| Location | Blighted Village Whispering Depth |
| Reward | 20 exp Speak with Dead |
Search the Cellar is a Quest in Baldur's Gate 3. Search the Cellar can be acquired during Act 1. Depending on your choices, it might not be possible to complete the quest until reaching a later act. Completing Search the Cellar will progress the story forward.
Baldur's Gate 3 Search the Cellar Objectives
Find the cellar.
- We found a journal that mentioned a cellar - along with some powerful items. This sounds promising and, more importantly, valuable.
Investigate the cellar.
- We found the cellar mentioned by the journal. Time to have a look around.
Find the necromancer's book.
- The owner of the cellar was more that a doctor - he was a necromancer. And he was obsessed with a particular book.
Decide what to do with the book of necromancy
- We found a strange and powerful tome, 'The Necromancy of Thay'. What should we do with it?
Destroy the Ancient Tome
Destroy the book.
- Evil is inscribed on every page of this book. But all evil has a weakness - there must be a way to destroy it.
Unlock the Ancient Tome
Unlock the book.
- The necromancer's apprentice mentioned a keygem lost in the tunnels. We need to find it.
- The book is locked tight, and the mechanism isn't shaped for a key. Maybe some kind of stone would work?
- We found the gem to unlock the book.
Find a way to finish The Necromancy of Thay.
- We managed to read most of the book, absorbing some of it's necromantic power, but it snapped shut before we could finish it. There must be a way to reach the end.
How to unlock Search the Cellar
- Read the Apprentice's Journal
Search the Cellar Rewards
- Speak with Dead spell
Search the Cellar Walkthrough
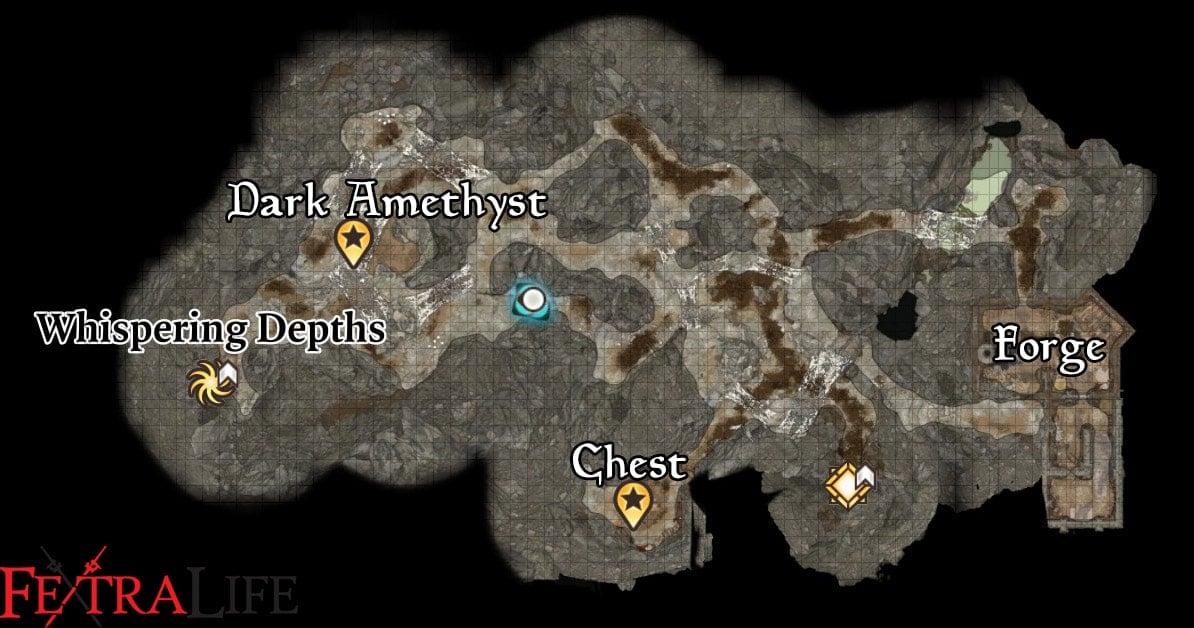
Search the Cellar can be started by reading the Apprentice's Journal. You can find this journal on a Skeleton in the Whispering Depths at (X:-493, Y:-367). The Whispering Depths can be reached through the Well or through a hole in the floor at the Blacksmith's House in the Blighted Village. Before leaving for the cellar mentioned in the journal, you'll want to grab one more item here in the Whispering Depths.
Head down the southwest path and climb up the Cragged Rock to your right. At (X-539, Y:-364), you'll find some vines going down. Be careful reaching these vines as there's a Phase Spider Matriarch nearby. Either defeat her and the rest of the spiders in the cave to get through, or stealth your way down the vines. Head northwest to (X:-557, Y:-357) to find a Dark Amethyst on the ground.
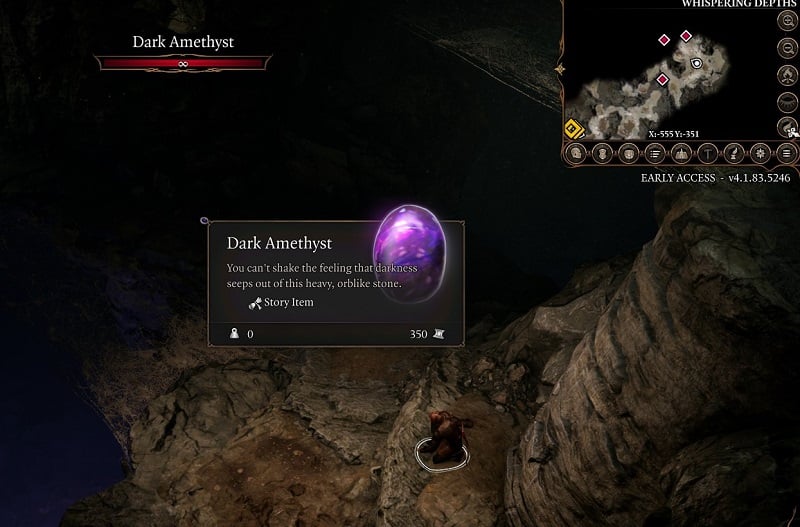
With these items in hand, you can now make your way to the cellar. Teleport back to the Blighted Village Waypoint. Head into the house right next to the waypoint. Read the Apothecary's Ledger on the bar to learn about the cellar of the house. The cellar can be accessed through a hatch on the floor underneath the window behind the bar.
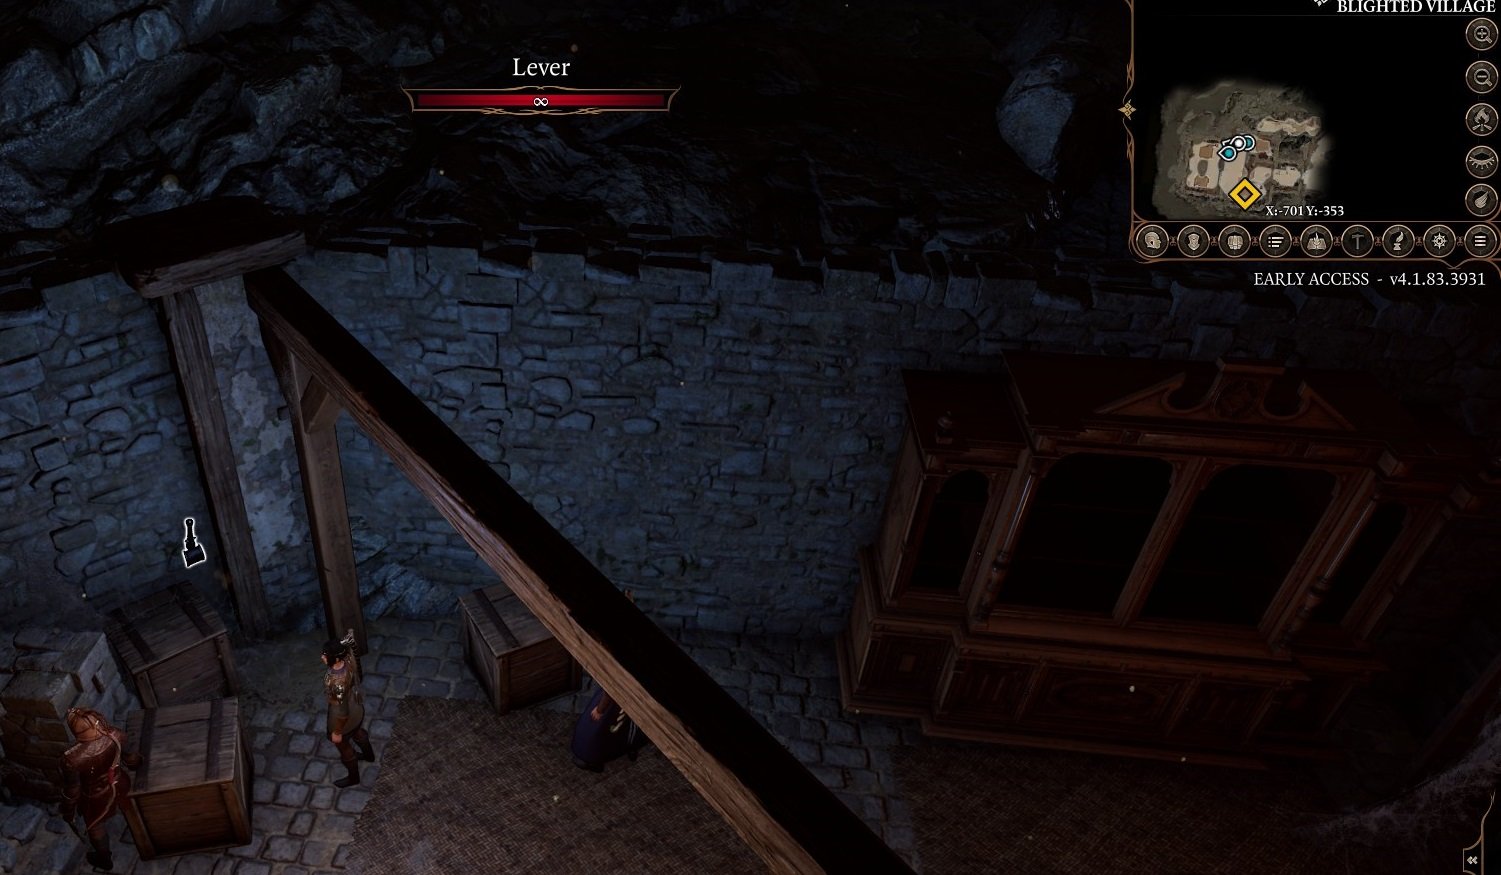
In the northwest side of the first cellar room, you can find a Healer's Log that you can take a look at to make a future dialogue choice easier to make. When you approach this side of the cellar, your party will roll automatic Perception Checks. If anyone succeeds, you'll find a hidden lever nearby behind three Crates. Interact with it to reveal a hidden passage behind on of the bookshelves nearby.
Head through and follow the linear path to the next chamber. Here, you can open the Mouldering Casket directly to the right for a Scroll of Summon Quasit. If you approach the one in the middle, however, an undead Agile Guardian will pop out of the casket and ambush you. The rest of the guardians hiding in this chamber will come out to join the fight if you approach the casket this way. If you destroy the casket from range instead, you can fight the undead one by one. There are a few Fissured Stalactites on the ceiling you can destroy to deal extra damage.
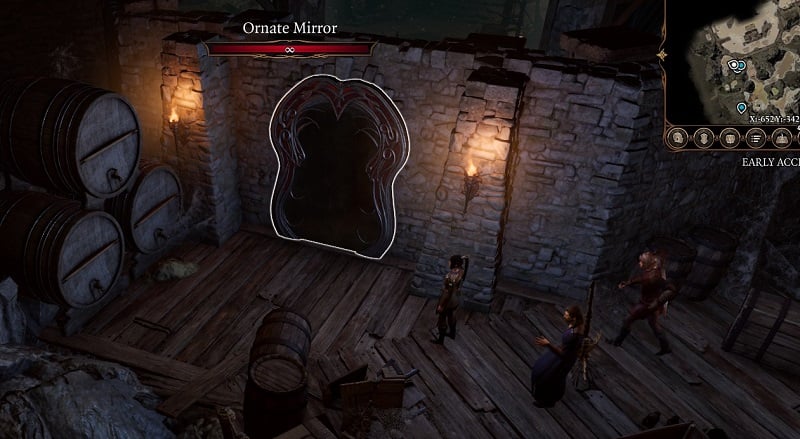
Once you're done, approach the crevice in the northern wall to find the Dark Journal. Read it to progress the quest a bit further Continue southeast, where you'll find an Ornate Mirror. This Mirror hides a secret and to reveal it, you need to make it believe you are an ally of its master. Interact with it, and your first set of dialogue choices will look like this (some choices may be dependent in your Race and Class):
- Repeat the name from the book you read: 'Ilyn Toth'.
- Tell it your name.
- [DRAGONBORN] I'm, eh - Svriit Hava.
- Examine your appearance.
- [WARLOCK] [ARCANA] Examine the mirror, trying to understand it's magic.
The fifth option is a DC 10 Arcana Check exclusive to Warlocks, Sorcerer and Wizard, it will not progress the dialogue. You should avoid choosing the first option, as this is the name of its master. If you choose the third option, you'll then have the option to declare that you are an ally. The mirror will then ask you about your opinion of Szass Tam. Your character will roll an automatic History Check (the Origin character Gale will pass the Check automatically and give extra lore), but whether you pass this check or not, your next dialogue choice should be saying that Szass Tam is a foul, wretched creature for the mirror to allow you to pass through.
You'll then be asked what balsam ointment is used for. If you read the Healer's Log from earlier, your character will remember having read it and you'll have the choice to answer to clean a wound (the Origin character Gale will also know the answer). For his final question, you'll have the following choices:
- I'd see the ones I love.
- I'd look for whatever spells will rid me of this worm in my head.
- I'd see my enemies suffering.
- *[SORCERER] Nothing - you're a thing of magic. I can shatter this prison for you, if you wish.
To gain the mirror's approval, the second choice is a good one, showing that you seek survival and power. If you gave the wrong answer at any point in the conversation, the mirror will send an exploding construct to destroy you. Give the 'correct' answers and the mirror will open up, allowing you to pass through into a secret laboratory.
*The fourth option is only available if you pass Arcana Check earlier and you're Sorcerer, the mirror will also give the approval, for being the first person who asks such a question and welcomes you in.
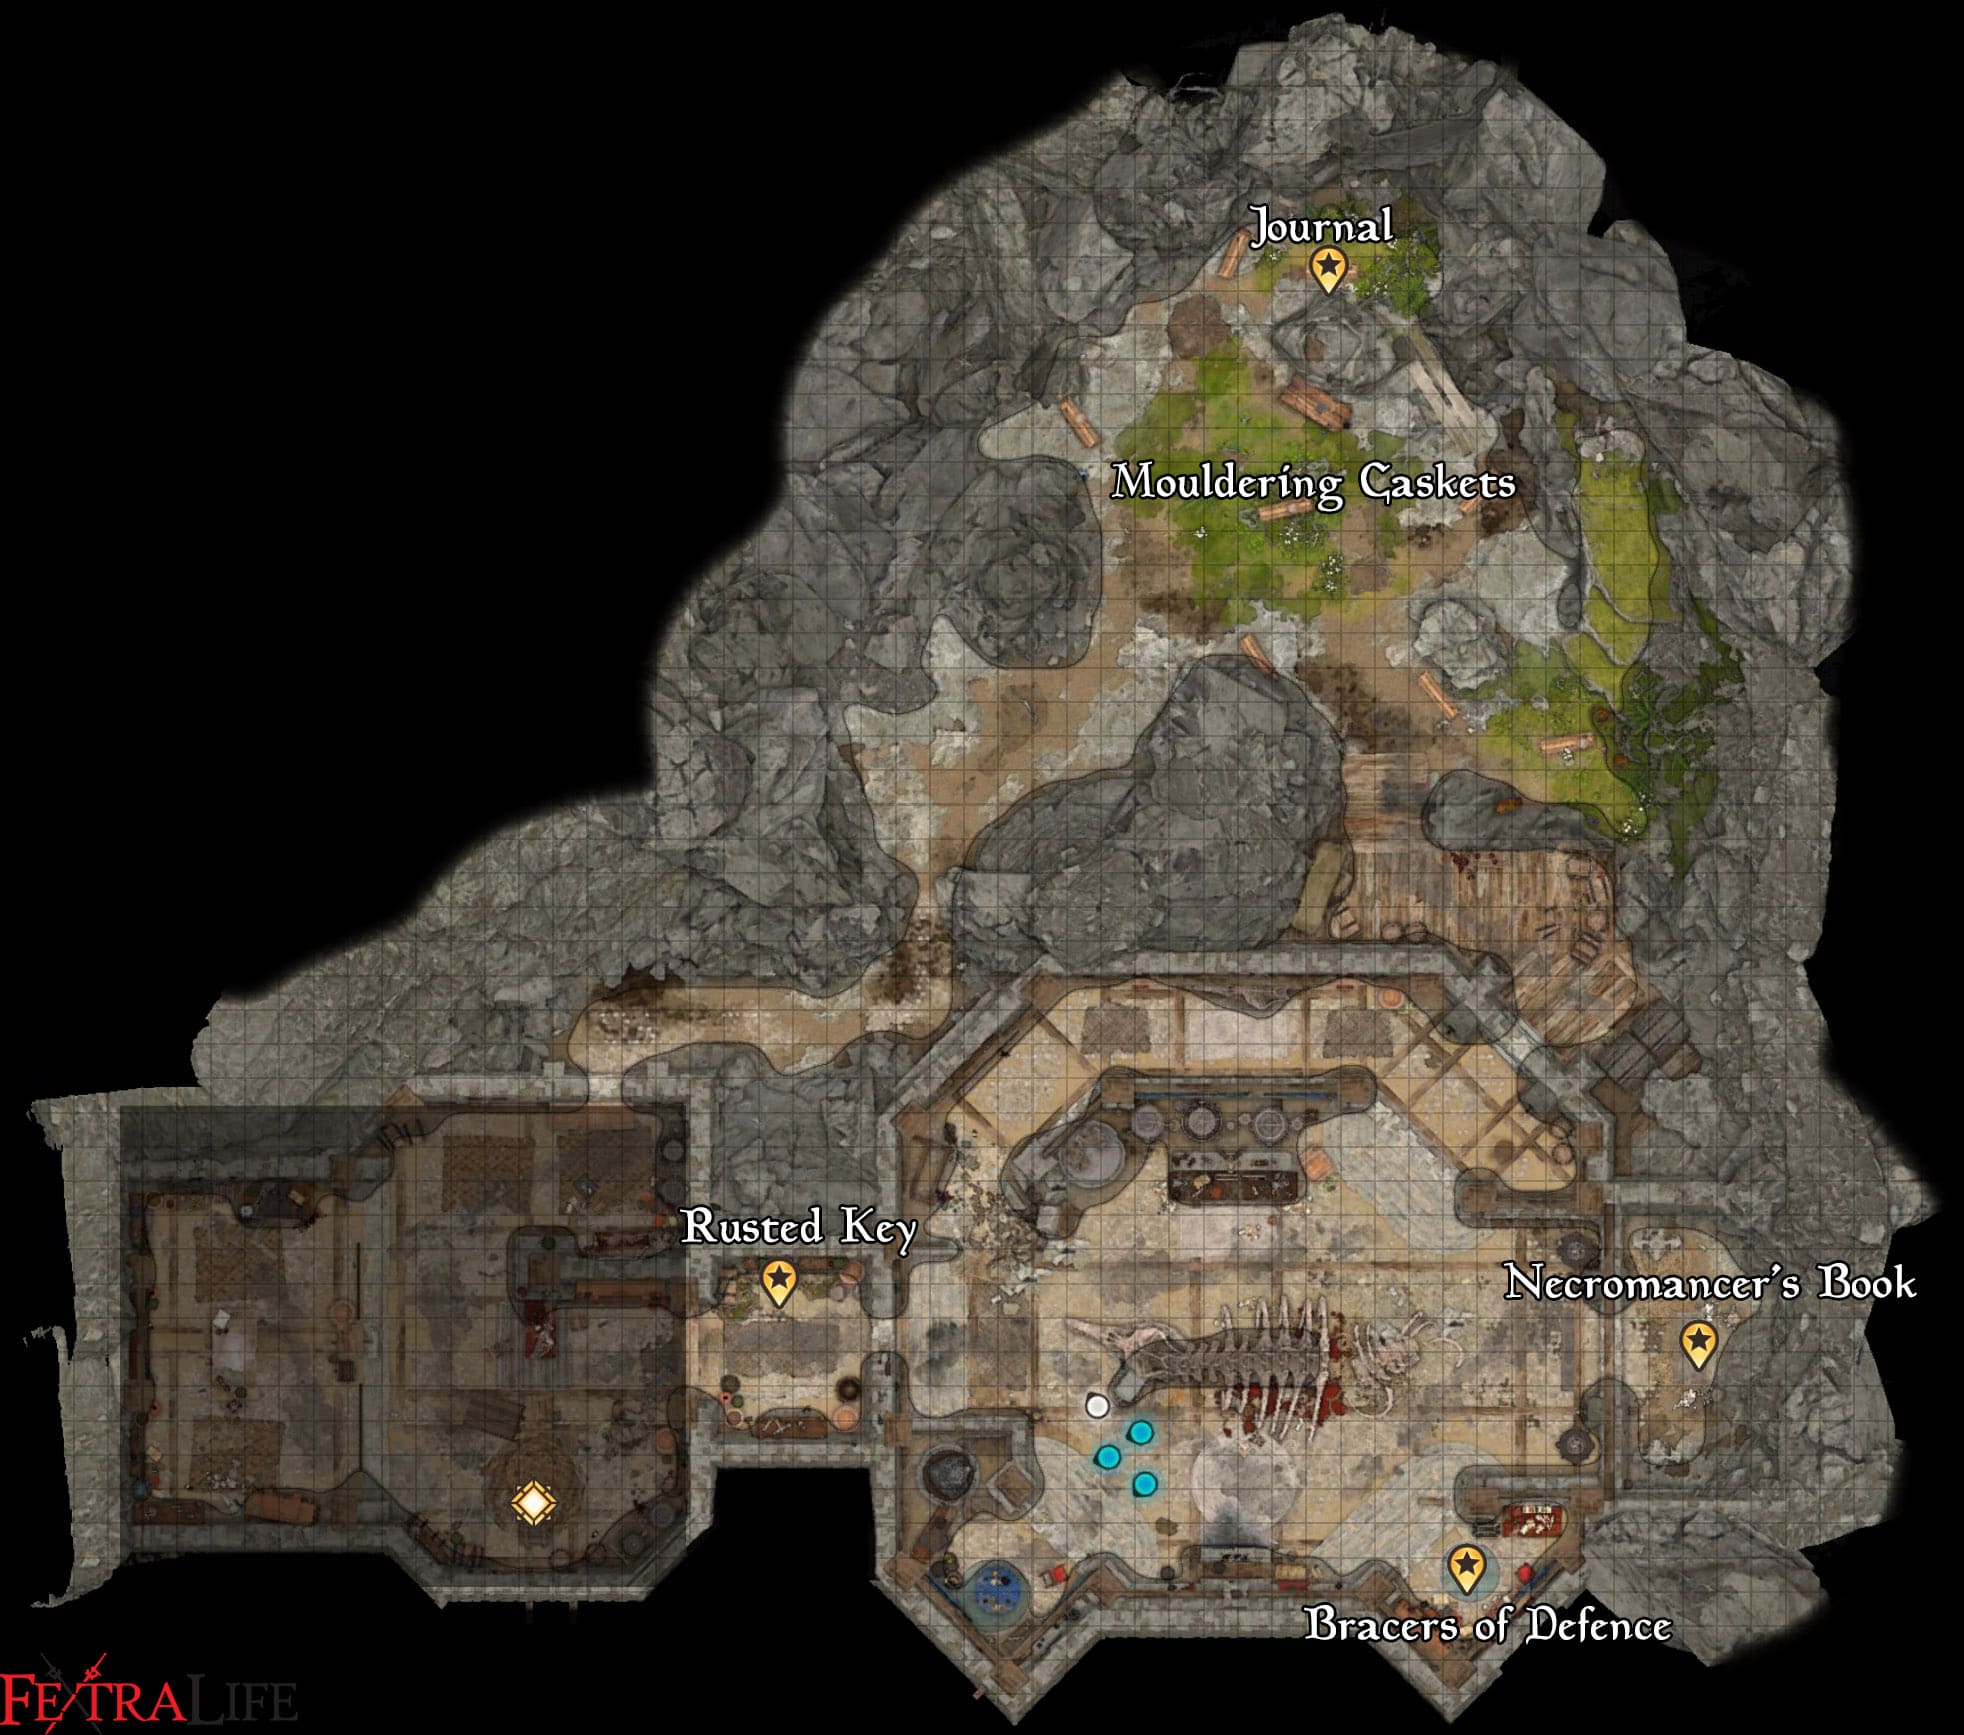
In the side room on the west side of the laboratory, you'll find a Rusted Key on one of the pot shelves. This key can be used to unlock the gate on the east side of the laboratory. As you approach it, your party will roll automatic Perception Checks. If anyone succeeds, they'll find a trap right in front of the gate that you can disarm through a DC 10 Sleight of Hand Check. Past the gates, your party will roll automatic Perception Checks, again discovering two traps that require succeeding a DC 10 Sleight of Hand Check to disarm. Alternatively, you can place an item on the panel before obtaining the tome to prevent the fireball trap from triggering or use Mage Hand to grab the book from range.
Within the small room, you'll find a tome named The Necromancy of Thay. Place the Dark Amethyst you found earlier in the Whispering Depths into the tome to start. At this point, you'll most likely want to put the book away and make a quick save here. Three people can be given the tome to read, but only one member of your party can read the tome in a single playthrough. Alternatively, this book can be destroyed through Radiant Damage, completing the Destroy the Book sub-objective of the quest. The three people who can read the book are the player character, Astarion, and Gale. If you give it to either Astarion or Gale, you'll gain their approval and you can assume control of them to read the tome. Whoever reads from it will have to succeed in three Wisdom Saving Throws to finish reading from it at this point. If they fail any Saving Throw, the book will remain shut for the rest of the playthrough. The first Saving Throw requires a DC of 10, then the next a DC of 15. Your final set of choices will look like this:
- [SAVING THROW] Urge your hand to turn another page.
- [SAVING THROW] Force the book closed.
- [WISDOM] Drink in the darkness, embracing it, and turn the page.
If you choose the first option, you'll have to succeed in a DC 20 Wisdom Saving Throw. Succeed in at least one Saving Throw, and you'll gain the Necromancy of Thay Status Effect. Succeed in all three Saving Throws, and you'll progress in the Unlock the Tome part of the quest. Head back into the side room to the west where you found the Rusted Key. Pulling the lever at the far end of the room will open up the wall next to it. This leads you back to the entrance of the cellar.
To fully unlock the book, you need to enter the Sorcerous Vault in Baldur's Gate.
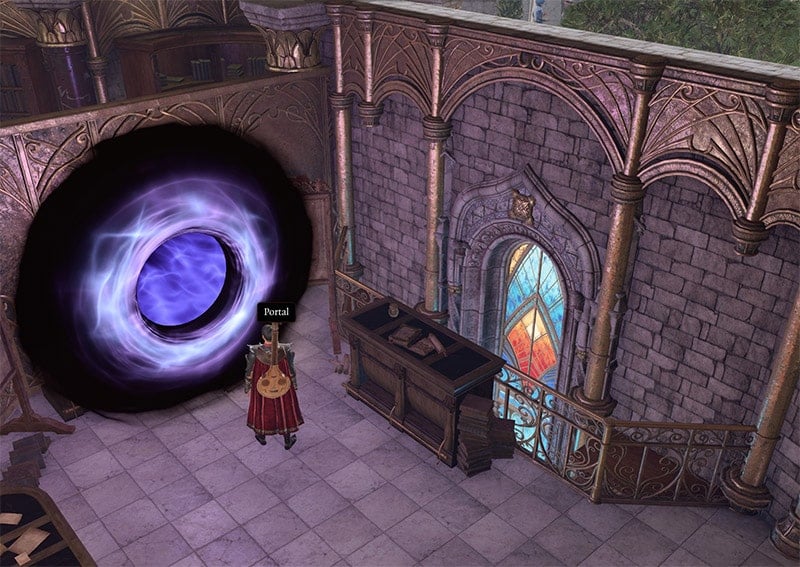
To access the vault, sneak into the office of the Sorcerous Sundries, then use the portal there.
Inside the vault, you can find lots of scrolls and other loot. Don't forget to read The Red Knight's Final Strategem, it gives you a Scroll of Artistry of War.
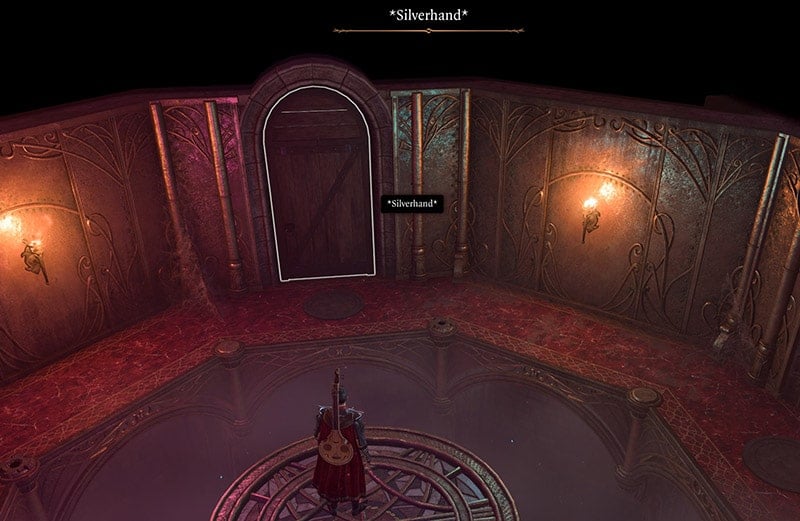
On the other end of the vault, there are three sealed doors, one leads to Elminster's Vault, and one leads to Karsus' Vault. Both two vaults are locked by now, and you can only open the Silverhand door.
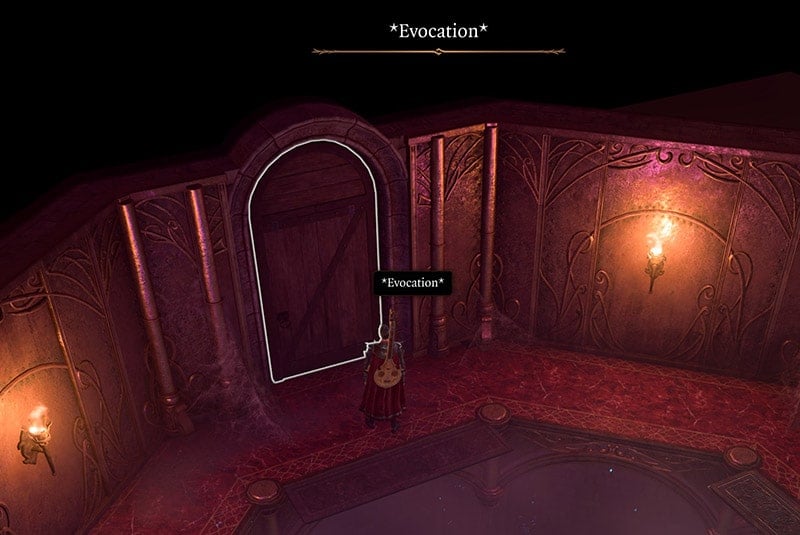
Disarm the traps in the new room, then open the door marked Evocation.
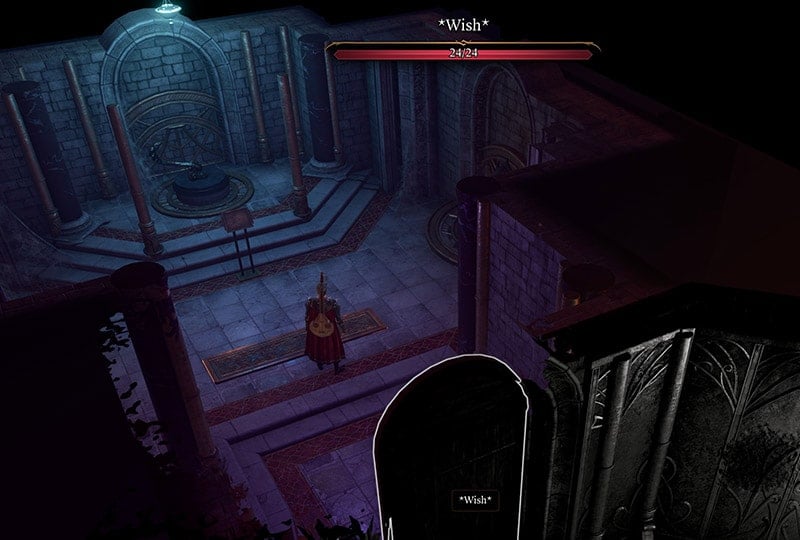
Again, be careful of the traps in the new room, you can put a misc item on the pressure plate to disarm them. Behind the "Wish" door there is a lever to unlock the Elminster's Vault.
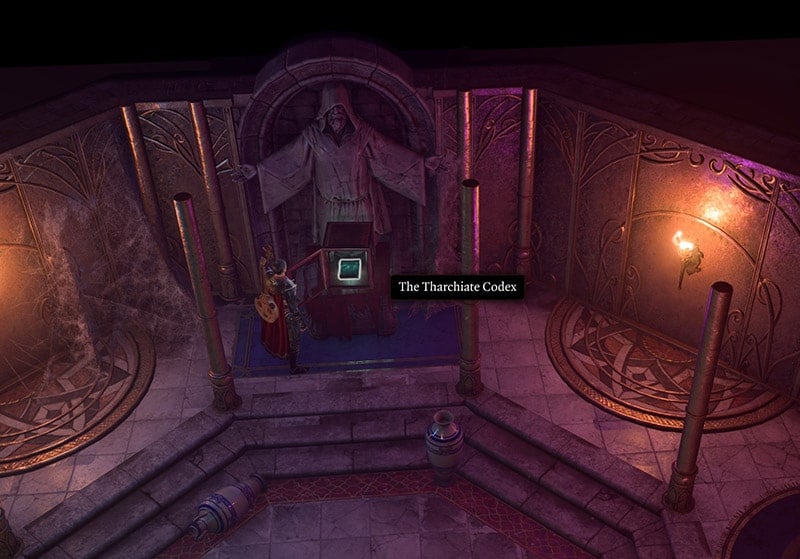
Inside Elminster Vault, you will find The Tharchiate Codex which gives you the right knowledge to finish reading Necromancy of Thay. Read The Tharchiate Codex gives you a curse, you can use the Remove Curse spell to counter it.
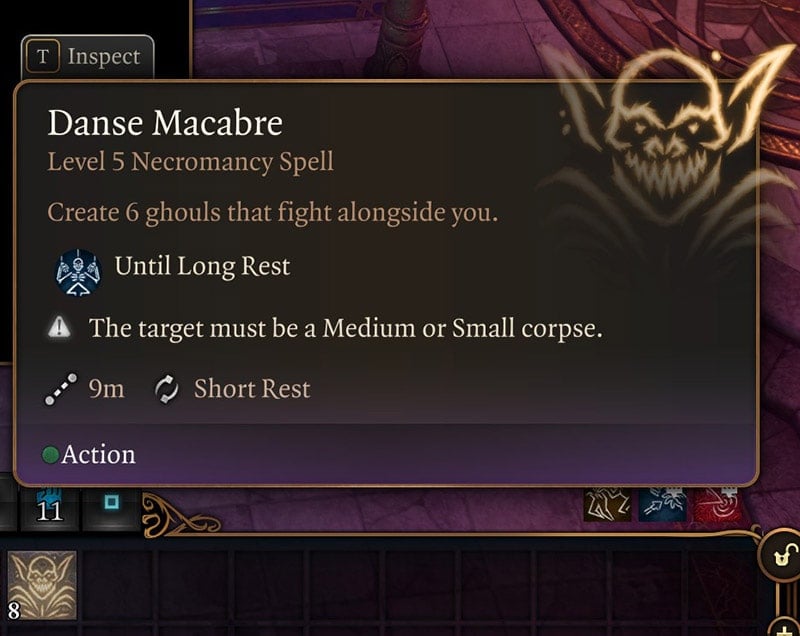
Now you can finish reading the Necromancy of Thay (DC 20). It gives you a powerful spell called Danse Macabre. (Summon 6 ghouls to fight for you.)
Note: After Patch 1 this was changed to 4 ghouls that are uncontrollable and do not require a corpse.
Note: You can sacrifice the knowledge you learn from the Tome when using the Mirror of Loss in house of Sorrow.
BG3 Search the Cellar Notes & Tips
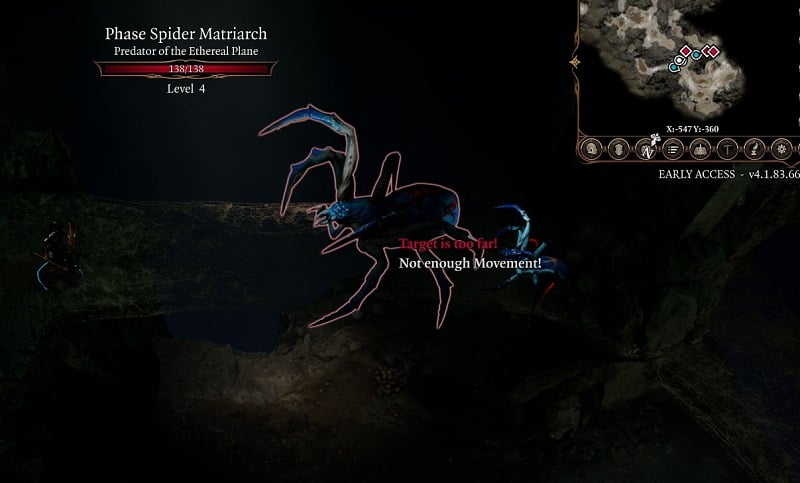
Be careful when you exploring Whispering Depth, there's a Phase Spider Matriarch near the waypoint. Defeat her and you can get Poisoner's Robe (Uncommon clothing).- With the Feather Fall spell, you can directly jump to Underdark from this Whispering Depth.
- To access Karsus' Vault, choose Abjuration door, then Silver door.
 Anonymous
When reading the book as a Sorcerer, you get special options to throw Charisma rolls to turn the pages, instead of Wisdom rolls.

I feel like someone should have mentioned the Super hard giant spider boss fight ypu have to go through to even get the stupid stone.

 Anonymous
1 - The book also opens for Halsin
2 - There's a dialog option with the mirror if you are a Gnome
 Anonymous
 Anonymous
 Anonymous
If you're a sorcerer (maybe wizard and warlock would be the same), you can choose to roll for lower at 5, 10, 15 respectively

 Anonymous
Some extra tidbits for the book. The speak with dead spell seems to be acquired automatically if you give the book to another ally then you need to have them read it and pass the 3 checks to get the wisdom saving throw bonus. Also the 3rd dialogue option for the final roll makes it a wisdom check rather than a saving throw and it was only a 15 difficulty challenge. The third dialogue option is much easier to succeed with enhance ability and guidance.

 Anonymous
Is there a way to proceed if your party failed the lever perception check?

 Anonymous
Note: There is special Dialogue for the Mirror as a Drow as well, though I don't quite remember the name I gave the door with that prompt.

 Anonymous
You can give the book to Astarion and start an interesting questline.

 Anonymous
This guide has left out the whole Shovel bit... in the wooden coffins is a scroll of Cheeky Quasit, the clue being rather than a normal Quasit... it has an adjective. Summon, chat, enjoy.

 Anonymous
this is not the full quest guys. dont destroy the book. this will be used in later part of gales quest in a library.

 Anonymous
 Anonymous
The key is on the other side of the room across from the gate. Enter the little room with the lever after the flight of stairs. On the right side when you enter, there are some shelves. Its on the bottom right shelf and hard to spot!

 Anonymous
 Anonymous
 Anonymous
I got the apothecary book, but cant even find entrance to the cellar

 Anonymous
 Anonymous
I can confirm that the door is now not possible to be lockpicked.

 Anonymous
 Anonymous
"To open this mirror, you need to make it believe you are an ally of its master." in combat I used turn undead and that undead ran through and opened it for me. Until now I didn't even know there was a mirror.

 Anonymous
Choosing to close the book on the third check instead of reading on gives you a better save point if you’re having trouble beating the higher DC check.

 Anonymous
Save scummed for like an hour to get past all 3 checks (DC 10, 15, and 20! Wisdom) thinking that the reward must be worth it. Yeah, Larian really be trolling us with a measly amount of EXP and Speak with Dead... which everybody and their mother already got from that level 1 crypt. Why not something new and actually cool like a limited Animate Dead? Getting a free zombie or skelly minion for people who can't get familiars or animal companions would be sweet.
God damn it, I am beyond salty.
Just give unlock the book and feed it to Gale. Literally all it's good for.
 Anonymous
Destroying or giving the book to a companion rewards 50xp, reading it yourself is 50xp if you pass all 3 checks, but only 20 if you fail any of them.
if you fail the third check you get a PERMENANT debuff called "baleful knowledge", disadvantage on all wis checks and saves.
 Anonymous
One can destroy the book using radiant damage, guiding bolt did the trick for me.

 Anonymous
THATS FREAKING IT????! I ALREADY COULD SPEAK WITH THE DEAD.
omg talk about a let down....
 Anonymous
How the hell do you get divination to work for the saving throws? I've tried casting it before opening the book and also mid-dialog, but I'm not getting the bonus d4 dice on my wisdom checks.

 Anonymous
PROGRESS!
I've gotten past the freezing dialog sceen.
First of, I used a mage hand to throw the book out of the caged room, and actually took the book with me to my camp as well as the amethyst.
Regardless.. you put the amethyst IN your bag. Then READ the book, you get the cut screen with the dialog. Get to the frozen part, hit space to advance,as mentioned below.
Now you have the option to interact with the amethyst in the dialog.
 Anonymous
How in the world do you put the amethyst in the book? Please explain how.

 Anonymous
If the trap is already going when you get to the book, just toss something onto the plate where it normally is. That will stop the traps from firing. If the cinematic cut scene gets stuck, just hit "space" to advance the dialogue.

 Anonymous
need to keep the undead that spawn from the caskets away from that last casket before the mirror. if they get to that one it starts the trap in the cell with the book.

 Anonymous
 Anonymous
Failing the checks can get you a debuff that permanently reduces your wisdom save throws. Recommend adding “SAVE FIRST” before opening the book in the guide

 Anonymous
I got only speak with the dead spell .... that isuseless because i have speak with the dead amulett ....

 Anonymous
The Quest is very bugged, The tome is not on the stone tablet, but behind it in the spider web. The trap is already going.
You can throw something onto the table to disarm the trap and then grab the book but the cutscene is bugged and will just leave you stuck there staring.
I guess we will need a patch here.
 Anonymous
 Anonymous
I must have broken this quest. When I walked up to the mirror , the fire trap was already set off (no book) Note did not start the quest either. :(

 Anonymous
"Unlock the ancient tome" - how to open? where to find the gem-key


You can also give the tome and gem manually to other party members to make them unlock and open it.
It just did it with Shadowheart, who also has a special [CLERIC] [SHAR] interaction for the last check, with an easy DC 10 on Wisdom (and her base wisdom is already high if you haven't respec'd her).
0
+10
-1