Emerald Grove |
|
|---|---|
 |
|
| ACT | 1 |
| Location | Druid Grove |
| Suggest Level | 3 |
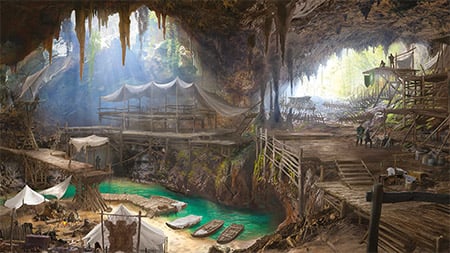
Emerald Grove is a Location in Baldur's Gate 3. Emerald Grove is an area located north of Roadside Cliffs on Ravaged Beach. On this page, you can find information about the map, quests, enemies, notable items, and other useful tips about Emerald Grove.
Emerald Grove Map
Emerald Grove Sub-Areas in Baldur's Gate 3
- Sacred Pool
- The Hollow
- Makeshift Prison
Baldur's Gate 3 Emerald Grove Notable NPCs
Items in BG3 Emerald Grove
- Gloves of Missile Snaring
- Battleaxe
- Stamped Handbill
- Gruel
- Ring of Being Really Invisible
- Ring of Resistance to Ants
- Ring of Infinite Wishes
- Ring of the Lekinesus
Baldur's Gate 3 Emerald Grove Quests
- Save the Refugees
- Save Arabella
- Find a Cure
- Investigate the Beach
- Save the First Druid
- Defeat the Goblins
- Find the Nightsong
Baldur's Gate 3 Emerald Grove Walkthrough
Battle at the Gates
Before making your way inside Emerald Grove, you first need to go here (X:216 Y:411) to initiate a cutscene. The cutscene will show Aradin, alongside his companions Remira and Barth, arguing with Kanon to open the gate leading to Emerald Grove. Kanon does not budge as he says the gates must be kept shut as per Zevlor's orders. Aradin then tells Zevlor that they were fighting off a group of Goblins and now followed them there, Zevlor then orders Kanon to raise the gate, but it's too late. The group of goblins arrives and just as Kanon was raising the gate, he gets struck by multiple arrows. Although it may seem they are being overwhelmed, Wyll shows up at the scene to help.
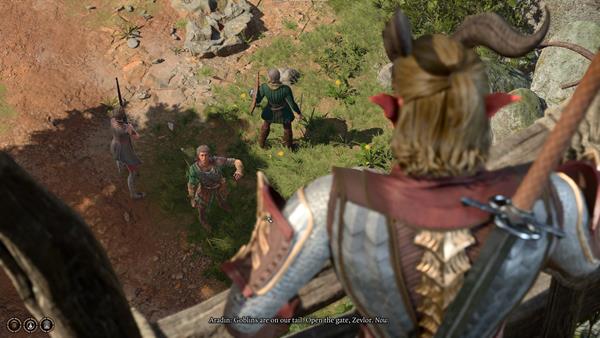
After that, you will immediately engage in combat. During this combat encounter, take advantage of your positioning as you are already at a high ground. Once you've slain all the enemies in the area, Zevlor will then order someone to open the gate. Before going through the gate, you can loot the corpses of fallen enemies for useful items. You can loot the Brass Locket out of Barth's corpse if he dies during the encounter.
Now go through the gate, and you'll reach Emerald Grove (X:209 Y:454). As you move forward, you'll see Aradin and Zevlor arguing about what just happened.
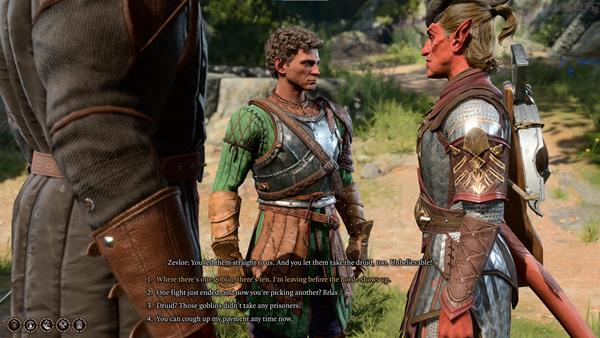
Your next set of choices will look like this:
- Where there's one goblin, there's ten. I'm leaving before the horde shows up.
- One fight just ended, and now you're picking another? Relax.
- Druid? Those goblins didn't take any prisoners.
- You can cough up my payment any time now.
Choosing the second option will just make Zevlor provoke Aradin in some way. Then they go back and forth insulting each other. Your next set of choices will look like this:
- [INTIMIDATION] If you want me to take both of you down, I will. Otherwise, knock it off.
- Stand back and watch.
- [PERSUASION] More violence won't bring back those you lost. Stop and think.
Choosing the third option will require you to pass a skill check with DC 15. Successfully passing the skill check will make Zevlor say you're right and there's too much at stake. Aradin then makes another side comment to insult Zevlor but he didn't bite back and says squabbling is pointless since the goblins already found their camp. You will also receive an approval from Shadowheart and Gale for choosing the third option.
Now make your way up a hill (X:248 Y:444) and you'll encounter a Bugbear Assassin trying to ambush a tiefling named Nadira. Make quick work of him, loot some items off his corpse, then interact with Nadira. She says you have good timing as she would not have won that encounter. But she thinks you're not actually there to save her, and instead thinks you're after her Soul Coin.

Your next set of choices will look like this:
- Coin? Mistress? You lost me.
- I've been to Avernus, but I'm no devil's servant.
- That bugbear would have crushed your skull. This is the thanks I get?
- [DECEPTION] You got me. Hand the coin over and I'll be on my way.
Choosing the fourth option will require you to pass a skill check with DC 5. Successfully passing the skill check will make her give you the Soul Coin, and you will also get an approval from Shadowheart. You will then be presented with the same set of choices from the previous one, except for the option you just chose:
- Coin? Mistress? You lost me.
- I've been to Avernus, but I'm no devil's servant.
- That bugbear would have crushed your skull. This is the thanks I get?
Choosing the second option will make her question why you reek of the Hells. You then reply by saying that she wouldn't believe it even if you told her. Then she says you'd be surprised considering what she's seen so far. Then goes on by saying that if you're not here for the coin, she would like to enjoy some peace and quiet.
After your conversation, go down the hill and make your way to this location (X:210 Y:448). You'll then encounter Kanon laying on the ground, with Arka screaming for help to find a healer.

You'll then have a few dialogue options to choose from:
- You need to avenge this - spill some goblin blood.
- I'm sorry. It happened so fast.
- He's dead. Stop wasting your time.
- Leave.
Choosing the second option will make her say that someone's going to have to pay for this. Memnos will try to stop her but she leaves anyway.
Now head north and find Zevlor (X:206 Y:477) and interact with him. He thanks you for your assistance earlier during the goblin attack, then he starts introducing himself.
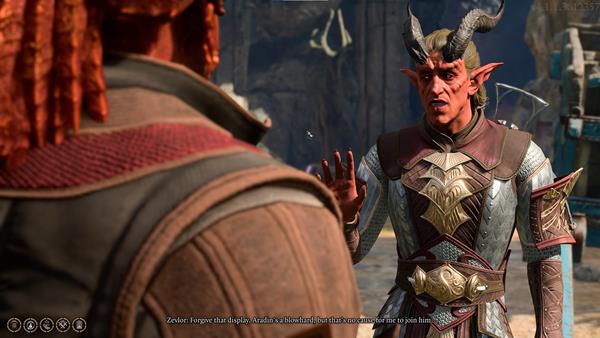
Your next set of choices will look like this:
- I'm Player's Name
- What is this place?
- I take my thanks in coin.
Choosing the first option will make him warn you that visitors are no longer welcome in Emerald Grove. He then says whatever your business is with this place, he wants to see to it quickly, since the druids are forcing everyone out and this attack will only strengthen their resolve. Your next set of options will look like this:
- I have no quarrel with druids.
- Why are they forcing you out?
- Those goblins - have there been many attacks like that?
- I won't be staying long - I just need to find a healer.
Choosing the third option will reveal to you that there have been several attacks by different monsters but the druids are blaming them "outsiders" for drawing them there, that's why no one's welcome anymore. He says they can't stay but leaving isn't an option either since they'd be slaughtered. Your next set of choices will look like this:
- This ritual - is there no way to convince the druids to stop it?
- I need a healer.
- What brought you here?
- Leave.
Choosing the first option will reveal that he already tried and that their new First Druid, Kagha, won't even see him. He then asks if you could persuade Kagha, even if it's not your business. He thinks you can persuade her since she owes you for saving this place. Your next of choices will look like this:
- I'll see what I can do.
- I'm sorry. I've got my own problems.
- I have my own temporal concerns. I need a healer.
- What are you offering for my aid?
Choosing the third option will reveal that you can find healer Nettie within the inner grove with the other druids. Your next set of options will look like this:
- I'll find her. And I'll speak to Kagha while I'm there.
- Enough about the ritual. I have my own problems.
- Leave.
You will receive a disapproval from Astarion if you choose the first option. Zevlor then says he owes you a great debt and asks that you talk some sense into the druids, before more lives are lost. The conversation will end here and you can proceed.
The Hollow
Make your way inside The Hollow (X:206 Y:496). There's a merchant named Arron located at (X:204 Y:512). Interact with him to see his inventory, you can also engage in a conversation if you wish to do so.

These are the dialogue options that will be presented upon your first interaction:
- Are you really locking down the grove?
- What are you selling?
- Leave.
Choosing the second option will reveal his current inventory. Choosing the first option will extend the conversation, which will lead him to say that they know it's drastic, but more monsters seem to terrorize their region every day. Your next set of choices will look like this:
- What about the people here?
- What are you selling?
- Leave.
He says that the druids will be safe upon choosing the first option, but the other refugees seem unlikely. Your next set of choices will look like this:
- You just said the region's overrun by monsters. They won't survive by themselves.
- Dire times. High stakes. I understand.
- Seems like most are tieflings. They'll be fine. They have devilish powers.
- Leave.
Choosing the first option will make him repeat what he said saying it's a drastic measure and the survival of the grove is of utmost importance and there aren't enough supplies to support everyone. Now you can choose to leave or check the items he's currently selling. He has the Gloves of Missile Snaring, some weapons, armor, and scrolls among other items.
Just up ahead (X:207 Y:527), you'll see a group of Tieflings, named Lia, Rolan, and Cal, arguing about whether they should stay and help fight off the goblins, or leave and get to Baldur's Gate themselves. Lia is the one who insists on staying and helping the people within the grove, but Rolan wants to leave to ensure their safety. Cal tries to calm them down but things are heating up.

Your next set of choices will look like this:
NOTE: Some dialogue interactions will have additional options depending on the Race or Class of your character.
- Say nothing
- Get out while you can - the goblins will be back.
- [PERSUASION] You should all stay. A single blade could make a difference.
- [DRAGONBORN] Clan is everything. You don't abandon those you swore to protect.
- Leave.
Rolan will say that he made no oath and he doesn't want to be held responsible to these people once you choose the DRAGONBORN option. Lia manages to convince Rolan to stay, as it is the right thing to do. Lia then thanks Rolan and goes on her way with Cal. Rolan stays behind, you can interact with him to have a conversation. He starts off by yelling and states that they should have left by now and that staying is a mistake since they're practically sitting ducks waiting to be attacked.

Your next set of choices will look like this:
- You're doing the right thing. The tieflings need help.
- Why the rush to leave?
- Leave on your own. Why wait?
Choosing the first option will make him say that there's every chance they risk their own lives by helping these people, and they will eventually die at the blade of a goblin just because Lia insists on helping everyone. He says their best chance to make to Baldur's Gate is on their own, since this place is lost already. Your next set of choices will look like this:
- Hold on. Why are you so eager to reach the city?
- Are you always this selfish?
- There's every chance you'll die on the road.
Choosing the first option will reveal that he's Lorroakan's newest apprentice. He says that Lorroakan is the greatest wizard in Baldur's Gate. Your next set of choices will look like this:
- You sound excited.
- [BALDURIAN] Is this Lorroakan of Ramazith's Tower?
Choosing the BALDURIAN option will make him boast more about being Lorroakan's apprentice, he assures you that you will boast about this interaction in the future, and he also hopes to meet you again in Baldur's Gate sometime soon. Your conversation ends here and then you can proceed.
As you move forward, you'll notice a Haystack (X:214 Y:535), you need to pass a Perception check to interact with it and loot whatever item you find inside it.
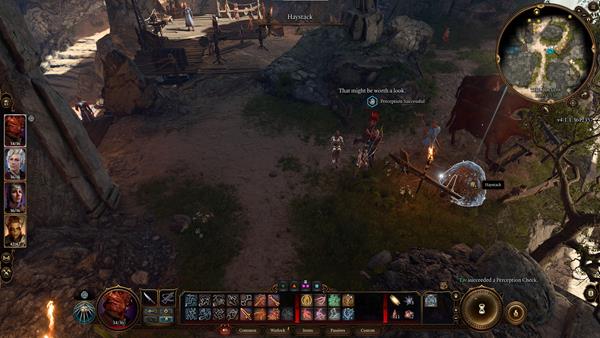
Just up ahead at (X:212 Y:544), you'll see a couple of Tieflings, as well as Wyll training a young tiefling named Umi.
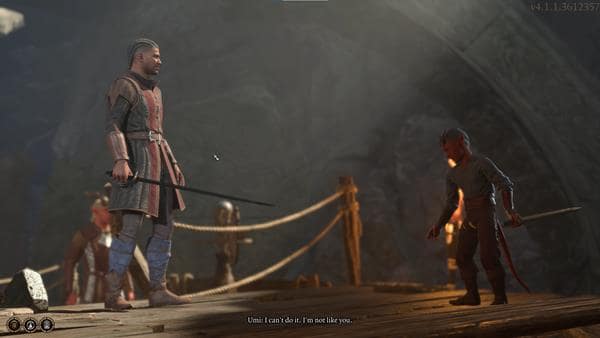
You can then interrupt their training with these presented dialogue options:
- Hey there. Can I have a word?
- This whelp is hopeless. You're wasting your time.
- It's good advice, child. You'd do well to listen.
- [DRAGONBORN] Heed the man's words, child. His form is highly efficient.
- Leave.
Choosing the DRAGONBORN option will make Wyll reply with "Kind words un unkind times, my friend", then just as he starts approaching you, you connect telepathically and learn that Wyll was aboard the Nautiloid ship with you at the same time you were abducted.
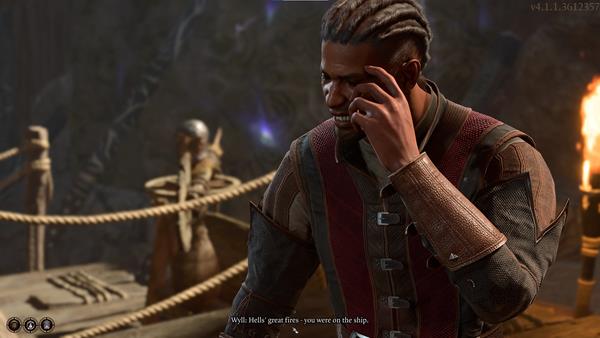
Your next set of choices will look like this:
- Yes - and we both carry parasites.
- Another escapee? Thank the gods - I need all the friends I can get.
- Who was that woman, the one in your thoughts?
- Peer further into his mind.
Wyll acknowledges that you both have parasites inside your brain upon choosing the first option. He also says that tentacles haven't sprouted yet, so he's guessing you're both just lucky. As he continues, your minds collide once more, this time you learn more about the woman in his thoughts. Your next set of choices will look like this:
- Who is she?
- Hunting in the Hells. Dangerous territory.
- Cavorting with devils, I see. You should consider better company.
Wyll will then tell you her name, the woman in her thoughts is named Karlach, an archdevil's soldier he swore on his good eye to kill. He said he tracked her down through the Hells to the mind flayer ship. But he was infected before he could kill her. He's worried about her being out in the open, preying on the innocent, and if he doesn't deal with her as soon as possible, she'll be leaving a trail of corpses. Your next set of choices will look like this:
- Let's join forces. I'll help you cast this devil back into the Hells.
- I'm looking to cure this infection. I suggest we partner up.
- Good luck with your devil problem - it seems your work's cut out for you.
Choosing the first option will give you a disapproval from Lae'zel. Wyll agrees with your decision, but he says your party's full at the moment, but he says when the time comes, you can call him. Your next set of choices will look like this:
- Go to my camp and wait for me.
- Leave
You can recruit Wyll to your party and meet him in camp if you choose the first option. You can also meet him at this place if you ever don't want him to go to your camp. After your conversation with Wyll, you'll see other tieflings you can interact with within the area. You'll see Guex trying to improve his sword skills to help fend off the goblin invaders.

Interact with him to start a conversation, and then your next set of choices will look like this:
- Interesting technique. Having some trouble?
- You'd better surrender - that target's a far better fighter.
- Leave.
Guex then tells you they need to be ready for a fight upon choosing the first option, but he says he's useless with a sword. Your next set of choices will look like this:
- Try hitting the target.
- [ATHLETICS] Demonstrate a swing - show him the fluidity of movement he lacks.
- [INSIGHT] No wonder you're struggling - you've no balance. Space your feet farther apart.
- [DETECT THOUGHTS] Read his thoughts.
- Leave.
Choosing the third option will require you to pass a wisdom check with DC 10. Successfully passing the skill check will gain you an approval from Lae'zel and Shadowheart. Guex then heeds your instructions. He then says you know what you're doing, and he found something by the road hoping you'll put it to good use. Your next set of choices will look like this:
- One last thing - don't shout out your moves like that. Spoils the surprise for your foe.
- Keep training. In time, you'll make short work of any goblins.
- Leave.
You will gain another approval from Lae'zel upon choosing the first option, and Guex heeds your advice once again. You'll then be presented with the same choices from before but this time eliminating the first option. Choosing the second option will make Guex say that hopefully, if it's just the goblins they have to worry about. But the druids are treating them like vermin. He thanks you at the end and your conversation is over. You'll then receive a Battleaxe at the end of your conversation and achieve Soldier: To Arms and inspire Lae'zel.
Now head north and you'll find Zorru (X:205 Y:568). Interacting with him will gain you Lae'zel's approval. He starts off being scared of Lae'zel and says "My f-friend's blood not enough? Come to rip me open, too?" Lae'zel then says that in Crèche K'liir, a formal greeting starts with a bow. Zorru then asks you if this "monster" is with you.

Your next set of choices will look like this:
- Yes. And I suggest you do as she says.
- [DRAGONBORN] Give the tiefling a menacing glare.
- Hold it, Lae'zel. I'll see to this one.
Choosing the second option will gain you the approval of Astarion, Lae'zel, and Shadowheart. Upon staring at him, he slowly lowers his head, but Lae'zel wants him to lower his head even further. Your next set of choices will look like this:
- Wait for the tiefling to obey.
- [DRAGONBORN] On your knees. She won't say it again.
- That's enough, Lae'zel. I'll take it from here.
Choosing the second option will gain you another approval from Lae'zel. Zorru bows down and gets on his knees. Lae'zel asks where Zorru saw another githyanki. Zorru replied and said near the mountain pass on the road to Baldur's Gate. He also says it saw them before they saw it and jammed its blade through his friend, Yul. Lae'zel then asks him to show it to her on the map. Once Lae'zel's request has been granted, Astarion interrupts and says he was hoping she'd kill him. Lae'zel says to him to cool his blood and he'll indulge him soon enough. Your interaction with Zorru ends.
An exclamation mark will then be seen on top of Lae'zel, interact with her to start a conversation. She'll start off by saying "The locals prove complaint. A useful trait.", then Shadowheart joins the conversation and says she warned you about keeping Lae'zel around, she's worried Lae'zel would cause real trouble soon.
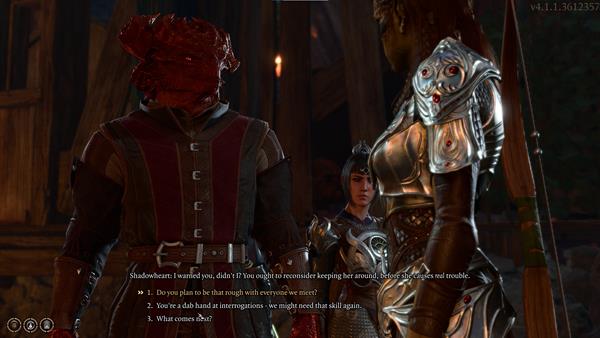
Your next set of choices will look like this:
- Do you plan to be that rough with everyone we meet?
- You're a dab hand at interrogation - we might need that skill again.
- What comes next?
Choosing the first option will gain you Shadowheart's approval, but gain Lae'zel and Astarion's disapproval in the process. Lae'zel then replies "When the tentacles sprout from your lips, will you still cry that I was rough?". Your next set of choices will look like this:
- Enough. Just tell me what's our next move.
- All right. You made your point.
- Leave.
Upon choosing the first option, she says if what Zorru said was true and if there are githyanki west of here, that must be our current objective. Your next set of choices will look like this:
- Heh - did you say 'teeth-ling'?
- What do you mean 'purification'?
- Leave.
Lae'zel says that the crèche holds the zaith'isk and it will cleanse us of the parasite upon choosing the second option. You will then be presented with the first dialogue option again and you can choose to extend the conversation or leave.
Now move straight ahead, you'll see a hooded tiefling named Eramas (X:188 Y:572). If you interact with her, she'll just say this grove is a death trap and to grab what you can and get out. Then she'll be on her way.
Just near her is a shabby door leading to the Makeshift Prison area (X:188 Y:592).
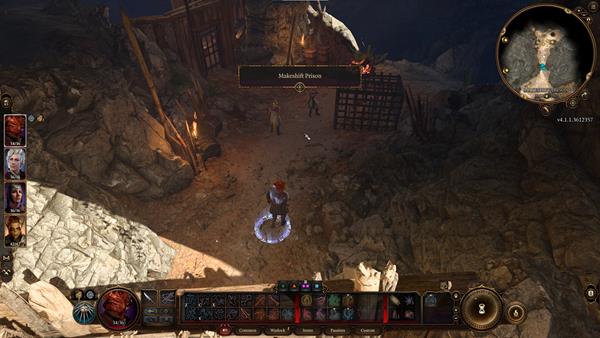
As you go through the door, you'll see a goblin named Sazza imprisoned in a cage, and a tiefling named Arka aiming her crossbow at her. She thinks this goblin killed her brother, Kanon. Memnos then tries to stop her but she refuses to listen, so he just walks away. Sazza still continues provoking Arka to pull the trigger.
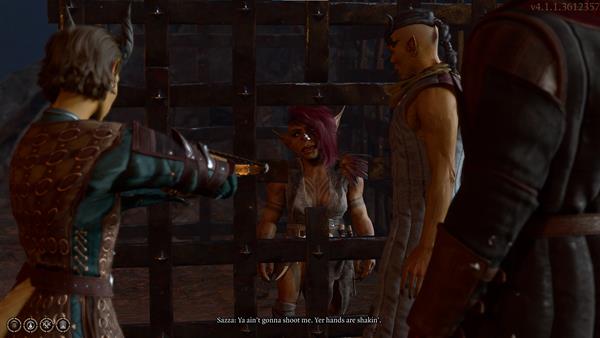
Your next set of choices will look like this:
- Shut up. Those words could be your last.
- Step between the crossbow and the goblin.
- Do nothing.
Choosing the second option will gain you the approval of Gale. Arka then asks you to move. Your next set of choices will look like this:
- [INTIMIDATION] Lower the crossbow, or I'll deliver you right to your brother.
- [PERSUASION] No, shoot me. Should be easy, right?
- [PERSUASION] This won't avenge Kanon. It won't change anything.
- [DETECT THOUGHTS] Read the tiefling's thoughts.
- Step out of the way.
Choosing the third option will require you to pass a Charisma skill check with DC 10. Successfully passing the skill check will make Arka lower her crossbow, she then says you're right, but she wishes you weren't. She then asks why do you care if a goblin lives or dies. Your next set of choices will look like this:
- Because she's not a practice target. She's a person.
- If she dies, she'll take everything she knows to the grave.
- A goblin prisoner. Her life isn't yours to take.
- Because vengeance eats people alive. You'll grant the goblins two victories this day.
- My reasons are my own.
Choosing the fourth option will gain you the approval of Shadowheart, but disapproval from Lae'zel, and she says your soft heart will be the death of us. Arka hopes you're right, Memnos then steps in again and says it's all right, and asks her to come with him.
As the two tieflings walk away, you can engage in a conversation with Sazza. She says she wasn't sure why you protected her just now, but she doesn't care either, either way, her tribe's coming and will burn this place to the ground.
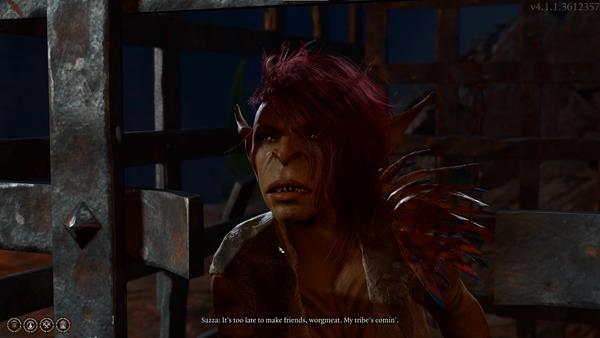
Your next set of choices will look like this:
- I just saved your life. Show some gratitude.
- Who is this Absolute you're so fond of? Your god?
Choosing the second option will reveal that the Absolute is actually a goddess, and they plan on burning her name across the world. Your next set of choices will look like this:
- You've caught my interest. Have any holy literature on you?
- An all-powerful goddess that can't get you out of a cage?
Choosing the second option will make her think that maybe the goddess sent you to help her, and she says it would be wise of you to help her if you want to save yourself. And if ever the tieflings manage to injure you while escaping with her, she assures you that this Priestess Gut will patch you up. Lae'zel then interrupts saying that her words cannot be trusted. Your next set of choices will look like this:
- Well, I'd certainly like to meet her.
- Nice story. Buy it for a copper in a tavern nearby?
Choosing the second option will make Sazza swear on your mother's grave. She then wants to make a deal, help her get out of there and she'll tell you where to meet her. Your next set of choices will look like this:
- Deal. I'll get you out of there.
- You already told me what I need to know. I'll find the priestess myself.
- Not a chance. You can rot in that cage.
- Leave.
Choosing the second option will make her say that even if you do find her tribe, they'd set the Worgs on you. She says you need her, tells you again to help her escape and she'll put in a good word for you. Your next set of choices will look like this:
- Deal. I'll get you out of here.
- Not a chance. You can rot in that cage.
- Leave.
Choosing the second option will make her insult you and it will end the conversation.
Now exit through the door you just came in, on the northwest side, you'll meet Dammon, a smith within the grove. (X:180 Y:559). Interact with him, and he'll thank you for fending off those goblins earlier and says if you ever need to replace any gear, just ask. He also says his selection's pretty slim as he left most of his equipment in Elturel.
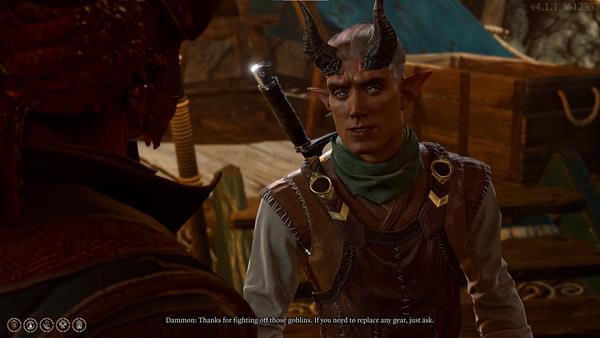
Your next set of choices will look like this:
- Let me see your wares.
- That forge is holding on by a thread. Are you a smith?
- Leave.
Choosing the second option will reveal that he used to be a bread-and-butter tinsmith before Elturel fell into Avernus. Then you will be presented with the same options before excluding the one you previously chose. If you choose the first option, you'll get to see what he has for sale. He's got a variety of weapons, armours, and shields among other items.
If you continue heading southwest, you'll find a Human named Remira cleaning her wound (X:173 Y:547).
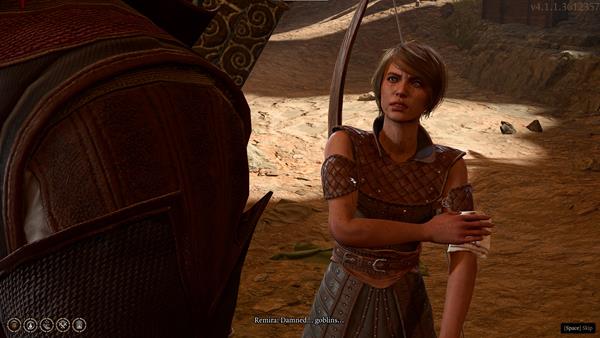
Upon interacting with her, you will be presented with these options:
- Wait for her to finish cleaning the wound.
- You should probably get that looked at.
- Leave.
Choosing the first option will make her think that you like the sight of blood, considering you've had your fill during the battle at the gate. She goes on to say that more blood might be spilled if Zevlor starts in on the lectures again. Your next set of choices will look like this:
- I'd have done the same in your place.
- He let you in, didn't he? It could have been worse.
- [DRAGONBORN] You put your own people first. That's just the way it is.
Choosing the [DRAGONBORN] option will make her say what about her people, and half her crew's lying dead back in the ruin. She then continues to tell you how Liam died, and she hopes his death was quick during that encounter. Your conversation ends here.
Just a few steps ahead at the northwest, you'll find Aradin (X:165 Y:546). Once you interact with him, he'll start off by greeting you as the fearless goblin-slayer. He asks if you're sure you want to be seen with him as he is not really likable in the grove.
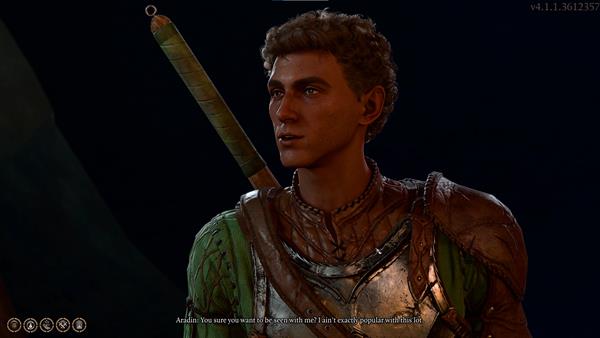
Your next set of choices will look like this:
- All you did was stand up for your crew. I respect that.
- You could try to be a little friendlier.
Choosing the first option will make him say that half his crew are full of holes, and now he's being blamed for leading the goblins in this grove, also adding that he lost track of the druid. Your next set of choices will look like this:
- Where did the goblins come from?
- Who's the druid you lost track of?
Choosing the first option will reveal that they were chased from the ruins they were poking around in. Your next set of choices will look like this:
- And is that where you lost track of the druid you mentioned?
- Sounds like you were looking for trouble.
Choosing the first option will reveal that he was tracking a Druid named Halsin within the ruins. He says they got a contract to hunt down some relic and Halsin wanted in on the job. The job didn't work out and the goblins got to Halsin when they were fleeing. Your next set of choices will look like this:
- Can I have a look at the contract?
- Did you think getting rich would be easy?
- You ran away from a few goblins?
He'll give you the contract and says the job's all yours upon choosing the first option. He says there's a wizard in Baldur's Gate that'll pay a lot for a relic that's supposedly buried around these parts. Your next set of choices will look like this:
- Just tell me where to find the relic.
- Any idea what the relic actually is?
Choosing the first option will reveal that the relic is called the Nightsong and it's supposed to be hidden under the temple where they encountered the goblins. He says he'd give you the map but his friend Brian got ahold of it and died during their encounter with the goblins at the temple. he says the contract will show you where they turned back. You can thank him or leave. If you choose to thank him, he'll say there's no need, as he'll be well on his way to Baldur's Gate when you die. This will end your conversation, and you will acquire the contract Stamped Handbill.
You can climb up the ladder on the right and you'll see two tieflings named Bex and Danis ((X:167 Y:552). Interact with them and you'll hear them talking about their plans once they reach Baldur's Gate, once they notice you, Danis will mention getting a high fence to keep eavesdroppers out.
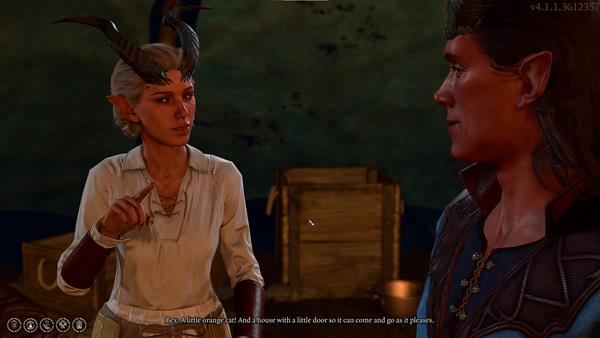
Your next set of choices will look like this:
- Don't mind me. I was just passing through.
- Sorry, didn't mean to interrupt. Good luck to you both.
- Two tiefling refugees? You'll be lucky to get a square of dirt at a public house.
Choosing the second option will make Danis thank you, then Bex ask you what your plans are when you reach the city. Your next set of choices will look like this:
- A pint and a clean room would do me a world of good.
- Plans? Just surviving the journey is ambitious enough already.
- I won't be joining you.
- [DRAGONBORN] I'll be keeping to myself. People tend to stare at me.
- [BALDURIAN] It's The Blushing Mermaid for me. Bit rough, but the ale's cheap.
- [BALDURIAN] I'll be seeking the warmth of theElfsong Tavern.
Choosing the DRAGONBORN option will make them say they understand. Danis then says in Baldur's Gate, they give people a chance. Bex ends with wishing you good luck, as we all need it. This will end your conversation.
Head down the ladder, and just northeast at (X:193 Y:548), you'll see Auntie Ethel. Interact with her and she'll start off by saying you're the talk of the camp, as she continues talking, she notices something wrong about you. She asks you what you need as she can sort it out, she's got a lot of potions at her disposal.
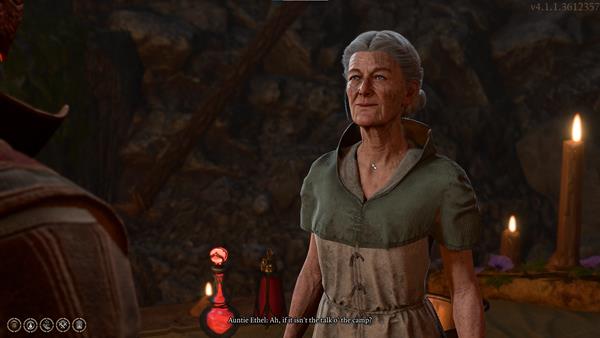
Your next set of choices will look like this:
- There's no need. I'm fine, really.
- I'm just here to trade.
- Let her fuss over you.
- What are you, an alchemist?
- Leave.
You'll see what she has to offer by choosing the second option. This is what she has at her disposal:
- Corellon's Grace
- Spellthief
- x3 Potion of Hill Giant Strength.
- Balsam Bundle
- x2 Mergrass Bundle
- Potion of Invisibility
- Potion of Fire Resistance
- x4 Potion of Healing
- Potion of Greater Healing
- x5 Water
- Wispweed Bundle
You can start a conversation again once you interact with her after trading goods. Your next set of choices will look like this:
- I need help. I've been infected by a mind flayer parasite.
- What harm? Show me your wares.
- Nothing for now.
Choosing the first option will gain Astarion's approval, but you'll also get Shadowheart's disapproval. As you tell her your story, she nods along. She then says her heart goes out to you, and she sees no sign of tentacles yet, but that could change in an instant, and that you need serious help immediately. She then remembers she might have something at her home that could help. Your next set of choices will look like this:
- Such as?
- My time could be running short. I can't afford to spend it paying you a house visit.
- [WARLOCK] There is something strange about you.
Choosing the WARLOCK option will give you three more Warlock responses:
- [WARLOCK] You have a certain bearing. An almost fey-like quality.
- [WARLOCK] I detect something devilish, I think.
- [WARLOCK] Might you hail from Thay, perhaps?
Choosing the first option will make her shrug off the idea, and she's just an old woman who loves tea and potions. She then says she'll be going home shortly, and marks her home on your map if you ever decide to visit her. This will end your conversation.
Just near Auntie Ethel, you'll see a tiefling named Okta stirring a giant pot (X:197 Y:549). She'll start off by showing her support to you, then offer you a bowl of what she's cooking.
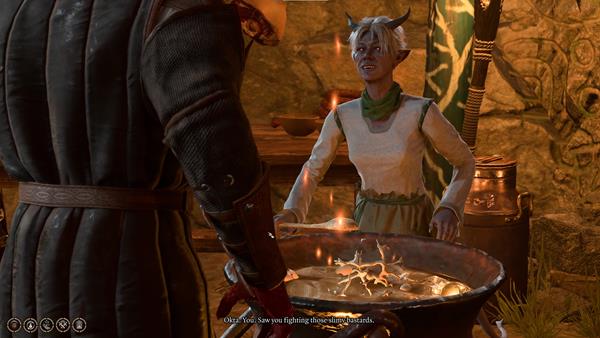
You have the following options:
- Take a bowl.
- I'm not hungry
- What is it exactly?
- [DRAGONBORN] Agreed. Hungry warriors make for easy prey.
- A bowl of grey goo. Reminds me of home.
If you accept, you will receive a bowl of Gruel.
Now head northeast and go to this location (X:244 Y:547), you'll see a young tiefling named Mattis. Upon interacting with him, he'll offer you a lucky ring.
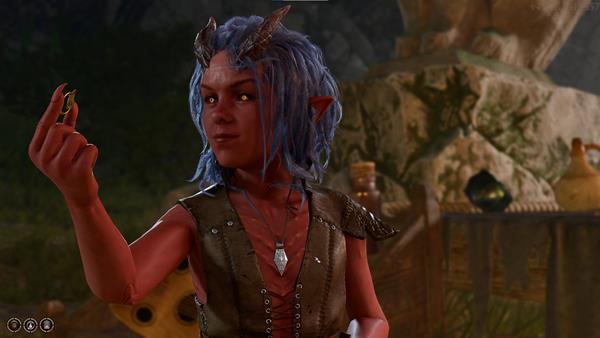
Your next set of choices will look like this:
- Take the ring
- That was a fancy trick
- Leave.
Even if you refuse, he will continue to insist. Your next set of choices will look like this:
- Take the ring
- [SLEIGHT OF HAND] Mimic his trick and make the ring disappear.
- Leave.
Choosing the SLEIGHT OF HAND option will require you to pass a Dexterity check with DC 15. Successfully doing so will make him challenge you to play a game of heads or tails. Your next set of choices will look like this:
- Heads.
- Tails.
- Pocket the ring.
If you choose to pocket the ring, he will ask you to pay for it. Your next set of choices will look like this:
- It's only a joke. Go on- flip your coin.
- you're getting paid in experience. The ring is mine now.
If you play along, then he will soon offer to show you his wares. He sells Rings, that according to him are lucky rings but actually have no real power. If you prod him, he will admit that they're not real lucky rings. In addition to these rings, Mattis also sells assorted miscellaneous junk items. Unique items will not refresh if previously purchased. Listed below are the items at his disposal:
- Ring of Being Really Invisible - Unique Item (No effect)
- Ring of Resistance to Ants - Unique Item (No effect)
- Ring of Infinite Wishes - Unique Item (No effect)
- Ring of the Lekinesus - Unique Item (No effect)
- Bucket
- Plate
- Clam Shell
- Fork
- Ink Pot
- Thieves' Tools
- Shovel
- Tarbell's Guide to Distractions
- Potato
At the north entrance of The Hollow (X:257 Y:451), you'll see a group of tieflings in a heated argument against the druids. Komira wishes to see her daughter, Arabella. But Jeorna claims Komira's daughter is a thief and will wait for Kagha's judgement. Komira threatens to rip Jeorna's throat out if she doesn't let them pass, but another druid begins to transform into a bear to make them back off.
Now you can talk to Komira and Locke.

Your next set of choices will look like this:
- I saw what happened. Why are the druids holding your daughter?
- You need to be careful. That bear would've torn you to shreds.
If you asked what happened, Locke will begin to explain that Arabella tried to steal the druids' idol needed for the ritual. Komira blames herself because she said something about wishing the idol to just disappear or explode. Shadowheart joins in the conversation and says she made the fatal mistake of getting caught and that we shouldn't involve ourselves. Your next set of choices will look like this:
- She's just a child - the druids are overreacting. I'll talk to them.
- You've got your work cut out for you.
- Like you said - it's your fault. You should've tried parenting her.
- Thieves deserve to be punished. It's as simple as that.
If you choose to talk to the druids, Locke will thank you, but Astarion will disapprove of this decision.
Sacred Pool
Now head down the stairs and you'll have reached the Sacred Pool (X:262 Y:535). You can talk to Jeorna. Maggran growls at you in his bear form, Jeorna asks him to calm down, she turns to you and tells you to get back.
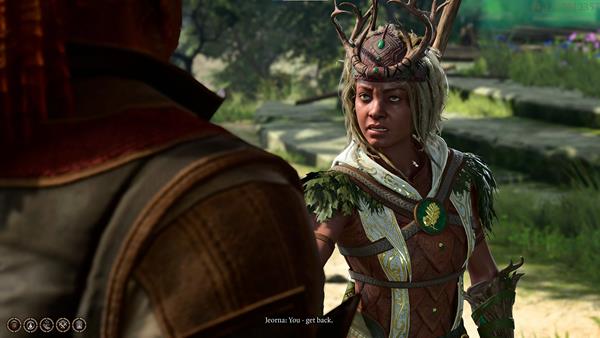
Your next set of choices will look like this:
- If it weren't for me, you'd be overrun by goblins by now. I'll go where I please.
- Why? What's so special down here?
- I'm not looking for trouble. Can't you just let me by?
- Ignore them and proceed.
- Leave.
If you choose to say that you're not looking for trouble, she still insists on not letting you through, but her companion Mino whispers to her ear and suddenly she says Kagha wants to see you and lets you through eventually.
Now continue heading south, and you'll encounter a man named Volo (X:256 Y:518). Interact with him and he will gladly ask you details about the goblin group that attempted to raid the grove.

Your next set of choices will look like this:
- Fine - ask your questions.
- And there's no overstating my disinterest. I've no time for questions.
- Leave.
Once you agree to let him ask you about the goblins, he asks how would you describe the particular batch you encountered earlier. If you succeeded in the History skill check, your next set of options will look like this:
- Common variety goblins, led by a lasher and flanked by booyahgs.
- They were goblins, same as all the others: lowly and vile.
- Give an exact description.
- Goblins? Hardly. They were shapeshifted devas!
Choosing the first option will make him ask you if you spent much time among goblins. Your next set of choices will look like this:
- The time was spent among books. I'm a student of the page.
- I'd rather not say. Are we done here?
- I'm not unfamiliar with their kind, certainly.
Upon choosing the first option, he will proceed to ask you about the dragon they had marching in the rear. Your next set of options will look like this:
- Dragon...? There wasn't any dragon.
- Heh - it was brass. No doubt about it.
- I think there's been a misunderstanding. What do you want exactly?
- [DRAGONBORN] A brass or silver dragon would die a million deaths before allying with goblins.
Choosing the DRAGONBORN options will make him write down that witnesses noticed a red dragon marching at the rear. For his last question, he asks if the attackers really did rally to 'the Absolute' when they fell upon the gates. Your next set of choices will look like this:
- Yes - they called out the name like a war cry.
- I don't think so. I was concentrating on not dying.
If you say yes, he'll share to you that he's interrogated a captive within the camp, and that captive states that they've abandoned their god Maglubiyet in favour of someone called 'the Absolute'. Your next set of choices will look like this:
- Goblin superstition - not worth the ink and parchment.
- Hold your tongue.
Upon choosing the first option, he says these goblins are informed by a kind of strategy anathema to their kind, and now he's preparing to head to their camp. Your next set of choices will look like this:
- Be careful. Goblins aren't known for mercy.
- Wait. About our conversation earlier - why the dragon?
- What brought you to the wilds in the first place?
- Leave.
When you ask him what brought him to the wilds in the first place, he answers he's curious about the goblins, and wants to record these curious events. You will then be presented with the same choices as before excluding the question about what brought him to the wilds. If you ask about the dragon, he says every story benefits from a dragon, then he bids you farewell.
Now head northeast and go up the hill, you'll find a tiefling named Alfira, playing with her Lute (X:284 Y:499). Interact with her and you'll see she's having trouble finding inspiration to complete her song.
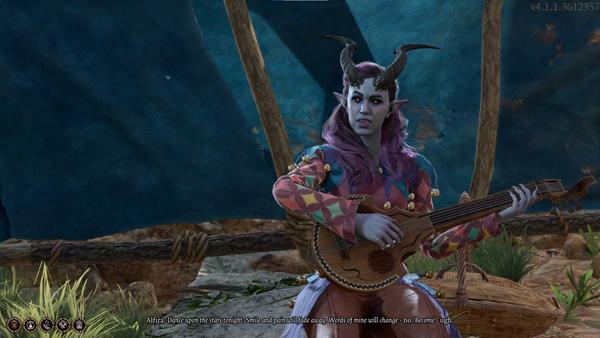
Your first set of choices will look like this:
- Stay silent and listen.
- What's that tune you're singing?
- How can I put this? That sounded a little... unpolished.
- Leave.
If you stay silent and listen, you'll see her get upset as she can't think of the write words for her song. Your next set of choices will look like this:
- Are you all right?
- This grove could become a battlefield soon enough. It's not the time for music.
- There's no singing voice that could save those lyrics. You know that, right?
If you ask her if she's alright, she'll say no as she can't think of anything that fits to finish her song. Your next set of questions will look like this:
- Let me see if I can help.
- That's the creative process for you. Agony and ecstasy. Mostly agony.
- Why are you songwriting now? Hardly the best time.
- You'd better swap that lute for a weapon. You'll need one, soon enough.
- Leave.
If you choose to help her, she'll try to offer you to borrow the extra Lute she has. Your next set of choices will look like this:
- First things first - what's the song about?
- Hand me that lute. We can perform together.
- Leave.
If you ask her what's the song about, she'll say it's about her teacher named Lihala. And just as she continues to tell you stories about her, she stumbles upon the word "ash" which seemed the perfect fit for her song. Your next set of choices will look like this:
- Nod in encouragement and gesture to her lute.
- Keep going. What would you say to your teacher if she were here right now?
- Perfectly awful. These are the worst lyrics I've ever heard.
If you choose to just nod in encouragement, she'll continue to sing her song, then a cutscene will play out. After she sings her song, she'll cry and say sorry. Your next set of choices will look like this:
- Don't worry. Cry as much as you need.
- That song was beautiful. Worthy of a few tears.
- No need to be sorry. Though it still needs work.
- Well, would you look at this grove. So lovely. So... grove-like.
She'll say thanks upon choosing the first option, then she continues to say that's the first time she's played ever since her teacher died. She also tells you how Lihala died and she can still smell her blood. Your next set of choices will look like this:
- Sounds terrible. I'm sorry.
- I'm sure your teacher would be proud to see you now.
- Hardly a unique tale of woe these days. Toughen up, or you won't last.
- Well, you've come up with a fine tribute for her.
If you tell her that Lihala would be proud of her if she were here now, she'll make a remark that her teacher would yell at her for her clunky verse and make her play until her fingers were raw. She then says she'll finish the song for Lihala, and thanks you.
Secluded Cove
As you make your way to the Secluded Cove and you'll find a tiefling child named Mirkon (X:327 Y:553). Upon interacting with him, he'll tell you to listen.
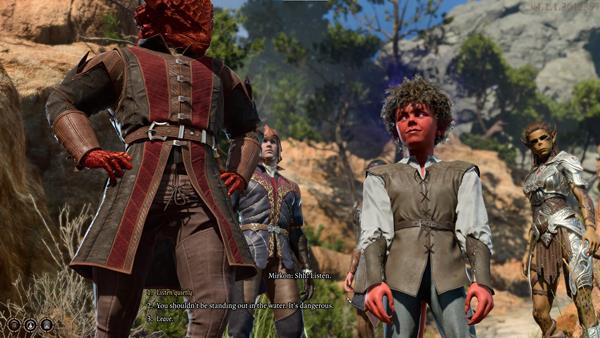
Your next set of choices will look like this:
- Listen quietly.
- You shouldn't be standing out in the water. It's dangerous.
- Leave.
If you tell him it's dangerous standing out in the water, he'll ask if you can't hear it. Your next set of choices will look like this:
- I don't hear anything. Come back to shore.
- Focus and try to hear what he hears.
- Leave.
If you choose to focus on what Mirkon hears, you need to pass a Nature skill check. Successfully passing the skill check, you'll also hear the sound. Now your next set of choices will look like this:
- Close your eyes and listen to the song.
- [WISDOM] Struggle against the music's pull.
Choosing the WISDOM option will require you to pass a Wisdom skill check with DC 5. Successfully passing the skill check will make you break free of the musical spell. Your next set of choices will look like this:
- Get back - it's a trick!
- Leave.
Telling Mirkon that it's a trick will make him say he only wants to listen. A number of Harpies land in the scene, then you'll have to engage in combat.
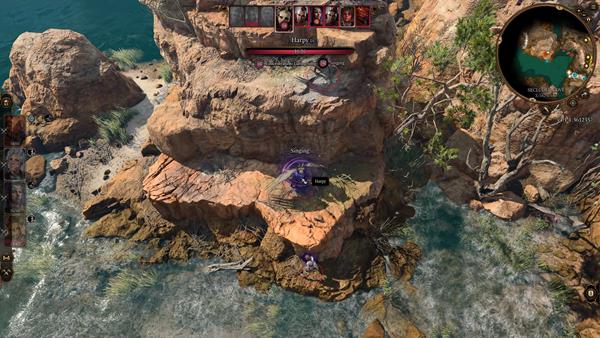
Be careful with this type of enemy, as it has the spell Luring Song, where you must succeed in a Wisdom Saving Throw every turn or you'll be lured by the song. The first Harpy you need to target is the one singing, once you incapacitate or make her lose concentration, you or the members of your party will break free of the spell. Once you've slain all the Harpies, speak with Mirkon.
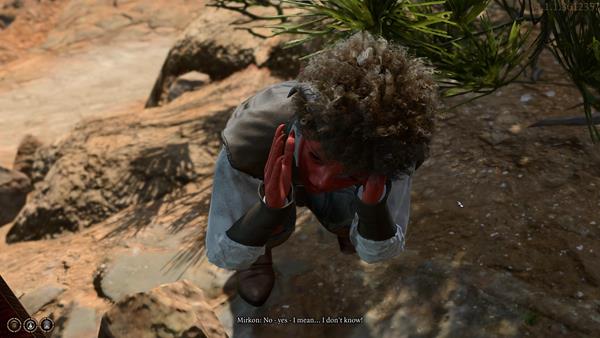
He will ask if they're gone, then your next set of choices will look like this:
- They're gone. Are you all right?
- Go back to your parents. There's worse in the wilds than harpies.
- Stop snivelling or they'll be back. They like tasty little tiefling kids.
If you say they're gone and ask him if he's okay, he'll reply to you while shivering and he doesn't exactly know. Your next set of choices will look like this:
- Take a breath, deep and slow. You're safe now.
- Go back to your parents. There's worse in the wilds than harpies.
- Stop snivelling or they'll be back. They like tasty little tiefling kids.
Telling him to take a breath will make him say that it's the same thing the voices said. He then says he needs to get back and Mol will be mad. Before heading off, he says you should meet Mol, as she'll be grateful you saved his life. He tells you to find a boy called Doni and tell him you want to see the 'Dragon's Lair. Mirkon will then leave the scene. You can then go back to where you just fought the Harpies and make your way up the Harpy Nest (X:328 Y:499). You will also see a note titled I'm Sorry. You can then loot the Harpy Nest for some items and other treasures.
Setting Up Camp
While in Camp, you can interact with all the NPCs and Companions you've invited throughout your journey. You can also manage your Companions and advance relationships with some of them if you wish to do so. Listed below are the possible dialogue interactions you can have with everyone at camp:
NOTE: Some dialogue interactions will be different depending on whether you have them accompanying you during your travels outside of Camp.
Withers
Once you approach Withers, he'll say he'll be in your camp whenever you require his services.
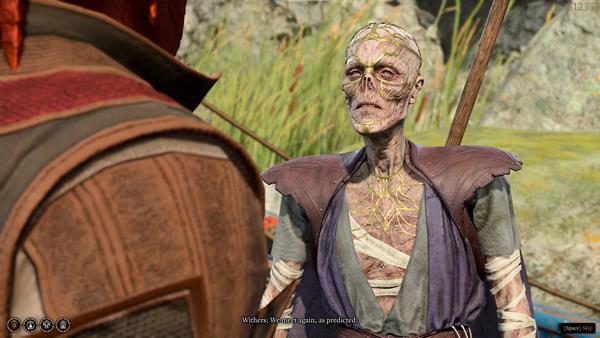
You'll then have 6 dialogue options to choose from:
- Not to be rude, but what are you?
- You were sorting something before. What were you doing?
- What kind of services can a skeleton offer?
- Care to explain why you're helping me?
- I'd prefer if you'd leave.
- Leave.
Asking him what he is will make him reply that there are many answers to that question but none are important. Your next set of choices will look like this:
- Skeletons aren't supposed to be able to talk.
- If you won't answer, then get out of my camp.
- Leave.
Telling him that skeletons aren't supposed to be able to talk will just make him say "Correct". Then you'll be presented with two options:
- Are you going to explain further?
- Leave.
Asking him if he's going to explain further will just make him say "No". Now you'll have four options to choose from:
- You were sorting something before. What were you doing?
- What kind of services can a skeleton offer?
- Attack.
- Leave.
If you ask him what he's doing, he'll go on to explain an amalgamation of spirits ensnared by the treacherous cult of the Absolute. He also says for a mere pittance of coins, he can summon the worthiest Hirelings to lend aid to your undertaking. Your next set of choices will look like this:
- Will these hirelings be joining me willingly?
- Do you think I can trust these cultists?
- Impressive. Are there other ways you can help us?
- Leave.
Asking him if you can really trust these cultists will make him say that his services are all that he can offer, and what you do with them is not his concern. You will then be presented with the same set of choices excluding the one you just picked. If asked if they will join you willingly, he says most willingly. Then if you ask him if there are other ways he can help you, he says he can revive anyone for a price. Your next set of choices will look like this:
- That's incredibly powerful magic. Why is it so easy for you?
- You mentioned a cost - what is it?
- And look very ugly doing it.
- Helpful. No one's dead on my side at the moment, though.
- I would like to talk about hirelings.
- Leave.
Asking him why this powerful magic is so easy for him, he'll reply that it is his calling, and there is little else to explain. You'll then be presented with the same set of choices as the previous one, excluding the one you just picked, and an additional option where you can ask him to change your class for 100 Gold. If you ask him how much Gold you would need to pay to be brought back to the dead, he'll mention he can do it for 200 Gold. If you tell him you don't have that amount of gold right now, he'll simply say he'll be waiting patiently at the camp until you can acquire enough gold.
Wyll
Upon approaching Wyll, you'll be given 6 dialogue options to choose from:
- How does the Blade of Frontiers end up chasing a devil in the Hells?
- Tell me, Wyll: How did you come to be the Blade of Frontiers?
- I've noticed your stone eye. Did you lose it in battle?
- I don't suppose you've come across an expert healer in your travels.
- I'd like you to join me.
- Leave.
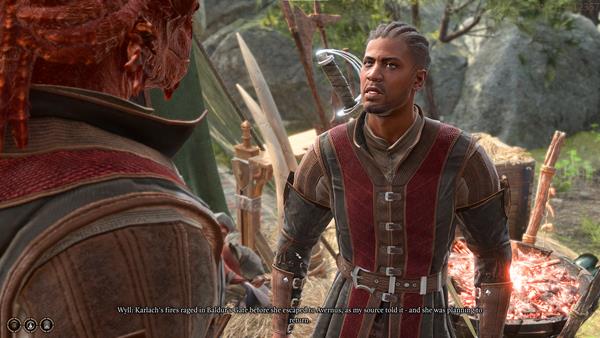
If you ask him how he ended up chasing Karlach in the Hells, he'll begin to explain that Karlach's fires raged in Baldur's Gate before she escaped to Avernus and his source told him, she's planning to return. He then explains he made his way to Avernus to stop her, but she fled from his reach and climbed the mind flayer ship. Your next set of choices will look like this:
- Who is this 'source' of yours?
- It's not exactly easy to journey to the Hells from the Sword Coast. How did you manage it?
- Let's move on to other matters.
- Leave.
Asking him about his source, he'll only say it's a powerful friend with a keen interest in privacy, and he'll reveal no more. You'll then be presented with these dialogue options:
- [WARLOCK] A powerful friend, hm? Like a warlock patron, perhaps?
- Let's move on to other matters.
- Leave.
Choosing the WARLOCK option will make him tell you you're a warlock and should know about bound souls and frozen tongues, and he will leave the rest to your imagination. Now your next set of choices will look like this:
- Tell me, Wyll: How did you come to be the Blade of Frontiers?
- I've noticed your stone eye. Did you lose it in battle?
- I don't suppose you've come across an expert healer in your travels.
- I'd like you to join me.
- Leave.
When you ask him if he happened to come across an expert healer during his travels, he'll say he did come across a few village clerics, but not one who can remove the parasites in our heads. He then says you should look for this healer named Nettie. You'll then be presented with the same dialogue options from before excluding the one you just chose. Asking him about his stone eye, he'll reveal he lost it in a vicious battle. He'll also say that his eye is made from pure bloodstone carved from the Galena Mountains. It is a constant reminder to him that sometimes blood must be shed and sacrifices must be made. Your next set of choices will look like this:
- [WARLOCK] Lean in and examine the eye more closely.
- I'd like to talk about something else.
- Leave.
If you choose the WARLOCK option, you'll be presented with another set of choices:
- Isn't your eye a sending stone?
- I'd like to talk about something else.
- Leave.
When asked if his eye is a sending stone, he'll shrug it off and say it's nothing special. If you pass the Insight skill check, you'll notice he's keeping something from you. Your minds will then be connected and some secrets will be revealed. Your next set of choices will look like this:
- [ILLITHID] [WISDOM] Enter his mind. What isn't he telling you?
- All right, then. Let's change the subject.
- Leave.
If you choose to change the subject, you'll be presented with the choice to either ask him how he came to be the Blade of Frontiers or ask him to join you during your travels. Choosing the former will gain you his approval. He'll then begin to explain how he came to be the Blade of Frontiers. Your next set of choices will look like this:
- What act could be finer than saving a life? You must have felt proud.
- And he named you the Blade of Frontiers?
- Whatever became of the boy, I wonder?
- Goblins? Pitiful vermin, easy to kill - hardly worth getting worked up about.
Choosing the first option will gain you his approval again. He'll then say he didn't feel proud, but he felt angry at the monsters preying on the innocent, at the gods for tolerating the cruelty of the evil. He was also angry at himself that it took so long for him to see the Coast's suffering. Your next set of choices will look like this:
- And before that?
- How great could you be? I've never heard of you.
- [BALDURIAN] It's nice to finally put a face to the name.
- I'd like to talk about something else.
Choosing the BALDURIAN option will also make him say it's nice to meet someone with your talents. You can then ask him to join you in your travels or leave the conversation.
Lae'zel
Upon approaching Lae'zel, she'll start off by saying that her people have a word called She'lak for men like Wyll. It roughly translates to 'idealist do-gooders' or 'benevolent burden'.

Your next set of choices will look like this:
- Are you sure a crèche is our only path to a cure?
- Wait for me in camp.
- Leave.
Asking her about the crèche will make her say she's entirely sure as she was devoted to her studies and her training. Your next set of choices will look like this:
- That kind of wisdom is very valuable.
- Books are fallible, as are those who write them.
- Total understanding? Absolute nonsense.
Upon choosing the first option, you will gain her approval. She'll also say that her people possess an eternity of knowledge and yet they still collect more. Your next set of choices will look like this:
- Is it me, or have you been looking at me differently?
- Wait for me in camp.
- Leave.
Choosing the first option will make her confess to you that she was too hasty to judge you. Your next set of choices will look like this:
- And what about now?
- And I thought you cruel, stubborn, and judgemental.
- Can I assume a compliment is incoming?
Choosing the first option will make her tell you that you've earned her respect and more. Your next set of choices will look like this:
- If you respect me so much, then why are you such a prickly grouch?
- Hold on, are you coming on to me?
- The attraction's mutual, Lae'zel. You know how to set my heart racing.
- I have just one word: 'yuck'.
Upon choosing the first option, she goes on to explain that she must be what she says she must be in order to survive every encounter and every wound she bears. Then she'll say she wants to taste you. Your next set of choices will look like this:
- Yes. I want to share my body with you.
- Sure thing. I've been wanting a hot githyanki girlfriend.
- I'm flattered, but the answer is 'no'.
You will gain her approval if you choose to share your body with her. She says one night she'll come to your bunk but until then, she'll keep enjoying your scent.
Astarion
Upon approaching Astarion, he'll reveal that he's actually a vampire.
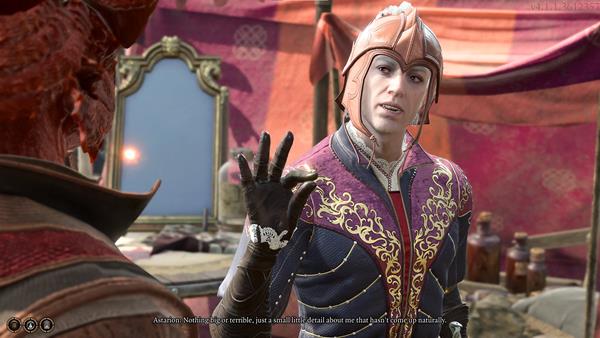
Your next set of choices will look like this:
- Well... yes. Obviously.
- But you've been walking in the sun this whole time.
- And I should just trust you not to bite me?
- I will not stand evil - leave!
If you choose the first option, he'll say he is glad we got that out of the way. You can then choose to ask him to stay in the camp if you currently have him in your party during your adventures or you can end the conversation.
Shadowheart
Once you approach Shadowheart, she'll start the conversation by saying that she hopes Wyll lives up to his name, as we need all the help we can get.

Your next set of options will look like this:
- I want to talk about all that's happened to us.
- We should journey separately for now.
- Leave.
If you want to talk to her about what's happened so far, she'll ask you what's on your mind. Your next set of choices will look like this:
- You must have thoughts about our little stowaways.
- How am I holding up in your estimations?
- Turn to other matters.
If you choose the second option, she'll admit you've been a surprise, and kindred spirits are few and far between for her. She also reminds you that you saved her life at the Nautiloid. You can then ask her if she has thoughts about your little stowaways together, or turn to other matters. If you turn to other matters, you can either let her stay in camp if she's currently in your party, or end the conversation.
Ending the Day
Once you end the day, the time will advance and it will be nighttime. You can then interact with your Companions and have a new set of dialogue interactions.
Astarion
Upon approaching Astarion, he'll be laying down and say "It's quite a sight", then he'll say he meant the stars.

Your next set of choices will look like this:
- You seemed more relaxed.
- Am I disturbing you?
- They are beautiful tonight.
If you choose to tell him he seems more relaxed, he'll say that he is and that he's reflecting on what tomorrow might bring. If this adventure of ours will be over soon. Your next set of choices will look like this:
- It doesn't have to be. We can still travel together.
- Probably. Once the worm is gone, I'm going my own way.
- What? Will you miss me?
If you choose to ask him if he'll miss you, he'll say why not, as you've been to the Hells and back, and survived everything that's followed. he says he's not easily impressed by people, but it seems you're stronger that what he gave you credit for. Your next set of choices will look like this:
- I thought you didn't like me.
- True. I am pretty impressive.
- I'm just trying to survive. Like you.
- I have many talents. If you want to explore them...
- You're too close.
Upon choosing the first option, he'll say you have your charms. Your next set of choices will look like this:
- Watch yourself, Astarion.
- Perhaps we should get to know one another better...
- You're too close.
If you choose the second option, he'll say it's a delicious thought, then follow up with the word "but...". Your next set of choices will look like this:
- But? What are you waiting for?
- I'm joking. Relax.
- A waste of time. Leave.
Choosing the first option will make him say he's waiting for the right moment. He then apologizes and says he needs to clear his head. This will end your conversation.
Shadowheart
Once you approach Shadowheart, she'll start off by saying the leader of the pack comes to chat. She then asks you what's on your mind.
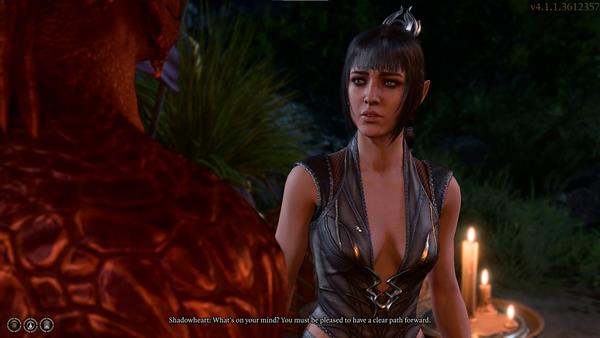
Your next set of choices will look like this:
- So what will come next for you, once this is all over?
- How are you feeling?
- You know, this could be our last night together.
If you ask her how she's feeling, she'll say the same. She then asks you a hypothetical question that if she turns into a mind flayer, what will you do. Your next set of choices will look like this:
- Maybe I could leave you tied up while I hunted for a cure.
- No hesitations. I'd just end your misery, then and there.
- Let's not do this. I don't like hypothetical questions.
- If you'd turn into a monster? I'd run away.
Choosing the second option will make her comment that was a wise decision, but she was hoping you'd miss her after she's gone. She says she thinks she would if the roles were reversed. This will then end your conversation.
Wyll
As you approach Wyll, you will feel a sudden tingle that connects your minds with each other. He then asks how you feel.
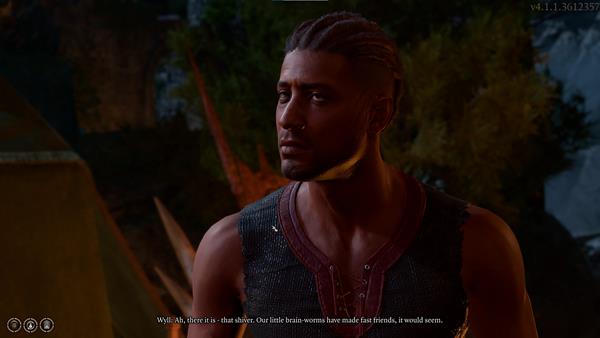
Your next set of choices will look like this:
- Surprisingly fine, in spite of it all.
- Nervous. I don't like the idea of that thing in my brain.
- Confident. No tiny tadpole will be getting the best of me.
- I'm more interested in how you feel.
If you choose the first option, he'll reveal that somehow the parasite weakened him, but thankful enough, there are no signs of turning into a mind flayer yet. Your next set of choices will look like this:
- Something's special about us, Or at least, about our tadpoles.
- It makes no sense, I know. Why haven't we turned?
- We could probably dig up some poison mushrooms, if you're that keen to be sick.
Choosing the first option will gain you his approval. He then says some theories on why we haven't turned into mind flayers yet. But the solution to this problem is clear, it's that we get these things out of our heads. Your conversation will then end here.
Lae'zel
Once you approach Lae'zel you'll be given these set of dialogue options:
- What do you mean by 'the Tears'?
- Faerun isn't so bad. Give it a chance.
- You want to do battle up where?
- Leave.
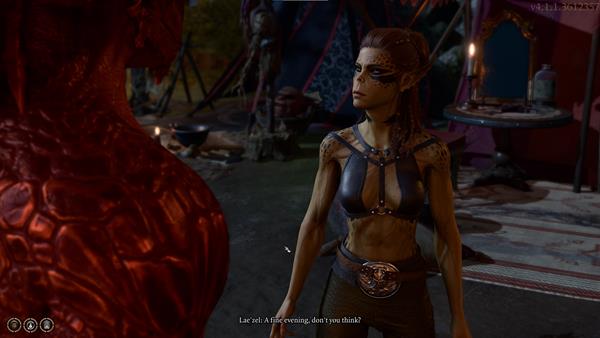
If you tell her that Faerun isn't so bad, she'll say she's seen nothing but cowards that rely on strangers' swords when they should be forging their own. You'll be given the same set of options excluding the one you just chose. If you ask her about the Tears, she'll tell you to look above and watch the moon cross the sky, she says the Tears follow behind it, and one of them is her crèche: K'liir. Your next set of choices will look like this:
- Are all githyanki from the Tears?
- It must be quite a shock, to leave your crèche behind and arrive here.
- Leave.
Upon choosing the first option, she'll say your curiosity is to be commended. She then proceeds to explain further. Then she says enough and come dawn, you resume your search for a crèche. Once you go to bed, Lae'zel will appear before you and say she's come to sate you, and her be sated. She says she'll lead and you follow. Your next set of choices will look like this:
- I am ready.
- I've changed my mind.
You will gain her approval upon choosing the first option. It then cuts to a scene where you both go to a secluded area. As she undresses, she tells you to close your eyes and submit.

You will have a few options:
- Close your eyes and submit.
- [DRAGONBORN] No. You submit to me. After, you can take whatever you desire.
- Submit? What do you intend to do?
- I've changed my mind.
Choosing the DRAGONBORN option will cut to a scene where you awake in pain. Lae'zel then tells you it's time to rise as the dawn is upon us. Your next set of choices will look like this:
- Hold on. I need a moment to recover.
- Last night was wonderful. I really enjoyed myself.
- Why in such a hurry? Relax, come rest.
- Yes, of course. We will leave at first light.
Choosing the fourth option will advance time to the next morning. If you interact with Lae'zel again, she'll say she drained you dry last night but you don't seem to be exhausted. Your next set of choices will look like this:
- Any chance of sharing our bunks again anytime soon?
- I'm ending our fling, if one can call it that.
- Wait for me in camp.
- Leave.
Choosing the first option will make her say it can happen again if she is in need of relief, but until then, she'll enjoy watching you squirm for the anticipation of it. You'll then be presented with the same dialogue options excluding the one you just chose. You can either end your fling, make her stay in camp, or end the conversation.
Back at Sacred Pool
Once you get out of camp, make your way back to the Sacred Pool and find Apikusis (X:232 Y:513).

Once you approach, you'll be presented with these dialogue options:
- What were you saying to that bird?
- I'm looking for a healer - help me narrow the search.
- It doesn't look like you're helping with the ritual.
- Are you helping to prepare for the ritual?
- Leave.
When you ask her about Nettie, she'll say you can find her in her room through the carved door, deeper in the grove. You'll then be presented with the same set of choices as before excluding the option you just picked. If you tell her she doesn't look like she's helping with the ritual, she'll say that the ritual is Kagha's decision, but she is not their leader. She says Halsin welcomed the refugees within the grove, and she'll wait for him to resolve this. Your next set of choices will look like this:
- Is that why you were talking to that bird?
- Halsin won't be resolving anything if he's dead.
- Leave.
Asking her about the bird will make her say that you do not need to know, and your next set of choices will look like this:
- [INTIMIDATION] Hmm... Suspicious. Do the other druids know? Because I could tell them.
- [PERSUASION] I helped defend this grove - I'm not your enemy.
- Leave.
Choosing the PERSUASION option will require you to pass a Charisma check with DC 10. Successfully passing the skill check will make her apologize to you and says she fears her brethren. Most of her kind follow Kagha since her solution is to kick out all the refugees to ensure their safety. Your next set of choices will look like this:
- And she's wrong?
- Sounds like she has to be stopped. How would we do that?
- You still haven't told me what you were doing with that bird.
If you ask her how to stop all of this, she'll say you and her can't do anything without having the others turn against you, and that only Halsin can put an end to this.
After your conversation with Apikusis, make your way to the Stone Door just northwest (X:228 Y:521).
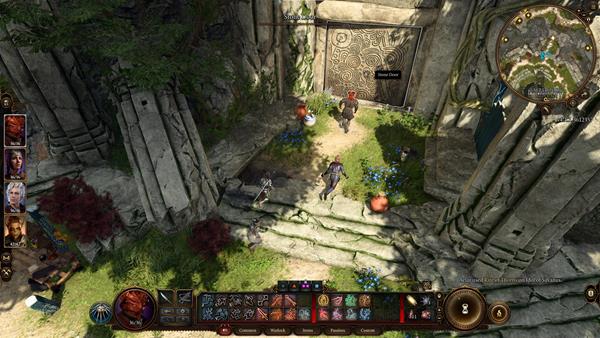
Go through the door and just down the stairs, you'll see Kagha trying to intimidate Arabella with her serpent. She wishes to imprison the young tiefling on account of theft. Rath tries to reason with Kagha but she sees the tiefling the same.
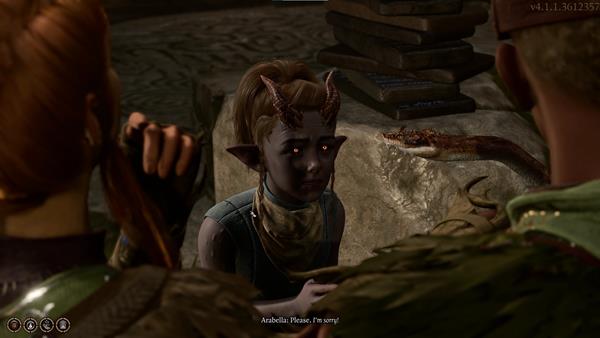
Your next set of choices will look like this:
- Thief? Poison? What's this girl's actual crime?
- Imprison her? She's just a child.
- Do nothing.
- One of your guards outside said you wanted to see me. Here I am.
When you tell Kagha that's Arabella is just a child, she'll say she's a parasite and eats their food, drink their water, then steals their most holy idol as thanks. Kagha then orders Rath to keep Arabella locked up until the ritual is complete. Rath tries to reason with Kagha one last time.

Your next set of choices will look like this:
- [NATURE] Don't druids cherish harmony? Jailing the girl disrupts nature's balance.
- [PERSUASION] Release her. I'll see that she stays out of trouble.
- [DETECT THOUGHTS] Read Kagha's mind.
- Keep silent.
- Prepare to attack.
If you use the PERSUASION option, you'll have to pass a Charisma check with DC 12. Successfully passing the skill check will gain you both Gale's and Shadowheart's approval, but also Lae'zel's disapproval. Kagha will agree with your deal, but if you break your word and her serpent will feed.
Before the conversation ends, you'll notice Shadowheart gets hurt. Now interact with Shadowheart and she'll say it had nothing to do with the tadpoles living inside our brains, she says it's just something she has to live with.
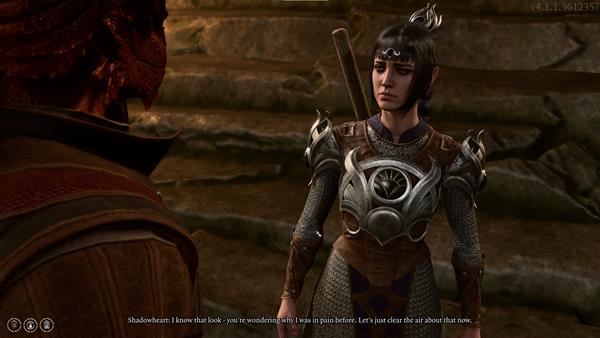
Your next set of choices will look like this:
- How badly does it hurt?
- Are you sure it's not connected to the tadpoles?
- Turn to other matters.
If you ask her how badly it hurts, she'll say it hurts quite a lot but it always passes so quickly so she can manage. You'll then be presented with the same set of options from before excluding the one you just picked. If you ask if she's sure it's not connected to the tadpoles, she'll say she's sure and you can trust her on that. If you choose the option to turn to other matters, you can either make her stay in camp, talk about what happened between you so far, or end the conversation.
Speak to Rath who's sitting by a rock (X:-465 Y:-28). He'll say you did well for standing up for Arabella.

Your next set of choices will look like this:
- That Kagha seems dangerous.
- And if I hadn't spoken up? What would've happened?
- I've heard there's some sort of ritual going on.
Choosing the first option will make him reply that they've let a snake replace their leader. Your next set of choices will look like this:
- Kagha seems happy to rule the roost. Who's your real leader?
- How did Kagha take over the whole grove?
- I'm looking for Nettie.
If you ask who's their real leader, he'll say it's Halsin. He thinks Halsin was caught by the goblins, or probably dead. If he's here he'd set Kagha in line and stop this ritual. He adds that more people will die if the ritual is finished. Your next set of choices will look like this:
- If no one's looking for Halsin, I could do it.
- I'm looking for Nettie.
- Sounds like I'd better leave.
Choosing the first option will give you another set of choices:
- No need to fret. I'll find him.
- I'd like a more solid offer than 'anything'.
- Never mind. I'm not interested.
If you choose to look for Halsin, he'll say Halsin's an Elf with a presence of a bear and that he left west with the adventurers.
You can then speak to Kagha (X:-467 Y:-22). Upon interacting with her, she'll say you think she's a monster.
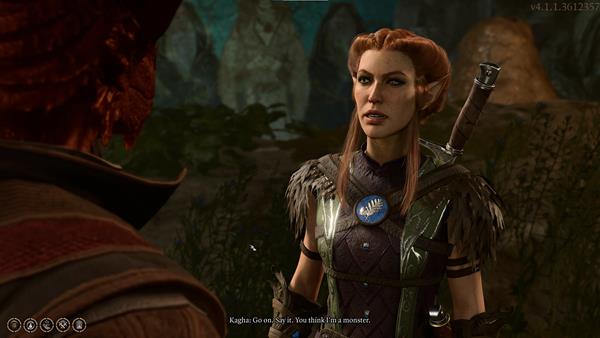
Your next set of choices will look like this:
- Only a monster would threaten a child.
- You're protecting your own - sometimes cruelty is required.
- Honestly, I just wanted to see what would happen.
If you choose the first option, you will get a disapproval from Lae'zel. Kagha will then tell you that she knows your kind and that you only see the villains and victims. Your next set of choices will look like this:
- This rite must be born of powerful magic.
- Zevlor believes his people will perish on the road.
- Do what you want. It's none of my concern.
- Reach for your weapon.
- Leave.
If you choose the first option, she'll explain that once the ritual is done, the grove will be covered in bramble and thorn, making sure no one enters and no one can leave. Your next set of choices will look like this:
- I came on Zevlor's behalf. His people could perish if you force them out.
- Do what you want. It's none of my concern.
- Reach for your weapon.
- Leave.
Choosing the first option will make her say that her kind will also perish if Zevlor's people stay within the grove. She then commends you for your battle at the gate, and that she wants you to provide those services again and offer them to Zevlor and his group once they are out of the grove. Your next set of choices will look like this:
- Then it seems I'd best speak to Zevlor.
- Prattle all you want. The refugees aren't my concern.
- Attack.
If you choose the first option, she says you'll do more than speak to Zevlor. And this could only end in two ways. Your conversation ends there.
Finding Healer Nettie
After your conversation with Kagha, go to the Druids' Chambers (X:-443 Y:-6) and you'll find Nettie trying to patch up an injured bird. Once you interact with her, she'll tell you to give her a moment.
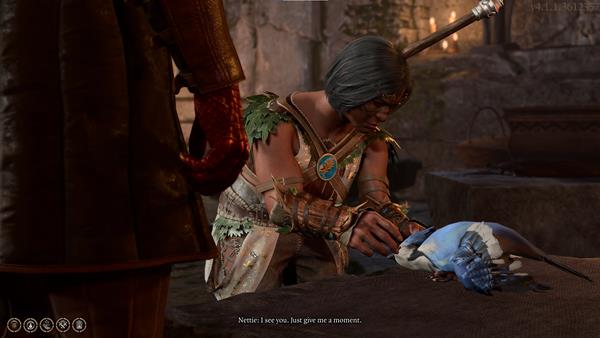
Your next set of choices will look like this:
- Is there anything I can do to help?
- Wait patiently.
- Excuse me? I'm more important than some bird.
- Leave.
If you choose to wait patiently, you'll see her perform a spell that will heal the bird instantly. She'll then ask what you need. Your next set of choices will look like this:
- I'm looking for Nettie.
- I need help. Now.
- Healing. Looks like I came to the right person.
Choosing the first option will make her reply that you found her, but she still doesn't know what she can do for you. Your next set of choices will look like this:
- Healing. As soon as possible.
- Do you know anything about mind flayers?
- I hear Halsin's the best healer around. I need to find him.
If you say you need healing, she'll give you a look and say you seem healthy enough. Your next set of choices will look like this:
- No good way of putting this. I... uh... have a tadpole in my head.
- More than tired. Something crawled into my eye.
- Right. Yes, I'm... very tired indeed.
If you tell her about the tadpole, you'll be presented with these choices:
- You know of them? Can you help me?
- What other kinds are there? It's not like a frog hopped in my eye.
- Actually, never mind. I'll get help elsewhere.
If you choose the first option, she'll say she'll do what she can and she might be able to help. Now you need to follow her inside the Enclave Library. You'll then see a dissected drow on the table. She says it had the same problem as you, and that this drow attacked her in the woods with some other goblins, and then a tadpole crawled out of his head soon after. Your next set of choices will look like this:
- The drow and I have the same kind of parasite?
- I'm hoping for a less grave cure.
- So you killed him and laid him out on the table?
- Is everyone being captured by mind flayers these days? Didn't think it was a common experience.
If you choose the first option, she'll say that you do have the same parasite. She'll also mention that Halsin has greater knowledge about these things as he studied them, and that's why he joined the adventurers on their expedition. She then says she'll see what she can do. Your next set of choices will look like this:
- Thank you, I'll take anything that can help.
- What's that plant? Will it help?
- Just hurry up and cure me. I don't have time to chat.
If you choose the first option, she'll ask you about what's happened so far and if there are any symptoms. Your next set of choices will look like this:
- I can merge my mind with anyone else that's infected.
- I fell from a ship in the sky, but something caught me. Saved my life.
- An intellect devourer spoke to me as if I were one of its own.
- No, nothing strange, I just want it out of my head.
Choosing the first option will make her ask you how you picked up the parasite. Your next set of choices will look like this:
- On a mind flayer ship - I was kidnapped and infected.
- I don't know. I just woke up with it.
- You're asking a lot of questions.
- Look, are you going to cure me or not?
If you choose the first option, she'll say you're dangerous, but you have a good soul. She then tells you to swear to her that once you feel any symptoms, you'll swallow the Wyvern Poison she's about to give you.

Your next set of choices will look like this:
- I thought you could cure me? What about that branch of yours?
- I swear.
- All right. Hand it over.
- No. I'm not taking poison from a woman I can't trust.
If you ask her about the branch, she'll say it's coated with a fatal toxin and it was just a last resort in case she couldn't trust you. She says she doesn't have a cure, only a way out. She then apologizes for misleading you. You'll then be presented with the same set of choices as before excluding the one you just picked. If you swear to take the poison if you ever show any symptoms of changing into a mind flayer, you will gain Lae'zel's approval, but get Shadowheart's and Astarion's disapproval. Nettie hopes it doesn't have to come to that but she thanks you, then hands you the Wyvern Poison. She then goes on to say that she's been treating people all her life and never encountered a mind flayer infection, and there are suddenly dozens of people like you. And what she finds weird is that the ones infected should be changing into a mind flayer and there should be an army of them by now, but the infected ones seem perfectly normal. Your next set of choices will look like this:
- What do you mean 'should' be changing?
- You must've learned something from studying them.
- Just tell me if there's a cure or not.
If you choose the first option, she'll explain that mind flayers reproduce by infecting someone with their parasite, and after seven days, the victim will transform, and a new mind flayer is born. The one residing inside your brain is different from their records, as it gives you telepathic powers and doesn't turn you into one of them. Your next set of choices will look like this:
- So you think it's only a matter of time?
- That's... good news?
- You said you were tracking other victims. Did they change?
If you choose the first option, it'll reveal that people infected like you were converging on an old temple in Selune, and this is what led Halsin to join the adventurers, and whatever he found there, he didn't make it back. Your next set of choices will look like this:
- What do you want me to do?
- So? Go and get him.
- You think he's still alive?
If you choose the first option, she'll say she's already sent birds to find Halsin, but the place is overrun by goblins and no one can get close. But you could maybe go there as she says they wouldn't kill someone carrying their parasite. She says if you can find and rescue Halsin and discover what he's learned, there's a chance it could save your life. Your next set of choices will look like this:
- All right. I'll find Halsin.
- It sounds like you're making a lot of assumptions that could kill me.
- You're sure he can cure me?
- That sounds like suicide. I won't do it.
If you choose the first option, she'll thank you as it would mean everything to the grove and to her. She wishes she could tell you more but only those adventurers that went with Halsin know what happened. She then reminds you of the oath you took before bidding farewell.
Talking to Zevlor, Arabella's Parents, and meeting Raphael
As your conversation ends, make your way to the Servants' Quarters (X:-461 Y:-17). At the back of the bookshelf, you'll see an open path, you can find Kagha's Chest there at (X:-488 Y:-4).

If you try to Lockpick the chest, you will need to pass a Dexterity check with DC 10. Successfully doing so will let you loot the items within the chest.
You can take your leave and exit the area, then go through the Stone Door and head back to the Sacred Pool. Now go to this location (X:261 Y:541) and you'll find Arabella with her parents, Locke and Komira. Once you interact with them, Locke will say their daughter told them what happened, and he thanks you.

Your next set of choices will look like this:
- I hope we'll meet again under better circumstances.
- I saved your daughter - got anything more than a thanks for me?
- This could've ended badly - keep her in line from now on.
- No more light-fingered antics - right, Arabella?
Locke will say likewise upon choosing the first option. Arabella will also thank you for helping her. This will complete the quest Save Arabella and you will be rewarded with Komira's Locket.
Now continue heading southwest and reach the Stone Door in this location (X:172 Y:541), enter the Stone Door and you'll find yourself within the Secluded Chamber. Just up ahead you'll find Zevlor (X:-53 Y:70). Once you interact with him, he'll thank you for saving the child.

Your next set of choices will look like this:
- Leaving the grove is the best option. I can help.
- Can you delay the ritual?
- You have to resist.
- Best of luck with that. This has nothing to do with me.
- I'm not here to advise you. I'm here to make sure you leave.
If you ask him if he can delay the ritual, he'll say that this is all Kagha's influence, and without her twisting things, the druids might see sense again. Your next set of choices will look like this:
- Then why don't you get rid of her?
- You need to cut your losses and run. I'll help.
If you choose the first option, he'll say it's a low thought, but did consider it at one point in time. He also says the druids would slaughter them, and they'd need to get close to Kagha within striking distance if they were to pull this off. He says they can't manage that maybe you can since you've already got close to Kagha previously. Your next set of choices will look like this:
- What's it worth to you?
- Leave it to me.
- I'm not some murderer for hire.
If you choose the first option, he'll say that it's worth everything to get his people to Baldur's Gate. He's still hoping that Kagha can be swayed from this, but if not, he'll make the tough decision. This will end your conversation.
Now that you've attempted to remove the parasite from your brain and rest, at any point in time you can meet Raphael. He then introduces himself and says he's at your service.
Your next set of choices will look like this:
- Pleasure. I'm Player's Name.
- Am I talking to the mouse or the cat?
- Pretty words. If you want to threaten me, don't disguise it.
- Walk away while you still have legs to walk with.
Upon choosing the second option, he'll teleport you to a fancy dining room. He'll say you're now in the Middle-of-somewhere. Your next set of choices will look like this:
- Nice decor.
- Can you be more specific than 'somewhere'?
- Take me back. Now.
- Reach for your weapon.
If you choose the first option, he'll say this is the House of Hope. He then tells you to enjoy the food warning that it might be your last meal. Your next set of choices will look like this:
- What makes you say that?
- I'm getting tired of your games.
- Are these theatrics leading somewhere?
- Ignore him and fill your plate.
If you ignore him he'll continue with the conversation, then he'll transform into a devil.

Your next set of choices will look like this:
- Draw your weapon.
- What makes you think I need saving?
- Why would you help me?
- I don't care what you are - I care what you want.
If you decide to draw your weapon, Raphael will de-escalate the situation and offers to fix your situation. Your next set of choices will look like this:
- I'll do anything to get rid of the tadpole.
- I need to think this over.
- You're mad if you think I'll make a deal with a devil.
- Then fix it - or die at my hand.
If you call him mad, Astarion, Lae'zel, and Shadowheart will approve. He's hoping you'd change your mind down the road. Your next set of choices will look like this:
- And if I do want to take this deal - how would I find you?
- I'll have the last laugh in the end.
- Take me back. After that, I never want to see you again.
- I'll rip out your mocking tongue.
If you choose the first option, he says he'll be around. Then transports you back to where you met him.
Return to the Emerald Grove
NOTE: The section below of this walkthrough takes place after you explore the Shattered Sanctum and you rescue Halsin.
When you're done exploring Shattered Sanctum and after rescuing Halsin from the Goblins, you will need to return to Emerald Grove to complete your quest. Make sure to check Shattered Sanctum to see the walkthrough. Teleport to Emerald Grove by using the waypoints, and then move to (X:209 Y:434) where you will find the entrance to the grove. You will first interact with Zevlor, who welcomes you and would wish to show appreciation for your hard work by offering gold from everyone. After this conversation, the quest Defeat the Goblins will be completed and you will also receive an item, a Patched-Together Sack.

Continuing your quest Save the First Druid, you need to speak with Halsin and find him at Emerald Grove. In the meantime, you can also look for Dammon, the trader in the area at (X:179 Y:554), and interact with him to buy and sell wares through him. Walk toward the Sacred Pool at (X:262 Y:518) and you will be able to speak with Halsin here, who is currently engaged in a heated conversation with Kagha. Halsin has decided that Kagha will remain in the grove but she will begin as a novice once more. Halsin declares that the grove still needs her, hence, why she needs to stay.
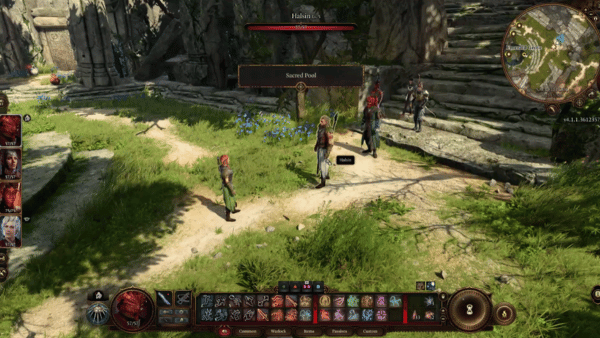
Halsin turns his attention to you and begins to acknowledge and thank you for your work and then he will ask you to speak with Zevlor to help out with the parasite that's troubling you. Tonight, the Druids wish to celebrate and they will begin the plan tomorrow. Approach the Stone Door at (X:229 Y:519) to return to Emerald Grove and speak with Rath. Rath will show gratitude for bringing back Halsin and for defeating the goblins. You will get choices on how to respond:
- For someone like me? It was pretty simple, actually.
- Think nothing of it. I'm glad Halsin is safe.
- It was a hell full of blood and ash.
- I'm just here for the reward.
Choosing the second option here will open up Rath to give you a reward, a rune that will show the location of the cache. He asks that you take it to the library and claim the contents of the cache when the wolf glows the brightest. After receiving the reward, this will complete the Save the First Druid quest. To claim your rewards, you will find the library at (X:439 Y:21) that will take you to a Hidden Vault beneath it after solving the puzzle.
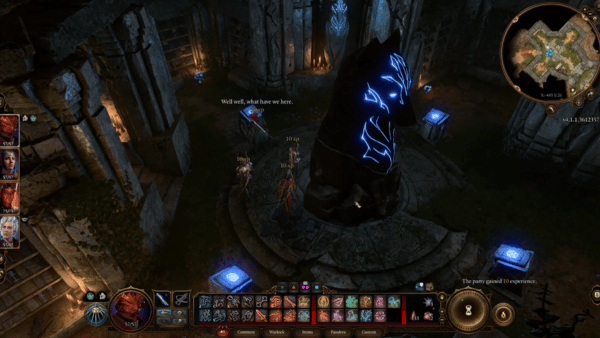
Approach the Empty Socket inside the library and then put the Rune of the Wolf into it, then click on combine. Then, activate the Rune of the Eagle, Rune of the Bear, then finally, Rune of the Elk. This will unlock the hidden access to the basement where you will find elixirs, potions, equipment, and other valuable stuff that you can use.
BG3 Emerald Grove Notes & Tips
- The three mice in the Grove are actually transformed shadow druids. If you find the evidence at Sunlit Wetlands and confront Kagha, they will reveal their true forms and attack.
- You can use the Rune of the Wolf to open the secret chamber. (by completing the quest Save the Refugees or steal it from Rath).
- Place the Wolf Rune, then activate all the runes that will open the entrance to Hidden Vault. There you can find Sorrow (Rare 2-handed Melee Weapon), Robe of Summer (Rare Clothing), and Wyvern Poison (Rare potion, coat weapon).
- Other Notes & Trivia for the Emerald Grove go here.

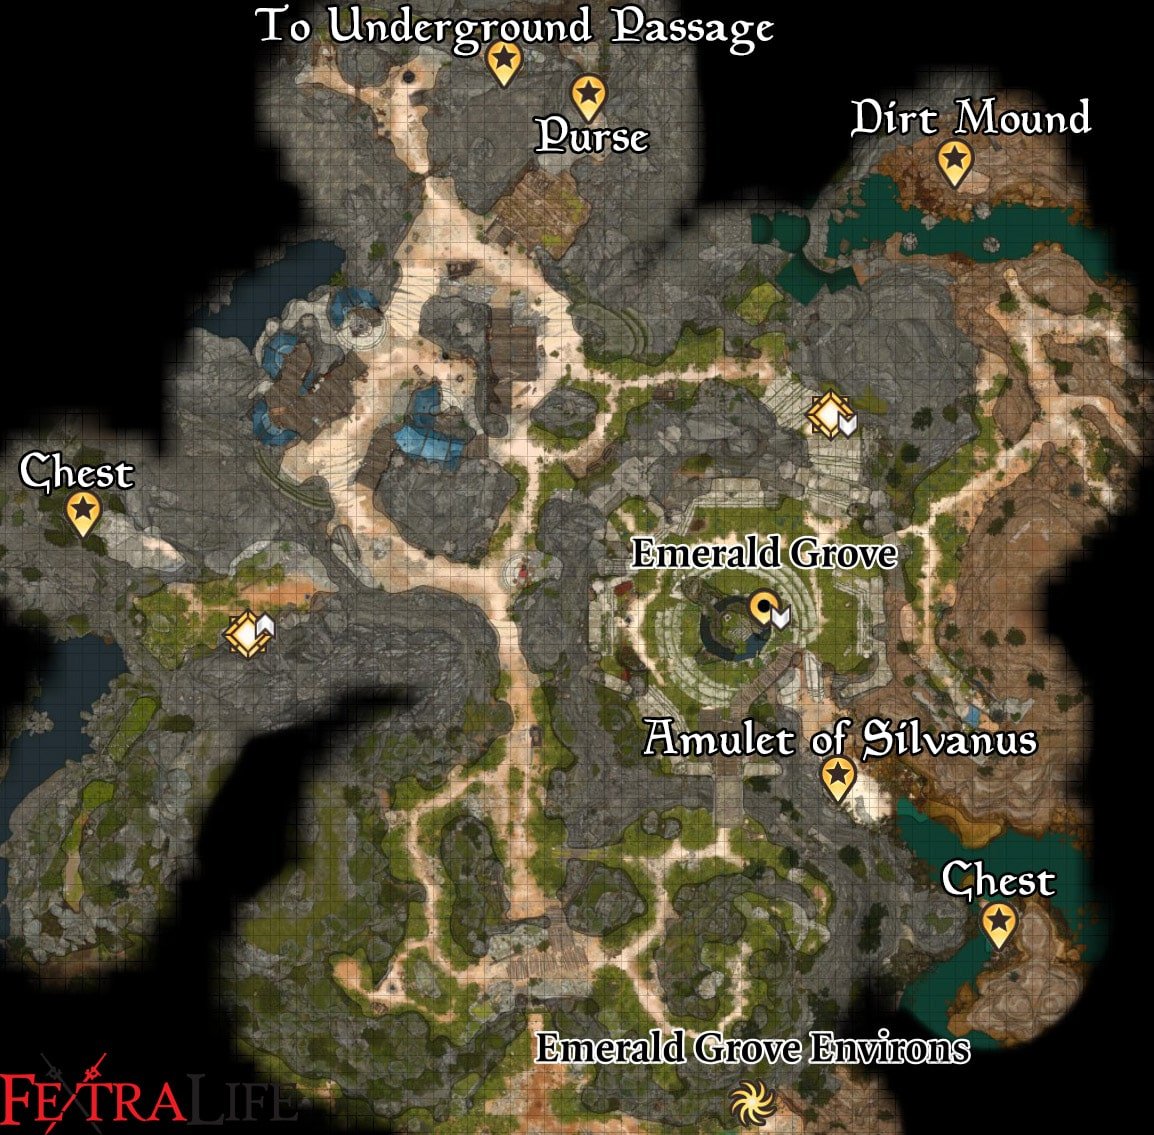
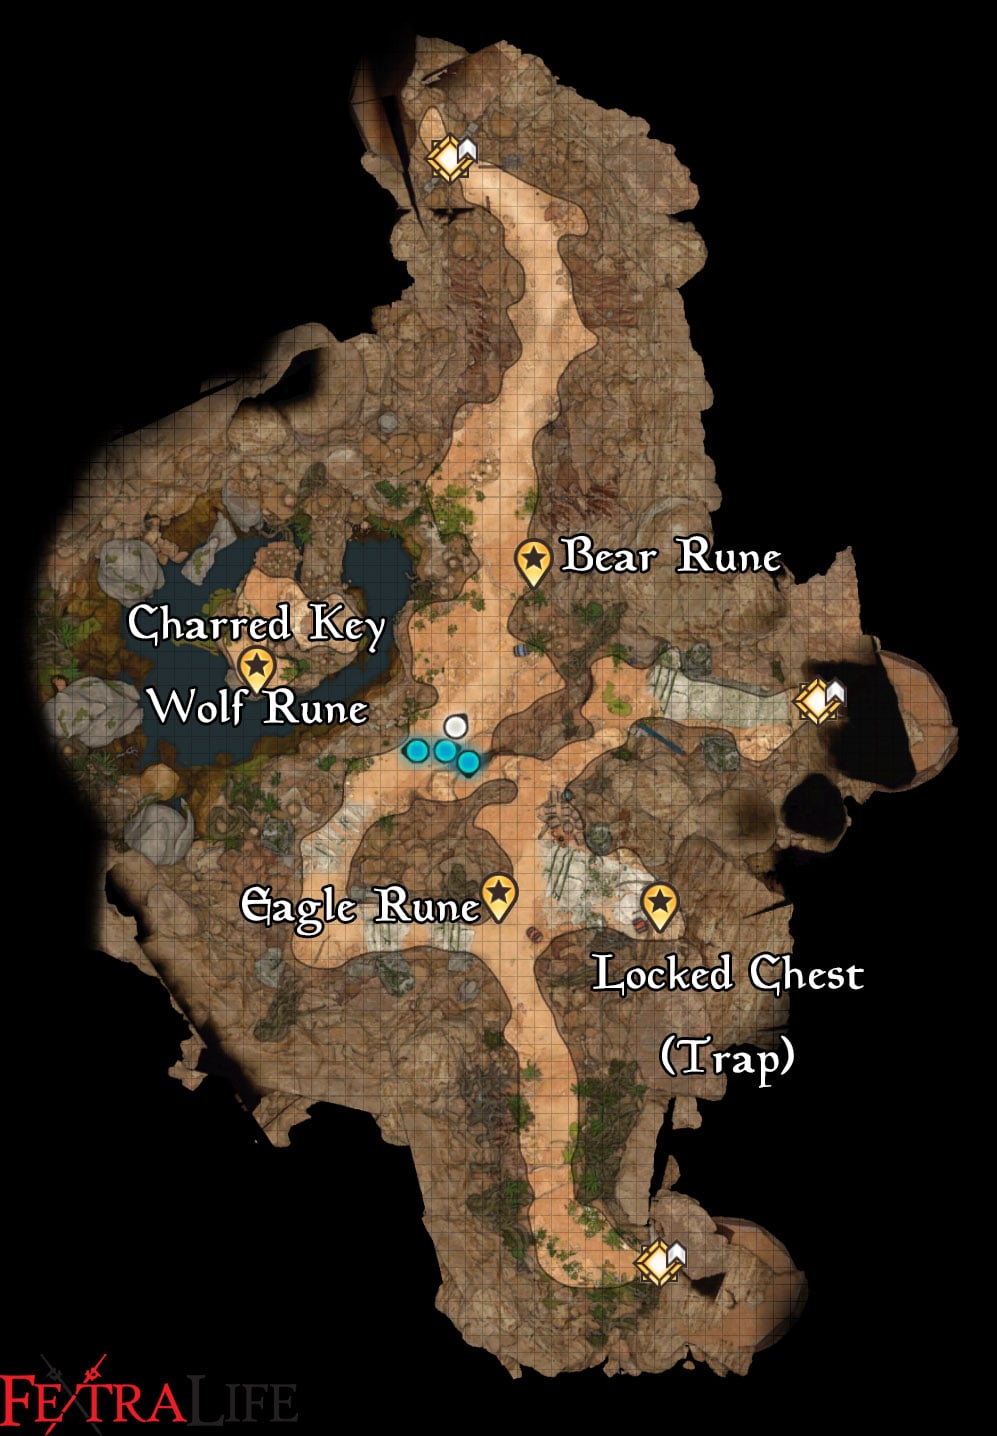
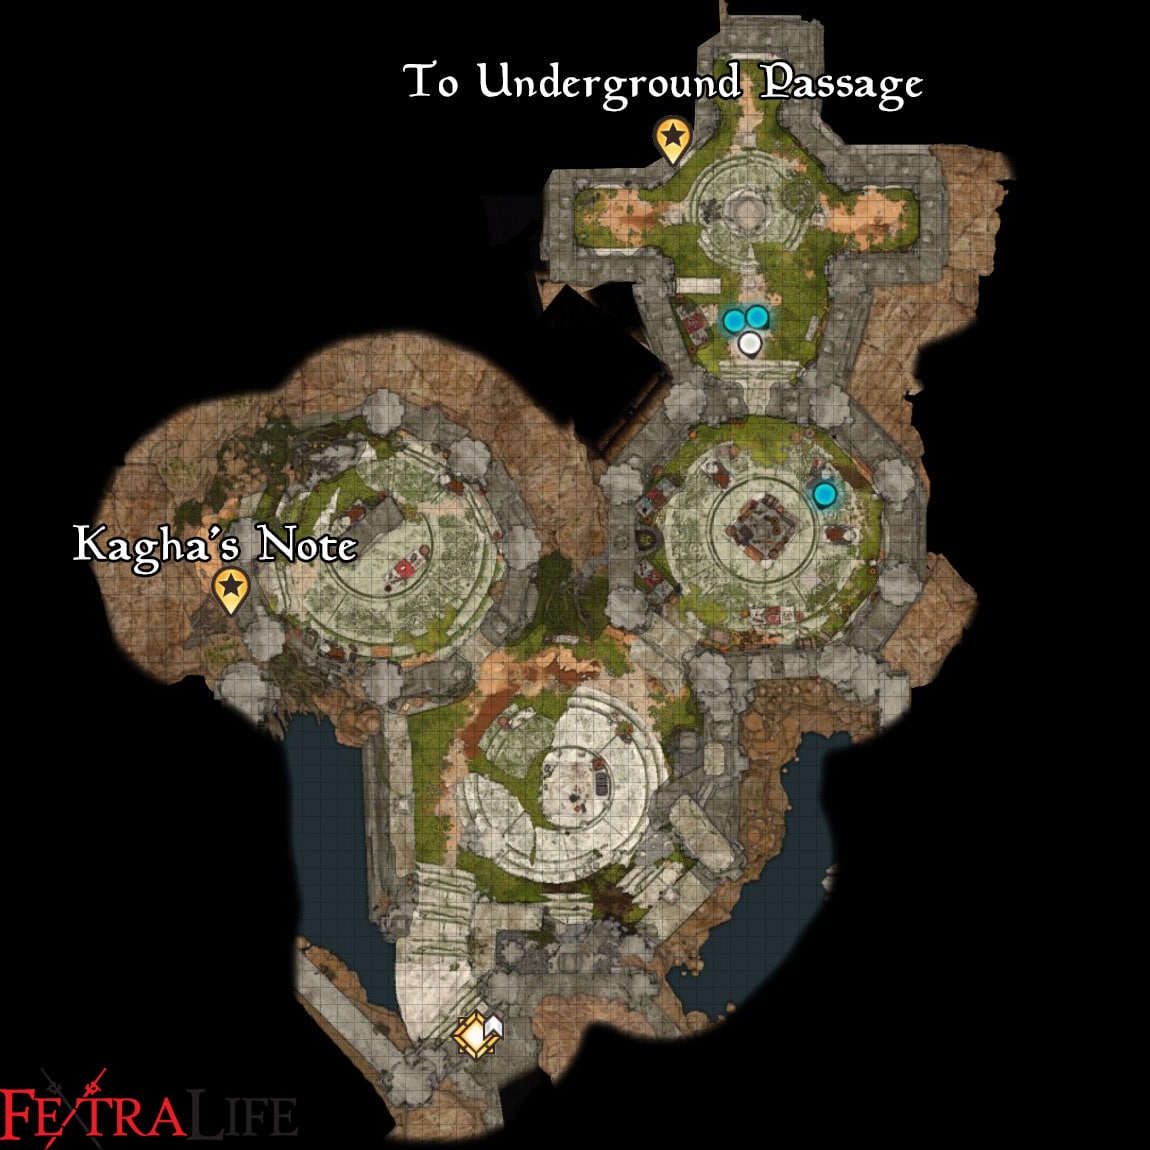
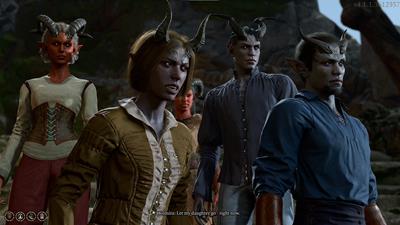

To those whom were locked out of the grove due to the ritual having been completed, do note that as long as you have some form of flight and or teleportation spell/ability you can get back in, top right of the front gate, for those with misty step, there's a bush if you hover around the back side, when it says "100%" you can teleport behind the thick vines, but please be warned that mostly all the citizens there have up and left, you can't complete any of the missions there, and a good 10~ people will have remained, mainly being druids, that of which will be enemies
you can still get into and complete the wolf head puzzle as long as you have the slab, go through the underground passage, take the left stone door.
1
+10
-1