Lower City |
|
|---|---|
 |
|
| ACT | Act 3 |
| Location | Baldur's Gate |
| Suggest Level | 10-12 |
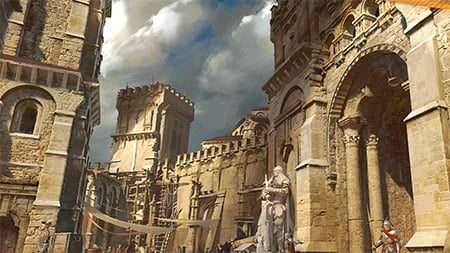
Lower City is a location in Baldur's Gate 3. Lower City is a bustling town located just after Wyrm's Rock featuring several sub-areas where you can interact with NPCs and progress your quests. On this page, you can find related information about the map, quests, enemies, notable items, and other useful tips about Lower City.
Lower City Map
Lower City Sub-Areas in Baldur's Gate 3
- Sorcerous Sundries
- City Sewers
- Undercity Ruins
- Cazador's Dungeon
- Cloister of Sombre Embrace
- Iron Throne
- The Counting House
- Heapside Prison
- Water Queen's Cellar
- Felogyr's Fireworks
- Candulhallow's Tombstones
- Bloomridge Park
- Graveyard
- Mortuary (has Jar of Mystic Carrion's Lungs for quest Find Mystic Carrion's Servant)
- Durinbold Mausoleum
- Hhune Mausoleum
- Gorion Mausoleum
- Grand Mausoleum (Lower City)
Baldur's Gate 3 Lower City Notable NPCs and Merchants
- Helsik - Devil's Fee Merchant
- Derryth Bonecloak - Bonecloak's Apothecary
- Mystic Carrion - Philgrave's Mansion
Items in Baldur's Gate 3 Lower City
- Silver Key
- Cerebral Citadel Armour
- Cerebral Citadel Gloves
- Sword of the Emperor
- Scroll of Artistry of War
Baldur's Gate 3 Lower City Quests
- Acquire the Gauntlets for Helsik
- Aid the Underduke
- Avenge the Drowned
- Avenge the Ironhands
- Deal with the Gnomes
- Feed the Mind Flayer
- Find a way into Wyrm's Rock fortress
- Free Counsellor Florrick
- Find Dribbles the Clown
- Find Mystic Carrion's Servant
- Find the Missing Letters
- Find the 'Stern Librarian' Ffion
- Help the Cursed Monk
- Help the Devilish Ox
- Help the Hag Survivors
- Investigate Cazador's Palace
- Investigate the House of Grief
- Investigate the Suspicious Toys
- Retrieve Omeluum
- Return Rakath's Gold
- Roveer's Storehouse
- Save the Gondians
- Save Hope
- Save Vanra
- Solve the Open Hand Temple Murders
- Stop the Presses
- Visit the Emperor's Old Hideout
Main Quests
Baldur's Gate 3 Lower City Walkthrough
Navigation
Click to jump to a specific section of the page
Lower City
Upon entering the Lower City at X:138 Y:-56, make a right turn onto the stairs and enter the Basilisk Gate Barracks through the door. Inside, you'll come across a dispute between Blaze Liara Portyr and another individual named Lora. Lora is upset, accusing Liara of not paying attention to her concerns. You can intervene by saying:
- Can you tell me what's happening here?
- Let's calm down - give the Flaming Fist some space.
- Sorry, not my issue.
- I'll leave this be.
Opt for the first option, and Lora will explain that her daughter named Vanra has been abducted. She's frustrated because Fist Liara supposedly had a lead but seems to have forgotten about it. Liara begins to speak but appears to struggle, and faint traces of magic are visible around her. Lora angrily states that her daughter was taken from The Blushing Mermaid near the docks. Lora's frustration grows as she feels Liara isn't paying attention. You can step in by saying:
- [Arcana] Examine the Flaming Fist's situation.
- Typical Flaming Fist behavior - they rarely listen.
- Taking a child to a tavern isn't responsible.
- I'm listening - tell me the whole story.
Select the first option to use your knowledge. You'll realize that someone has manipulated the Flaming Fist's memory. When Liara asks what they were discussing, it's as if she forgot again. Frustrated, Lora might think Liara is losing her mind. You can respond by saying:
- Have you tried searching for your daughter?
- Someone has tampered with the Flaming Fist's memory.
- I'll assist you in finding your daughter.
- Forget the Fist - provide me all the details.
- This is frustrating - I'm leaving.
Opt for the second option, and Liara will express disbelief and inquire again how she can aid Lora. This further confirms that something is wrong with her memory. Lora agrees with you. She then pleads for your help, mentioning that Vanra's father isn't around either. You can reply with:
- I'll do what I can to help you find your daughter.
- I'll gather more information - then we'll take action.
- I could assist, but I might need something in return.
- You're on your own in this matter.
Select the first option, and Lora will express her gratitude. She describes Vanra as a 7-year-old girl with red hair who was taken while they were at the Blushing Mermaid. You can inquire further:
- Was anyone else present when Vanra was taken?
- Did anyone witness the abduction?
- I'll head to the Blushing Mermaid now to gather more information.
- I'll leave this to you.
Opt for the second option, and Lora will mention that there were others around: Bosun Gannet and the establishment's owner, Captain Grisly. However, none of them assisted Lora in searching for her daughter.
Later, head west until you reach a building named Baldur's Mouth. There, you'll encounter Ettvard Needle, who regards you as the city's upcoming sensation. He mentions you're the next big story for their edition. You can reply with:
NOTE: Some dialogue interactions will be different depending on your character's class or race.
- It's strange that you've written an article before even questioning me.
- I'm sorry, who are you?
- Are you sure you have enough ink to cover all my adventures?
- [Warlock] I might need to consult my patron before being in the spotlight.
- I'd prefer not to appear in your publication at all.
Choosing the 4th option will lead Ettvard to remark that you should have thought about this earlier, mentioning your violent behavior against the circus performers. He claims to have never seen such aggression towards innocent circus members and warns that the truth will be exposed in the upcoming article. He predicts that you'll become a disgrace, with people spitting at you and treating you like an outcast. In response, you can say:
- Who is spreading these false claims?
- Could some coin persuade you to withhold the article?
- If what you're saying is true, angering me is unwise. Stop the article.
Opt for the first option, which will progress the quest "Stop the Presses." Ettvard asserts that he won't reveal his sources and claims it's too late to stop the article. He mentions that the headlines are already prepared for printing and asserts that the power of free speech will be felt tomorrow. The guards are then instructed to escort you out. You can respond:
- Let the guards escort me outside.
- Attack the guards.
Choose the first option, and you'll find yourself outside the building instantly. Proceed northward to the Elfsong Tavern at X:54 Y:-25. This action will advance the quest "Visit the Emperor's Old Hideout." At the tavern's entrance, interact with Enforcer Skoona, the bouncer. She briefly mentions the loneliness of her role as muscle, and you can humorously suggest she could become a bard if she wished.
Upon entering the tavern, explore to collect Emperor's old belongings. Engage in a conversation with Chef Roveer regarding his presence on the murder list. He'll claim he can manage the murderers while tasking you with dealing with the rats. This will update the main quest "Investigate the Murders" under the "Get Orin's Netherstone" section, as well as a side quest titled "Kill the Rats." Proceed to the Elfsong Tavern Basement, where you'll encounter numerous rats to eliminate. After exterminating them, both the "Roveer's Storehouse" and "Visit the Emperor's Old Hideout" quests will receive updates.
Locate the Wine Racks in the basement and identify a mechanism that opens a secret door. Upon entering this passage, you'll find a descending staircase. Proceed downstairs and open the door to access the old hideout. Upon entering, you'll need to eliminate the Guthyanki forces that have occupied the area. This action will trigger further updates to the quest.
Explore the hideout for useful items to loot, including a silver key located on the central desk. Then head to the right side of the Huideout to find a hidden room where you can loot the Emperor's old belongings.
Returning to the Campsite, engage Gale in a conversation about Karsus's forged crown. He expresses disbelief that the very crown is being used to control the Elder Brain. Gale compares the crown's value to the scrap metal that Raphael offered previously and suggests visiting the Sorcerous Sundries. He believes that valuable information may be hidden within their book collection. Respond with:
- Why start our search at a Baldurian Magic Shop?
- Is this just an excuse to go shopping?
- That's an interesting suggestion.
- I'm not interested, Gale.
Opt for the first choice, leading Gale to clarify that the Sorcerous Sundries is no ordinary trading post. It's been serving the Arcane community for centuries, boasting an unparalleled collection of rare tomes. Gale asks for forgiveness if he sounds too eager, but he believes this might hold the answer to their problems.
From the Emperor's Hideout, access the Lower City Sewers through the hatch. There, you'll encounter a bloodied Gale who warns you to distance yourself from a particular "monster." Reply with:
- What monster are you referring to?
- Gale, you're injured. What happened to you?
- Why are you here in the sewers?
- Whatever you're running from, it poses no threat to me.
Select the first option to learn that Gale was abducted by Orin the Red and held captive in her Bhaalist temple. He reveals the temple is situated within the sewers and that Orin subjected him to terrible experiences. Gale urges you to run since Orin is formidable. Respond with:
- Very well, we'll turn back and figure out how to deal with her. Thank you for warning us.
- I'm not leaving you behind.
- You won't face her alone. We'll confront her together.
- Gale, what did she do to you exactly?
Opt for the fourth option, which reveals Gale's peculiar reaction and leads to his transformation into Orin herself. Confronted by Orin, she questions your presence in the sewers and assumes you're after her Netherstone. She also mocks your concern for Gale. Respond with:
- What happened to Gale?
- You're welcome to him; I could use some peace and quiet.
- Gortash warned me that you might try something like this.
- You'll pay for this, monster.
- Prepare to defend yourself.
Choose the third option, and Orin will mention Gortash, hinting at her knowledge of him. She refers to your interaction with him and claims that the Murder Lord also desires you. Reply with:
- Why does the Murder Lord want me? What's his motive?
- If you come for me, you'll meet your god soon enough.
- The voice you hear isn't divine; it's a product of your twisted mind.
- It seems everyone wants a piece of me. He'll have to wait his turn.
Select the first option, and Orin will mention Ketheric's Killer. She indicates that before you can challenge her, you need to sharpen your skills against a different foe—the Tyrant's Throat. Orin then shifts into Gortash's form, claiming to see his whispers and promises in your thoughts. She explains his desire for the Crown of Karsus, wanting it for himself. Orin expresses her urge to eliminate Gortash but reveals she can't touch him since he bound her blade during their initial encounter. She proposes you kill Gortash, retrieve the Netherstone from his body, and bring it to her temple. After reverting to her true form, she offers to bring her assassins under control if you agree; otherwise, she threatens harm to Gale. Respond with:
- So you're betraying your ally? Or are you asking me to?
- Very well. I'll kill Gortash. Gale will live. After that, we settle things for the final Netherstone.
- Gortash can wait. First, I'm confronting you, monster.
- I'll comply. Just promise not to harm Gale.
Choose the first option, leading Orin to explain that they aren't allies, just two forces in balance. Then inquire about Gortash's whispers, and she'll confirm that she sees them. She adds that Bhaal's age is drawing near and insinuates that you could be part of it—an idol of flesh to welcome the coming dawn of his bloody reign. Orin warns not to underestimate the Steel Watch and threatens to harm Gale if she sees you in her domain while Gortash remains alive. Then, she disappears. This conversation updates the quests "Disable the Steel Watch", "Get Orin's Netherstone", and "Rescue Orin's Victim".
After your conversation with Orin, return to the Elfsong Tavern and speak with Chef Roveer concerning the rat situation. He'll reward you and assure you he's vigilant against potential threats. This completes the "Roveer's Storehouse" quest. Then, proceed to the staircase leading to the tavern's second floor. The two Fist guards will halt you, mentioning Devella. Respond with:
- Investigator Valeria directed me to speak with Constable Devella.
- What's the issue?
Opt for the first choice. One guard will still attempt to stop you, but the other will defer to Valeria's rank and allow you to proceed. Ascend the stairs and enter the door ahead. A cutscene will unfold, showing Devella at the crime scene. While she's frustrated someone let you through, she asks why you're interrupting her. Reply with:
- Are you Devella? Valeria sent me to assist.
- I'm just a curious adventurer, interested in the scene.
- I'm no one important, just passing through.
- Your anger is quite palpable. I'll leave you be.
- I seem lost. I'll find my way out.
Select the first option. Devella will reluctantly confirm her identity. She'll express that if you lack helpful information, you should leave her to her work, as she's investigating Duke Stelmane's murder. Reply with:
- Share about the murder target list you found.
- Is it possible the murderer was tied to the Bhaal cult?
- With Bhaal's involvement, more is at stake than Stelmane's death.
- Best of luck with your investigation.
Opt for the first choice. Devella will be intrigued by your information, updating the Main Quest "Investigate the Murders." She'll elaborate that her assignment led her in the same direction, but she hadn't expected these developments. She explains that a century ago, Sarevok Anchev, Bhaal's son, ruled the Iron Throne, which masked a dark arms-dealing network. Sarevok aimed to ascend to godhood by amassing an army, leading to the revival of Bhaal's temple and cult. Although the temple was destroyed, the cult's remnants persisted, ultimately evidenced by the murder list. Devella concludes that the Bhaal cult has resurfaced, and someone is continuing Sarevok's sinister legacy. Respond with:
- Why don't you think it's Sarevok himself?
- Do you have any suspicions about who might be behind this?
- But Sarevok led the cultists a century ago; he can't still be alive, can he?
- I share your concerns. I've noticed an uptick in Bhaalist activity myself.
- You should inform your superiors about this immediately.
Opt for the first option. Devella is skeptical that Sarevok is involved, noting differences in the recent murders that suggest they're acts of worship. She explains she tried informing her superiors, but they dismissed it as conspiracy. She turns her attention to you, hoping for assistance. Reply with:
- Can't you provide any assistance?
- What will you do while I investigate?
- How about the other individuals on the list who are still alive?
- I'll do my best to uncover the truth.
- I've got more important matters to attend to than a cult investigation.
Select the first two options. Devella states she needs to alert Upper City residents and asks you to warn those on the list in the Lower City. After Upper City, she'll head to Basilisk Gate to push her superiors for action. She invites you to meet her there once you have any relevant information to report. This conversation advances the "Investigate the Murders" quest.
After conversing with Devella, descend to the tavern's second floor and exit. Make your way westward until you arrive at the Wine Festival located at X:25 Y:-38. There, you'll encounter Cora Highberry, who's enjoying the wine tasting. She invites you to join her and her friend Roger Highberry. However, Meztli interrupts, offering a solo tasting to Cora. She declines, preferring company. You sense the poison in Meztli's offered wine. Choose:
- Cora, that wine is poisonous. This man wants to harm you.
- I'll gladly take a glass, Master Meztli.
- I'll have to pass, but enjoy your wine.
- Let Master Meztli try the wine first, or should I say Dolor?
- Attack the poisoner.
Opt for the first choice. Meztli speaks briefly and threatens you before a battle ensues. Afterward, the Main Quest "Investigate the Murders" will be updated. Enter the Highberry's Home nearby to speak with Cora. She'll express gratitude for your intervention and disbelief at the assassination attempt.
Having conversed with Cora and received a reward, head southwest to a flier attached to a wall at X:-168 Y:-72. This flier holds a note from Hag survivors seeking aid against the Hags. Reading it advances the quest "Help the Hag Survivors."
Subsequently, proceed straight ahead until you arrive at Facemaker's Boutique at X:-182 Y:-32. As you enter, a cutscene unfolds, depicting Dolor attacking Devella and her superior, leaving them immobilized. Overhearing Dolor mention a gift for Lord Bhaal, you can react with:
- Halt!
- Step back. That's my target.
- [Stealth] Remain concealed as the dwarf is distracted.
Choose the first option (Astarion Disapproves), prompting Dolor to acknowledge a challenger and triggering another battle. After defeating Dolor, the quest "Investigate the Murders" is updated. Once the enemies are vanquished, Devella expresses gratitude for your rescue. She explains that Doppelgangers ambushed them, paralyzing them before they could retaliate. Respond with:
- Weren't you responsible for safeguarding the patriarchs in the upper city?
- These doppelgangers appear to be monitoring his advancement. This one seems to be gaining prominence among Bhaalists.
- Fortunately, I was here to assist.
- It's regrettable. I assume you're swamped with paperwork. I'll leave you to it.
Select the first option, and Devella elaborates that she heard a disturbance while en route to the upper city. She believes these killings are part of a trial, detailing that the document you shared outlines the test. Victims are paralyzed, offered to Bhaal, and framed as the work of the Cult of Absolute. This provides access to a "Tribunal," an initiation for aspiring cultists to demonstrate their dedication. This initiation occurs beneath 'Canduhallow's Tombstones'. However, due to her constraints, she defers the investigation to you. Reply with:
- I should probably seek out a hand, then.
- Can you pinpoint the location of 'Candulhallow's Tombstones'?
- It sounds like you have a lot on your plate. I'll handle this.
- I'll look into it.
Choose the fourth option. Devella plans to head to the upper city, meeting you at Basilisk Gate later. Lastly, loot Dolor's body and acquire the "Hand Bag" updating the Main Quest "Impress the Murder Tribunal".
After speaking with Devella, head outside the boutique and talk to a messenger rat at X:-214 Y:-22. The messenger rat will just tell you that there are creeps in cloaks creeping around the down in the sewers. just to the left of the rat, is a bush, Shadowheart will notice graffiti from before. She never thought she'd see it again. You can reply with:
- Why did it stand out?
- It didn't seem all that memorable to me.
Choose the second option, and Shadowheart will share that she was the one who did it. It's a mark she wanted to leave to prove that she existed.
- I wanted to talk about our relationship.
- I want to talk about all that's happened to us.
- I think that special tadpole the Emperor offered will increase our chances of success.
- We should journey separately for now. I'll see you whenever we camp.
- Leave.
Just choose to leave and make your way to The Blushing Mermaid at X-147 Y:-103. Speak with Zena first will she will talk about a kid who got nabbed. You can reply with:
- I know - the child is called Vanra, right?
- That's awful.
- What happened?
- If a child is in this dump, they deserve to be 'nabbed'.
Choose the third option, and Zena will mention that she doesn't know anything and that she only heard whispers. But, she'll say that these only happened when the city started letting anyone in. Next, speak with Nesha Leesha, who will talk about how her friend dared her to go here alone and have a couple of mugs of ale. You can reply with:
- You should make yourself scarce - there's a killer loose and you're a target.
- Leave.
Choose the first option and Nesha Leesha will wonder who would want her dead.
- Fair point- must have mistaken you for someone.
- [PERSUASION] Please listen to me. Others have died already, you are in danger.
- I do - time to die.
- Leave.
Choose the second option, and she'll eventually realize that you are serious. This will then update the quest "Investigate the Murders". After speaking with her, head inside the Blushing Mermaid and speak with the bartender Bosun Gannett. Ask about the missing girl Vanra, and he will come off as aggressive and threaten to boot you out. You can reply with:
- Who pulled a knife on you?
- Didn't think a tough guy like you would be scared of a little knife.
- I'd love to see you try and kick me out.
Choose the first option, and Bosun will mention a woman who came in screaming about some kid and tore the place apart. Captain Grisly had to deal with her and throw her out. This will update the quest "Save Vanra". Now, head to the second floor and speak with Captain Grizly about the missing girl Vanra. Captain Grizzly will then say that Lora was getting drunk and didn't see any kid. Captain will then say that Lora pulled out a knife to her frontman and that she didn't tell you that didn't she? You can reply with:
- No, she didn't.
- If Lora's daughter isn't here, where is she?
- How do I know you're not lying?
Select the first option and Captain Grizly will warn you about Lora. The captain knows her from her pirating days. She ran with Bart Blackdagger's crew who threw her out after she stabbed one of the crew members because of a card game. Captain will state that she doesn't have any beef with Lora up until the knife incident at the pub. She'll suggest that something has to be done before someone dies. You can reply with:
- What are you suggesting?
- I'll talk to her - see if I can calm her down.
- Just pay Lora off- that usually works.
- A child is missing - I just want to get to the bottom of this.
Choose the first option and Captain Grizly will suggest killing Lora. She'll pay whoever can kill her. You can reply with:
- That's insane.
- I'll do it.
- I need to think about it.
- Absolutely not - I refuse to do your dirty work.
Choose the first option and Captain Grizly will say that lying about having a kid is more insane. Next, choose the third option and Captain grizly will then show you her true nature which shows that she has been lying to you all this time. She'll now threaten to cut you apart and a battle will commence. But before the battle commences, she will transform into Auntie Ethel. You'll have a few dialogues with her, and then she will disappear while saying that she will leave you to her crew which you need to defeat and she advises you to stay away or Vanra will suffer. This will update the Save Vanra quest.
In the Blushing Mermaid basement at X:-2357 Y:-110, a battle will commence between your team and some enemies. After defeating the enemies, go through the wooden door to the left and immediately a conversation between you and Auntie Ethel will commence. She'll mock you for showing up and will threaten you that you can't kill her without risking the life of Vanra. Afterward, another battle will commence between you and Auntie Ethel. After defeating her, the quest "Save Vanra" will end, but unfortunately, Vanra dies too. Killing Auntie Ethel also updates the quest "Help the Hag Survivors". make your way to the hideout at X:-69 Y:- 131 to find the hag survivors. Upon entering the hideout, you'll find the group of survivors wondering if Ethel has really died. You can reply with:
- I killed her - she's not coming back. Mayrina? Is that you?
- Can confirm - that is a dead redcap.
Select the first option and the survivors will be thankful. Mayrina will introduce you to Adrielle, who says that Mayrina has to her everything about you. You can reply with:
- Mayrina - what are you doing here?
- Nice to meet you.
- What a bunch of misfits.
Select the first option and Mayrina will say that she could not just sit back after you have saved her. She went to the city to look for the other people who were victims of the hag as well.
After speaking with the survivors, make your way to Flymm's Cobblers at X-32 Y:-110. Here, you will meet Gortash's mother, Sally Flymm. Sally welcomes you to the Gortash family home and shares that they celebrate their son's achievements with a special pair of leather-soled shoes. You can respond with:
- [DETECT THOUGHTS] Probe her mind.
- A pleasure to meet the mother of the Archduke.
- So you're to blame for the rise of that charlatan.
- Show me what you have in stock.
- Leave.
Select the first option and you'll find out that Sally is in fear and is infected with the parasite along with the others in the building. She'll continue to act like a proud mother and eventually you can respond with:
- [ILLITHID] Connect your tadpole to hers - delve into her mind.
- Show me what you have in stock.
- Leave.
Select the first option and you'll find out more that she cannot act independently and that this is the doing of ember. This will update the quest "Embrace your potential". You can reply with:
- Why would Enver do this to you?
- What exactly happened?
- He infected you with a mind flayer tadpole. I have one too - but for now, they can't be cured.
- Leave.
Select the first option and Sally will mention that Enver wanted to make them powerless. You'll also find out that they sold their son to a warlock for a good amount to handle their world-ending debts. Sally will then question what choices did she have before. You can reply with:
- You had every choice. You sold your son to a warlock - that's unforgivable.
- You may not have intended to, but you created a monster.
- A very fair trade, if you ask me.
Choose the first option and Sally will reason out that she did it for the good coin and to keep themselves alive. She'll say that they do not deserve this and that you are the first person to talk to the real her in months. You can reply with:
- Why would I help you after what you did to your own son?
- You deserve what you got - and more.
- There's nothing I can do for you, at least for now - I'm sorry.
- I can put you out of your misery, if you like.
- End her suffering - attack. suffering-attack.
- Leave.
You can select the fourth option, but Sally will disagree and ask if there's another way since she deserves her life. Unfortunately there's no option to help her. You can select the 6th option which is to leave, but then Sally will ask you to wait. But then your connection with her breaks and she will act happy again. After speaking with Gortash's mother, head over to X:-32 Y:-82 and speak with Fytz the Firecracker. This is an old friend of Karlach who will start catching up with her. In the middle of their conversation together, you may choose to interrupt my choosing one of the following dialogue options:
- Let them catch up uninterrupted.
- Care to introduce me to your friend, Karlach?
- We need to move on.
Choose the first option so that Karlach and Fytz can catch up more. After a few more dialogues between thee two, she'll offer her stocks for sale and she will be a merchant. After checking out her items, go ahead and go to X:24 Y:-62. here, a cutscene will play out of Aradin and Klank arguing. Aradin wants to get back inside the building or to have someone named Lorroakan come out. You'll find out that Aradin is collecting payment for a Nightsong that Lorroakan requested. Aradin will then notice you listening and will recognize you. He'll ask if you found the Nightsong after he tried to find it. You can reply with:
- [DECEPTION] Sorry; I didn't find anything.
- Who are you trying to get at inside?
- I found the Nightsong. Turns out it wasn't a relic, but an aasimar.
- That's none of your business.
You can choose the 2nd option and Aradin will mention Lorroakan the wizard. Lorroakan set the contract to find the Nightsong and is the owner of this place. Aradin will share that Lorroakan deceived him and told him that the quest was a piece of cake but turns out to be located in a temple of Shar which had an army of Goblins. After that, select the first option and lie to him. this will end your conversation. Now, make your way inside the Sorcerous Sundries and speak with the book seller at the back named Tolna Tome-Monger. You can ask:
- I'm trying to find out about a particular Netherese crown. Have you anything on that subject?
- Why are you whispering?
- I'd be interested in any especially rare tomes you might have.
- What do you have on offer?
- Leave.
Select the first option and Tolna will call you bold. But will mention that it's locked away for the safety of the customers. She'll mention other books and will ask which one would interest you. The quest "The Wizard of Waterdeep" will update and you can reply with:
- ("The Annals of Karsus: A Netherese Folly'.)
- (The 'Tharchiate Codex'.)
- ('Sights of the Seelie'.)
- ("The Curriculum of Strategy'.)
- Trade.
- Leave.
Select the first option and Tolna will warn you that there are great magical knowledge in the book but not many can withstand it. She'll tell you it's best to forget about the book. You can reply with:
- (Surely there's some amount of gold that could convince you to part with the book?)
- [DECEPTION] (I came here all the way from Neverwinter to admire your collection. Couldn't I just peek in the vault?)
- [INTIMIDATION] (Unless you want a very nasty paper cut, you're going to tell me how to get into that vault.)
- [PERSUASION] (Isn't it your job to share knowledge, not keep it locked away? At least tell me where the vault is...)
- (Thank you. I've learned more than enough.)
- Leave.
You can select the second option and she will appreciate what you said. But she will say that the only way to access the vault is through her office and you are not allowed in there. After speaking with Tolna, head up the stairs and try to reach Tokna's office. But before that, enter the left-most portal and a cutscene will play out between you and Lorroakan. Lorroakan will question where the Nightsong is and that his apprentice shouldn't have let you in to not waste his time. You can reply with:
- Not quite the enthusiastic welcome I was hoping for.
- What do you want with her?
- You must be the wizard Lorroakan.
Select the first option and Lorroakan will say that you'll have more gratitude when the Nightsong is in his hands. He'll ask if you have it:
- What do you want with her?
- She isn't an it.
- I couldn't bring her to you even if I wanted to.
Select the first option and Lorroakan will suspect that you already found her since you referred to it as her. He'll threaten you to choose your next words wisely and ask you again where she is:
- Be careful what you wish for. She'll eat you alive.
- Why do you want her so badly?
- [DECEPTION] I've seen her - she was trapped by Ketheric Thorm. I left her there.
- [INTIMIDATION] Get out of my face now.
- [DECEPTION] I know nothing. I swear it.
Select the third option, and Lorroakan will just tell you to fetch her. Now, return to the portal and once you return to where you entered, got to the left door and toggle a collapsed book on the shelf. This will update the quest "The Wizard of Waterdeep" and will open a secret portal. You can now enter the portal and find yourself inside the Sorcerous Vault. This will update the quest "Unlock the Ancient Tome".
Bloomridge Park
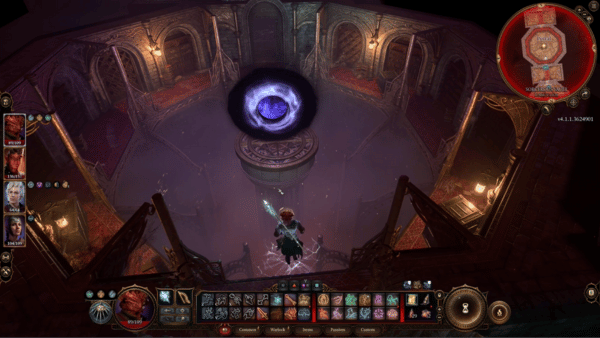
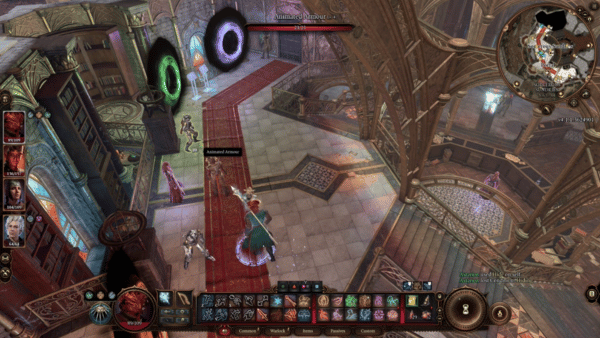
When you're done exploring the Sorcerous Vault, interact with the Portal to lead you back to the tower of Sorcerous Sundries. Beware that this area is considered forbidden and you will have to talk your way out of this situation if you get caught. Your next destination is Bloomridge Park located in the northwest of the Lower City. Pass through the bridge on your left and you will see a gate that leads to the park. You will immediately notice the brightly colored trees highlighting the beauty of the park.
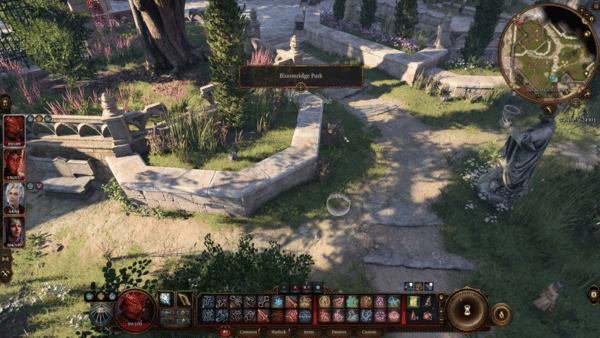
As you get closer to the park's gate, if you have Karlach as one of your companions, she will warn you that she smells an ambush in this area. A Fire First named Manip Edenosa is standing guard on the gate and tells you that the park is not a place for a stroll anymore and that it is more likely to find mugging these days. You realize that she has a tadpole and with your Illithid powers, you find out that The Absolute's warriors are at work. You get the following options to respond:
- Praise the Absolute.
- What's going on in the park?
- Leave.
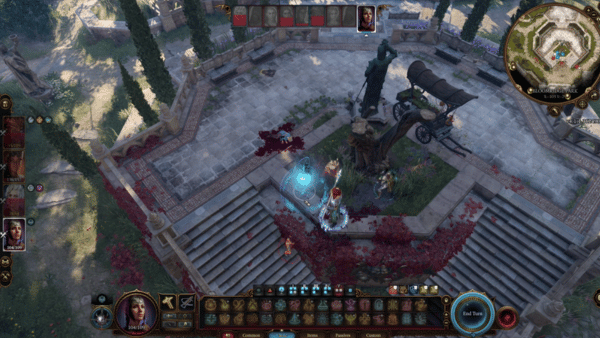
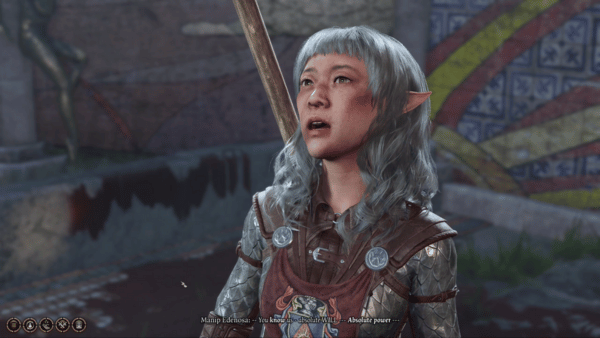
If you choose the second one, she will become defensive and will tell you that nothing is going on, and it's Absolute business. Now that you're aware of the presence of hostiles, make sure to ready yourselves for a fight as you get closer to the park. As you move to the top of the stairs, the enemies will come out of hiding and the battle will begin against Bhaal's spawns. Manip Edenosa joins the fight to defeat the enemies. After clearing out the enemies, Manip Edenosa turns out to be under the control of another creature. You will get the following options to respond:
- Who are you?
- I'm listening.
- You're bleeding.
- [ILLITHID][WISDOM] Use your parasite to explore her thoughts.
- I don't think so.
If you choose the second one, it turns out the Absolute is speaking through her and offers you a deal. They're asking for your help to get a certain necromancer and a tyrant dead and tell you that you have a place in their Grand Design. Shortly after, Manip Edenosa will pass out. When you're done here, you will return to the Lower City to look for Jaheira's home. Go to (X:-208 Y:-60) and you will find a kid name Fig attacking a training dummy. She tells you that you look harmless enough and can go inside. She warns you to be nice to Rion as well.
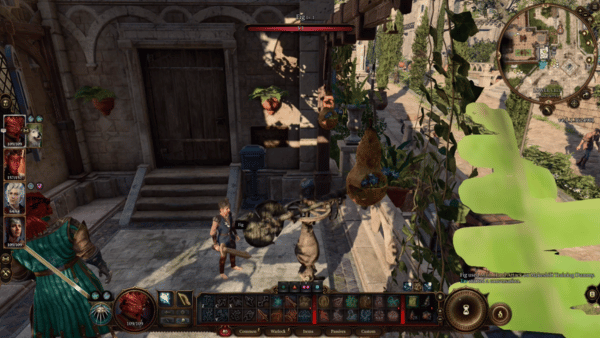
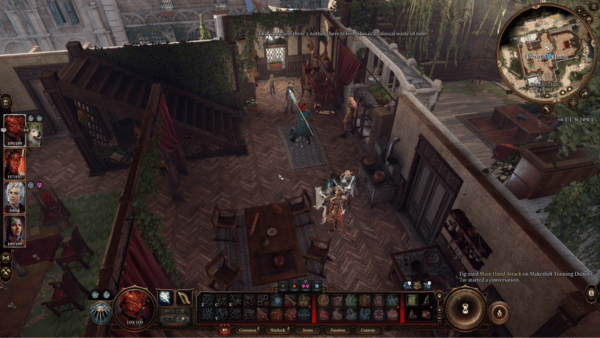
Interact with the door behind her to reach Eleerrathin's Home. You will find Rion near a window next to the stairs. Engage her in a conversation to reveal that this is actually her mother, Jaheira's home. Tell her that you know her and have returned to the city with her. Rion appears that she's unaware of the whereabouts of her mother and seems really worried about her. She wants to know your relationship with her and you will get the following options:
- A friend. Thought maybe not so close as I'd hoped- she never mentioned you.
- Allies. We fought General Ketheric Thorm together.
- I'm Tav. Your mother hasn't mentioned me in any letters?
If you choose the second one, she tells you that she has heard that the army is headed for Baldur's Gate and assumed that she has died trying to stop it. Now, she tells everyone that Jaheira is alive and calls out to everyone. She notified them of the news and wants you to bring her to this house so they can kill her. If you don't have Jaheira as one of your companions yet, return to your campsite first and have her join you so she can come home.
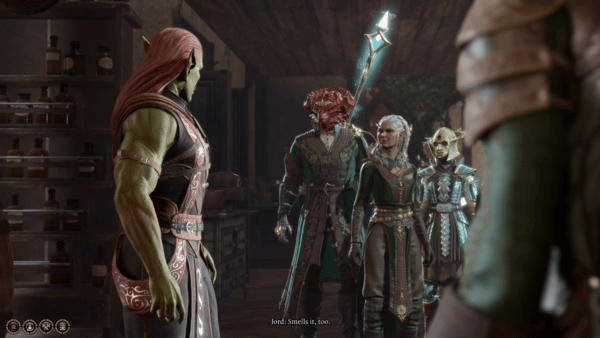
Approach Rion who is waiting in the living room of her house. Rion and Jord, the half-orc is acting indifferent to her and tells her that they are surprised that she knows how to find her way home. Jaheira explains that she has been through a difficult road and has come to take the fight to the cult. Jaheira also mentions that you save her, and with this fact, Rion asks you if they are all doomed.
- Not in this lifetime.
- The cult is powerful- it's not going to be an easy fight.
- You should really just listen to your mother.
- We're all going to die.
If you choose the second one, Karlach will give you her approval and Rion tells you to fight, since it's what Harpers do after all. Rion is uneasy about having Jaheira inside their home but the rest of the family votes to let Jaheira stay.
Graveyard
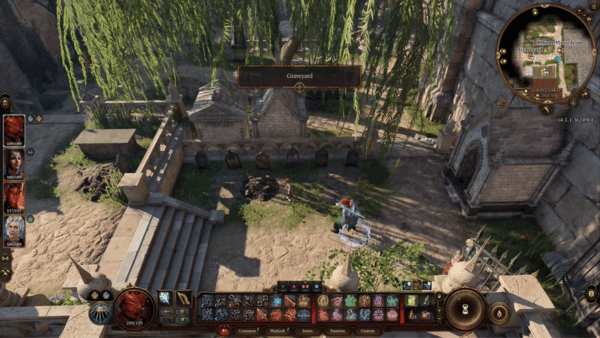
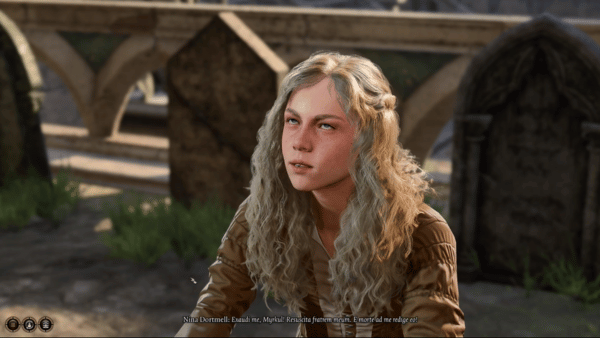
You will explore the Graveyard next after getting Jaheira to return to her home. At the very entrance, you will see a young kid of the name Billyum who appears to be talking to the grave of his mother, to tell her not to worry and that he is safe now. There are other citizens of Baldur's Gate here who are grieving the loss of their loved ones. There are others who find consolation in having monologues. There's a child named Nina Dortmell who is calling out to Myrkul. You notice that the child has power but lacks control. She is trying to bring back her brother. You will get the following options to respond:
NOTE: Some choices are different depending on your character's class, race, and other traits.
- [ARCANA] The spell you're looking for is Raise Undead. This is how you do it.
- [PERSUASION] Your brother deserves to rest in peace- let him.
- [WARLOCK][ARCANA] Teach the child deep, forbidden magic to regurgitate a soul from the void.
- Keep trying- you'll get it eventually.
- That was dangerous! You must never do it again.
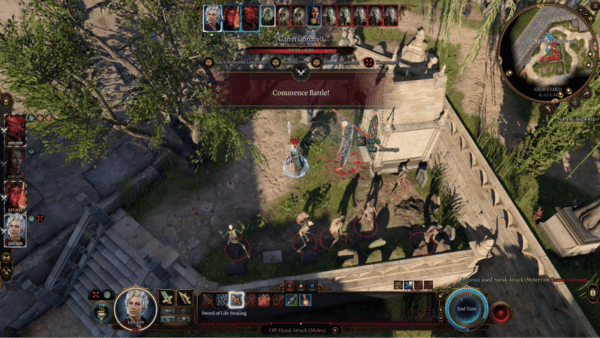
If you choose the 3rd one to attempt the Arcana check, you will need to pass a DC of 10. When successful, she is able to raise many of the dead around her, and not just her brother. This event called "What Remains of the Dead" will inspire Shadowheart. Fight the army of the undead that was raised by Nina Dortmell, including Garret Dortmell. After the fight, Nina appears to be distraught and realizes that she ruined the resting place of her brother.
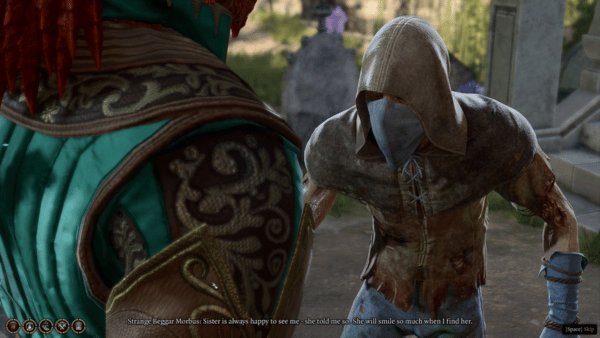
Look around the Graveyard and you will find a strange man called Strange Beggar Morbus, the man appears to be playing hide-and-seek with his sister. You can smell the scent of rot from this person, even death. You get the following options to respond:
- You're a bit old for hide and seek, aren't you?
- Do you know where she's hiding?
- If I were her, I'd be hiding too. You smell terrible up close.
- Leave.
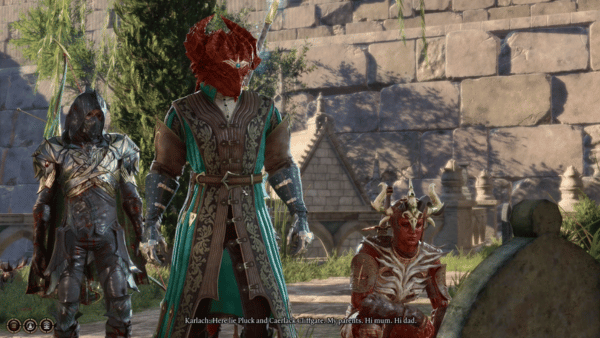
If you choose the first one, he tells you that his sister is older and she always likes to play. He continues to tell you that she likes to hide in the ground and he is determined to find her. He ends the conversation and continues to look for her. For your party, you can continue to explore the Graveyard and you will find multiple Mausoleums that you can explore. In a nearby grave, Karlach is drawn to one of them as she recognizes the name of her parents Pluck and Caerlack Cliffgate. Karlach goes on to tell her how sorry she was for being away, but she has returned with friends and doing important things.
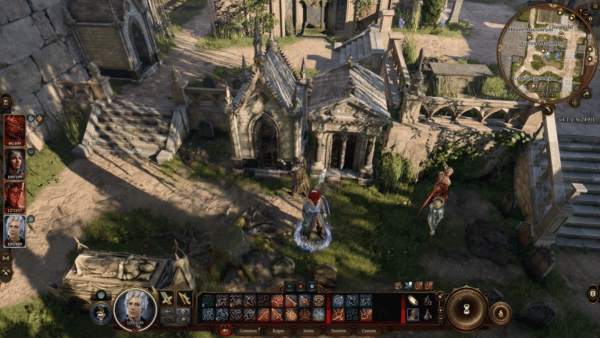
Behind her parents' grave, you will see Gorion Mausoleum. You can have one of your companions unlock it by attempting a Dexterity check and passing a DC of 10. This will take you to the resting place of Gorion along with some of their belongings. It turns out that Gorion is the first High Constable of Baldur's Gate. Open the sarcophagus by attempting a Strength check that requires you to pass a DC of 20. You can retrieve the Elixir of Heroism together with his armor and belongings. On the left corner of the Mausoleum, you will find a hole that has been dug but it's too small for any of your party to fit through but indicates that there are other rooms to explore. Return to the hallway and walk past to the right side where you can see a Crumbling Wall. Attack this wall to reveal another room adjacent to Gorion Mausoleum.
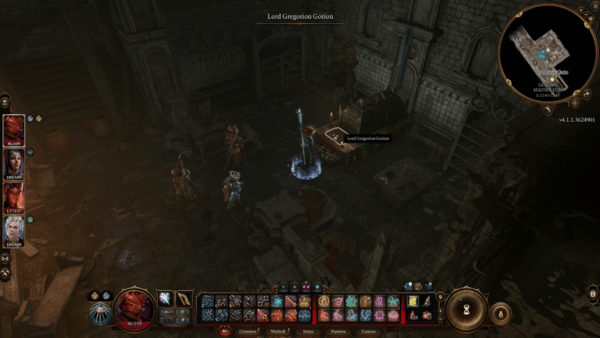
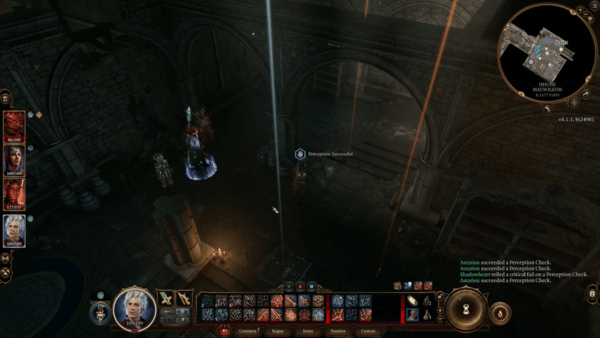
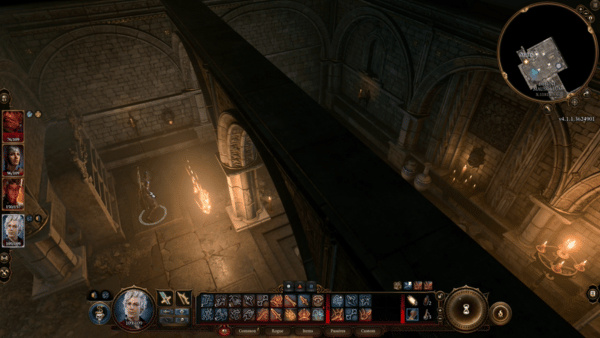
This next Mausoleum is Hhune's and far more dangerous. There are tripwires that need to be disabled by attempting a Dexterity Check which requires you to pass a DC of 15. It is recommended to use the turn-based mode while exploring this area to avoid setting off traps as your party walks around. There's a Gargoyle Head that shoots off fire arrows periodically, disabling this will require you to do a Dexterity Check and pass a DC of 10. Once the trap has been cleared, you can now open the sarcophagus by attempting a Strength check that requires you to pass a DC of 15. Retrieve the Hhune Mausoleum Golden Key from here.
Return to where you found Nina Dortmell and interact with the grand Mausoleum behind her, unlocking this will require you to do a Dexterity Check and pass a DC of 10. There are more traps in this Mausoleum so make use of the turn-based system to be in full control of your characters. First, go to the middle of the room, right below the sarcophagus. Disable the trap there, and the one below it.
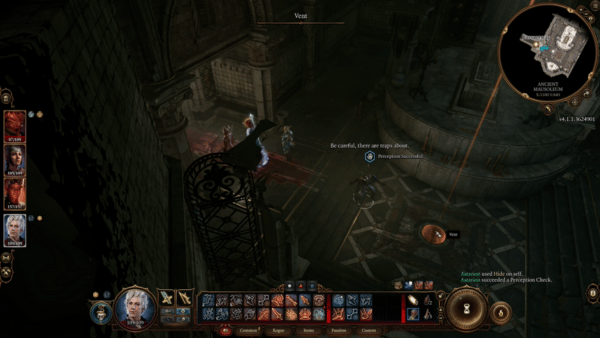
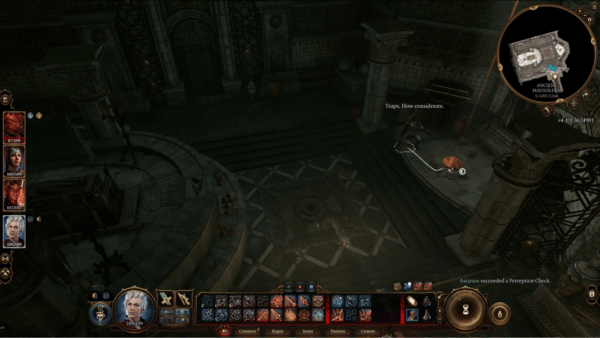
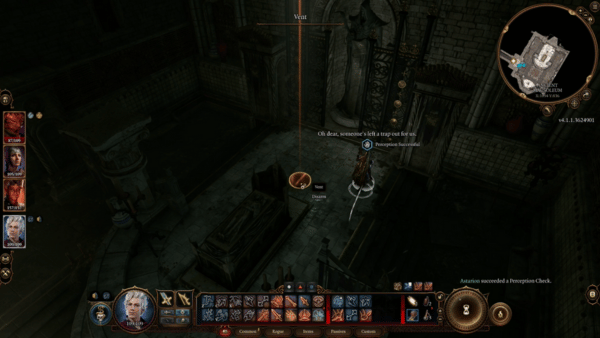
These traps will require you to pass a DC of 10-15. The last trap is located right above the Sarcophagus then the room will be cleared. You can now have one of your party members open up the sarcophagus, then, search the rooms nearby. There are no traps in the other rooms so you can feel free to explore them. There are also chests at the end of the room and you can use the Mausoleum Offerings Key from the sarcophagus or attempt a Dexterity check to open them.
Devil's Fee
Return to the Graveyard when you are done exploring the Mausoleum by interacting with the door that you came through and head to the Devil's Fee at (X:-35 Y:-11). You will see a tall building surrounded by a wrought iron fence with flowers crawling over it. Head inside the building and you will notice the floor is decorated with red carpets, bookshelves lining the walls, and a wide range of monster skulls are proudly displayed both on tables and on the walls. Interact with these items that you see and upon closer examination, it appears that these items are genuine infernal collections.

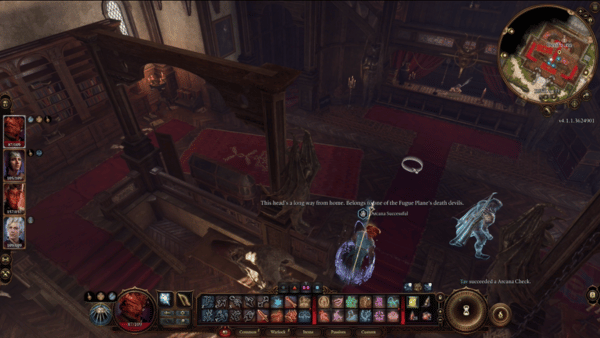

In the middle of the building, there's a trader called Helsik. Speak with her and she will show you her items like dyes, oils, and other items. However, she has more items to sell to you but first, you need to explore and take a closer look at the building. You will see there's a floor above the trader and you can access this by going through the stairs on the right of the trader. Be careful as you reach the top of the stairs as there is a trap waiting for trespassers.
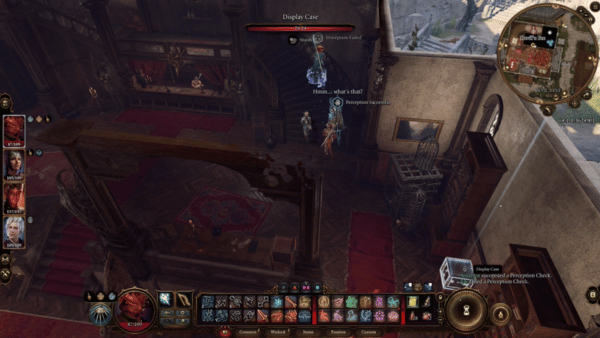

For now, return to the lobby and examine the decorations that you will see. Return to Helsik once more and compliment her collection of items. She will appreciate this and will now show you her rare collection including Gemini Gloves, Cloak of the Weave, Shapeshifter Hat, and others. She claims that this is her more curated collection and she's willing to sell it to you.

Speak with Halsik once more to ask her if she can grant us access to Raphael's House of Hope. She welcomes you back to her store and you will get the following options to respond:
- Curious don't interest me. I'm interested in the hells themselves- a place called the House of Hope in particular.
- Did you help Lord Gortash retrieve some hellish curious by any chance?
- Show me your wares. The good stuff.
- Leave.
If you choose the second one, she will suspect that you are familiar with the Archduke to know a private matter such as that. You will get the next choices:
- I happened upon some of his correspondence that mentioned your dealings with him.
- We're old colleagues.
- We were lovers. It was all very steamy,
- I'm asking the questions here.
If you choose the second one, she will respond that she likes to deal with remarkable people. She will now ask for an offer to help you with the answers you seek. She servers Lord Mammon and he is asking for coin.
NOTE: Some choices may be different depending on your character's class, race, and other specifics.
- Toss a coin to the diabolist.
- Here's 100 gold.
- How about 1000 gold?
- Actually, I'll just take a look at your usual wares, if you don't mind.
- [WARLOCK][PERSUASION] I'm also of the pact-bound persuasion- don't suppose I can have a free sample?
If you choose the 5th one, she will happily oblige to give you info for free. Attempting the Persuasion check will require you to pass a DC of 10. Astarion will also give you his approval. She tells you that she's known as the Latchkeeper of the Nine Hells and she can break people into the Hells and also shares that she opened a portal for Lord Gortash. Your next set of choices will look like this:
- Where in the hells did the portal go?
- What business did Gortash have in the Hells?
- Raphael told me the Crown of Karsus was stolen from Mephistopheles- were you involved with that?
If you choose the 3rd one she will ask for more coin for information. She acknowledges that the Crown of Karsus has left the vault, and an opportunity opened for a devil named Raphael. He also collects a great deal of treasures in his House of Hope and the crown is what he's lacking. Now, you will get the next choices:
- Can you help me break into the House of Hope?
- Well, that was interesting but I'd just like to see your wares.
- That information wasn't worth what I paid.
- Leave.
If you choose the first one, she tells you that it is a ludicrous task and will require a substantial donation to Lord Mammon's coffers amounting to 20,000, you can try to bargain with her by attempting a Persuasion check to lower the price to 10,000. This will require you to pass a DC of 25. You can agree to pay her or come back when you are ready to pay the fee.
The Lodge and helping Omeluum
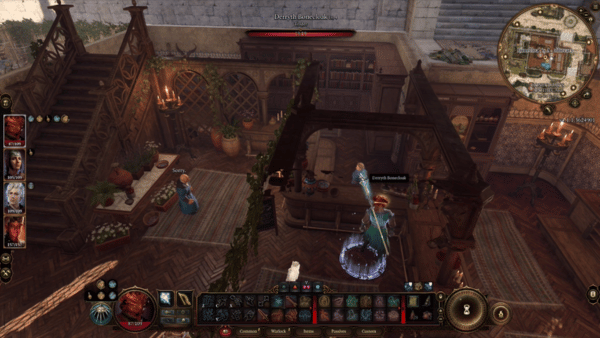
Before moving to your next destination, make sure to drop by Bonecloak's Apothecary. If you helped Derryth and her husband in the Underdark, their store would still be running, thanks to you. She sells elixirs and some equipment. When you're done, head to the Lodge which can be found at (X:-217 Y:78), and interact with the double doors to go inside.

Use the stairs on the right of the building where you will find Blurg in one of the rooms. Blurg is a friend of Omeluum, whom you met while on your journey in the Underdark. Blurg appears to be worried about Omeluum since he hasn't heard from him, who went on an investigation about your tadpole's condition. Remember to ask Blurg if he has anything to trade, as he also sells items in Lower City. Agreeing to help Blurg will give you a new quest: Retrieve Omeluum.


Your current quest will lead you to investigate the basement of Jannath's Estate. Upon reaching the entrance of her estate, a butler will greet you to tell you that she is not able to welcome any guests at the moment. This will prompt you to look for other entrances through the Gardener's Basement at (X:-251 Y:-86) this is found just below where you talked to the Butler named Tarhun Mnemonis. The door says 'Keep Out' but it is not locked at all so you can just walk inside.


Next, look at the corners of the room and you will notice a plate with a rectangular shape on the floor and an arch on the wall. Have two of your party members stand on each plate to reveal the door in the middle of the room. You will also need to move the wooden crates to pass through, be careful as you go inside because there is a trap just by the door that will explode if you can't disarm it. Next, interact with the Ornate Wooden Hatch to reach the Abandoned Cistern, a sub-area in the City Sewers.
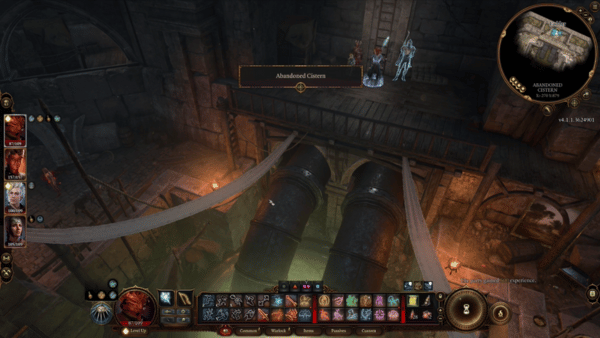

Beware of this area as you will find many Bhaalists down here and they are hostile on contact. The good thing here is that upon arriving at the location, you will stand on a tall platform which gives you an advantage over your enemies. When you are done fighting them, make sure to look around and retrieve items from the chests and the bodies of your enemies before proceeding to the next location.

Grey Harbour Docks and Water Queen's Docks
Next, leave this area to continue your search for Omeluum and return to the Lower City. In Grey Harbour Docks at exactly (X:-226 Y:-147), you will find a familiar face that needs rescuing. Volo is seen captured by bandits led by Churg Elvek. They are calling Volo a fearmonger, an agent of chaos. Astarion speaks up to get him out of distress and you will get the following options to respond:
- Volo has done nothing wrong- you, on the other hand, serve the Absolute.
- Ready your weapon.
- What crime is this man guilty of? If he is guilty, where's the evidence? Where's the trial? This isn't justice- this is mob madness!
- Well, go on then. Do whatever it is you're planning to do to him.


If you choose the first option, Churg Elvek will claim that your mind has been clouded by the disruptor's lies and will engage your party in a battle. You will be outnumbered in this location as there are 7 enemies, but not to worry, if your party is well-equipped and if you plan your moves right, you will come out of this battle victorious. Volo is still tied on crates along the rails so make sure to reach him quickly and use 'Help' to free him. Volo will thank you once again for helping him and this event will inspire Astarion 'Saving a Fellow Tale-Spinner'.
Continue exploring South of Grey Harbour Docks to reach the Water Queen's Docks. One of their members will greet you at the entrance to carry a certain 'Holli' to her final rest in the Deep Wilds. However, she notices your confusion and asks if you are visiting for the Waveservant Holli's funeral. Now, you will get the following options to respond:
- Is that what that singing is for?
- Am I interrupting the funeral?
- Thank you.
- Leave.
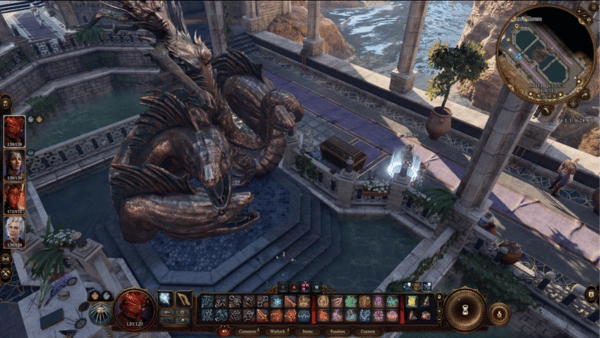
If you choose the first one, she will take it kindly and tell you that you are most welcome and that they have much to be thankful for. Inside the Water Queen's House, you will find a scenic landscape and ponds that trail in the middle leading to the fountain. One of the captains reveals that they believe in offering coins to Queen Umberlee to gain blessings during their travels in the sea.

Continue walking down the path and towards the back of the fountain, to the Main Chamber. You will hear a voice praising the Glorious Wavemother and celebrating the passing of one of her daughters. Flood Tide Allandra Grey, the one who's leading the service notices your presence and asks you what tribute you have to honor the Wavemother's fallen daughter. You will get the following options to respond:
- I've brought gold. (500)
- I've brought a prayer.
- I've brought my weapon to help avenge her death.
- Haven't brought any tribute, really.
If you choose the 3rd one, she acknowledges this and tells you that blood must be shed to avenge her. Your tribute is well-received and your next set of choices will look like this:
- Did this person drown?
- Who's the deceased?
- This is one of the more upbeat funerals I've attended.
- Nice corpse. What are we celebrating?
If you choose the first one, she will reply with "Yes, thank the Wavemother." They are praising the Wavemother for sparing her an ignoble death, however, she explains further that it was a beast that took her life. She describes the monster as a rusting pollutant that bleeds black blood, destroying Umberlee's pristine waters, she said.
- How did Umberlee 'spare her an ignoble death'?
- I'm good at slaying beasts- maybe I could help you.
- I'm not getting involved in this.
She replies that the queen is generous to those who serve her. She will then ask you to find the master of the beast and slay him, then she will bestow you with one of her most precious gifts. Then you will get the next set of choices:
- Where can I find the beast's master?
- All right- I'll see what I can do.
- Sorry, I don't have time for this.

She will describe how Holli was found by some fishermen. She was last seen swimming in Grey Harbour. She tells you honestly that they haven't found the lair of the beast and were hoping you can find it during its slumber. Agreeing to help them will give you a new quest: Avenge the Drowned. This event will inspire Shadowheart: 'Offerings to the Waves'.
To begin your investigation, one of the things you can do is use Speak with the Dead on the corpse. The corpse known as Holli Daylord will tell you that they were swimming and were attacked in the waters. You will now get the following questions to ask:
- Who are you?
- Do you remember what happened before you were attacked?
- What killed you?
- Where were you attacked?
- Leave.

If you choose the second one, the corpse reveals that they remember black blood surrounding them and described the beast as a Metal Monster. The spell's power wanes, and forbids you from asking any more questions. Now, you will return to Grey Harbour Docks where you just rescued Volo to continue your investigation on Holli's attacker.
Return to the docks where you first found Volo then walk over to a group of people gathered near a boat. Captain Sleam is not allowing any freeloaders and a father will not be able to get on board the boat with his family. You will get the following options:
- Excuse the interruption, Captain, but can I pay for the father's berth? (1000 GP)
- [PERSUASION] Captain... Sleam, is it? It would be a shame to split up the family, don't you think? Let the father go with them.
- [INTIMIDATION] I have news for you, Captain: you're going to accept for the price of three and take the father aboard, or I'll pitch you into the harbor. Got it?
- Leave.
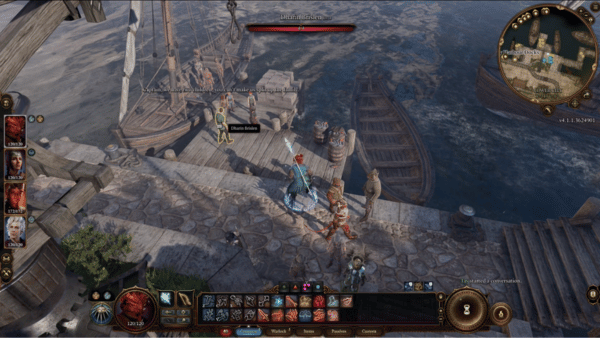
If you choose to do the Persuasion check, you will need to pass a DC of 15. The father Dharin Brislen will thank you and you can now continue investigating Holli's attacker. Unlock the waypoint at (X:-214 Y:-262 and speak with the fishermen attending to their boat next to it. The man named Gowlan will ask you if you have any experience getting oil out of sealed wood, and you will get the following options to respond:
- Oil? This isn't black blood?
- Have you tried vinegar?
- I'm sure it'll come out eventually.
- Where did all this stuff come from anyway?
- Leave.
If you choose the first one, he will assume that you have been talking to the people from Water Queen's House. Your next set of choices will look like this:
- I'm looking into the death of a waveservant- do you know anything about it?
- Where did all this stuff come from anyway?
- Why are there so many dead fish floating in the harbor?
- Is your boat all right?
- Leave.
If you choose the first one, he will tell you that they were the ones who found her. He goes on to tell you that they tried to help her when they fished her out of the water but she was already dead. Your next set of choices will look like this:
- What happened to her body?
- Did you see anything else unusual?
- Why are there so many dead fish floating in the harbor?
- Is your boat all right?
- Leave.

Then he will tell you that the other waveservants took her body back to the temple. Then he will describe that they saw a sort of wave moving toward the docks when they picked her up even though there weren't any boats around leading them to suspect that it might be something big moving underwater toward Flynn's Cargo, so this is the next area that you will be investigating.
Flymm Cargo


You will find Flymm Cargo located south of The Blushing Mermaid. The fastest way to get there is to pass through the lodge and around the docks. Use the stairs to get to the lower levels and reach the level below. After a few sets of stairs, you can now see Flymm's Cargo in the distance. Go to the roof of the building by accessing the balcony at (X:-147 Y:-152), Rotate your screen facing the North of your map to see a balcony with a door leading to the inside of the building. Jump down and have one of your characters unlock the door by attempting a Dexterity check, this will require you to pass a DC of 15.
As you head inside, you will find beasts guarding the cargo but no sign of the Metal Beast as described by the waveservants. Luckily, your party is at an advantage because of your positioning which lets you attack the enemies from a safe distance. Eliminate the beasts so you can continue investigating the building. There is a chest below the platform that you are standing on so make sure to check that. Next, you have to reveal a hatch beneath the wooden crates gathered at (X:-161 Y:-140). Move around the crates to reveal the hatch to the basement.


Down in the basement, you will see a door that leads to a larger pathway. Walk to the right of the path and you will see a crack in the wall with the description 'A greasy, smelly climb down...' Take note of this location in the meantime and then return from the path where you came from and interact with the door. Next, you will reach a small room with a 'Subacquatic Dock' door at the end of it. This room reveals a much bigger area and you can now see the water down here.
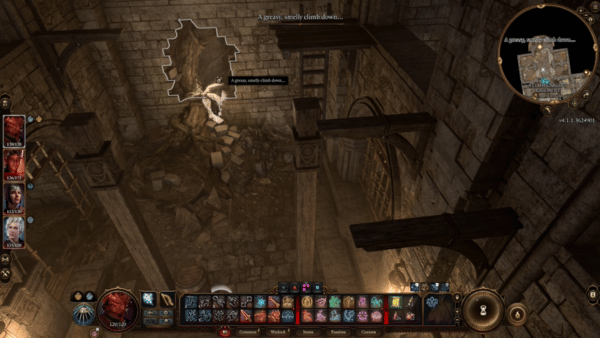
At the center, you will see Redhammer the Deviser examining something in the water. Walk over to him and then he will tell you that you're not supposed to be down in the basement. Then you will notice the metal contraption in the water and get the following options:
- That submersible- why is it here? What is this place?
- [DECEPTION] Boss sent me to check up on the situation down here.
- [INTIMIDATION] I have questions. You have answers.
- You killed one of those servants of Umberlee. Now they want you dead.
- Sorry, I just got turned around.
If you choose the first one, he will reply that it's the only port that matters in the whole city. Then, he will ask you if Gortash sent you. Your next set of choices will look like this:
- [DECEPTION] Boss sent me to check up on the situation down here.
- [INTIMIDATION] I have questions. You have answers.
- You killed one of those servants of Umberlee. Now they want you dead.
- Sorry, I just got turned around.
If you choose the 3rd one, he will ask if you will make good on that, and tell him that you just want to know what happens in the port to get more information out of him. He will continue to tell you that he uses the port as commanded by Gortash, and he transports whoever he needs to be taken to the Iron Throne. He describes it as an underwater prison and the most secure in the Realms. You will also find out that Gortash keeps Gondians in prison as collateral to keep the Steel Watch Foundry under control.
- I'll make you a deal- take me to the Iron Throne, and I'll protect you from Umberlee's servants.
- You're going to take me to the Iron Throne- I'm getting the prisoners out.
- You're as guilty as the people who imprisoned the Gondians.
- You killed someone. You need to face justice.
- Leave.

If you choose the 3rd one, then you will now begin the battle against Redhammer the Deviser. When you are done fighting him, go to the other end of the hall to find a locked Metal Trunk. The submersible in the water can be used to take you to the Iron Throne, but for now, you must leave this area and return to the path that will take you to the sewers. Later on, you will need to return to Water Queen's House to complete the quest: 'Avenge the Drowned'.
Abandoned Cistern
The entrance to the Sewers from Flymm Cargo is located at (X:-1095 Y:337). Interact with the crack in the wall with the description "A greasy, smelly climb down..." and this will take you directly to a trapped path with locked chests in the area. You can also pick up a map with an X mark on it, but you will need to tread carefully. If you have Astarion with you, switch to turn-based and have him look around to scout for traps and pick the locks on the chests. These chests can be unlocked either by passing a Dexterity or Strength check DC of 20.
When you're done going through the chests, take a dip in the sewer water and follow its flow, but enemies are waiting for you on the other side so make sure that you are prepared to fight them. Eliminate the enemies perched on the tower and then carefully make your way to the top to surround them. When you're done fighting them, your next task is to solve the Sluice Gate Puzzle.
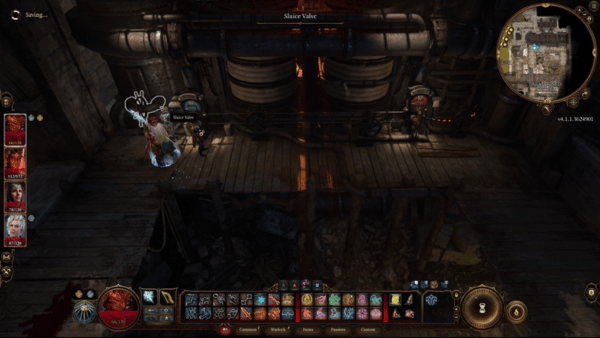
How to Solve Sluice Valve Puzzle in Abandoned Cistern
To solve this sluice gate puzzle, you will need to balance the heat and the amount of water flowing. There are 2 valves that you can interact with- The Water Valve on the left and the Heat Valve on the Right. This puzzle is dependent on the timing of the valves so do the following:
- Interact with the Water Valve on the let
- Ready your other character in the other valve and as soon as the Water Valve status teacher the 'Perfect Water' level, interact with the Heat Valve.
- If you got the timing correctly, then the Sluice Gate will automatically open.
Take note that if you miss the timing, the valves will cause an explosion that can do fire damage and set the surroundings on fire. You can reset the puzzle by interacting with the valve at the far right, then begin following the solution again. After the fight and solving the puzzle, your next goal is to find Minsc, and before proceeding decide if you will be helping this Human ranger or not.
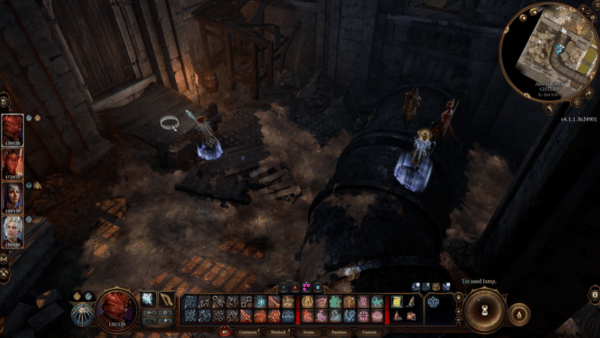
You will find a door at (X:-164 Y:879), directly in front of you, There's a loose stone that can be detected if you pass the Perception check. Walk towards it and take the Painted Key from it. Behind the pillar, from where you picked up the key, there's a chest that you can interact with. Open it and take the items. You will find more loose stones here if you pass the Persuasion check, during our playthrough, we found at least 3 of them. To the right of the corridor, you can open the door that will take you to the other side of the sewers. However, you would want to go to the other end of that hallway to reach the Undercity Ruins.
You can reach the Undercity Ruins by walking the opposite way from the door you just opened. Make sure to move close to the Waypoint so you can unlock it and then, at the foot of the stairs, you will find a trader by the name of Bareki, a Voiceless Penitent. You can try to communicate with him, but he is sworn to silence. Make sure to take the time to look at his items for sale before you proceed. You will find a Passageway of Penitence behind the trader but go to the left of the NPC, and this other Passageway will take you to the Ancient Lair.
Ancient Lair
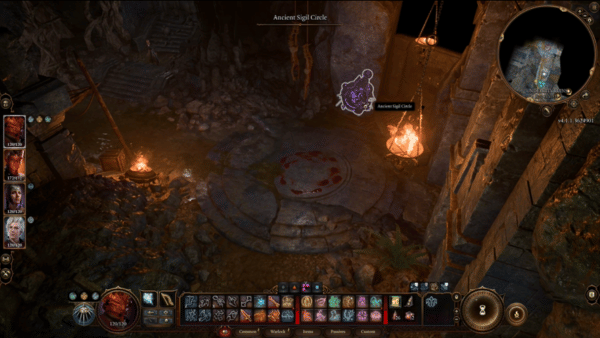
When you get to the Ancient Lair, you will be faced with two options: Kill Thrumbo and bring his body back to Philgrave's Mansion, or betray Mystic Carrion which will progress the quest 'Find Mystic Carrion's Servant'. Take note that you will receive two very different outcomes and different rewards.
- If you help Thrumbo and betray Mystic Carrion, he will reveal the secret chamber underneath Philgrave's mansion.
- If you choose to help Mystic Carrion, you will have to fight Thrumbo and receive the Torch of Revocation reward from Mystic Carrion.
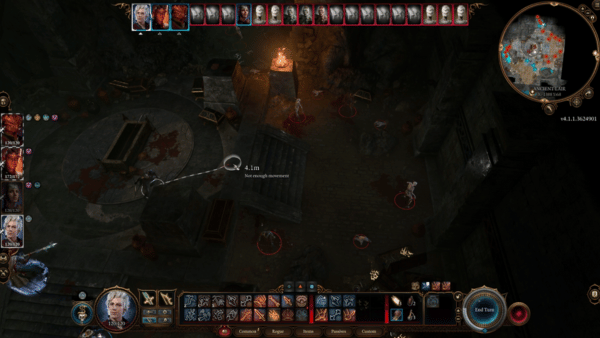
Upon entering, you will dead bodies of humans, and as soon as you loot one of the opened chests, the Undead Foes will get ready to attack you. You can make use of fire spells to effectively fight them off, or use any Radiant spell, as the Undead are vulnerable to these kinds of attacks. This battle will prove to be a long and tedious fight because of their number, so make sure you have healing spells and potions available to you, so you can keep your party alive.
When you're done fighting your enemies, you can now return to exploring the Ancient Lair. You will discover chests that you can loot gold and valuable items from. Some Gilded and Opulent chests will have traps on them, so be careful as you work on them. Inside the lair, you will see a Stone Wall marking, and you can use any of your abilities to destroy it. Once the wall is down, enter the new area.
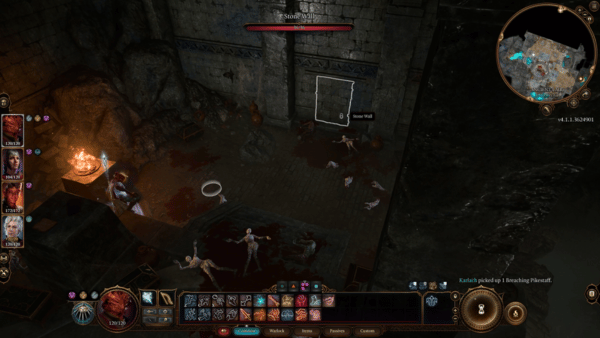
This new area is a chamber that contains a book, which reveals that Mystic Carrion's heart is contained in Thrumbo's chest. This will update your quest 'Defeat Mystic Carrion', then, look around you inside the chamber to see a jar that you need to destroy, then head back to speak with Thrumbo, should you decide to help him. You may refer to the Quests page for more info. Your next objective is to return to the Lower City Sewers and continue exploring the other side.
Lower City Sewers
Return to the door where you first encountered the Penitent Trader and then proceed to the other end of the hall that will lead you back to Lower City Sewers. There's a big door blocking your path so you can either have Astarion attempt a Dexterity check here or go around the other path to encounter NPCs and discover a ladder that will lead to Szarr Palace, Lady Jannath's Estate, and Lorroakan's Portals.
Continue exploring the depths of the Sewers from this path and you will encounter Aelis Siryasius, who has a profound fear or hate, or both for Absolutists and plans on turning you into kindling for a funeral pyre. You can try and convince him that you're not with the Absolute, then Aelis will continue blabbering about how he and his group were the best thieves in Baldur's Gate and they have stashed their loot in the Sewers where they are currently safe, while the Absolutists search for them.
However, the rest of his group had joined the cult, as Aelis believes, and he killed them. So now he wants to conduct the funeral rites, for Sarin's final resting place. This will allow Aelis to leave you alone and will not attack you for now. However, if you take him out, you will be able to gain access to his treasure and will solve the Sarin's Skeleton puzzle.
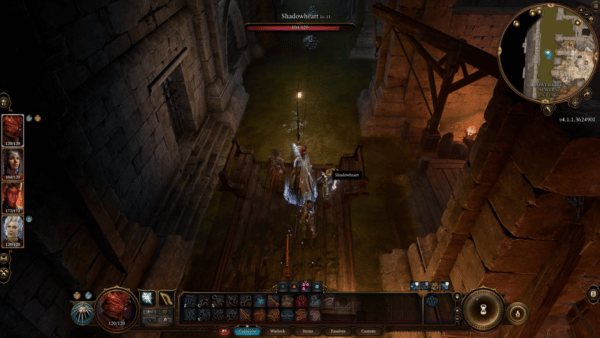
There is a door right next to where you encounter Aelis. Have Astarion lockpick this and attempt a Dexterity check. To pass, he will need a DC of 10. This will reveal a path to the raft in the sewers, and use it to move forward. This will take you to a path closer to the Lord of Murder's domain. As you jump off, switch into turn-based mode as there are traps set here that will explode on contact.
Upon opening the doors, the Night Blades will immediately become hostile as soon as they see your party enter the room. Eliminate all the enemies that you see here and continue exploring the Sewers until you reach a room filled with Noxious Fumes. On the right side of the wall, look for the lever that will dispel the fumes. Continue to work your way on the right side and dispel the traps that you see by attempting Dexterity Checks.
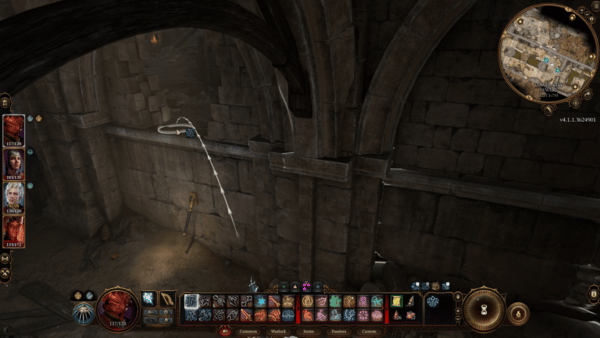
Then, jump on the crack on the wall, right on top of the lever that you just deactivated. You will see a breakable wall here and destroy that with Eldritch Blast or other spellcasting abilities to reveal a ladder out of the Sewers.
Entrance to Guildhall from Lower City Sewers
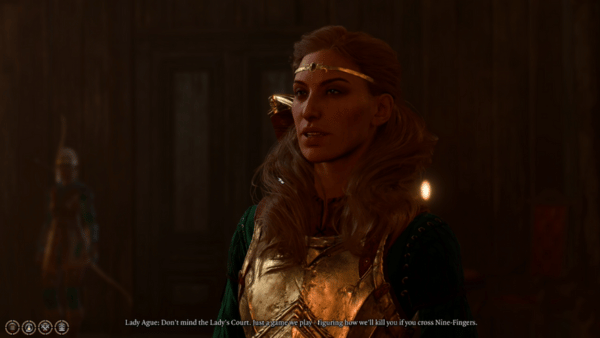
Continue exploring the depths of the Sewers and once you reach the Guild Hall at (X:-12 Y:774), you will see a door with the description "No Entry - No Exit". You can attempt a Dexterity check but you will need to pass a DC of 20. This will give you access to the Guildhall Bar. Directly to your right, you will see Lady Ague who will threaten to kill you, should you cross Nine-Fingers. There are other members of the guild gathered here as well as Merchants and other NPCs who offer their services.
In this section, you will find yourself in the middle of an uprising that was started by the Zhentarim Leader, Roah, and the Guildhall Leader Nine-Fingers Keene. If you choose to side with Keene, you need to inform Roah about your decision, but this will make all of the Zhentarim hostile, and the Guildhall will be on your side. Then, Keene will be grateful for your help, and they will offer to aid you in your fight against the Absolute later on. Otherwise, if you agree to take Zhentarim's side, the fight against the members of the Guildhall will begin and then Roah will become the new leader of the Guildhall and will reward you for your help by joining you in the fight against the Absolute later on.
Continue exploring the Guildhall and you will meet a man named 'The Professor' who will ask which crew you are affiliated with. You will have the following options to respond:
- [DECEPTION] Neither. I run a crew called the Wormskulls.
- Consider me an independent operator.
- I'm not with any crew. Why?
- Leave.
Choose the 2nd one so the Professor will leave you alone. He will also warn you to not get involved with Zhentarim. Then you can continue to look around and interact with the other NPCs. Follow the guide in your mini-map and interact with the door to meet Nine-Fingers Keene, who is in the middle of a discussion with Uktar who is trying to persuade her to withdraw protection from those who failed to pay tribute but Nine-Fingers is firm with her decision and welcomes you into the room as soon as they notice you.
Nine-Fingers Keene will tell you that she plans on burning the Absolute from the city, and if you want to help, she will welcome it. Now, you will get the following options to respond:
- What can I do to help you?
- Why do I need to help the Guild? I've been doing well enough without you so far.
- You can help a companion of mine who needs information- Jaheira.
- I need information.
- I ran into some of your thugs- the Rivington Rats?
- Leave.
If you mention Jaheira by choosing the 3rd option, she will start asking questions about your purpose and your identity. Then, you will get the following options to respond:
- Well, you already know I'm a friend of Jaheira's.
- A passer-by. I heard you serve good food down here.
- Just exploring the local sewer life.
- Let Jaheira do the talking.
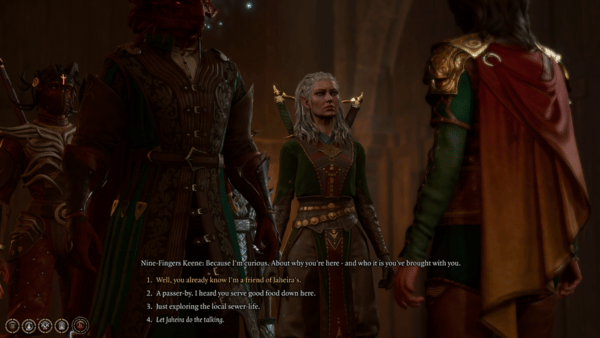
If you choose the first one, Jaheira will give you her approval. Then, she will ask Keene about a man named Minsc. Keene will respond that they're about to bring him in, but can't promise anything about his condition. Keene believes that Minsc has found a new name and believes that he is none other than Stone Lord who has been stealing her territory for his cult. She claims that she knows where the next attack is going to take place and plans on attacking there.
Jaheira will try to convince Nine-Fingers Keene to call off the ambush and let your party handle it. If you support Jaheira and respond to Nine-Fingers by saying 'She's not alone- she has me', Jaheira will give you her approval. However, Nine-Fingers is very stubborn and will not call off the ambush, so instead, you will get a new objective under The High Harper quest, which is to search for leads within the Guildhall regarding Minsc's whereabouts.
You will find the note on her bedside table where you'll learn that Minsc will be heading to The Counting House, where Nine-Fingers Keene had prepared an ambush. For now, you will return to the surface before continuing to help Jaheira with the search for her old friend.
Return to The Surface, Lower City
As soon as you're done with getting intel, you can return to the surface and complete the quest in Water Queen's House. If you offered to help the Wave Servant, which meant that you would fight Redhammer the Deviser, then make use of the Waypoint in the docks, then walk to the Water Queen's House to complete the Avenge The Drowned. Make your way to the back of the building where the Waveservants are gathered. They will ask you if it's done, and if you killed Redhammer, then you tell them that the beastmaster is dead.
Flood Tide Allandra Grey will thank you for your service and she will reward you with the Wavemother's Robe, a very rare clothing that provides Watery Rejuvenation and Temperature adjustment. Make sure to check out the Armour page for more info.
The Counting House

Following the events that took place after Jaheir and Nine-Fingers Keene's meeting, you will now continue to look for Minsc. Your next destination is The Counting House, where you will solve the Vault Puzzle and meet Minsc for the first time. You will find this building on the Southern side of the Lower City at exactly (X:-98 Y:-148).
As soon as you enter the building, you will find yourself in a Grand Hall, fitted with a tall ceiling and bright fixtures. Speak with the Head Clerk Meadhoney at the front desk who seems to be worried about something. You will get the following options to respond:
- Remind me again where Head Banker Glitterbeard is?
- Who is this Stone Lord that has you worried?
- I'm not a customer. I'm here because Nine-Fingers is planning something in your vault.
- I need access to your vaults.
- I would like to open an account.
- Leave.
Choose the second option that will prompt Meadhoney to reveal that a man named Stone Lord has taken the Head Banker below. He didn't say where specifically so you'll get the next options to respond:
- [PERSUASION] Let me help. I'll go and check on your Head Banker.
- Tell me more about this large fellow.
- It sounds like a robbery to me.
- I want to open an account.
- Leave.
If you choose to attempt the Persuasion check, you will need to pass a DC of 18. If you succeed, the Head Clerk will say that it is unusual but will agree nevertheless. He will hand you a temporary vault pass that will give access to the lower part of The Counting House. Interact with the Iron Fence next to the Head Clerk's table, then a guard will approach asking for your pass. Hand it over, and then the gate will be opened to your party.

There are locked chests here that you can lockpick to loot their gold and some others that are already opened. Take a look around here to get valuable items including gold. Then, interact with The Double Door at the end of the hall where you will see guards stationed at the gate. Before you can go, they will ask you again for your pass. So show it, and then you will be allowed access. Continue following the stairs that will lead to The Vault Door.
Solve the Vault Puzzle in The Counting House
To solve the puzzle in The Counting House, you will need to step on the correct tile in the right order. Doing this will light up the indicators on top of the Vault Door. To do this, you need to ungroup your party first and then move them to the correct tile without stepping on another tile.
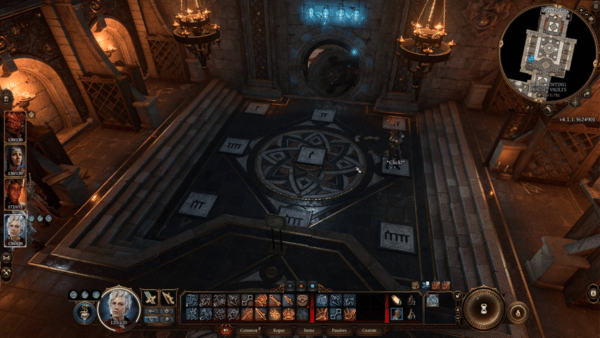
You can do this with just one character, or have your entire party stand on each plate. So as you are facing the light indicator step on the following tiles:
- Top Left Corner Tile
- Top Right Corner Tile
- Center Tile
- Middle Row, Right Tile
If you do the puzzle correctly, the Vault Door will be opened automatically. Then, follow the stairs going down. As soon as you reach the door, a cutscene will play showing Minsc and the Bhaal Cultists. Minsc was kept inside a mimic, a monster chest but he would break free from the inside. Then, a clone Jaheira will show herself and claim to be working with The Absolute. She claims that Nine-Fingers Keene set a poor trap for Minsc, and she will ask the Stone Lord to leave, and then they will retreat to the Sewers.
You will be left to fight with the remaining Bhaal Cultists here if you don't have Jaheira in your party. You are now free to speak with the Head Banker who was caught in the middle of this trap. He will ask for your help to get the coin that was stolen from The Counting House. He will invite you to look around and investigate the area, then he will leave.
Lower City Sewers
As Minsc believes that he is working with the real Jaheira, he has retreated into the dark with the clone. You will now follow their trace into the Lower City Sewers. You can make use of the Waypoint and travel to the Undercity Ruins, which is the closest one to the Lower City Sewers. Make your way back to The Sluice Gate to reach Minsc and Clone Jaheira's hiding place.
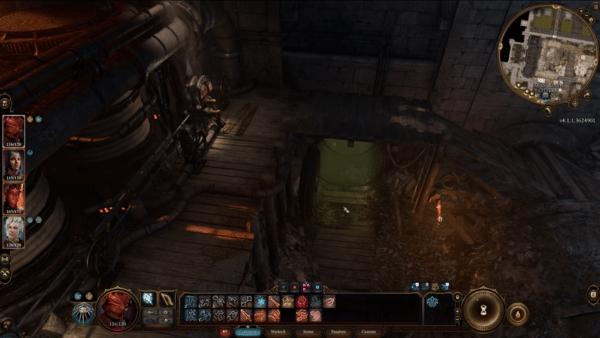
Go through the pipes and a cutscene will play where Roah Moonglow and Minsc are seen talking. They are talking about their plans and that they serve only The Absolute. Roah speaks about returning to The Guildhall to do their bidding. However, Minsc will spot your party from a distance. Roah will try to run away and the battle against Minsc and his party will begin. Attack the fake Jaheira first, and then knock out Minsc.
NOTE: If you want to keep Minsc alive, make sure to switch to a non-lethal attack. This will result in Minsc getting knocked out.
Then, using your Illithid powers, you can see the image of Jaheira in Minsc's mind. He thinks that you have killed the real one, but you can counter this with your thoughts. Minsc will continue to run away deeper into the Sewers. Follow his lead as he destroys the crumbling wall. This will take you to a small room where Minsc warns you to not show fear and to trust in him. Then, you will get the following choices:
- I do trust you. I think.
- If this is a trap, you die first.
- Can we just get on with... whatever this is?


Minsc will fall to his knees and appear to speak to a tiny creature. He will introduce you to Boo, a hamster. He calls it a Miniature Giant Space Hamster, and that you will be able to learn the difference in time. Minsc and Boo will join your party, and cleanse Baldur's Gate of Evil together. Invite Minsc to your camp if you have a full party, and he will give you his approval. This will also complete The High Harper quest.
Guildhall

Return to the Guildhall once more by traveling to the Revealed Entrace at Lower City (X:57 Y:-96), to settle the matter with Nine-Fingers Keene. At the entrance, you will find Roah Moonglow who has something to tell you after she escaped the Sewers last time. She offers her, and the Zhentarim's alliance with you to purge the Guildhall of Nine-Fingers Keene's loyal servants. She will try to convince you that Keene's guild is undisciplined and broken, but Roah's is still strong.
NOTE: If you choose to side with Keene, then you will have to fight Roah and the Zhentarim. Then, Keene will be grateful for your help, and they will offer to aid you in your fight against the Absolute later on. Otherwise, if you agree to take Zhentarim's side, the fight against the members of the Guildhall will begin and then Roah will become the new leader of the Guildhall and will reward you for your help by joining you in the fight against the Absolute later on.
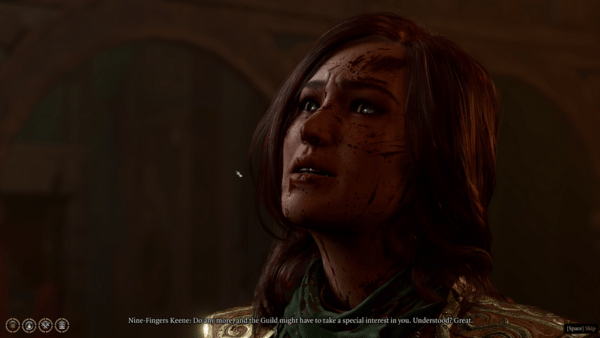
Settling this matter will result in a bloody Guildhall, and you will be left to loot the bodies of the Zhentarim. Next, seek out the bloodied Keene who's seated at her desk. She will now offer to help you in the fight against the Absolute. You can also ask her about how she knew Jaheira and what happened to her Guild. The Aid the Underduke quest will also be completed upon defeating the Zhentarim.

After that, you can now return to The Counting House and return the gold that was stolen. This will complete Return Rakath's Gold, and you will be rewarded handsomely, together with a Counting House Vault 9 Key. You will find this Vault inside the large vault on the walls. You will get Elegant Studded Leather, a very rare light amour.
Return to the Streets of Lower City

Now that you were able to settle the uprising in the Guildhall, you will now return to the street of Lower City where you will continue your quest related to Mystic Carrion and his servant. Move to (X:-10 Y:-158) and you'll discover a hidden stone wall. Have Astarion unlock this door by attempting a Dexterity Check, but you will need to pass a DC of 25. This will take you to Philgrave's Mansion.
A mummy Mystic Carrion will see you right away, and he tells you that you do not have an appointment. He recognizes that you are familiar with the Necromancy of Thay. He will ask you about your thoughts of its contents. You will get two options to respond:
- You're familiar with the subject matter?
- Oh yes, I loved it. Especially the part about the unicorns.
If you choose the first one, he will suspect that you are not familiar with it and will try to turn you away and will suggest that you return to the domain of the living. You will get the next choices:
- Is there anything I can do for you?
- Have you anything to trade?
- Leave.
If you choose the first one, Mystic Carrion will consider getting your help for a task. He tells you about his servant by the name of Thrumbo who ran away. He is asking you to return the body to him, and you will be rewarded. Then, you will get the following options to respond:
- First, tell me why he ran.
- His body? It sounds like you want him killed.
- Baldur's Gate is a big city/ A name's not much to go on.
- i might be able to help. For a fee, of course.
- I'll think about it.
- You've got a deal.
If you choose the 3rd one, Mystic Carrion will tell you that he has accopmplices, and has led many others astray. If you agree to help Mystic Carrion, he tells you that spirits bore witness to the agreement, and they will follow your progress too, just like him. You will have a new quest "Find Mystic Carrion's Servant." Before leaving this room, make sure to trade with him and take a look at his very rare items for sell that might be suitable for yourself, or your companions.

Due to the lack of information from Mystic Carrion, you will go around searching the docks and looking for anything related to Thrumbo and his servants. You will find a Strange Beggar Lumbar on the streets of the Lower City at (X:124 Y:-30), just outside the mansion. As soon as you mention the name Carrion to him, he will become hostile. You will get the following options to respond:
- [DECEPTION] Carrion means Thrumbo no harm. He sent me with provisions for his journey.
- [INTIMIDATION] Either you tell me where Thrumbo is, or I drive my fist through your skull.
- [PERSUASION] Tell me where Thrumbo is, and it'll be like we never met.
- Leave.
If you choose the first one, you will need to pass a DC of 18. Lumbar tells you that he last heard from Thrumbo that he's going to get them a boat, but haven't heard from him since and he suspects that he must be somewhere near the water.

You will be able to locate Thrumbo inside Vonayn's Home near the shore in the Lower City. It's close to where Philgrave's Mansion is, and if you have explored this area before, this is where you fought Sea Monsters or Sahuagin enemies that jumped out of the water to attack you. If it's your first time, it will be an interesting encounter. Then, go inside the house next to the pier, use the stairs and you will find Thrumbo hiding in the wardrobe to your right.
NOTE: You can either choose to help Thrumbo or Mystic Carrion. This will reap you two different rewards and 2 different outcomes for this quest as well. However, you will be able to loot more from Mystic Carrion if you kill him, and you can take the Torch of Revocation from the chest inside Mystic Carrion's room if you kill him.
- If you help Thrumbo, this will involve destroying the parts of Mystic Carrion that keep him alive. You will have to travel to the sewers, in the Undercity Ruins and smash the jars containing Mystic Carrion's brain, and liver. Then, you will discover that Mystic Carrion's heart is inside Thrumbo, and he will have to vomit it so you can destroy it. Then, you must return to Philgrave Mansion and kill Mystic Carrion to get the Crypt Lord Ring from Thrumbo.
- If you choose to help Mystic Carrion, all you have to do is take Mystic Carrion's heart from Thrumbo and bring it back to Philgrave's Mansion. He will reward you with Torch of Revocation.
The Steel Watch Foundry
After settling the issues of Mystic Carrion and Thrumbo, your next destination is The Steel Watch Foundry. This is a place in Lower City where you will find many of Gortash's mechanical soldiers. If you choose to raid and disable the foundry, this will result in fighting Gortash's army, eventually freeing the people from his rule.

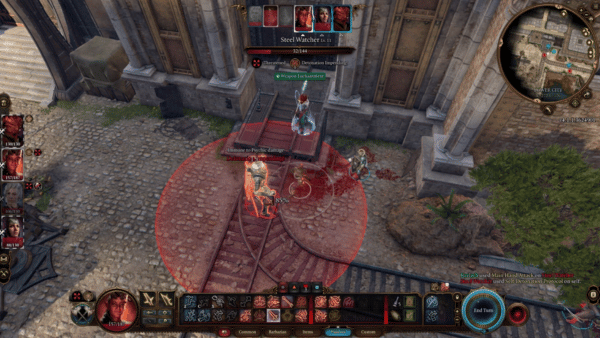

To begin, you need to locate the foundry at the Southwest corner of the Lower City. There are multiple ways to enter but we find that the most accessible area is going through the tracks at (X:-243 Y:-178). This will require your entire party to sneak past the patrolling guards. If one of your party members gets detected, the nearby Steel Watcher will be alerted and will trigger a battle. If you get caught, the fight will be tough but manageable, as long as you only have to fight one watcher at a time. Eliminate the guards so you can continue to head inside.

Activate the lever to lift the platform to the door's level. Upon entry, a short cutscene will play showing a Gondian named Lowa pleading to take a break. However, the Black Gauntlet Tamia Holzt is unfazed by her pleas, and she takes out a purple crystal and activates Prinski's Motivation sequence. Consequently, the collar placed on Lowa's neck will also light up. Holzt will begin asking her questions about her personal life and use that information against her. In the end, Holzt allowed her to take a break but threatened to take her son's life if she couldn't do a perfect job.
Looking around the foundry, you will see many parts of the Steel Watchers lying around. You will find an arm, a greatsword, and shields, among others. Being on the high part of the foundry, the enemies haven't detected your presence yet. If you interact with the greatsword, the narrator reveals that this was forged in the Upper City, at the Hall of Wonders itself. To progress, allow yourself to be seen by the Overseer.
Note: Some dialogue choices are modified depending on your character's traits, features, proficiencies, and others.
In this playthrough, our character's Religion proficiency allowed it to recognize the uniform of the overseer, that they are a follower of Bane- the god of tyranny. This event gave us the following choices:
- [DECEPTION] Forgive the interruption, Dread Sister. I've just arrived for duty.
- [INTIMIDATION] I wish to bathe in the blood of these worthless Banites. You can help, Gondians- or you can die.
- [INTIMIDATION] Gondians! Fight back! Do not let these people torment you.
- [PERSUASION] I am here to help, Gondians. Together, we can free you all.
- Touch these people, and I'll kill you.
If you choose the Intimidation check, you will need to pass a DC of 15. The Gondian will hear you and they will retaliate and fight with you. This will trigger a battle between Tamia Holzt and the other guards. After eliminating the enemies, you can now talk to the Gondians. Lowa will tell you that it's not only their lives that are at stake but also their families. She fears that the other Overseer will find out about what they have done, and do the unimaginable. If you speak to the other surviving Gondians, they will feel the same way about what happened.

While the rest of the Gondians are worrying about how to clean up the bodies, walk up to the metal stairs that will lead to the security office. You will need to talk to a Gondian named Zanner Toobin. You will need to get him on your side and cooperate with your party. Tell him that you have come to free them, however, he will seem to resent what you have done. You will find out that the Overseer has placed a powerful collar on each and every one of the Gondians, which prevents them from retaliating. The Overseer can just press a button and easily wipe out all of them, including their families who are being held somewhere unknown.
If you ask him if he will fight back if you free their families, Zanner Toobin will respond by saying that he'll do more and help destroy the place. He tells you that you will need to infiltrate the foundry to investigate the location of their families. He will ask you to be careful and not get spotted, or else it will mean death for all of them.
Steel Watch Foundry - Lab Level


Just below where you meet Zanner Toobin, locate the stairs that will lead you deeper into the foundry. You will find furnaces powering the foundry and other guards are stationed here. You can take on this fight as long as there are no survivors and you will also have an advantage over enemies since you have the high ground. Eliminate all threats so you can continue investigating. Your goal in this area is to go deeper by using the elevator within the foundry. You will need to defeat the boss, the Steel Watcher Titan. So keep exploring until you reach the basement level.
NOTE: To successfully save the Gondians, you have to disable the Prinski's Motivation sequence device. This will prevent the Black Gauntlet from harming the Gondians. Make sure to secure them as most guards will have one on them.
The Iron Throne

Your investigation will lead you to travel to the Iron Throne and to get there, you will use the submarine located in the basement of Flymm's Cargo. Interact with the submarine and a confirmation dialogue will be shown on the screen. Upon arriving, a voice will communicate with you using the tadpole. He informs you that you need to move fast as Duke Ravengard's life is on the line. You will get the following options to respond:
- Omeluum? Is that you?
- Where are you?
- Tell me what to do.
- I want to free the Gondian hostages.
- Get out of my head.
If you choose to tell him that you want to free the Gondian hostages, he will tell you the painful truth that Duke Ravengard is the priority because the city needs him. Then, you will get two of the choices below:
- Fine, where is he?
- [PERSUASION] You would let innocents die? Shame on you. I will save everyone, just tell me how.
If you attempt the Persuasion check, you will need to pass a DC of 20. If successful, he will agree that indeed, everyone must be saved. Then, he reveals that the Duke is being held in the security wing. He continues that the prisoners are scattered throughout the prison, and if you want to save them all, then you must be ready to spread your resources or split up the party. Doing this will also get Astarion's disapproval.


NOTE: By progressing in this story, you will have 8 turns to save everyone before the Iron Throne collapses. Before continuing we recommend equipping boots that give you extra speed, taking potions, or learning spells that increase movement speed. A good example is a Githyanki's triple jump, the Cunning Dash from Rogues, or a Teleport (Monk). Make use of all your turns here so you can save as many as possible. Aside from the limited turns, take note that there are also enemies patrolling about.
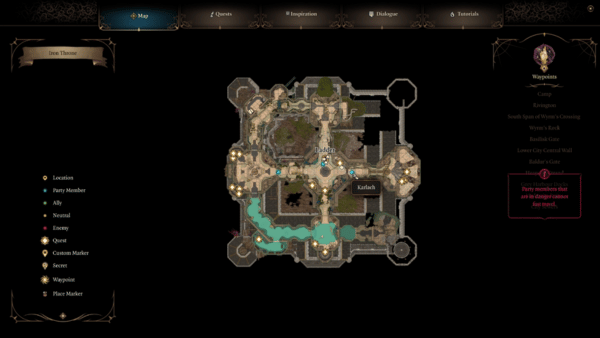
As you go around rescuing survivors, you will find Duke Ravengard held at the Security Wing at (X:35 Y:59). Activate the lever next to the door, to speak with the Duke. Shortly after, a laughing demon can be heard, possibly Mizora's voice because of her contract with Wyll. Shortly after, you will encounter Mizora here, who is planning on collecting the part of their contract, or the life of Duke Ravengard because Wyll chose to break free from the contract in our playthrough. She will then attack the Duke with exploding flames. This could play out differently for you, should Wyll choose differently.

When you are down to your 2 remaining turns, make sure to return to get out of the Iron Throne and return to the submersible. This should give you enough turns to run back. Make sure that everyone gets on board safely, or otherwise, they will be left to die. Interact with the ladder inside the submersible to return to the basement in Flymm's Cargo.

If you managed to save Omeluum who was held captive in the Iron Throne, you will find him again at The Lodge with his friend there. He tells you that he and his colleagues are grateful that you rescued him, but regrets to report that his investigation has ended in failure. You can reply with:
- Why were you down there in the first place?
- I tried to save everyone. It just wasn't possible.
- Ravengard meant nothing to me.
- The Society has deep pockets. I expect to get paid for it.
Choose the second option and Omeluum will assure you that he is grateful for his existence and to you for saving him. He will share to you though that he still feels a bit of heaviness because of Ravengard's death because it will destabilize Baldur's gate. He will then proceed to reward you with some items. After your talk with Omeluum, teleport to grey Harbour Docks and proceed to the Steel watch boundary at X-276 Y:-154. Here, a battle will commence alongside Gondian Zanner Toobin. You'll need to save the Gondianswhich will update the quest "Save the Gondians". After the battle, Toobin will ask what happened to Obelia and if she's safe. You can reply that she is safe and this will update the quest again. You'll find out that their destination is Neurocitor which is the nerve center of the Steel watch, he'll ask you to guide him while he does the rest. Agree with him and he will tell his co Gondians to flee the prison since he will bring it down. head towards the elevator ahead and descend. You'll arrive at the labs of the Steel Watch Foundry. head straight and go through the big doors which lead to the Control center. Interact with the brain jar and it will also connect with your brain. Starting some dialogues. You can respond with:
- [WISDOM] Attempt to wrest control of the Watcher and spare the dwarf.
- [ILLITHID] [WISDOM] Force the Steel Watcher to release the dwarf.
- Stomp on the dwarf.
- Disconnect from the Steel Watcher.
Select the first option and it will fail. Look around next in the area and suddenly, Toobin will notice Elevated Gyroscopes and other equipment and will realize something. Ask him what's wrong and he will say that he hears something powerful through the floor. The ultimate Watcher - the Titan. He mentions that you'll need to face the enemy alone because Toobin will only be crushed in an instant. This will update the "Save the Gondians" quest. Once you enter the next room, you'll now need to battle the Steel Watcher Titan. Once the Steel Watcher Titan has been defeated, speak with Toobin again to begin the destruction of the area. Afterward, head over to the entrance of Flymm Cargo within Lower City at X:-171 Y:-148. Once you enter, head downwards until you reach the submersible hatch in Flymm Cargo's Basement at X:-1042 Y:316. Enter the hatch and a cutscene will play out of the submersible heading to another area. Eventually, a hologram of Gortash will appear who doesn't like you wondering and diving to places where you should not be. You can reply with:
- I'm here to rescue the hostages, Gortash.
- What the hells is this place?
- **** you, Gortash.
- Cut the crap, Gortash. I go where I choose, and I'm curious about what's down here.
- Whatever you're hiding down here, I'm going to take it.
Select the first option and Gortash will say that you are wrong and that you're the only threat to their survival. He'll state that they are not useful to them dead. That's why Gortash keeps them safe. He will then threaten you not to interfere, or he will destroy the Iron Throne. He will threaten you once again to go back to the docks or the deaths of everyone will be in your hands. A choice will be made:
- Dock at the Iron Throne.
- Turn the submersible around and retreat.
Choose the first option and Gortash will tell you that's a mistake. 3 quests will update in your journal. Once you dock, the voice of Omeluum will tell you to halt. He'll tell you that Duke Ravengard is within the area and must be extracted. You can reply with:
- Omeluum? Is that you?
- Where are you?
- Tell me what to do.
- I want to free the Gondian hostages.
- Get out of my head.
Select the third option and Omeluum will state that the other innocents will not be your priority but only Duke Ravengard. You can select the following as a response:
- Fine, where is he?
- [PERSUASION] You would let innocents die? Shame on you. I will save everyone, just tell me how.
Select the second option and Omeluum will agree with you and say that you are correct. He'll then say that Duke is in the security wing while the other prisoners are scattered. He'll encourage you to do things fast and will wish you good luck. A battle will commence after the conversation. During battle, you'll need to free prisoners along the way. The grand uke on the other hand, is at X:32 Y:60. Free him and the quest Rescue the Grand Duke will update. There are also other prisoners near the grand duke. Once done, head back and suddenly Mizora will appear. After you conversation with her, defeat all of the enemies in the area while the Grand duke and the other prisoners make their way to the Submersible. Once done, a cutscene will play out of the iron throne collapsing while you escape in the submersible. A conversation will start between you and Duke Ravengard, he will thank you for what you've done. You can respond with:
- The Absolute's voice has gone silent. It must be a relief.
- What are you going to do now?
- How did you end up in the Iron Throne?
Select the first option and he will say that he is thankful that his thoughts are his own again. After speaking with him, you can now return to the Lower City.
Wyrm's Rock - Lord Gortash Battle
Now head over to Wyrm's Rock fortress at X:2 Y:221 and immediately a battle will commence between you and the guards there. This area has multiple enemies in the area so it might take you some time to clear the area. Once you clear the first area, go through the Audience hall doors at X:26 Y:208 and another battle shall commence. At X:55 Y:-737, you can loot one of the enemies that you've defeated and take the Prison Entrance Key, Storage Room Key, and the Wyrm's Rock Prison Cell Key. Use the Wyrm's Rock Prison key to talk to Otto Ot in one of the Prison cells. He'll ask you what you want and you can reply with:
- Not your attitude, that's for certain.
- To help you escape, if I can.
- Leave.
Select the first option and he will reply that does not need to escape because he has privacy, food, and water already. Afterward, head to X:51 Y:-762 and go through the Passageway for another battle to commence. This will be a very long battle since you will also battle Lord Gortash in this area. After defeating Lord Gortash, 4 quests will be updated in your journal. These are "Get Gortash's Netherstone", "Rescue Orin's Victim", "Confront the Elder Brain" and "Our Fiery Friend". Afterward, take Gortash's hand from his corpse and make your way out of the fortress at X:4 Y:220 and escape. You'll find yourself at the campsite again and you will see a letter on the ground named "Kudos on the murder of Gortash". This will yet again update three quests which are "Rescue Orin's Victim", "Impress the Murder Tribunal", and "Get Orin's Netherstone". Afterward, Return as Karlach again and select her to flee from combat. This will enable the Emperor to talk in her mind again stating that Bane's chosen has fallen and that his Netherstone is yours. You can respond with:
- Where do we go from here?
- I heard the Absolute scream.
- What just happened?
- Leave.
Select the first option and the Emperor will state that you heard the Elder Brain and that it's regaining its autonomy. It cries not from pain but exultation. The Emperor will then state that you need to stop it before it breaks free. He'll remind you that one Netherstone remains which is Orin's and you must take it from her. Afterward, once you take control of the brain, you'll need to decide what to do after. You can respond with:
- I will put an end to it.
- I'll decide that when we get there.
- I will become the Absolute myself.
Undercity Ruins
Select the second option and The Emperor will admit that he is surprised by your wisdom. Afterward, head to the Undercity Ruins and immediately, The Elder Brain will talk to you through your mind. It will say a bunch of words but one thing stands out which is the words "Kill Orin". From the Undercity Ruins to X:-138 Y:931 and interact with a door and you will feel ancient magic as you approach it. Once you approach it, the door will ask you if you have proof of your faith to their lord. You can reply with:
- I have proven my faith to the Tribunal. I'm an Unholy Assassin of Bhaal.
- How can I prove myself?
- Leave.
Select the second option and the door will mention that you need to bear proof of the Dread Lord's favour or pay his toll of blood. Afterward, select the first option and the door will immediately sense that you are lying and will let you know that the door stays closed. For now, head outside the Undercity ruins and go through the Lower City sewers. Once you reach X:-48 Y:785, head up the ladder and you'll find yourself near the Basilisk Gate at X:125 Y:-31. Now, head over to the Graveyard at X:9 Y:25. Here, you'll come across Strange Beggar Morbus and you'll recognize him as one of the runaways in Mystic Carrion's chambers. You can reply with:
- Mystic Carrion is looking for you. He sent me.
- I'm playing hide and seek with Thrumbo. Can you help me find him?
- Attack.
- Leave.
Lower City
Select the second option and Morbus will say that Thrumbo said not to tell anyone where they went. You can reply with:
- [DECEPTION] It's too late for that. I already caught you. The game's over.
- [INTIMIDATION] Thrumbo's not here to protect you, is he? So tell me. NOW!
- [PERSUASION] Come now - we're friends, aren't we? You can trust me.
- Very sensible. Don't tell anyone anything.
Choose the first option which is the deception option and Morbus will say that you must be nice for playing too which is like Thrumbo. He'll mention that Thrumbo told him what to do but said it very quickly and because of that, Morbus could not understand. All he remembers was the words " Down the stairs, across the sand. Down the stairs, across the sand." After this conversation, the quest "Find Mystic Carrion's Servant" will update. Just nearby, you can talk to Elias Fischer and Anita Fischer who are talking about their daughter Lily who does not have a coffin yet. They'll notice you and inform you that there is a backlog for coffins if we're looking for a burial. It will take at least a month for one to be made. You can reply with:
- You lost your child? I'm so sorry.
- A month? That seems a bit excessive.
- Just dig a hole and dump the body - far cheaper.
Select the first option and Elias will immediately say that Lily was 7 years of age and was murdered and will ask what kind of monster does that. Now, head over inside the coffin house and talk with Valmorba. She will instantly tell you that there will be delays for coffins and that if the corpse starts to smell, you'll need to apply Jasmine, Honeysuckle and whatever you can get. You can reply with:
- I'm looking for a grave. Name of M Kurwin?
- It sounds like you're pretty busy.
- There's some strange things happening in this graveyard.
- Leave.
Select the first option and Valmorba will tell you the location and she will tell you that it's good of you to visit because that grave has not had a visitor in a long time. Afterward, head beside the coffin house in the graveyard and enter the Durinbold Mausoleum. You'll need the Durinbold Mausoleum key to enter. A battle will commence once you enter between you and ghost Houndmasters. Once you finish defeating the enemies, head out of the Mausoleum and head to The Counting House Vaults located at X:-90 Y:-173. Once you breach the Counting House Vaults, move to the area at X:-718 Y:881 and open the small vault containing keys which will open other vaults inside. This is the Counting House Safe no6 Key. Once done, head out of The Counting House VAults and make your way to X:-206 Y:-33 near Elerrathin's Home and speak with a kid named Newshaker Jonah. He'll mention that you are plastered all over today's Gazette and say that it isn't pleasant news. He'll then offer you the news for gold if you're curious what's written. You can respond with:
- Let me see that Gazette. (2)
- [PERSUASION] You know what'd really annoy the writers? Giving me a free copy.
- No, thank you.
Select the first option and you will receive the "Baldurs Mouth Gazette 1492 DR Issue 99". Read the newspaper and you'll see that news of Gortash's killers are spreading.
Lady Jannath's Estate
Afterward, head for Jannath's Estate at X:-251 Y:-78 and before you enter, use the scroll of see invisibility to spot creatures or enemies that may be lurking inside. Once you enter, a battle will commence with Poltergeists and the quest "Free the Artist" will update in your journal. After clearing the first floor of enemies, head to the 2nd floor and another battle will commence. The 2nd battle will just take a short while due to small amount of enemies. Afterward, head over to one of the rooms on the second floor and there you will see Oskar Fevras and Lady Jannath again. You'll see Lady Jannath persuading a possessed Oskar to snap out of it. The possessed Oskar will then insult Jannath and Jannath will simply ask him to stop and that she loves her.Oskar will proceed to say that he only loves the gold of Jannath. Jannath is convinced that he is just being possessed and will ask you to help her subdue him gently. Another battle will commence between you and Oskar. After defeating Oskar, Lady Jannath will thank you and will recognize you as the one who saved Oskar from the Zhentarim. You can reply with:
- What in the hells is going on here?
- And you must be his patron?
- I hope he drew my most heroic side.
- [WARLOCK] I know supernatural influence when I see it. Tell me everything about Oskar's condition.
- You're remarkably calm, given your husband just tried to kill us.
- I did. And I've come to collect the reward he promised.
Select the fourth option and Lady Jannath will say that after they got married, Oskar started to lose appetite and change moods. Most of the time, he will try to avoid her company. Then he started becoming violent and started cursing at her. She will agree with you that he may be possessed.
- Yes, that much is obvious.
- I had no idea he'd married. Then I take it you were his patron?
- It doesn't seem personal - he tried to kill me too.
- You're sure he hasn't been, you know, sniffing his paints...?
Select the second option and she will correct you that she is now his wife. She will then ask you to help if him if its okay with you, and you can reply with:
- Where should I start?
- [WARLOCK] While I've been... aided by powerful forces, that doesn't mean I can help Oskar. He needs an expert.
- He's too dangerous. A merciful death is the best I can offer.
- Trust me. He's not worth the trouble.
Select the second option and she will say that no one can find out about this and it's you who needs to help him quietly. Select the first option now and Lady Jannath will say that whatever thing is possessing Oskar, does not want her in the Threshold. Once you're done speaking with Lady Jannath, head upstairs to Oskar's Atelier and as you go up the stairs, an invisible force will knock you off the stairs as if telling you not to proceed. You'll need to use Shadowheart to Remove the Curse of the skull that's preventing you from going upstairs. Do this with every skull that you see upstairs. Ve careful though, because Shadowheart will take damage each time you remove a curse from a skull. Once you enter Oskar's Atelier, lockpick the hidden door on the Wooden wall and you'll find a painting of a smiling maiden. This will update the quest in your journal named "Free the Artist". Behind a portrait lies a chest containing a letter from a mystic Carrrion addressed to Oskar which asks him to bring the letter to Carrion's Mansion which provides a password that will grant entry. You should visit the Mystic Carrion and ask him about Oskar's situation.
Philgraves Mansion
Head over to Philgrave's mansion at X:8 Y:-162 and talk with the Mystic Carrion. You can ask him by choosing one of the following:
- I came to speak to you about your customer Oskar. He's been possessed.
- Do you have anything to trade?
- Leave.
Select the first option and Carrion will immediately recognize Oskar as the painter and will say that he wanted to contact a tormented spirit. Carrion gave him exactly what he wanted but said that if Oskar wanted his safety guaranteed, it would have cost him extra. You can respond with:
- Who was he trying to contact?
- How can he be freed of the spirit possessing him?
- His foolishness did not merit such a cruel punishment.
- So if he were richer, you would have protected him?
- You knew exactly what would happen. You torment him intentionally.
Select the first option and Carrion will mention that the customer's [privacy is a guarantee so he cannot say. He'll then assume that you came to him to seek exorcism. He'll say that he can provide the means to perform such a ceremony but you'll need to do something for him. You can respond with:
- What kind of service?
- Can't I just pay you instead?
- So you won't just do it out of the goodness of your heart?
- I'll figure it out for myself.
Lower City
Select the first option and Carrion will say that you'll need to return Thrumbo's body for him and he will help your painter friend. For now, head over to X:-245 Y:2 and speak with an NPC named Arves. You'll notice that he is admiring something you cannot see so you can ask him one of the following:
- What are you looking at?
- Ahem.
- [INVESTIGATION] Study the man's appearance.
- Leave.
Select the first option and Arves will share that there is a squirrel on the tree and is amazed by it. Youc an respond with:
- You're fawning over some tree-vermin? Perhaps you've taken too much sun, or wine.
- Are you feeling well? You seem... distracted.
- I don't see any squirrel.
- Fascinating. I must be going.
You can select the second option and he will say that he is just fired and will randomly wonder if you know where lives. You can respond with:
- Can't say that I do.
- I doubt you're from around here. Who even are you?
- You seem confused - taken a bump to the head lately, perhaps?
- [DRAGONBORN] Do I look like I'm from around here?
Select the fourth option and he'll say that he does not know. You'll then sense that there is more to this. You can reply with:
- What do you remember?
- Is there anyone you can go to? Anyone who could help?
- [DETECT THOUGHTS] See what you can learn from his thoughts.
- [DECEPTION] I am from the Baldurian Bank. I've come to collect interest on your debt.
- Leave.
Select the third option and you'll find out that he remembers from time to time something but then will forget afterward. You'll detect him saying a name called Moyra and then will immediately forget about her. You can respond with:
- Do you know someone called Moyra?
- What do you remember?
- Is there anyone you can go to? Anyone who could help?
- [DECEPTION] Moyra sent me. She said you had money I was to bring to her - household expenses.
- Leave
Select the first option and he will agree at first but then will say no. He'll then say that he thinks he remembers a face. Smiling, young, then older, then ill, then he will randomly say no. He will say that he does not know anyone by that name. You can ask him next what he remembers and he will say he remembers being sad and does not know what caused it. He's not even sure what sad is anymore. He'll then point to a building who helped him but does not recall what he was even doing there. Ask him next if there's anyone who he can go to for help. He'll then say that there is someone but he cannot remember. The quest "Investigate the House of Grief" will then be updated in your quest journal.
House of Grief
Head over to X:-262 Y:-11 which is the House of Grief area. Enter the building and speak with Mirie. Mirie will sarcastically welcome Shadowheart and will say that the term "Welcome" must be the wrong word to use. She will then on to say that Shadowheart has to face the consequences of her actions or will she flee like a craven. The two will have some exchanges, but you can respond with the following:
- Let us pass.
- I don't like this - we should leave, Shadowheart.
- I met a man who'd been robbed of his memories - your handiwork?
Select the third option and Mirie will say that the House of Grief is a place of healing, and that anyone who partook in their methods did so willingly and was freed from their troubles. She will then sarcastically ask if you would accuse a surgeon of robbing a tumor? Select the first option now, and Mirie will say, "In due time". She'll say that you'll need to submit to the Mapping of the Heart, because only then will they know what is to be done with you. You can select one of the following:
- The mapping of the what?
- Remain Silent.
Mire will then explain that this is the House of Grief, where they strive to help people whose hearts have grown heavy. She will then ask you to submit to the Mapping and reveal whats in your heart. If you consent, you will follow her, if not, leave. This will update the "Investigate the House of Grief" quest in your journal. You can talk to Mirie once again and ask about the name of the House of Grief.
- House of Grief? Quite a foreboding name...
- Unburdened? What does that mean?
- I just want to trade.
- Leave.
Select the first option and Mirie will say that It can be quite deceiving and that originally, they first sought to help those who are consumed by the loss of a loved one. But they realized that there are so many others who needed their help. They unburden people of the suffering of their hearts which can be anger, self-doubt, troubling memories, and of course grief. Mirie will then say that you would benefit from their help, and thinks that you desperately need their help. She can sense turmoil in you which will update the "Investigate the House of Grief" quest again. You can respond with:
- I desperately need help? What makes you say that?
- You seem to think you know a lot about me.
- This smells like a scam.
- I just want to trade.
- [INSIGHT] Usually a god would've been mentioned by now - is this a scam?
- Leave.
Select the fifth option and you will sense that she does want to help but is also hiding something. Select the first option now and she will say that a great number of people have entered their building and that she has recognized their sufferings. Admitting that you have a problem is the first step, which is the hardest step. Afterward, they will guide your by your side. Afterward, go to the back room and sit on the Granite bench. This will update the "Investigate the House of Grief" quest again. A cutscene will play out between you and the Inquirer of Grief. She will say that you seek to be unburdened and there is another whos need is great. Shadowheart will say that she thinks she should be the one who should partake in this, you can select to let her go ahead. The inquirer of grief will ask if Shadowhearts knows why shes here. Shadowheart will say that there was something taken from her which is her life and family, She wants it all back. The inquirer of Grief will say that loss is a gift and will ask why Shadowheart really is here. You can respond with:
- What's going on? Is this part of the Mapping?
- Who are you?
- Remain silent.
Choose to remain silent and shadow heart will admit that she was sent to retrieve it at any cost. This will update the quest again. The inquirer of grief will then ask who tasked her with this mission, and Shadowheart will say the Mother superior. Shadowheart will then recognize that the inquirer of Grief is her and will hesitate to say her full name. The Inquirer of Grief will then ask her to say her name while she takes off her hood. The name is Mother SUperior Viconia DeVir. This will update the quests "Daughter of Drakness" and the "Investigate the House of Grief" quest. The wall of the Graniote bench will open and you can enter. This will lead you to another sub-location.
Cloister of Sombre Embrace
Once you enter the Cloister of Sombre Embrace, just walk down to the path and you'll find a circular stone door in which you can enter. Onc you enter, a cutscene will play out between shadowheart and Viconia DeVir. Viconia will state that they have already heard how Shadowheart disgraced herself before Lady Shar and how she marked Shadowheart as the enemy. Viconia will state that she can show a small amount of mercy if you hand the artefact. Shadowheart will state that she does not answer to Viconia anymore and is here for her family. Shadowheart will then say that she knows what Viconia did and will threaten that it's not going to be quick for Viconia. Viconia will then state that this is her family and that she failed to prove herself for the last chance, You can now respond with:
- Shadowheart has nothing to prove to the likes of you.
- This was a mistake. We shouldn't have come here.
- Why is the artefact so important to you?
- Keep silent.
Select the third option and Viconia will explain that its the artifact that Absolutists feared. You can ask if Lady Shar tasked her with this. And Viconia will say that as long as it does not threaten lady share, she can ignore it. She wants to prove that she is the most loyal servant to Lady Shar. Shadowheart will then say that Lady Shar will just use her. Viconia will then ask you to surrender and if you do, the forces of Shar will be your allies. Decline it and a battle will commence. This will also update the "Daughter of Darkness" quest. There will be a lot of enemies, but once you defeat all the enemies and defeat Viconia, the quest "Investigate the House of Grief" will be completed. Speak with Viconia who is lying down and she will ask you to finish her so that she can join Lady Shar. Shadowheart will say that she still needs answers. You can tell her to make it quick or decline her. Decline her request and she will tell you to deal with Viconia while she looks for her parents. Viconia will then interrupt and say that she won't like what she finds. You can then decide to kill Viconia.
Chamber of Loss
After killing Viconia, head to the Threshold of Loss stone gate and the "Daughter of Darkness" quest will update. Once you enter the Chamber of Loss, you can immediately see Shadowheart's parents, Arnell Hallowleaf and Emmeline Hallowleaf. A cutscene will play out between Shadowheart and her parents. Arnell will be sceptical if this is another vile trick. But Emmeline will state that it is indeed Shadowheart but will call her Jenevelle. Shadowheart will then say that it is all over, and that she is here to get them out. Something will then happen which will have them see and talk to Lady Shar. Shar will state that it does not matter whether shadowheart slays every enemy in the base, the more she steps away from Shar, the more her hold on Shadowheart deepens. You can respond with:
- You're a monster, not a goddess.
- Ignore her, Shadowheart. She's just trying to spite your victory.
- We should leave.
Select the first option and Shar will say that she is neither. Shadowheart will say that she will get her parents out, but to her surprise, her father Arnell says that they cannot be freed from the curse at the same time and that Shadowheart must return to the fold. Shar will then leave and will leave Shadowheart to make her choice. Arnell will then ask you to help Shadowheart understand what must be done and will beg you. You can choose one of the following to say:
- You have to choose, Shadowheart. Free your parents, or rid yourself of Shar's curse.
- She wants you to kill your parents. Her idea of a parting gift.
- Talk to your mother and father. See what they wish.
Select the first option and Shadowheart will say that she cant decide because she came here for them. Arnell will say that Shadowheart did come to them. Both her parents will say that she is a brave girl. They will both say that she has saved them, and now its time to free herself of Shar's reach and they will be at peace. Shadowheart will hesitate because she has just found them. She cant lose them again. But Arnell will say that they will still be with her and will never be far. Shadowheart will then look at you for help and you can respond with:
- You should end their suffering, and yours.
- Do not lose your parents, not again. The pain can be handled.
- This is your choice, Shadowheart. You don't need me to tell you what is right.
- Remain silent.
Select the first option and SHadowheart will ask her parents if this is truly what they want. Shadowheart will then say her goodbyes and her parents will turn into Moon Motes and will say that her parents are watching over her. She will then ask you to leave this place with her. This will then complete the quest "Daughter of Darkness". Afterward, head over to the Dormintories and you'll find Nocturne. She will remind Shadowheart that they were close during training but Shadowheart does not remember. Nocturne will say that they can talk more later if Shadowheart does not plan to turn on her. She will also say that it looks like SHadowheart does not walk in the Dark Lady's Shadow anymore. Shadowheart will say that they are enemies now but Nocturne will say that only if she wishes them to be. She vows not to turn on Shadowheart even if it angers Lady Shar. Shadowheart will then say that that is good enough for her.
Lower City
Afterward, head to the Groundskeeper's Basement at X:792 Y:980 and loot the corpse of an Incontinentia Figgin who looks like died off a ritual and loot the "Clown's Severed Leg". This will update the quest "Find Dribbles the Clown". Now, head towards Rainforest's Basement at X:1416 Y:1059 and loot a "Clown's Severed Foot" from Winslow Reginol corpse. Afterward, head back to the Lower City and make your way to X:31 Y:-96 at Peartree's home. Here, you'll find a murdered body, and the quest "Investigate the Murders" will update. Use your speak with the dead necromancy spell and talk with Frank Peartree. Talk to the corpse by selecting one of the following:
- Who are you?
- What happened to you?
- How were you killed?
- What did your killer look like?
- Where are you from?
- What were you doing when you died?
Select the third option and Frank will mention that his limbs were locked up and his hand was cut off. Afterward, select the fourth option and he will describe the killer as a dwarf with a red shirt. Afterward, your quest will update again. Once done, head to the basement of the house and you'll see a dead Courageous Little Kimmabeth. Loot the body and you'll find a Clown's Severed Arm which will update the quest "Find Dribbles the Clown". Once done, head over to Philgrave's Mansion at X:21 Y:-155 and head to the basement. Once you enter the basement, this will update the quest "Defeat Mystic Carrion". Once done, leave the mansion and head over to X:59 Y:-121 and attack Thrumbo. This will update the quest "Find Mystic Carrion's Servant". Pick up the Jar of Mystic Carrion's heart once you defeat Thrumbo. Afterward, head to Philgraves Mansion again and speak with Mystic Carrion. He will immediately sense that you have Thrumbo's carcass. You can respond with:
- I think it's time to renegotiate. I found the jar hidden in Thrumbo's corpse.
- I don't have his body, but will this jar suffice?
- I've decided to keep it. The smell isn't so bad once you get used to it.
- Attack.
Select the first option and Mystic Carrion will clarify what you said. You can reply with:
- You know what, the Torch of Revocation is plenty.
- [INTIMIDATION] Not the hand, but the heart. So sweeten the deal, or I'll destroy the jar.
- [PERSUASION] Come now - what's a handful of gold when your life is at stake?
Select the third option and Carrion will say that he is willing to refund Oskar's original fee. He'll mention that you'll need the Torch of Revocation to help him. You'll need to use it to destroy the painting of his self-destructive lover so that the spirit will be forced to vacate the body. After speaking with Carrion, head over to Jannath's Estate now and use the torch to destroy the Painting of a Smiling Maiden. This will update the quest "Free the Artist" and an echo of a lost love will appear looking for Oskar. Follow the echo to the bedroom and you'll see a conversation between Oskar and the Echo, who he calls Kerri. Kerri will then proceed to blame Oskar for everything and will tell you not to interfere and that Oskar is coming home with her. You can reply with:
- Calm yourself, shade. We can resolve this peacefully.
- To the realms of the dead? You'll kill him!
- I rather like interfering. It's kind of my thing.
- Attack.
Select the first option and Kerri will just say that you're another one who wants to control her. Kerri will proceed to say that Oskar called her here and trapped her. Oskar will then proceed to say that he only wanted to explain himself. But Lerri will cut him off and you can reply with:
- Please. Tell us what happened to you.
- You don't seem all that peaceful to me.
- He won't disturb you again. I'll make sure of it.
- Mystic Carrion was the one behind this. It wasn't Oskar's fault.
Select the first option but Kerri will not answer but instead will ask if you want to help her or is it just for Oskar's sake. You can respond with:
- [INTIMIDATION] I don't care if you're a spirit. Touch him, and I'll break you.
- [PERSUASION] The Kerri Oskar spoke of was kind and gentle. This isn't the real you.
- Leave Oskar to his fate.
- Attack.
Select the second option, but to no prevail, Kerri will proceed to attack. This will cause a battle to commence. Afterward, Oskar will feel guilty for the mess that he has caused. Lady Jannath will be upset by the mess that Oskar caused. Oskar will explain that he did it for them and will ask you to vouch for him. You can respond with:
- He genuinely respects you, Lady Jannath. Even if he is an idiot.
- You ran away to avoid it. Your marriage is a sham.
- Erm, yes. He always said how much he valued your relationship.....
- This is between the two of you.
- If you want my relationship advice, that's going to cost extra.
Select the first option and Lady Jannath will give Oskar another chance. This will update the "Free the Artist" quest. Afterward, Oskar will reward you with a portrait of you. This will now complete the "Free the Artist" quest.
Afterward, head to Cazador's Palace at X:-70 Y:-38. Once you climb the watch tower, Merony will immediately speak with you and inform you that this is the palace of Cazador Szaren and entry is forbidden. The quest "Investigate Cazador's Palace" will update in your journal. You can respond with:
- [INTIMIDATION] Another word from you and you'll fly out of this tower.
- [DECEPTION] I am inspecting the security, on your master's orders.
- I'm here to kill Cazador Szarr.
- All right, I'll go.
Select the second option and Merony will fall for your deception and let you pass. You'll then receive the Key to Ramparts door.
Szarr Palace
Once you enter Szarr Palace, head straight and you'll see a huge Sinister Door that you can inspect. You'll see that the door is covered by intricate texts but no keyhole. You only see a small round hollow engraved with a family crest. You can respond by choosing:
- [HISTORY] Try to decipher the text on the door.
- [INVESTIGATION] Examine the hollow in the door.
- Leave.
Choose the first option and you'll realize that the writing means nothing to you and you cannot even recognize the script. Astarion will then enlighten you that there are writings like these all over the palace and it is probably dead language used by Cazador. They were strictly forbidden from learning it. Now, select to examine the hollow in the door and you'' realize that its the right size and shape of a signet ring bearing the family crest. Now, head to the door to the Kennel and Astarion will call out someone named Godey. You'll learn that Godey used to torture Astarion and other pupils and will mockingly speak with Astarion. He'll refer to you as a treat and ask if you are a new friend of Godey. You can respond with:
- [DECEPTION] Cazador hired me to capture Astarion. I'm here to deliver.
- [INTIMIDATION] Lay a hand on me and lose it, bones.
- Attack.
Choose the first option and Godey will inform you that the doors to the masters room are sealed. Astarion will then ask if Godey has a key. Godey will say perhaps but will mention that the master told him that the doors remain closed until he was finished. You can respond with:
- [PERSUASION] Your master needs Astarion for the ritual. He'll be furious if you stop us joining him.
- [DECEPTION] Cazador gave me orders too-Astarion needs to be returned no matter what.
- [INTIMIDATION] How about I start breaking bones and keep going until I find that key?
- Attack.
Select the first option and Godey will hand you the Szar Family Ring.
To The Temple of Bhaal
Following the events of your investigation, you and your party will now be heading to the Undercity Ruins. You can reach this place by traveling via Portal if you have unlocked the Waypoint previously. You will find yourself in a dark cave with only small fires emitting light in the room. As soon as you exit the portal, walk towards the door to your left and down the stairs. The inquirer of Grief will as if Shadowheart knows why she's here. Shadowheart will say that there is something that was taken from her which is her family and life. She wants it all back.
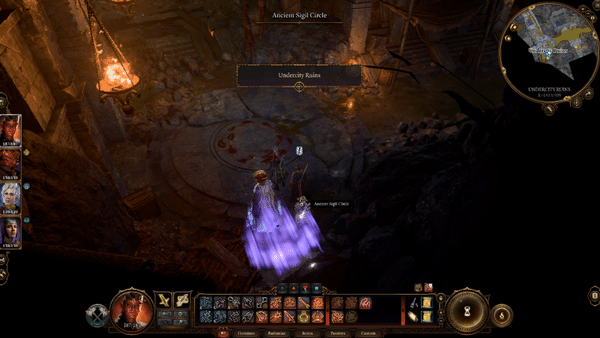

You will soon discover a corpse on the ground with a note that reads the following: "To gain admittance to the Bhaal Temple, you must cross Manslaughter Chasm. But if you are weak, like this aspirant, the Farslyaer will deny you passage. Defeat him or die." This note tells you of the future that awaits you and your party if you want to gain entry to the Temple of Bhaal, which is your next destination. Continue walking down the steps but tread carefully from here because of the traps placed by the enemies and their planned ambush.
At (X:-118 Y:956) a battle will commence against Bhaal's followers and the trial begins. This will be triggered after one of the followers spots you and your party. In this same section, a trap will also be detected if one of your party members succeeds in the Perception check. From where your party is standing, the enemies have an advantage because they have the high ground. You can try and make your way across the other side through the bridge, or the archway to the left of the cave. After an enemy attacks you, they also cast the Shroud Self that makes them invisible. In this area, your party will be up against a strong Foe called Ghost who has the ability to use Ritual Chant: Bhaal's Power Word Kill, the chant begins as soon as you enter their zone. You can win against the Ghost by slaying it or exiting the Farslyer's chanting range of 55m.
As you move forward, the enemies will also walk closer to the cliff to corner your party. This fight can become incredibly difficult if you are unprepared but focus on the goal of reaching the cliff opposite your party to eliminate the weak enemies attacking you. From there, if you have a range attack, you can try to chip away at the Unstoppable stack of the Ghost standing at the other end. It will move as soon as you turn your attention to them and will try to escape the battle. Find a way to reach the Ghost by following its tracks while the rest of your party eliminates the other enemies.


As you try and catch up to the Ghost, more enemies will join the battle. They will come from the left side of the Temple near the bridge. Make sure that your party is ready for this long fight and take the necessary consumables. You can take down the enemies who have just joined the battle or take another shot at Ghost if you have any ranged spells on cooldown. Eliminate the rest of the enemies and you will gain passage to the Temple of Bhaal.
To continue, Use Misty Step to the space on top of the door and pick up the Undercity Ruins Chasm Door Key from the enemy that was stationed there, then open the door underneath you. You can have one of your companions explore this side of the ruins and navigate your way leading to the lower area and down in the room with a lit campfire, but make sure to return to the area where you defeated the Ghost.

Walk through the tall archway and take note of the Metal Door to the right, before you open it, walk to the end of the room first across the archway to examine the Wooden chest, and retrieve the items. Now, walk back to the Metal Door and open it. A whispering voice can be heard and you can light the brazier directly in front of you. Walk down the steps until you reach the lit campfire and pick up the Grilled Pork Belly from it. Turn back and walk down further into the depths. Light up the braziers that you come across.


As you navigate this area, you will find the aftermath of a bloodbath. The corpses are left next to each other and you can retrieve a note from one of the bodies of "Wilting Alex":
"The Effigy of Amelyssan, who grasped divinity,
"What use her betrayal? She thought herself perfect, but forgot the once she served.
[Below is an exaggerated signature, written in blood]
Orin the Red."
From the same body, you can also retrieve the Clown's Severed Head, which is one of the parts that you are looking for in the quest: Find Dribbles the Clown. Enter the ruins ahead and climb up the ladder. Then retrieve the items from the Wooden chest inside the tower-like structure. You will find a few more skeletons and chests within this area.

When you're done, make your way towards the bridge that will lead you to the Temple of Bhaal. This will require you to walk the opposite side and through sets of ladders. Make sure to light up the brazier on the last landing and you can also look inside the nearby building. Walk further down until you reach a round platform and walk up the stairs connected to the bridge. Activate the Waypoint to your left and walk to the opposite side and down the bridge through the lit braziers, then use the stairs to go up at the end of the path. Interact with the solid doors and the narrator will describe it as the stone that seals the chamber against the world.


There's no keyhole and no handles to pry open the door. However, you will get the option to attempt the Religion skill check, which requires you to pass a DC of 20 or walk away. Have one of your characters with a good level in Religion attempt this and once successful, the quest Get Orin's Netherstone will be updated. After this interaction, the Impress the Murder Tribunal will be completed and Shadowheart will be inspired by this event (Acolyte: Forgotten, Bloodied, Halls).
This interaction turns you away from gaining access to the Temple of Bhaal, from here, you can travel to Lower City and complete the Find Dribbles the Clown by teleporting to Rivington.
Return to Rivington

From the Waypoint, make your way to the Circus of Last Days found on the left side of the Map. Walk towards the table next to where Popper is standing. Then pick up the Clown's Severed Hand. Popper will try to get the "super special hand" back from you and you will get the following options to respond:
- What makes this hand so special?
- I just wanted to have a look. Here- take it.
- It's mine now. You got a problem with that?
From here, we recommend taking things the friendly way and asking him about what makes the hand so special. In response, he will tell you how he found it inside a tent filled with rats. He tells you that it's worth LOTS (10,000). Then, you will get the next options to choose from (NOTE: Some of the dialog choices will vary depending on your character's class, background, and other specifics):
- Fine. Here's y our money.
- [DECEPTION] Y ou know, I can get a hand for much cheaper elsewhere.
- [INTIMIDATION] Give it to me now, or I'll cut off your hands.
- [WARLOCK] [DECEPTION] I'm actually a sorcerer working for Lucretious. I need that hand for a magic spell.
- [PERSUASION] I think that belongs to Dribbles. I need it- your ringmaster needs it.


Attempting the skill check will require you to pass a DC of 15. This event is also an Inspiration called Macabre Enigma, where you piece the corpse of Dribbles back together. Then, your next destination is the ringleader named Lucretious found near the large tent next to the stairs. Report to her your findings and deliver the pieces of Dribbles. Lucretious plans on rebuilding Dribbles again and tells you that they will be leaving Wyrm's Crossing soon. She hands you over a gift for assisting her.
You will receive the Spellmight Gloves and the quest Find Dribbles the Clown will now be marked as completed. Just like that Lucretious said, the circus will be leaving soon, and if you need anything from her staff, now is the time to do so.
Path to The Temple of Bhaal, continuation
After being turned away from the Temple of Bhaal in the Undercity Ruins, your next step is to seek another way into the temple. Travel to Candulhallow's Tombstones in Lower City (X:70 Y:-25). Inside the house, look for the painting behind the red drapes. Have one of your party interact with the "Butterfly on Skull" painting and press the button. This will reveal a cellar door hidden behind the bookshelf.


The locked door has red text written on it: "All are awaited, all are embraced, none shall escape." Then you will get the following options to interact:
- Speak the passphrase: Sicarius.
- [HISTORY] That text is vaguely familiar- try to recall its historical source.
- [INVESTIGATION] Examine the red symbol blazoned on the door.
- Leave.
Choose the first one to gain passage into the Bhaalist Crypt. Upon entering, the quest: Investigate the Murders will be updated. Walk down the main path and ahead of you, you will see a flooded area. You can go down here and locate the chest at the end. However, you need to be careful because of the traps placed that explode on contact. Exit through the other end where you will find a door with two lit torches on both sides.


The door will give you entrance to the Tribunal Antechamber where you will be greeted by a "That Which Guards" who demands a gift from your party and threatens to attack if you decline. You will get the following options to respond:
- I killed to be here- and took the victim's hand as proof.
- I offer myself.
- I've got several powerful magic artefacts you can take.
- How about some gold? I've got plenty.
- I care not for what you seek. Stand aside.


If you choose the first one, you will be given entry to seek an audience with Sarevok Anchev. However, things can get sour here and turn into a fight that can easily overpower your party because of their strength and number. Instead, you can pick a fight with the Guards outside the chamber and eliminate them before you enter the Murder Tribunal. To initiate the fight, choose the 3rd option to prompt the guards to attack you.
There are 3 guards who will go against your party, the fight should be doable on the first try since you can have the advantage by making sure your other members have the high ground. If you have a good melee like Karlach she can lead the attack and deal damage to the Guards while the rest will take cover and support her. Make sure to take a look at the items they carry in their backpack after defeating them. These guards have rare Blackguard's Gauntlets on them and other pieces of armor such as a Very Rare Blackguard's Plate and a Shield of the Undevout. Then, take the Key to the Murder Tribunal from one of the bodies.
It is recommended to save here before you proceed and take a Short Rest before proceeding.
Defeat The Murder Tribunal BG3

Approach the throne inside the room and you will be greeted by Sarevok Anchev together with the Echo of Amelyssan, Sendai, and Illasera. They call themselves the Prodigal Servants and Bhaalists. The man who sits behind them is a powerful Bhaalist who almost brought Baldur's Gate to ruin a century ago. He introduces himself as the custodian of the court of the Dread Lord's tribunal. Where he presides over those who seek to transcend as the Unholy Assassins of Bhaal. Then, you will get the following options to respond:
- Sarevok Anchev. How are you still alive?
- Are you the reason there are so many murders in the city?
- Orin sent me here to be baptized by Bhaal. What must I do?
- What exactly is an Unholy Assassin?
- I have no business with Bhaal, I'll leave.
- Attack.
Choosing the 3rd one will reveal his connection to Orin. It turns out, that Sarevok Anchev is the grandfather of Orin and Orin is the Murder Lord's new favorite and Chosen. Then, you will have the following options to respond:
- What does Orin have to do with the murders in the city?
- Orin is your granddaughter?
- How does it feel to be surpassed by your own grandchild?
- I'm looking for Orin. Is she here?
- I don't care about Orin- I came here to be baptized by Bhaal.
If you choose the 3rd option, Sarevok will reveal Orin's past. He tells the story of how Orin's gift surpassed her own mother's, and that her very own mother couldn't bear it and tried to offer Orin to Bhaal. Sarevok described how he heard the screams and that he ran to help while fearing for Orin's life. It turns out that Orin was safe and that her mother's blood soaked the sheets. Orin cut off the hand of her mother and made a plaything of it. As soon as Sarevok witnessed what took place, the Lord of Murder spoke through the child and commanded Sarevok to protect her, in his name. Shortly after, you will get the following options to respond:
- That's horrible. No child should have to go through that.
- Did you know that your daughter was planning to kill Orin?
- Your granddaughter killed your daughter? Your family sounds deeply disturbed.
- I can see why Bhaal c hose Orin.
- You should have killed Orin for what she did.
- I didn't come here to become embroiled in your family drama- I came here to be baptized by Bhaal.
Choosing the 5th option delivers the message that you do not care about Orin's welfare and this will remind Sarevok of the matter at hand. He will command you to approach and be judged. You will get the following options:
- I am ready to be judged.
- I will make Bhaal proud.
- What does this judgment involve exactly?
- I have no interest in being judged by Bhaal.
- I'll approach and take your head, monster.


Choosing the 4th option will reveal your true intentions and will prompt Sarevok to fight you. The Echoes will be joining in and the battle will commence and Sarevok will be the first one to attack. He jumps down from the throne while the Echoes will support him. They will try and move up the throne so they can have an advantage over the rest of your party. You can inch closer to the Echoes and eliminate them as fast as you can then you can focus later on defeating Sarevok. Upon defeat, the quests 'Get Orin's Netherstone' and 'Investigate the Murders' will be updated. To progress, you will speak to the hollyphant captive before heading to the Temple of Bhaal. Remember to search the belongings of Sarevok and his fellow servants and you will find many valuable items such as the Amulet of Bhaal, Map to Bhaal Temple,Abattoir Key, Sarevok's Horned Helmet, and the Sword of Chaos.

After the fight, look for the secret passage on the right side of the throne if you're facing it. You can find the keyhole on the wall, directly below the torch. This will reveal a hidden room where Valeria is held captive. Interact with the chains on the ground and attempting this Dexterity check will require you to pass a DC of 15. Valeria will thank you for acting quick and setting them free. You can ask Valeria how they ended up down here and they will tell you that it started after your chat at Sharess' Caress and finished off the bottle on their own. They blacked out and when they came back to their senses, they were already in chains.

Valeria will tell you that the city needs you and will share what they heard from the Bhaalists. Valeria heard that there's a temple deep within the old Undercity that the cult is using. After that, Valeria leaves the area and you are free to look around and grab loots from the chests inside Murder Tribunal. The end of the conversation with Valeria will also update the quest 'Rescue Orin's Victim'. You will need to hurry to the temple and rescue them before she learns that the Murder Tribunal has been dismantled and her grandfather killed.
Fight Orin the Red in Temple of Bhaal BG3
After rescuing Valeria in the Murder Tribunal, your goal is now to gain entry to the Temple of Bhaal. To progress, use the Waypoint and return to the Solid Doors that seal the chamber from the rest of the world. Make sure to equip The Bhaal Amulet that you took from Sarevok Anchev so the prompt will show up to press it against the door. This event will inspire Karlach called "Outlander: The Face of Evil" and will update the quest 'Get Orin's Netherstone'.


As soon as you open the door, you will find a human named Death's Head of Bhaal Glyria and the bloody chamber lies ahead. Traces of blood and red are found everywhere and Bhaalists roam free, but they are not hostile yet. At the center, you will find a round platform where Gale is lying on top of the Altar of Bhaal. Walk towards the altar and this will prompt a cutscene with Orin the Red.


Orin is aware of your presence and recognizes what you have done. In this case, our protagonist killed Gortash, and she can smell his blood on you. Not only that, but Orin is also aware that you spilled the blood of Sarevok, and this angers her, as she claims that his blood was not yours to spill. Then, Orin turns her attention to Gale who is lying on the altar. She pulls out her blade and places it against Gale's throat and claims that only the blades can offer salvation. You will get the following options to respond to the situation at hand:
- [INTIMIDATION] Anything you do to him, I will inflict on you a hundredfold.
- [PERSUASION] You said Bhaal wanted us to fight. He will reject this offering.
- [PERSUASION] I did what you asked. I killed Gortash, so let him go.
- His fate is of no interest to me.
If you attempt the Charisma check, you will have to pass a DC of 25. If you choose the 3rd option, Orin will recognize your work and will tell you that it is your blood that she is destined to spill. She will then call on Bhaal to set her flesh to his "unholy purpose". After a short moment, Orin will transform into her Slayer Form of a bedeviled creature with strong and sharp tusks. She grows into a size that towers over the protagonist and the battle will commence immediately. This event will also update the quest 'Get Orin's Netherstone'.


As you face Orin the Red, the Bhaalists will gain the condition Bloody Favour. Enemies will be surrounding your party here and it is ideal to take out the nearby weak enemies to lessen the threat against your party. Take note that these Bhaalists may have the Sanctuary condition which allows these entities from being targeted by enemy attacks or spells. However, you may use spells that affect a larger area or AoE spells to inflict damage on them.
Orin the Red gained the Unstoppable condition and will take several attacks before it's fully depleted. There is also a nearby Boon of Bhaal that uses Boon of the Unstoppable on Orin as soon as the charges drop to a certain threshold. Gale remains unconscious throughout this fight leaving your party to take care of the matter at hand. Once you have defeated some of the weaker enemies, you can now focus your attention on Orin. Surround her with your melee allies while the rest will take cover and provide support. This will allow your party to take effective spots critical to the success of this battle.


After the fight, a short cutscene will play as Orin struggles to stay alive. Orin's slayer form will disintegrate leaving behind her weapon and the Netherstone. The Main Character kneels down to pick it up and the Emperor will make an appearance. As you hold on to the Netherstone, it reveals the location where the Elder Brain is imprisoned. Then, you will have the following options to respond:
- Why would they put it there?
- Do you think we're ready to face the elder brain?
- We should go back to the Undercity docks.
- I'm not ready.
If you choose the second one, the Emperor tells you that you have all that you need and you stand as good a chance as you ever will, especially with the chosen ones dead. From here, you can take your time to prepare before the fight, and the Emperor will warn you that there's no turning back as soon as you enter the Elder Brain's domain. Make sure to take a look at your inventory where you will find Bloodthirst and the Netherstone. Now that you have eliminated the threat, you can now interact with Gale. It is recommended to take a long rest before proceeding here so that you can have a conversation with Gale and other Companions.


After taking a long rest in camp, look for Gale who is eager to address the fight against the Elder Brain. He claims that if the crown was forged by Karsus himself, then the Book of Carsus will confirm it. You will get the option here to hand over the book to Gale. If you choose to give it to him, he will give you his approval. Gale turns the pages of the book and discovers that Raphael is telling the truth. It is the Crown of Karsus that is controlling the Elder Brain. The book also contains the original plans of Karsus for the Crown's construction and his design for godhood. You will now have the following options to respond:
- The design for self-destruction, more like. Didn't this crown kill Karsus?
- Godhood? I know crowns are an ego boost but that's ridiculous.
- A design you could follow?
- Stay silent.

If you choose the first one, Gale will explain that it was his actions that sealed his fate and that The Crown was merely the means. Gale claims that it is possible to reforge The Crown if you are able to collect the crown's setting and the three Netherstones by following the correct invocation of spells and gestures detailed in the book. You will get the following options to respond:
- To what end?
- We already know the crown is dangerous. Wouldn't that make things worse?
- You 'think'? What happens if you fail?
- That crown has caused chaos. We should be seeking a way to destroy it, not make it more powerful.
If you choose the second option, it becomes evident that Gale is consumed by his greed for power and he seeks the power of gods in the hands of the mortal. Gale tells you that the gods will never grant mortals such a blessing, no matter how much you worship and adore them.
- You dismiss the entire pantheon so easily. Not all gods are selfish.
- And you think Mystra will let you do this?
- Mortals are far better guardians of their fates than the gods. We have more to lose.

If you choose the second one, Gale claims that Ao does not look kindly on gods meddling in mortal affairs. He claims that Mystra may be forced to stand by and let events unfold. Gale continues to explain that Mystra wanted the brain obliterated because of the crown. He thinks that Mystra fears a world in which such power is beyond her control, ready to be claimed by Karsus' successor.
- I thought you were past this kind of temptation, Gale. You know exactly where such over-reaching leads.
- Or to destroy the next wizard who attempts it. The attempt would kill you as killed Karsus.
- And you believe yourself to be that successor?
- This is no ordinary artefact, Gale. Do this and you'd challenge the gods themselves.
- So you want the Crown to settle a score with Mystra?
If you choose the first one, Gale tells you that it is worth trying to find out what it truly is. He will ask you to think on it before you say no. He goes on to tell you that Karsus may have been powerful, but he, Gale, has advantages over him. Gale carries a frag meant of the Weave within his body and he knows Mystra intimately. You get the following options to respond:
- Gale- I'm urging you to drop this. This crown cannot be reforged.
- Seems like you've got this all figured out. I won't stand in your way.
- You're a convincing man, Gale. The crown sounds promising.
If you choose the first option, Gale will give you his disapproval. This sets you on the path to defeating the Elder Brain the canon way.
Notes & Tips
- ??
 Anonymous
Is there any consequence for visiting the lower city immediately upon arrival or are there quests that will be uncompletable upon stepping in ? Cause the prompt warning makes it seem like a point of no return

 Anonymous
Is it just me, or is there a big piece of this guide missing?

 Anonymous
Spoilers for Stormshore Tabernacle:
I tested this with a Selune Cleric, but you can use this on ANYBODY and on ANY DEITY'S STATUE (The flavor text is just slightly different). You have to donate about 4.5k (Unsure about precise amount, lowest i tested was 4530) gold to get the ability to pray at the temple once a day. However, NOTE that this 4.5k is PER CHARACTER. It gives a buff called "Anointed in Splendour" and has a +2 bonus to ALL saving throws for a day. You can pray at the statue daily.
 Anonymous
How to get there. Is there a legit way other than jumping off a bridge


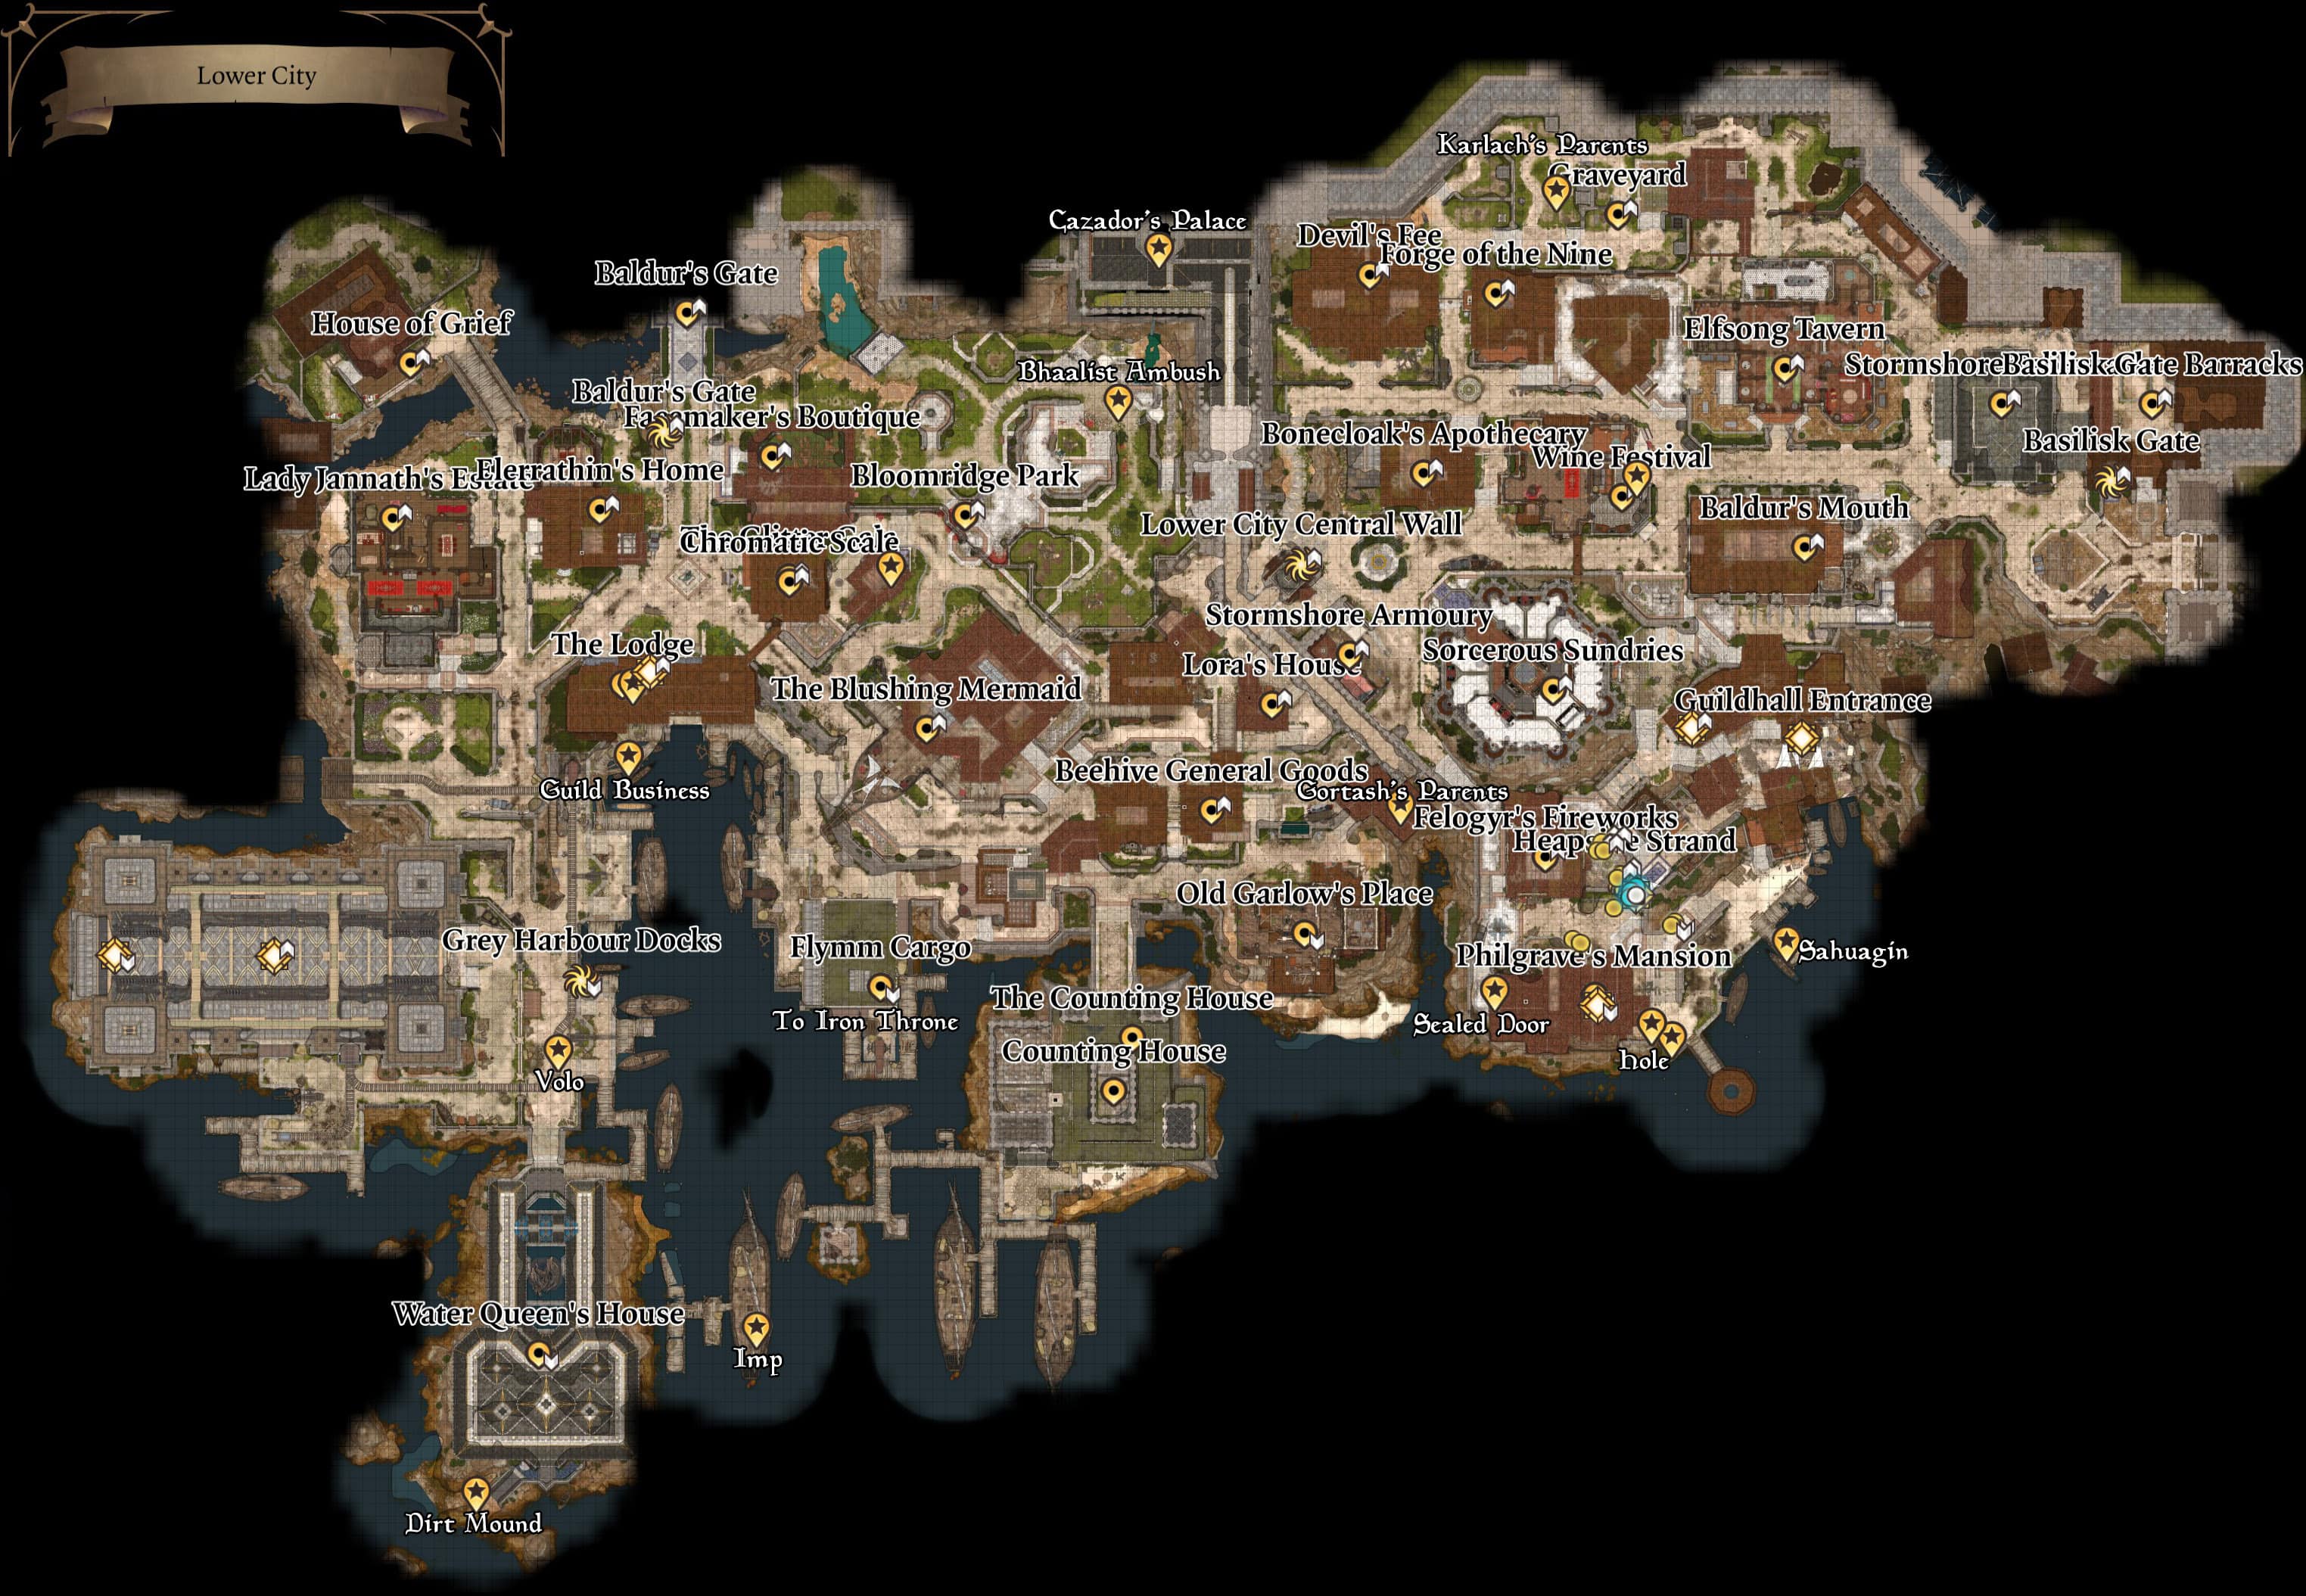
Feels like this guide is ****
0
+10
-1