Sharran Sanctuary |
|
|---|---|
| ACT | Act 2 |
| Location | Reithwin Town |
| Suggest Level | 6-8 |
Sharran Sanctuary is a location in Baldur's Gate 3. Sharran Sanctuary is home to an ancient Sharran trial which grant the user bonuses. On this page, you can find related information about the map, quests, enemies, notable items and other useful tips about Sharran Sanctuary.

BG3 Sharran Sanctuary Notable NPCs and Merchants:
- Intelligent Sentinel
- Wise Sentinel
- Charismatic Sentinel
Items in Baldur's Gate 3 Sharran Sanctuary:
Baldur's Gate 3 Sharran Sanctuary Quests:
Baldur's Gate 3 Sharran Sanctuary Walkthrough

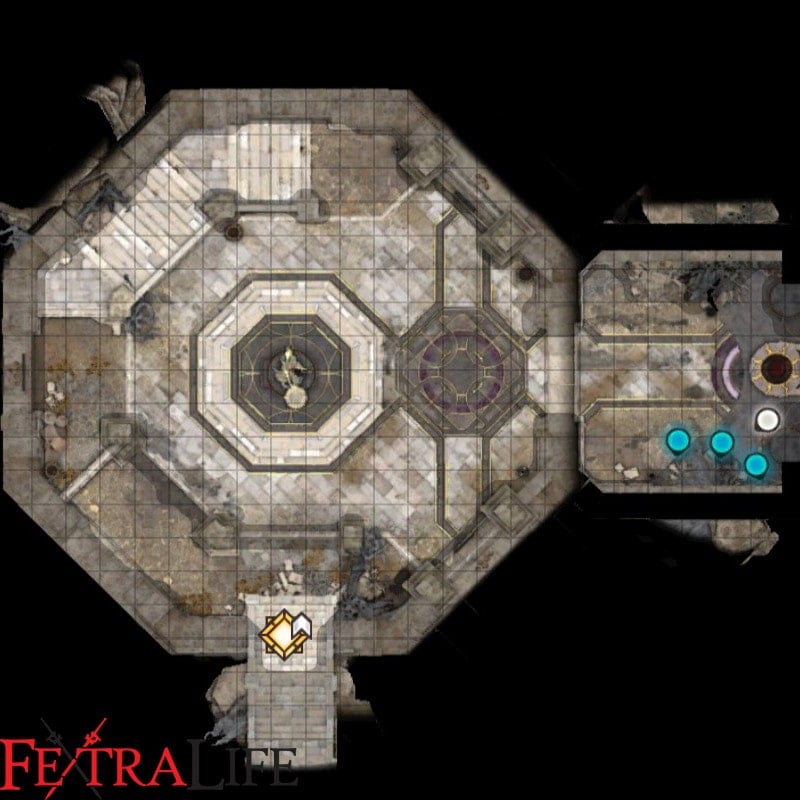
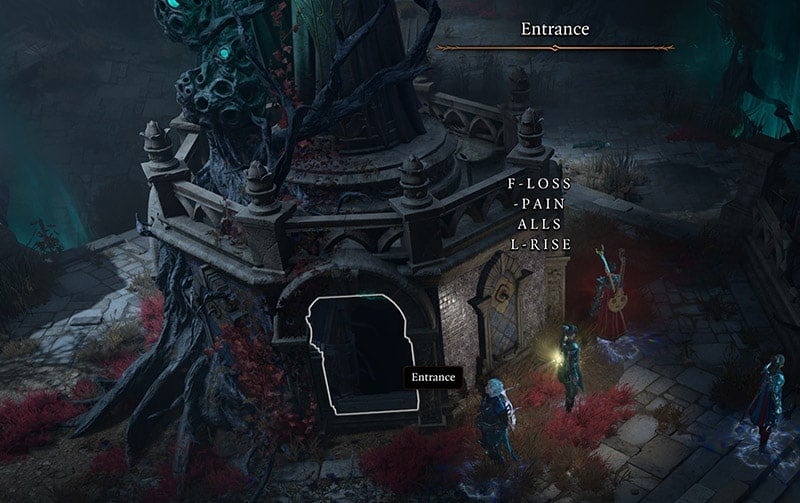
The Sharran Sanctuary can be found in the central area of the Reithwin Masons’ Guild, in the middle of the House of Healing, Tollhouse, Masons Guild, and The Waning Moon. You’ll want to look for a structure that looks like a small crypt. Once you go near it, you’ll start a combat engagement with three Shadows, and some corrupted harpers guarding it. Defeat them and then loot them as needed. As you approach the structure you’ll notice something clicking underneath the plaque nearby. Successful Perception checks here will reveal the same thing about the rest of the plaques around the structure. For this puzzle, you’ll have to click the three plaques in the right order, in order to fully form the broken words that they show. First, you’ll want to click on the plaque to the north, then to the west, and finally the one in the east. The full line should read: “OUR LADY OF LOSS MISTRESS OF PAIN WHEN NIGHT FALLS THORM SHALL RISE.” Successfully solving the puzzle will open a pathway into the structure, leading into the Sharran Sanctuary.

After heading down the stairs, examine the first plaque below a statue of Shar holding twin blades. It’ll ask if you’re ready to take on a test of intellect. You’ll have to pass an Intelligence Saving Throw here, but if you do you’ll get a free +5 bonus to your Intelligence, active until you take a Long Rest. The next plaque will ask you to do a Wisdom Saving Throw to get a +5 bonus to your Wisdom, also active until you take a Long Rest. Finally, the plaque under the central statue will ask you to do a Charisma Saving Throw to get a free +5 bonus to your Charisma until you take a Long Rest. If you are a Warlock, you’ll gain Advantage on this roll. If you brought Shadowheart with you here, she’ll be inspired by you honing the darkness.
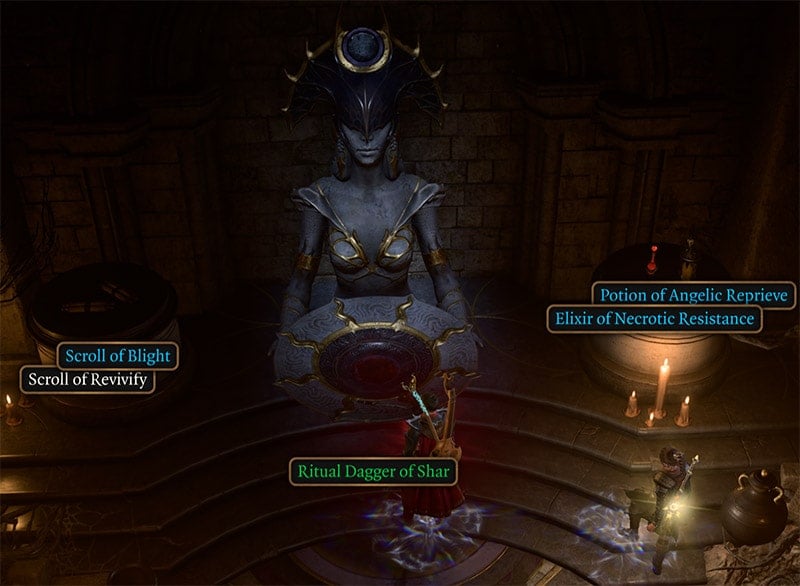
Being successful in all three Saving Throws will open an arch to a room on the east side of the chamber. Examining the Shar Altar at the end will have you do a Religion check. Passing it will give you the option to carry out a short Sharran ritual, that’ll allow reward you with some scrolls, potions, and elixirs. Trying to take the Ritual Dagger of Shar for yourself will initiate a combat engagement against three Sharran Sentinels. If your character is of the Guild Artisan Background, they will get inspired by this act.

The three sentinels can be quite formidable, but the Enemies don’t increase in number so the fight shouldn’t be too difficult. The Intelligent Sentinel will be the easiest to take out and can cast Spells from afar, so if you can focus on them first, do so. Eventually, they’ll fall and you’ll be free to pick up all your rewards for undergoing the Sharran ritual.

BG3 Sharran Sanctuary Notes & Tips:
- Attacking any of the statues will summon a hostile Intelligent Sentinel, Charismatic Sentinel, and Wise Sentinel. Doing this before opening the chamber door will prevent the statues from allowing you in.
 Anonymous
You can do both to maximize XP. Pass the tests, do the ritual (get loots and Shadowheart approval). Then have *Shadowheart* take the dagger (no approval loss if she does it!) - fight the mobs. Get loots and XP. Win - Win

 Anonymous
It's worth noting that this +5 Int / Wis / Cha bonus will push your score up past regular maximums (Ex: if you have an 18, it'll go up to a 23).
If you're a caster, it's worth leaving this until you complete Rescue the Tieflings first, because the reward from that is the Potent Robe which will increase the damage of your Cantrips by your Charisma Modifier, and grant you temporary HP at the start of a round equal to your Charisma Modifier, and this is a massive boost to it.
Additionally, since Thaniel will transport you to this location during the Lift the Shadow Curse quest, it's also worth taking a long rest before going to complete this, so that you can have the benefit of those buffs for as long as possible.
 Anonymous
No loot is kind of a lie. Let's resolve this; Attacking/Destroying the statues summons the Justicars. Don't do this, prematurely. No point either. Just counts as a fail. The Justicars ARE subject to the Fear Spell, and Disarming Maneuver to DROP their equipment; by extension, the Intelligent one holds a unique, but not very powerful staff you can pick up. It's worth nabbing if you like collecting loot, unique and otherwise. The other two drop a Mace, and Greatsword, non-unique models along with Incense, and a but of junk. It's more accurate to say, they don't drop GOOD loot. Just, interesting, and worthless loot.

 Anonymous
If you switch to Shadowheart, she can automatically past the three tests

 Anonymous
not really worth it to take the dagger , u get a disapproval from shadowheart, it will spawn 3 mobs with no loot and only 60 xp

 Anonymous
not much point to fight the 3 sentinels, only worth 60 exp each and no loots

 Anonymous
I failed the first check and had to fight the 3 sentinels. There doesnt seem to be a way to enter the secret door now...

 Anonymous
Can anyone check if it works the same as the weapons replace trick in Rosymorn monastery, which grants infinite +1-4 radiant damage?
i.e. if you can get here and get the buffs each time after long rest? I stole the dagger so the statues don't want to cooperate.

Please note. My smart ass tried something. Im a Duergar with unlimited Invisibility. So i left my party outside, grabbed the dagger in spite and snuck out.
Yeah so i got karma'd. The door locks when they spawn. I can't get out, party can't help
12
+10
-1