Owlbear Nest |
|
|---|---|
| [IMG] | |
| Suggested Level | 4 |
Owlbear Nest is a Location in Baldur's Gate 3 (BG3). On this page, you can find the information about the map, quests, enemies, notable items and other useful tips about Owlbear Nest.
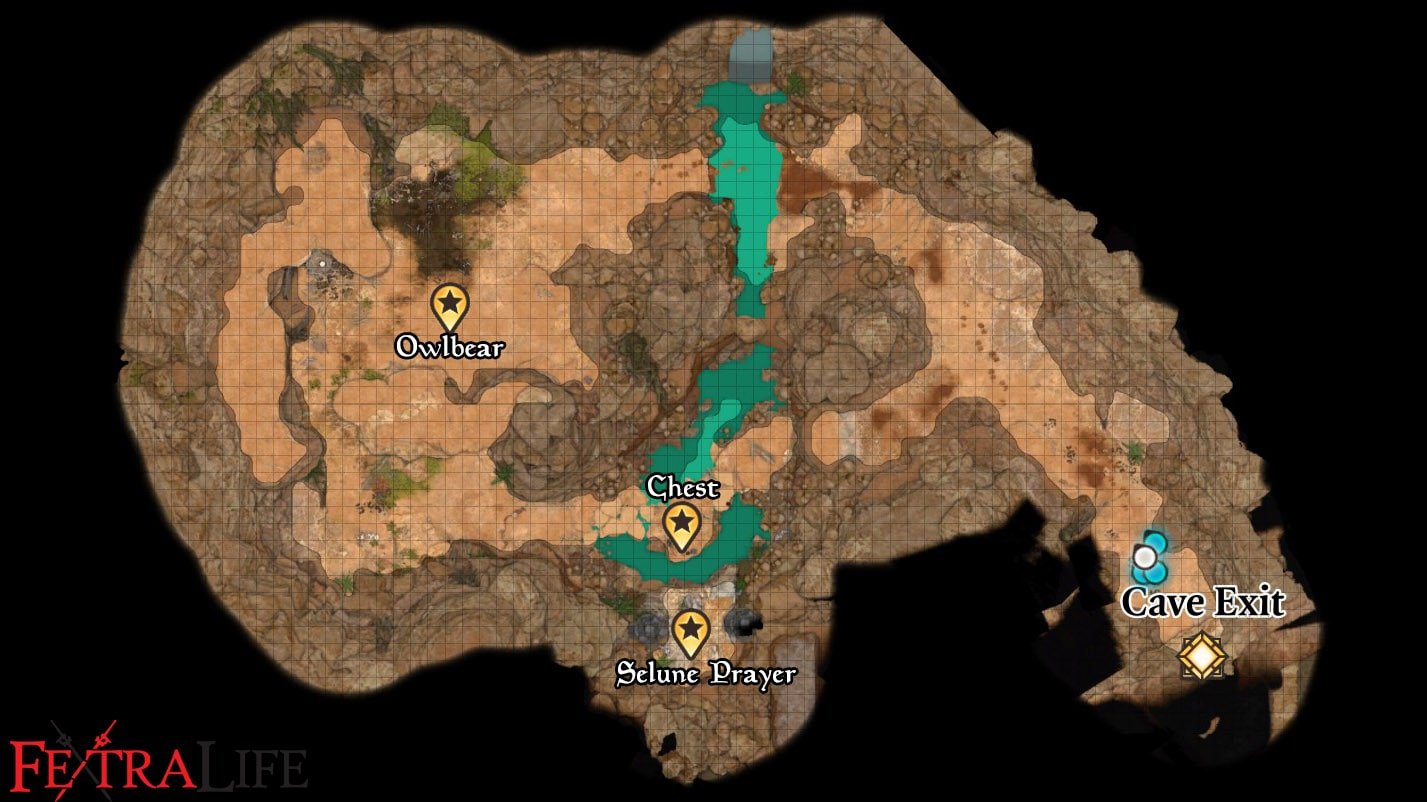
Baldur's Gate 3 Owlbear Nest Map
Entrance located in the forest east of the Blighted Village, close to the river at (X:86, Y:448).
Owlbear Nest Sub-Areas in Baldur's Gate 3
- There are no Sub-Locations in the Owlbear Nest.
Baldur's Gate 3 Owlbear Nest Notable NPCs
Items in BG3 Owlbear Nest
- Head of a Broken Spear
- Moondrop Pendant
- Owlbear Egg
- Potion of Animal Speaking
- Potion of Healing
- The Oakfather's Embrace
Baldur's Gate 3 Owlbear Nest Quests
- There are no Quests in the Owlbear Nest.
Baldur's Gate 3 Owlbear Nest Walkthrough
You can find the entrance to the Owlbear Nest in the Forest at (X:89, Y:443). On the map, it will be marked as a Cave Mouth. As you approach it, your party will automatically roll Survival Checks. If anyone succeeds, they will be able to identify the cave as an Owlbear Nest.
Once in the cave, head forward, then turn left to approach a ledge overlooking a large cavern with a shrine. Climb down the Cragged Rock surface of the ledge and when you reach the ground, your party will automatically roll Religion Checks. Succeed to learn that this is a shrine to the goddess Selune. Approach the shrine, and your character will roll an Arcana Check. If you succeed, you will learn that the Gilded Chest found here is protected by a magic aura. If any of your party members attempt to touch the chest, they will take damage. Besides the chest, you can also find a book named The War between Selûne and Shar, a Potion of Animal Speaking, a Potion of Healing, and a Scroll of Detect Thoughts.
Walk as close to the large statue as you can, then Jump over to the ledge to get next to it. If you're concerned about missing loot, you may want to do a quick save now. Head behind the statue, where your character will perform a Perception Check. You'll be able to find and pick up the Selûnite Prayer Sheet if you succeed. This item is necessary to open up the nearby chest safely.
Jump back over to the Gilded Chest and read the Selûnite Prayer Sheet from your inventory in front of it. Reading the prayer sheet will provide Inspiration to anyone with the Acolyte Background, even Shadowheart who does not like Selûne, and remove the magical aura surrounding the chest. You are now free to open the chest, however, if you have Shadowheart in your current party, she will protest against doing so. In your first set of dialogue choices, you can safely ask her why she doesn't want you to open the chest. Your next set of choices will then look like this:
- [INSIGHT] Why do you care so much?
- [INTIMIDATION] I'll do as I please. If you want to try stopping me, be my guest.
- [PERSUASION] We can't just abandon resources that we might need. Be sensible.
- If it matters that much to you, I'll leave it.
If you choose the third option, you will have to pass a DC 15 Persuasion Check to be able to open the Gilded Chest without Shadowheart's disapproval. Inside the chest, you'll find a note named Selunite Rite, a Silver Necklace, a Bloodstone, an Idol of Selûne, and the Moondrop Pendant.
When you're done looting the chest, head further into the cave. Your character will make a remark about a stench. If you head up straight, your party will automatically roll a Survival Check. If anyone succeeds, you'll find some hatched Owlbear Eggs. Head to the right and you will initiate a cutscene with an Owlbear. You may choose to take the Potion of Animal Speaking looted earlier before approaching the Owlbear for more options during the cutscene. If you don't take the potion, you'll have four options to choose from:
- [ANIMAL HANDLING] Study the owlbear's behaviour.
- [SURVIVAL] Back away.
- [PERFORMANCE] Puff out your chest and roar.
- Attack.
Choosing the first option and succeeding in the Animal Handling Check will allow you to leave the encounter peacefully. If you choose the third option, you will have to succeed a DC 15 Performance Check. Succeed, and the Owlbear will temporarily back down, being inflicted with Distressed. Do note that this effect is temporary and approaching the Owlbear again will trigger a fight. Lae'zel disapproves of this action, while Shadowheart approves of it. If you fail any check or simply choose the fourth option, you will have to fight the Owlbear and it's Owlbear Cub.

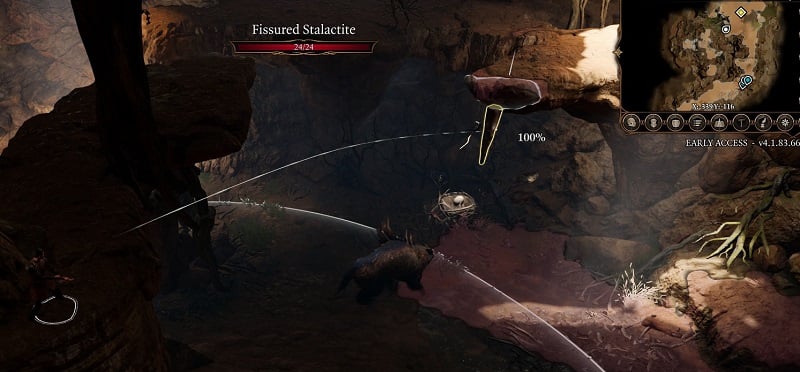
You can climb up the Cragged Rock to the right of the Owlbear to get a higher vantage point during the fight. The Owlbear will be able to climb up here too, but it's cub will not. There is also a Fissured Stalactite here that can be dropped onto enemies for decent damage. At about a quarter health, the Owlbear will get enraged, gaining Owlbear's Rage. You only have to defeat the big Owlbear to end the encounter.
If the Owlbear Cub is alive at the end of a fight, a cutscene will play. You will get two choices during the cutscene - letting the cub live or attacking it. If you let the Owlbear Cub live, you can bring it back to Camp later in the campaign, and you'll get approval from Shadowheart.
By the Cragged Rock to the right of where the Owlbear was standing, you'll find a Backpack with some Gold, a Potion of Healing, and a Supply Pack. On the Owlbear's body, you can find a Head of a Broken Spear. This item is one of two required to create Vision of the Absolute. To the left of where the Owlbear was, you'll find an Owlbear Egg and a Headless Skeleton with The Oak Father's Embrace on it.
Continue following the path to the right, walking over the Mud, and you will eventually circle back to the entrance of the Owlbear Nest.
BG3 Owlbear Nest Notes & Tips
- A Cleric of Selune will be able to open the gilded chest without harm.
- Other Notes & Trivia for the Owlbear Nest go here.
 Anonymous
I entered the cave, calmed the owlbear, then decided to take a long rest to prepare for the battle. When I got back to the cave, goblins had killed the adult owlbear and taken the baby. It was later in the Goblin Village

 Anonymous
Reading the Selunite Rite scroll lets you automatically recognize the relevant rite during certain scenes/dialogues without having to succeed a religion check.

 Anonymous
There’s a chest at the top of the path above the Owlbear. Idk how you didn’t cover that.

 Anonymous
There's a small back entrance to the nest near a beehive that will take you above the owlbear, but you're too big to fit if you don't use Reduce to shrink yourself. Dunno why you'd ever go in that way, but it's an option

 Anonymous
Unsurprisingly, if you choose to kill the cub (in the dialogue at least, not sure about during combat) you break your Oath of Ancients. Lets just say the Dark Urge compelled me...

 Anonymous
Big map. Location. Not a description of the location. Point on the big map.

 Anonymous
The owlbear will die regardless if not you the goblins when you rest, put the cub to sleep during combat, kill the mother for the exp and then rescue the cub from the goblins.

 Anonymous
1. In my case any combat option also triggered owblear cub to be hostile (no chance to have it later in your camp)
2. When you visit the gobilin camp you will notice, that they have the owlbear cub (you can pass some tests and then invite the cub to your camp)
3. If you come back to the cave after visiting goblin camp - no fight needed just loot everything - hope it helps
 Anonymous
The owlbear is too adorable and I can't bring myself to kill it

 Anonymous
 Anonymous
in the chest theres is an idol of selune and if you give it to shadowheart you will lose -5 sympathy xD

 Anonymous
You can talk to the owlbear with the right skills but this only seems to allow you to escape if caught. I've yet to work out if there any other dialogue options for a non-combat ending.

 Anonymous
The owlbear will have half a spear in it if you choose to kill it. You can combine that half with the half u get from the true soul outside the cave and make a pretty nice weapon.

 Anonymous


If you go up the cragged rock in the middle of the cave and walk around that higher vantage point, there will be a survival check at the end of the higher path, and a buried chest containing a smoke powder bomb and an arrow of Roaring Thunder. There is also another cragged rock along that path that appears to lead up, but apparently you have to be very small to use it, leading me to think that it's a hole rather than something to climb. I didn't investigate further.
0
+10
-1