Underground Passage |
|
|---|---|
| [IMG] | |
| ACT | 1 |
| Location | Druid Grove |
| Suggest Level | 3 |
Underground Passage is a Location in Baldur's Gate 3 (BG3). On this page, you can find the information about the map, quests, enemies, notable items and other useful tips about Underground Passage.
Baldur's Gate 3 Underground Passage Map
Underground Passage Sub-Areas in Baldur's Gate 3
- There are no Sub-Locations in the Underground Passage.
Baldur's Gate 3 Underground Passage Notable NPCs:
Items in BG3 Underground Passage
Baldur's Gate 3 Underground Passage Quests:
Baldur's Gate 3 Underground Passage Walkthrough
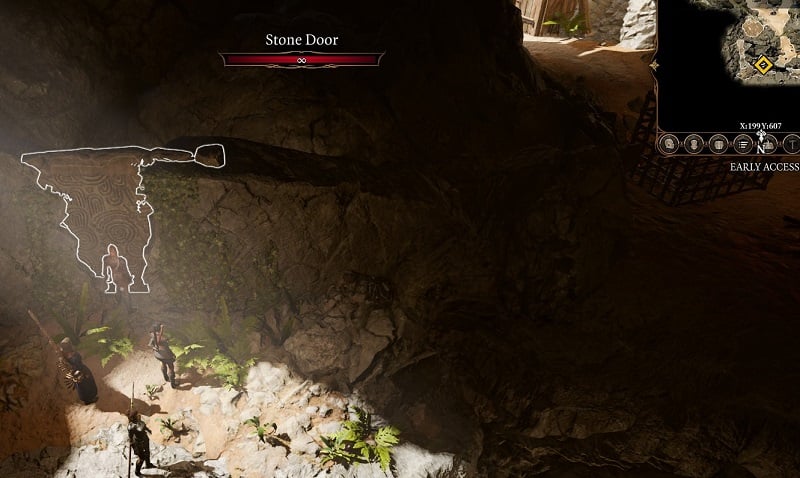
The Underground Passage is a passage that connects the Emerald Grove and the Forest. If you approach the stone cliff at the entrance of the Forest at (X:172, Y:419), your party members will all roll automatic Perception Checks. If anyone succeeds, you'll notice a Stone Door appear. Interacting with this door will take you into the Underground Passage.
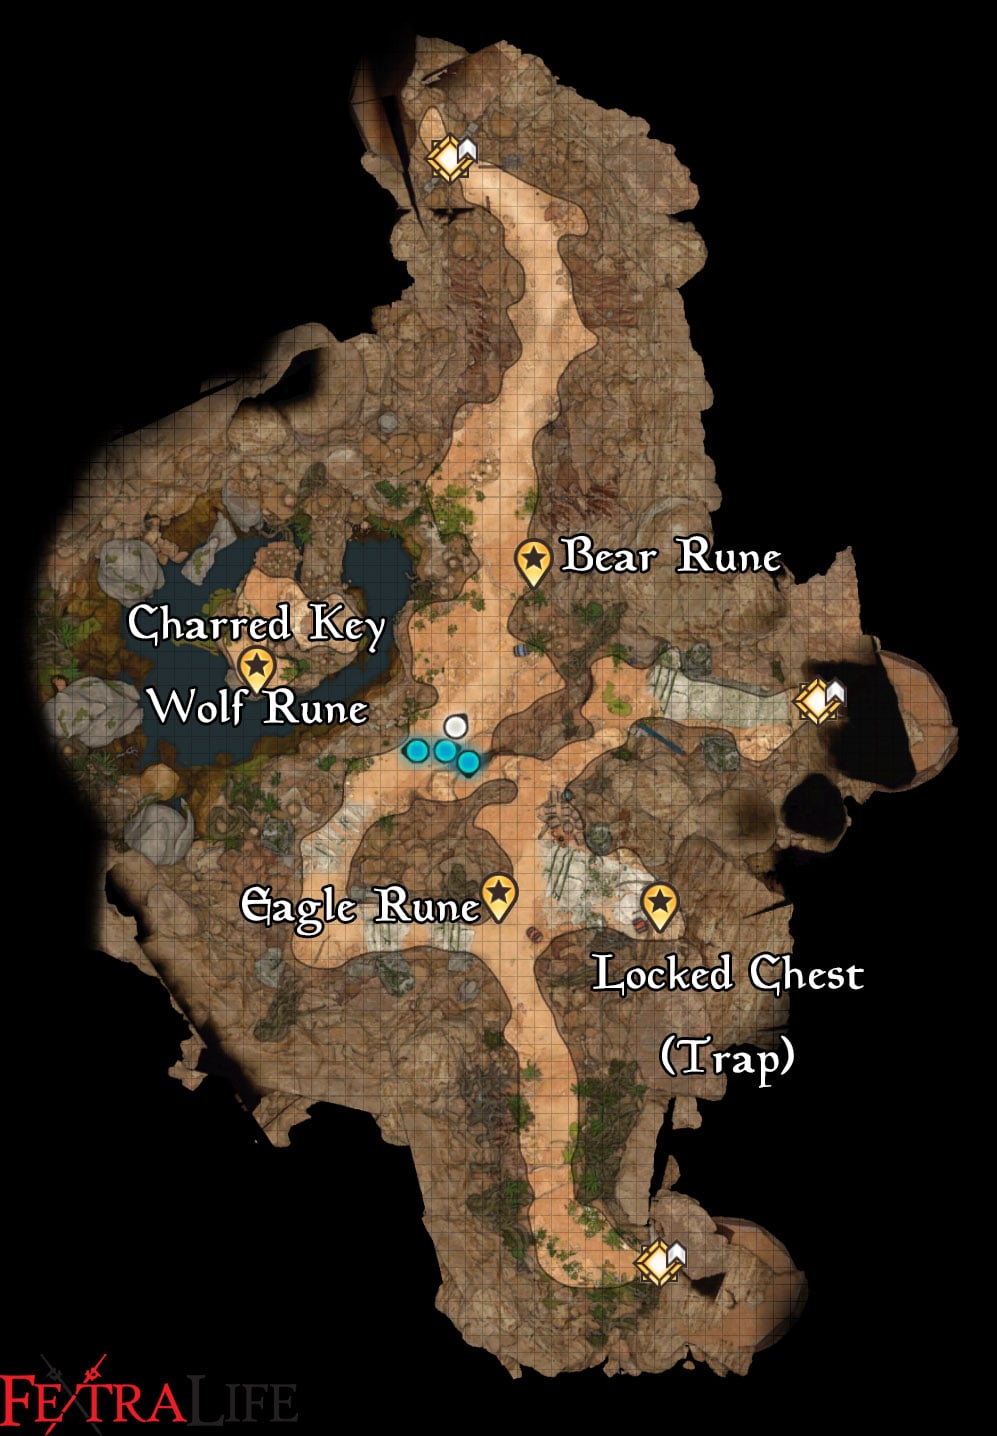
When you walk a little bit into the Underground Passage, your party will automatically roll Perception Checks. Succeed and you will notice an Eagle Guardian Statue with glowing eyes. If you get close to it it will shoot fireballs at you. Further up ahead in the cave is a glowing blue rune. If you hover over it with your mouse, you'll see it's called the Rune of the Eagle. Interacting with the rune will disable the corresponding statue. You may be able to perform the Hide Action and stealth across to the rune. Be careful if you're brute forcing it and simply walking past the statue as it shoots at you however, as there is a puddle of oil connecting to an Oil Barrel that will explode when set alight.
After disabling the statue, you'll notice someone up ahead. The crates next to them contains some useful items such as a Healing Potion, an Antidote, a Trap Disarm Kit, some Thieves' Tools, and a Scroll of Expeditious Retreat. They won't notice you until you get into melee range.
On your right, you'll notice a Heavy Chest. If you approach it, your party will automatically roll Perception Checks. If anyone succeeds, they'll notice that the chest is trapped. You'll need an item found later to safely open this chest, so let it be for now. Instead, initiate combat by moving into any hostile's range or hitting Sharp-Eye Gurza, Tracker Torrack, Tracker Worm, or Warrior Gresh.
After combat ends, if Findal is still alive, he can be healed with Spells. He can then be asked one question before he leaves to warn the others from Emerald Grove. If he dies, you can loot the Arcane Circlet off of him. Up north is the Rune of the Bear you can interact with to disable it's corresponding statue.
Go into stealth, and hop onto the lone island to the west of where Findal was. You'll roll automatic Perception checks when you step on it and if you succeed, you'll find two statues. The Bear Guardian Statue should already be disabled. The rune required to disable the Wolf Guardian Statue is found at the bottom of the island you're on, the Rune of the Wolf. There's a corpse here by the rune that holds the Charred Key. This is the item you needed to open the Heavy Chest from earlier safely. Head back up to it and loot the chest for Nature's Snare and some Red Dye.
Head back down to the now unactive Rune of the Bear, and continue following the path north. You're party will roll a Perception Check, which if you succeed, will reveal a Bear Guardian Statue. It's disabled now though, so continue north and interact with the Stone Door to get into the Makeshift Prison at the Emerald Grove.

Climb down the Knotted Vines, then jump to the very edge of the next ledge. You'll roll a Perception Check and if you succeed, you'll find a Malnourished Torchstalk. If you get too close to this mushroom, it will explode. Stay far away and destroy them with ranged attacks to get rid of them safely. The next ledge will also have a Malnourished Torchstalk, so be careful.
When you get to the end, break down the Broken Door with any attack. As soon as you enter the door, you'll roll a Perception Check. If you succeed, you'll find another Malnourished Torchstalk. Make sure that any party members are out of the doorway when you get rid of this mushroom, or else they'll get sent falling to their death out the door. The Rusted Prison Door up ahead can be lockpicked, requiring a DC 15 Sleight of Hand Check. Pass, and you'll unlock the door into the Makeshift Prison, unlocking the shortcut between the Forest and the Emerald Grove.
BG3 Underground Passage Notes & Tips
- If you want to escort Sazza out of the Emerald Grove, this is the safest way. (Quest Save the Goblin Sazza)
 Anonymous
Has anyone encountered what seems to be a hidden quest in here? As you're stepping down to the body, a ghost NPC asks you to revive him and explains how to do it. I triggered it but died because once the NPC interaction ended, I got blasted by the guardian statue. I've tried multiple times after that to get it to trigger again and I can't get it.
It happened by the corpse with the charred key.
 Anonymous
Is there any way to open that Stone wall/door in the room with poison gas?

 Anonymous
 Anonymous
When you jump over to loot the dead body, the body disappears (unlootable) and there are more guardian statues!

 Anonymous
 Anonymous
Patch 4 adds a fair bit to this area.... another guardian statue near the chest and 4 guardian statues with overlapping target areas guarding the area with the dead body.... trying to find safe spots to clear these from is not easy.


You can come to this place with a Rogue. Enter turn mode, and all his dashes should be more than enough to get to the Runes without taking a single attack.
0
+10
-1