Gauntlet of Shar |
|
|---|---|
 |
|
| ACT | Act 2 |
| Suggest Level | 6-7 |
Gauntlet of Shar is a Locations in Baldur's Gate 3. Gauntlet of Shar contains lots of puzzles and even more valuable loot, this place is also vital to Shadowheart's personal quests. On this page, you can find related information about the map, quests, enemies, notable items, and other useful tips about Gauntlet of Shar.
Gauntlet of Shar Map
Gauntlet of Shar Sub-Areas in Baldur's Gate 3
- Silent Library
- Nightsong's Prison
Baldur's Gate 3 Gauntlet of Shar Notable NPCs
Items in BG3 Gauntlet of Shar
- Summon Golem Bell
- Scroll of Seeming
- Boots of Brilliance
- Hellfire Hand Crossbow
- Purple Worm Toxin
- Killer's Sweetheart
- Moonlight Glaive
Baldur's Gate 3 Gauntlet of Shar Quests
- Daughter of Darkness
- The Chosen of Shar
- Find Ketheric Thorm's Relic
- Find the Nightsong
- Kill Raphael's Old Enemy
Baldur's Gate 3 Gauntlet of Shar Walkthrough
Reach Gauntlet of Shar by Hidden Room in Grand Mausoleum
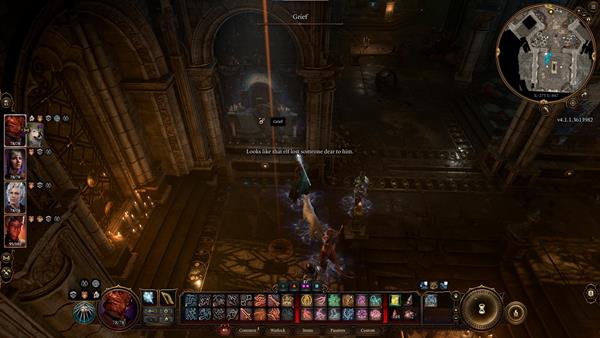
To reach the Gauntlet of Shar, you have to be within the Reithwin Graveyard in Grand Mausoleum. Successful Perception checks here will reveal traps on the vents and various tiles on the floor, as well as gargoyle heads on the walls, all around the room. In order to reveal the path, you need to press the buttons under the 3 paintings in the following order: Start with the button below the Moonrise Towers (X:-248 Y:-848) painting first, and then the Grief (X:-278 Y:-842) painting beside it, before finally pressing the last button under Ketheric Thorm’s (X:-280 Y:-830) painting. After pressing the corresponding buttons, the walls beside the last painting will open up and allow you to pass through. You'll find a platform there with a Traversal Gem, interact with it to travel down the Gauntlet of Shar. There are 4 Umbral Gems in Gauntlet of Shar, you need to collect all of them in order to progress Shadowheart's personal quest, Daughter of Darkness: The Chosen of Shar.
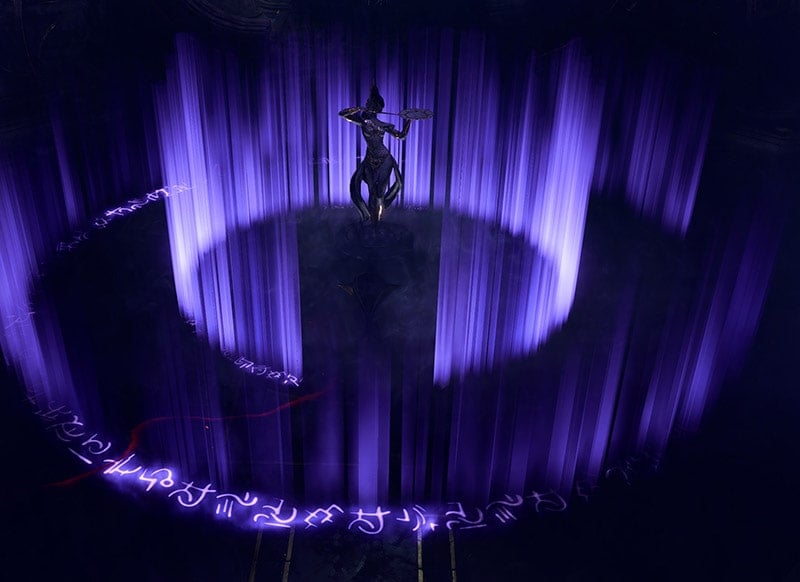
Continue heading north and go through the first Stone Door to enter the first chamber. In this area, there is a small statue holding an orb. You'll get pushed back if you attempt to approach it. In order to solve this puzzle, you need to explore the side rooms and pull the levers to lower all the lanterns. Do note that all rooms with levers will have traps. Once you've pulled all the levers, interact with the lowered lanterns to extinguish the light. When the room is completely shrouded in darkness, you'll see the pattern on the floor. Use only one character to crouch-walk and avoid the glowing lines to prevent your character from being blasted away. Once you touch the orb, you will open the door leading to the next area. For an easy way to reach the orb in the middle of the forcefield, you can use any sort of teleportation and simply teleport directly next to the orb and then click the Umbral Gem.
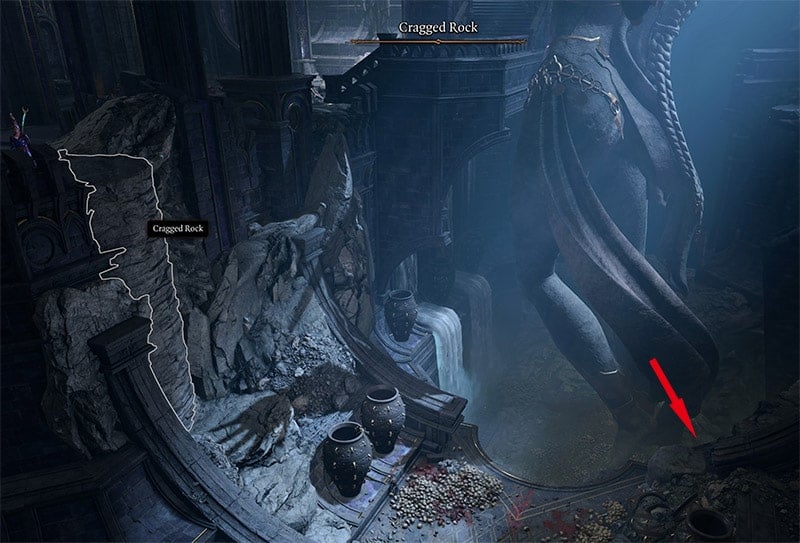
Now continue heading west and on the left side of the room (X:-775 Y:-853), you can jump across the platforms that'll lead you to the next area. All of your characters should be able to make the jump as the platforms are relatively close to each other. You can then go down through the cragged rock (X:-801 Y:-850). As you move forward, you'll see a Cloaker in the area. If you pass the perception check, you'll notice you're going through an area that's perfect for an ambush, then you'll initiate combat. The Cloaker can summon Phantasms which are basically clones of itself. It is recommended that you aim for the main body, as killing the Cloaker will make the Phantasms disappear. There's a chest at (X:-824 Y:-866), you can loot its treasure.
Meeting Balthazar
From the cloaker room, head north and go down the stairs. You'll see a giant locked door. You can lockpick or attack it until it breaks down. Now head to the room located east and interact with the Altar to Shar (X:-807 Y:-816). You can then either pray to the altar or leave. If you choose to pray, you'll need to pass an Intelligence check in Religion with DC 14. If you successfully passed the skill check, you will gain Nightsinger's Favour, you will be resistant to any type of necrotic damage until your next long rest. In the room located west, there's a traveler's chest, and a Key on a Skeleton you can loot (X:-839 Y:-813).
Now go to the middle and pull the lever on the left side to open the door ahead. As you enter the room, you will find three undead skeletons. As you approach them, the one in the middle asks if you are a friend, a foe, or a thief. Then it will say you're a friend, but you were uninvited as he did not request help.

Your next set of choices will look like this:
- Who am I really speaking to?
- I'm no friend of yours - whatever you are.
- Attack.
If you choose the first option, it will tell you to join him and find out. The camera then cuts to the lantern above shaking, suddenly the whole place is shaking. A portal opens up next to you and a Justiciar Avenger comes out. You'll then initiate combat after the cutscene. This can be a difficult combat encounter as the Umbral Tremors can keep appearing throughout the battle.
Once you've slain all the Justiciar enemies, go inside the room located west and you'll meet Balthazar (X:-851 Y:-786).

You'll then be presented with these options once you interact with him:
NOTE: Some dialogue interactions will feature additional options depending on the Race or Class you've chosen.
- Who are you?
- I fought a battle right under your nose - whoever you are, some help would have been useful.
- True Soul? Bold of you, to assume I'm a comrade.
- Naturally-born? That's a strange thing to hold against someone.
- [WARLOCK] Well, I'm not just a True Soul. I have some extraplanar help, so to speak.
- Attack.
If you choose the WARLOCK option, he'll say you're a leech and says there's always room for improvement when it comes to the flesh. Your next set of choices will look like this:
- Who are you?
- Your creations? Mindless undead minions, from what I've seen.
- You're assuming I'm an ally. Unwise, perhaps.
If you ask him who he is, he'll introduce himself as Balthazar, the Chief Advisor to General Thorm and he's here because he was entrusted with an important mission. He then asks you if you know what's at stake at the moment. Your next set of choices will look like this:
- Enlighten me.
- Judging by how you're cowering in here, your survival?
- [HISTORY] The name Balthazar seems vaguely familiar, but from where?
If you choose the HISTORY option, you'll need to pass an Intelligence Check with DC 14. If you failed the skill check, you'll be presented with the same options from before excluding the one you just picked. If you choose the first option, he'll say he's been sent here to collect a Relic for General Thorm. He says you will help him as you've shown some prowess in scouting in combat. You'll realize he has General Thorms trust and this could gain you access to him if you play your cards right. Your next set of choices will look like this:
- So you need my help - what would I have to do?
- [WARLOCK] [PERSUASION] I'm not the type to make a deal without the details. What exactly am I looking for?
- As much as I enjoy you flattering me, this isn't my problem.
If you choose the second option, you'll need to pass a skill check with DC 14. Successfully passing the skill check will reveal to you that this relic gives General Thorms his strength and invulnerability. He says it must be recovered before his enemies attempt to exploit it. Your next set of choices will look like this:
- You need my help?
- This sounds like your problem, not mine.
- I think I'd rather exploit this relic - after I've gotten rid of you.
If you choose the first option, he'll reveal that the relic is close by but he needs you to clear the way for him. he says he'll remain in that area whether you succeed or fail. Shadowheart will then make a comment that it's better to play along for now. Your next set of choices will look like this:
- I'll see what I can do.
- What exactly will you be doing while I'm out risking myself?
- [PERSUASION] You have resources to spare - give me something to aid my search.
- This sounds like your problem, not mine.
If you choose the PERSUASION option, you'll need to pass another Charisma check with DC 14. Successfully passing the skill check will gain you Astarion and Shadowheart's approval. Balthazar will also assign someone to aid you as you clear the way. He'll offer you the bell that can summon his brother. You can either take the bell, attack, or extend the conversation. If you choose to take the bell, you'll receive the item Summon Golem Bell. This item will summon Balthazar's brother and can only be used in combat while in the Gauntlet of Shar. After your conversation with Balthazar you will advance the quest Infiltrate Moonrise Towers.
You can also decide to kill Balthazar and successfully doing so, you will achieve the Acolyte: Those for Whom the Bell Tolled.
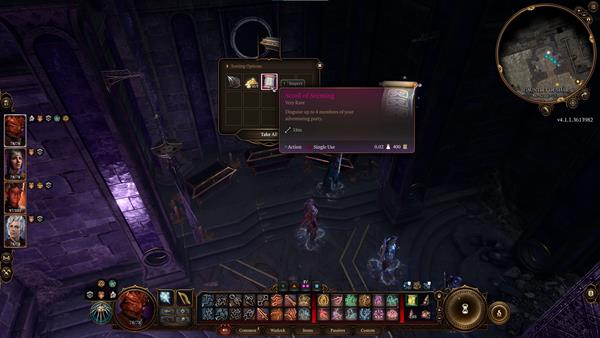
Now exit the room and on the north side you'll see a locked Vault Door. You need to lockpick the door with DC 30, successfully opening the door will reveal three Opulent Chests inside. All the chests will contain valuable loot but the most notable loot is inside the chest in the middle, this one has the Scroll of Seeming which is a very rare scroll. It's a single-use item that lets you disguise up to 4 members of your party.
Exit the vault and continue heading east, at this location (X:-752 Y:-789) you'll find a waypoint that lets you fast-travel to this location at any time. Continue heading east and go up the stairs, at this location (X:-731 Y:-802) there's a Gilded Chest that contains a rare bow called Least Expected, along with some gold, and other loot. Continue heading east then jump down the broken stairs, then jump on another to get across. At this location (X:-646 Y:-787) there's a Gilded Chest with some gold and other valuable loot.
Meeting Raphael's enemy
Delving further in the temple, you will see a Displacer Beast seemingly run away from you. You can follow it down the stars or jump east to proceed above.
If you follow it, you will find a room with a bloody mess and the Beast in front of an Orthon's Bed. Walk to it and you will trigger a dialogue with Yurgir, a Hell's Orthon and Raphael's enemy.
You can find more about his circumstances and what happened to the Justiciars of the temple. In the end, you must choose to either roll for persuasion to work together and fulfill or void Raphael's contract with him, or you can talk your way into combat.
- If you persuade him to kill his underlings you won't get any exp from those enemies. This is a rare occasion in this game that a "peaceful" option gives less exp than a violent choice.
- If you choose to help him you will miss a chance to get Hellfire Hand Crossbow and Infernal Iron. We don't known whether there is a benefit for saving him later on.
If you decide to go from above, you need to pass a perception skill check to reveal the invisible enemies in the area (X:-652 Y:-776).

If you get too close or fail the perception check, you'll immediately engage in combat. Once you've cleared all the enemies within the area, you'll complete the Kill Raphael's Old Enemy quest. We recommend checking the enemies' corpses as you may find some valuable scrolls and weapons, there's an enemy there named Yurgir that has a very rare weapon called the Hellfire Hand Crossbow.
Continue heading north until you reach this location (X:-648 Y:-724) and interact with the Spider Meat.

You'll then be presented with these choices:
- Take a good long sniff.
- give it a lick
- [INVESTIGATION] Study it.
- Leave.
If you choose the INVESTIGATION option, you'll need to pass an Intelligence check with DC 14. Successfully passing the skill check will reveal that the spider has fresh bite marks and an old puncture wound. You will then be presented with the same options as before excluding the one you just picked, and an additional option depending on your class. If you're running a Warlock, you can choose the WARLOCK option to scan the meat for signs of magical interference. This will require you to pass another Intelligence check with DC 16. Successfully passing the skill check will reveal that the spider has been dosed with some type of potion. Now you can choose to leave or give it a lick and take a sniff. Taking a sniff will reveal that the dead spider has something fragrant. If you give it a lick, you'll need to pass a Constitution skill check, and successfully doing so will gain you the approval of Karlach but the disapproval of Shadowheart. After licking the dead spider's meat, you'll notice that it's charmed. You'll then achieve Guild Artisan: Mating Season and inspire anyone in your party including yourself if you have the Guild Artisan background. Head east and you'll find a Heavy Chest that has some gold and a rare Boots of Brilliance.
Now head to this location (X:-648 Y:-738) and drop down from the pile of rocks. Then head east and you'll find a Heavy Chest here (X:-677 Y:-759). Continue by going down the stairs, and you'll find a corpse of a Zealot of the Absolute, loot its corpse and you'll find an item called Instructions from B, among other items. There's also a Gilded Chest at this location (X:-649 Y:-758) that contains a very rare Purple Worm Toxin, some gold, and other loot.
Head back up and go back to this location where you dropped down (X:-648 Y:-738). Head south then go west and jump across the broken stairs (X:-687 Y:-786). Then head north and place both Umbral Gems you've collected at the Ancient Altar (X:-716 Y:-776) to activate the platform. Before you can go, Shadowheart will tell you to wait. You can then respond by asking her what's wrong, ask her if this isn't one of her episodes, or simply glance around. If you ask her what's wrong, she'll say it's nothing, and if you failed the perception skill check, you'll be presented with these choices:
- What's going on? Tell me.
- Snap out of it.
If you ask her what's going on, she'll say there's a holy weapon hidden away called the Spear of Night. She says she has to claim the weapon and use it to make a sacrifice in Lady Shar's inner sanctum so she can become a Lady Justiciar. Your next set of choices will look like this:
- A sacrifice? You intend to kill some innocent down there?
- You're not going to turn against me, are you?
- All right. Where is this spear?
- And you just figured this out by yourself, just now?
- This is nonsense - we've already cleared the way forward.
- Let's move on. Perhaps this mission will prove real - or not.
If you choose the first option, she'll say she'll sacrifice a monster, saying that this place has been empty for years and no simple mortal would have been here for a while now.
Debriefing with Raphael
Once you end the day, Raphael will show up. Astarion will then make a remark that Raphael needs to hold his end of the deal as his devil Yurgir has been dispatched.
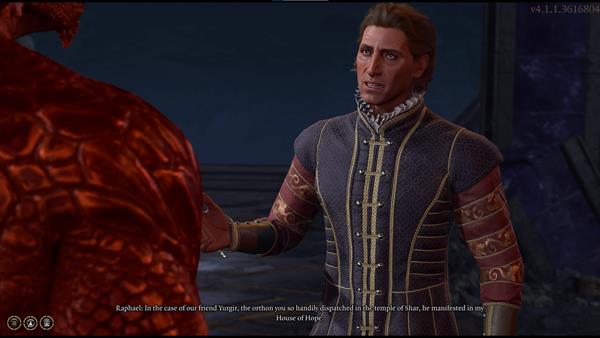
Your next set of choices will look like this:
- Stop stalling.
- Are you sure you want to know, Astarion? Maybe it's best left in the past.
- Spill it - this sounds fascinating.
If you choose the first option, Raphael will reveal the story about the scar on Astarion's back. He says that his former master, Cazador Szarr, made a contract with the archdevil Mephistopheles that states Cazador will be granted knowledge infernal knowledge. If Cazador completes the ritual, he will become the Vampire Ascendant, which amplifies all his vampiric abilities, while enjoying the luxuries of the living. This ritual requires Cazador to sacrifice all his vampiric spawns, and Astarion is the only vampire left that Cazador needs to sacrifice. After Raphael concludes the story, he vanishes. Astarion is left speechless, and your next set of choices will look like this:
- Cazador is a piece of ****. We're going to stop him.
- 'Hmm'? That's all you have to say?
- You don't need to go back to Cazador - you're with me now.
- You're... quiet. It's unsettling.
If you choose the first option, Astarion will ask you if you think it's that simple. Your next set of choices will look like this:
- We can't let Cazador complete that ritual. He could unleash terrible horrors.
- I think you should run. If Cazador can't find you, he can't complete his ritual.
- You'll never be free while Cazador lives.
- There's a way to become a living vampire... That must mean a lot to you.
If you choose the first option, he'll say that Cazador would never leave him alone and would hunt him down. He needs to take the fight to Cazador and needs your help with it. Your next set of choices will look like this:
- After we dealt with our tadpole problem, yes, I'll help you then.
- Of course I'll help. We'll hunt him down and kill him.
- If he comes for you, I'll defend you. But we're not risking an attack on his lair.
- Not a chance.
If you choose the second option, he'll thank you and you will also gain his approval.
Sharran Trials
To find the remaining Umbral Gems, you need to complete Sharran Trials. The Soft-step Trial can be found here (X:-761 Y:-755), just northwest of the Gauntlet of Shar Waypoint. You'll see a Bulky Door as its entrance.
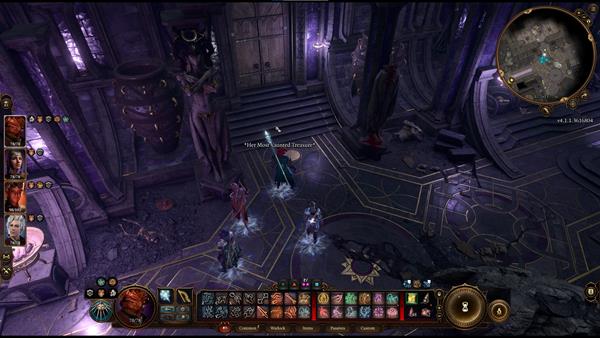
Go inside and interact with the Sacrificial Bowl, Shadowheart will then interrupt and say this is one of Lady Shar's trials. You can then let her do as she wishes or tell her to stand down. If you choose to let her do as she pleases, you will gain her approval. She then wounds herself and offers her blood on the bowl, the gates will then open after. Now you need to skulk to the end of the maze without being spotted by the shadows and if you are spotted, you'll immediately be transported to where the Sacrificial Bowl is. Using an invisibility spell and turn base mode works well. But be careful of the traps. You need to find Soft-Step Key (on the table of a hidden room) or use lockpick to open the final gate. Alternatively, you can use Dimension Door spell to bypass this trial. Once you've made it inside the gate, retrieve the Umbral Gem to complete the trial. You can then interact with the Umbral Transporter to transport you back to where the Sacrifical Bowl is and exit the room.
Continue heading north and you'll find the Self-Same Trial here (X:-763 Y:-733).

This trial forces you to fight a clone of your parties. If you wish to make the combat encounter easier for you, get naked and remove your armor and weapons before you offer your blood to the Sacrificial Bowl. You can just re-equip them before you enter the room. The clone team has the ability to dip in and out of the shadows. For this trial, you would also need to take note of the Cheater's Folly condition, if any member of your party attacks the enemy team that's not their own clone, all their Ability Scores will be reduced by 1 and this effect can stack.

So it's recommended that you only attack your own clown if possible so you won't get stacked with debuffs. If you ever get the Cheater's Folly inflicted on one of your party members, simply killing the clone will remove that debuff. Once you've slain the enemy team you can loot the Umbral Gem from the last clone you killed. You will also find a very rare ring called the Killer's Sweetheart.

Just like before, you can use the Umbral Transporter to transport you back to where you came from to exit the area.
The last and final trial, the Faith-Leap Trial can be located downstairs (X:-744 Y:-728).

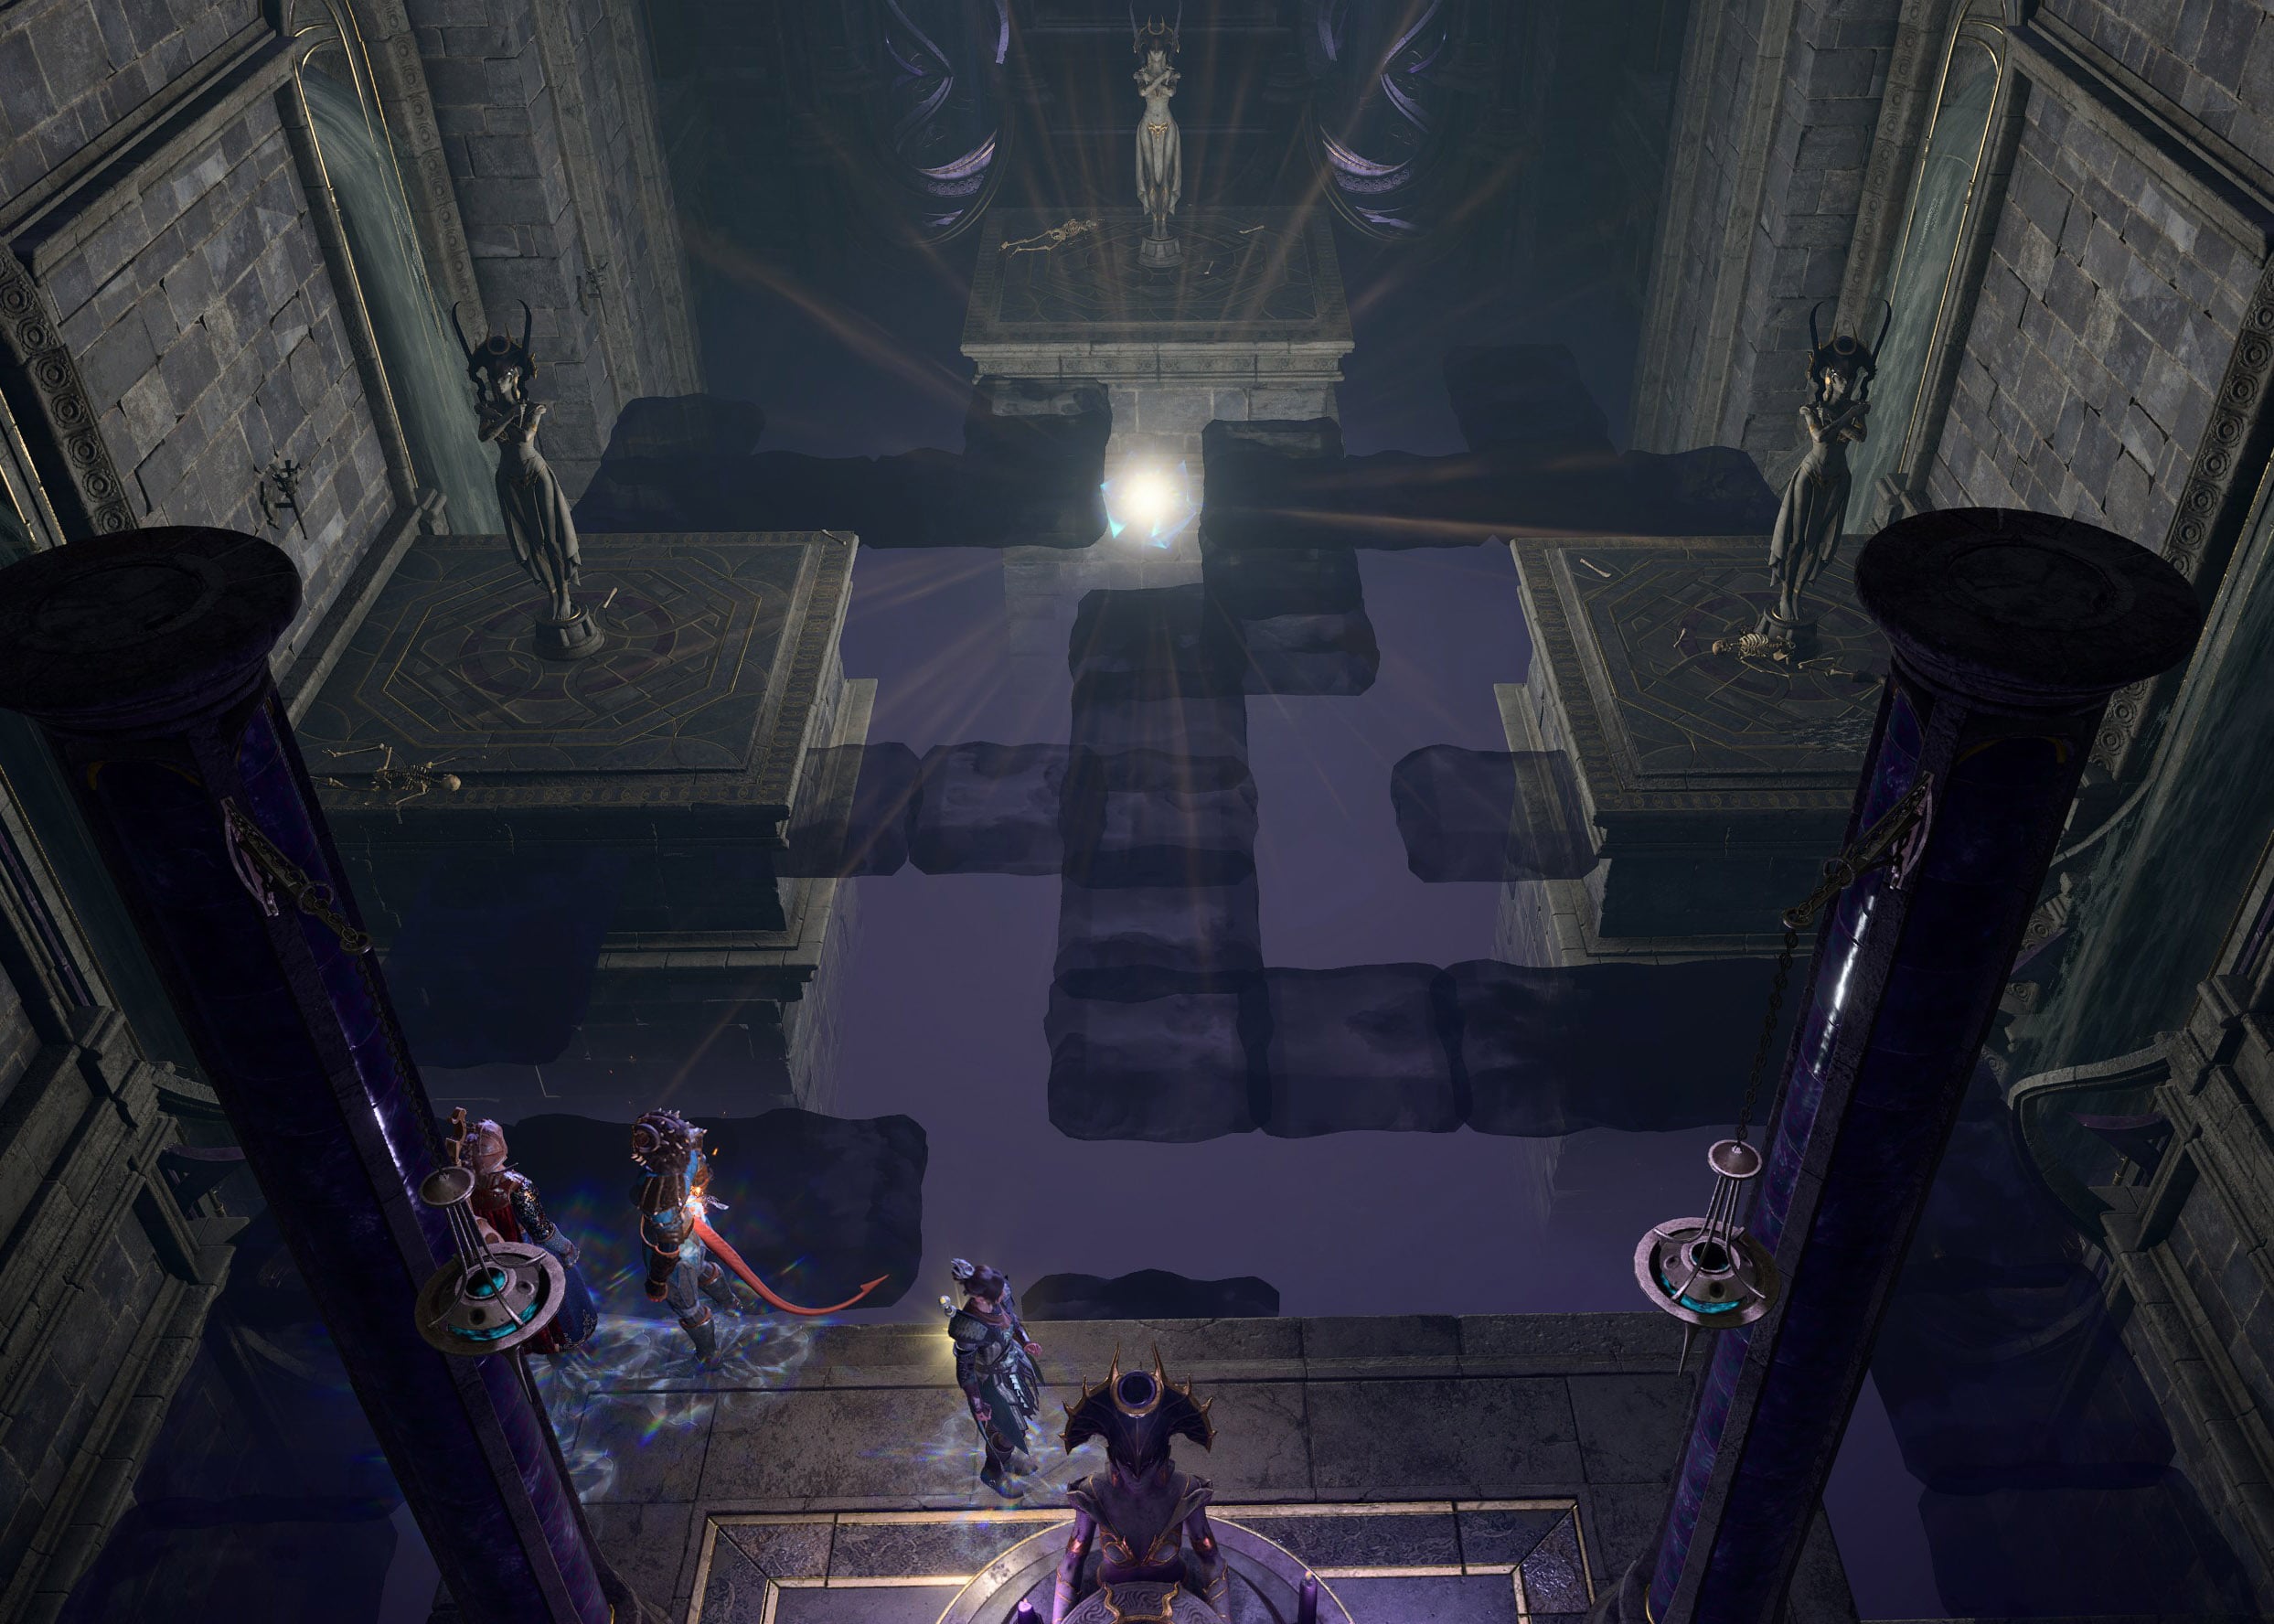
For this trial, the room will be plunged into darkness after you offered the blood, and you need to remember the location of the platforms to reach the Umbral Gem. However, you can use the Daylight spell to light the entire room, or use Fly or Dimension Door spell to reach the final platform. Once you reach the final platform, retrieve the Umbral Gem and transport yourself to where you started and exit the area.

Silent Library
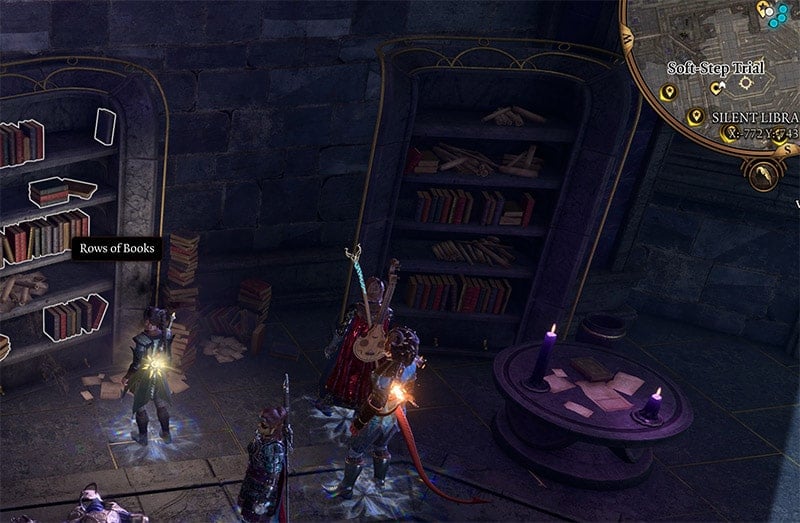
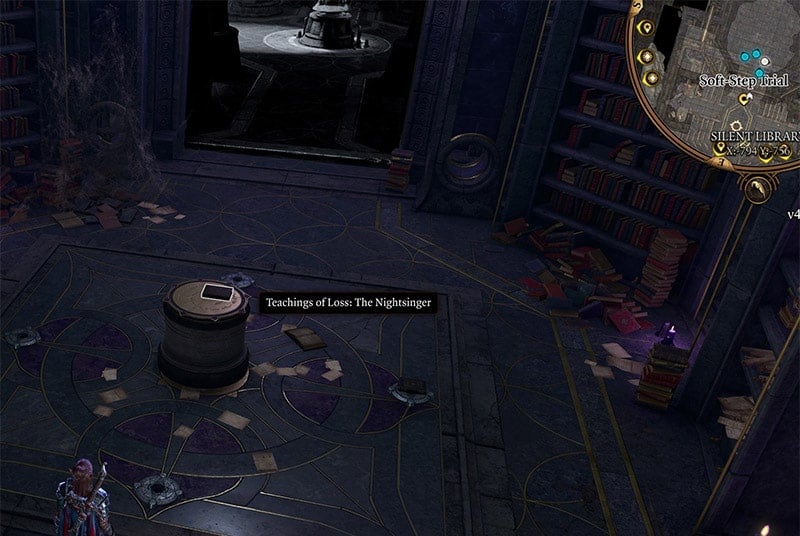
Once you've completed the trials, continue heading south and at this location (X:-756 Y:-753) is the Silent Library. You'll notice there's a white barrier at the entrance, you can go through but you will be Silenced and you'll be unable to cast any spells. There will be several Justiciar enemies in the area, if you want to avoid combat, you can try to sneak attack them with ranged attacks. They don't seem to get triggered by getting damaged, which will make this section easier. Use caution when slaying the Justiciar enemies: Make a special save before the combat starts. There is a bug (still unfixed as of Patch 4) which causes the book "Teachings of Loss: The Nightsinger" to become unobtainable if you kill a Justiciar next to the bookshelf which contains it. Once you've slain all the enemies in the area, press the button on the far right corner of the room (X:-778 Y:-751) to unlock the gate to the Treasure Room. Once you enter the room, disarm all of the traps first, then look for the book called Teachings of Loss: The Nightsinger, then interact with the plinth and place the book. After placing the book, the door to Treasure Room will be opened.
Inside you'll find the Dark Justiciar Helmet, Dark Justiciar Half-Plate, and the weapon to kill the Nightsong - Spear of Night.
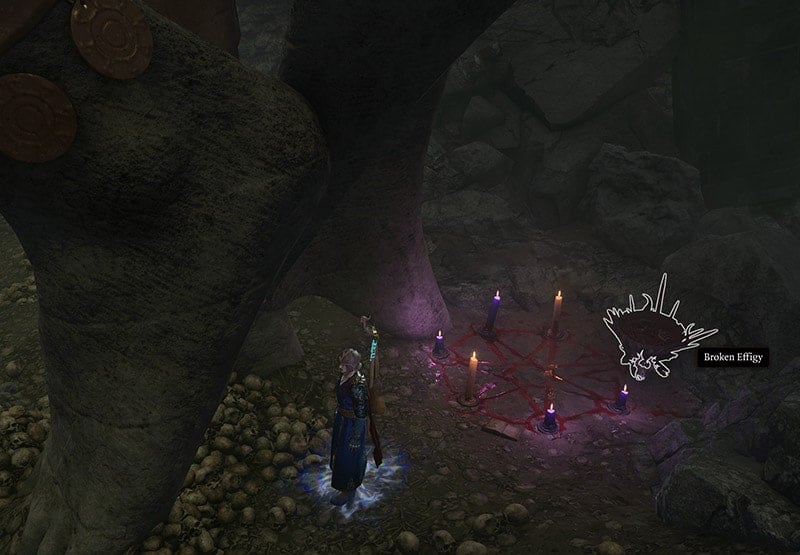
Once you retrieve the weapons, loot whatever you can inside and exit the room. While exploring the area, you find lots of Rats. Try talking to them and you can find they are not natural. Use the Cragged Rock between the 2nd and 3rd trials to reach the feet of the giant Shar Statue. Here you can find a Broken Effigy and a book, read the book and talk to the rat to learn his story - another victim of Raphael and the last remaining Dark Justiciar.
The rat will also reveal the location of Sharrn Provisions if you agree to spare him. If you want to side with Yurgir, you can kill the rats and the last Justiciar. Doing so can avoid a fight with Yurgir. And later easier to get his help when you sneak into Raphael's House of Hope and confront the archdevil. Yurgir is also a potential ally in Gather Your Allies. But you can still persuade Yurgir to join you even if you killed him here. Alternatively, if you chose to help the Orthon break his contract, you learn more about the trickery of Raphael after killing the rat swarm at this location.
Inner Sanctum
Now make your way back to the Pedestal of Reckoning at this location (X:-717 Y:-776).

She'll say that even if half her memories are locked away, she still remembers the stories about this place. You'll then be presented with these options:
- Examine the altar.
- What are these trials, Shadowheart?
- Leave.
If you choose the second option, Shadowheart will say that in order to join Lady Shar's elite, you would need to pass her trials and then make a sacrifice in her innermost sanctum. The inner sanctum will only reveal to those who have proven themselves, and very few have made it that far. She says she's dreamed of this place, she thinks this is her destiny. Your next set of choices will look like this:
- This is a distraction. We need to stay focused on finding a cure.
- Are you sure this is what you want?
- What does becoming a Dark Justiciar mean?
- All right, I'll help if I can.
If you choose the second option, she says if she completes the trials, Lady Shar will bless her with powers that can be used to take on the Absolute and also rid of the parasite. After your conversation with Shadowheart, get on top of the platform and interact with the Traversal Gem to reach the Inner Sanctum. Once you've been transported down, interact with the Ancient Altar and place three Umbral Gems you've collected to unlock the door ahead. If anyone in your party has a background of Guild Artisan, they will be inspired and you will also achieve Guild Artisan: Dark Machinations. head down the stairs and you'll discover the Verge of the Shadows waypoint at this location (X:-717 Y:-842).

Interact with the Shadowfell Entrance pool to trigger a dialogue with Shadowheart. She says she needs to pray, and tells you that everyone made it this far because of Lady Shar's grace. Your next set of choices will look like this:
- Shadowheart...?
- There'll be time to pray later - let's move.
- [WISDOM] Use the power of the parasite. Feel inside Shadowheart's mind.
- Leave her to her prayers.
If you choose the WISDOM option, you'll need to pass a Wisdom check with DC 16. Even if you successfully pass the skill check, you will get a disapproval from Shadowheart. She'll then say that wasn't for you to hear. Your next set of choices will look like this:
- I deserve to know what I'm getting myself into.
- I'm sorry, I couldn't help myself.
- Whatever you think you're going to do there - forget it.
If you choose the first option, she'll say that Lady Shar only demands one sacrifice, but it doesn't matter since Lady Shar's reward aligns with your own interests. Your next set of choices will look like this:
- All right. Fine. Let's move on.
- One life is too high a price.
- Forget it. We're not going to sacrifice a life to Shar.
If you choose the first option, you'll gain an approval from Shadowheart. She'll also tell you to remember what she said about letting her do what she must do. A prompt will then appear on the screen asking you if you want to proceed, depending on your choices, the state of the region could change and some active quests may become unavailable. If you choose yes, your character will step into the pool, you will be transported to Nightson's Prison.
Nightsong's Prison
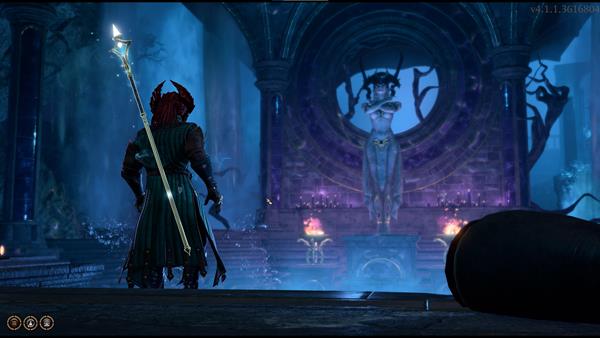
Continue heading northwest, you'll need to make multiple jumps to reach the objective area. You don't need to worry about fall damage as the gravity in this plane is adjusted. You'll also notice Justiciar Soulhunters along the way, as long as you don't attack them, they won't turn hostile. Once you reach this location (X:-606 Y:-1435), you'll find Nightsong.
Interact with her to initiate a dialogue sequence. She says she felt Shadowheart come in and she's the first after a century has passed. Shadowheart is set on killing Nightsong, but you can still sway her.
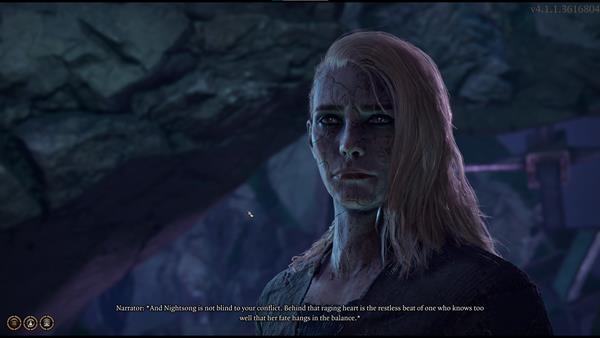
Your next set of choices will look like this:
- Trust Shadowheart - do not interfere.
- Do as you must.
- Is this truly what you want?
- Choose your own way, Shadowheart. You cannot allow your goddess to control you.
- Please, Shadowheart. Don't do this.
If you choose the fourth option, she will say that this is her life's purpose. Your next set of choices will look like this:
- All right, fine. Do as you will.
- [PERSUASION] No, it's not. Your life is whatever you make it - don't give up on yourself.
- Find a new purpose then. My mind is set.
- Please, Shadowheart. Don't do this.
If you choose the PERSUASION option, you will need to pass a Charisma check with DC 30. If you fail the skill check, there's a possibility for her to turn on you as she'll say she'll do whatever it takes to fulfill Lady Shar's wishes, even if she has to step on your corpse. Your next set of choices will look like this:
- All right. You have my support.
- This is wrong... but I can't afford to lose you. Do what you must.
- You want to fight? Fine.
Shadowheart and Nightsong will have a short dialogue interaction with each other and you will be given these set of choices:
- Kill her. Let's finish the ritual.
- [PERSUASION] Don't do it, Shadowheart. Don't kill her - you'll regret it.
- She knows something about you. Spare her, and see what she has to say.
- Say nothing.
If you choose the third option, Karlach will approve. Shadowheart will then ready her spear, but she will start to hesitate, and then throw away the spear. She'll then say Lady Shar will disown her. Shadowheart will then touch Nightsong to release her from her prison. Nightsong will then receive all her powers and armour back. She says Shadowheart has great power, but she will also need a powerful weapon. She then asks if she is ready.
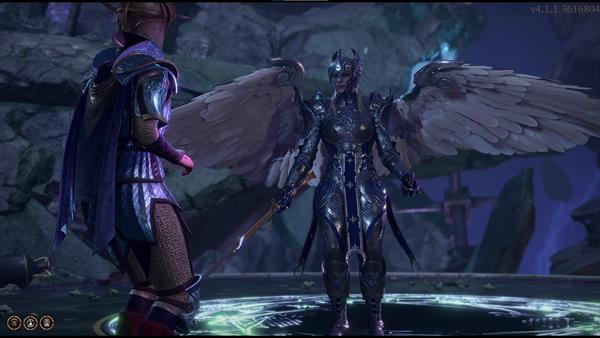
Your next set of choices will look like this:
- Ready for what?
- Dark Lady be merciful... What have I done?
- To get out of this place? Absolutely.
- For my weapon? Naturally.
If you choose the first option, Nightsong will say to be ready to kill Ketheric Thorm. Nightsong will then fly away. Shadowheart will tell you that you need to get out of this place as Lady Shar will not be happy after what she did. She also says that Nightsong will be headed to Moonrise Towers and you should get there as well. After the dialogue interaction and the short cutscene, you will receive the Moonlight Glaive weapon. You can then interact with the Shadowfell Portal to exit the area.
Return to Gauntlet of Shar
NOTE: The section below covers a walkthrough wherein the character plays along with the army of Ketheric Thorm, pretending to be one of them. The guide below happens after investigating the towers and freeing the prisoners in Moonrise Towers Prison, then returning to Gauntlet of Shar after.
In order to defeat Ketheric Thorm, you now realize that there's a power that makes him invulnerable. Your investigation will lead you to travel to Gauntlet of Shar where you will continue to aid Balthazar at the request of Disciple Z'rell. At the Verge of the Shadows at (X:-718 Y:-845) you will find a body of water that serves as the entrance to Shadowfell, the domain of Lady Shar. You will get a warning that the state of the region can change depending on your decisions, such as quests becoming unavailable. If you proceed to do so, we recommend following our guide to get your desired outcome.
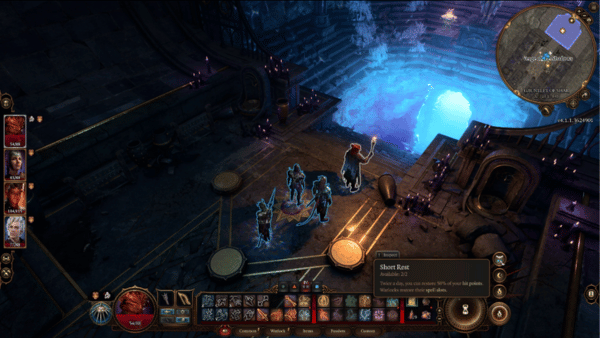
As you step forward into the statue and through the body of water, you will feel your body struggle as you fight back the sensation. Your character will get knocked out, together with your party. Once you come back to your senses, you will find yourselves in Shadowfell, and Shadowheart immediately recognizes the presence of Lady Shar. However, you will be interrupted as Balthazar flies in to tell you to hurry along and become a witness to his work. Shadowheart defies him and quickly tells him that he does not belong in the Dark Lady's domain. You will now get the following options to respond:
- I was hoping for something more substantial than 'thanks'.
- How did you get here?
- What is this place?
- I cleared the way to this place, not you. Why shouldn't I just kill you instead of letting you interfere?
- Lead on, then.
- Attack.
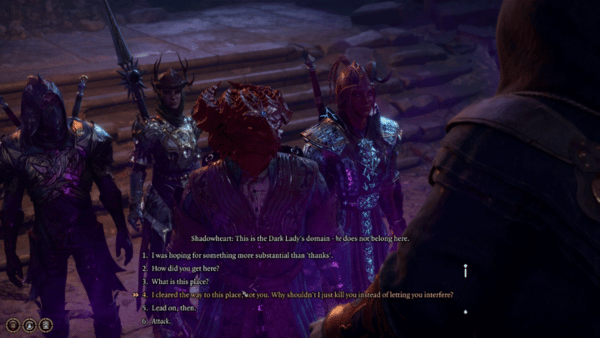
In this area, Balthazar has no desire to fight even if you choose the 4th one. He will ask that you follow him as he leads the way into Nightsong's Prison. Your party will be doing a series of jumps until you make it to the bottom of Shadowfell. The pattern shouldn't be difficult and each member is guaranteed to survive the jumps as long as it's near the ledge, and not falling off the rocks. Once you finally catch up with Balthazar, you realize that the relic that Discipe Z'rell was referring to was the Nightsong, which is in fact, a humanoid. She invites you to "heap more sins upon your head. My retribution will be all the sweeter for them." Nightsong continues to reveal, that she supplies Ketheric Thorm's immortality with her own soul. Balthazar calls her "Aylin" and commands you to keep back to secure her for a journey. You will now get the following options to respond:
- Wait- the Nightsong is a person?
- What are you going to do to her?
- I can't let you take her, Balthazar.
- Attack him.
If you choose the first one, Balthazar tells you that she is more than that. He shares that she possesses immortal strength and lends it to General Throm through his work. After realizing that she is the key to Ketheric Thorm's immortality, you will now have the option to save her or let Balthazar do his job.
- If she's the reason Ketheric Thorm is invulnerable, you're not taking her. Leave, or you're a dead man.
- Go on, then. Take the Nightsong to Ketheric. Get it over with.
- Attack him.
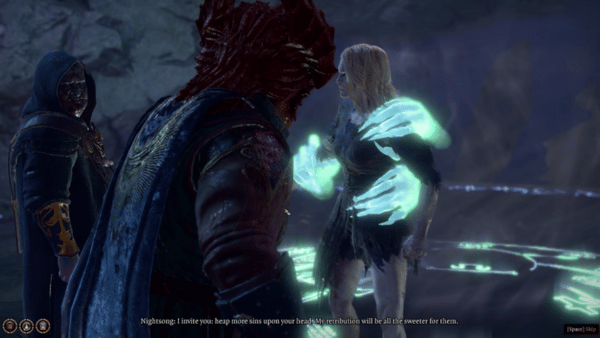
If you choose the first option, Karlach will give you her approval and you will begin to fight Balthazar right after. Take note that this area is surrounded by Balthazar's minions and they will have the advantage as they are in a higher position. Plan well so you can survive this assault. With Balthazar out of the picture, the Nightsong addresses Shadowheart. She possesses the power to free her or kill her. Shadowheart will turn to you and tells you that "Her fate is mine to seal. Let me handle this." but the Nightsong tells her that the only fate she's sealing is her own and that to become a Dark Justiciar, she will know no love, no joy, but only servitude.
Shadowheart is conflicted about what she wants to achieve and you will be given the option to help her out:
- Trust Shadowheart- do not interfere.
- Do as you must.
- Is this truly what you want?
- Choose your own way, Shadoeheart. You cannot allow your goddess to control you.
- Please, Shadowheart. Don't do this.
If you choose the 3rd option, you will sense hesitance in her voice. You will get another chance to talk to her, or sway her with the next choices:
- Trust Shadowheart- do not interfere.
- Do as you must.
- Choose your own way, Shadoeheart. You cannot allow your goddess to control you.
- Please, Shadowheart. Don't do this.
Choose the 4th option which will then lead you to the next choices:
- All right. You have my support.
- This is wrong... but I can't afford to lose you. Do what you must.
- You want to fight? Fine.
Next, choose the 2nd option so Nightsong will once again, interrupt your conversation with Shadowheart. Nightsong reveals that she knows of the only memory that Shadowheart has. The memory of her being hunted by wolves, and yet, Shadowheart still can't remember what she has lost. Shadowheart still believes that she is meant to become the Lady Justiciar, and you will get the next choices here:
- Kill her. Let's finish this ritual.
- [PERSUASION] Don't do it, Shadowheart. Don't kill her, you'll regret it.
- She knows something about you. Spare her, and see what she has to say.
- Say nothing.
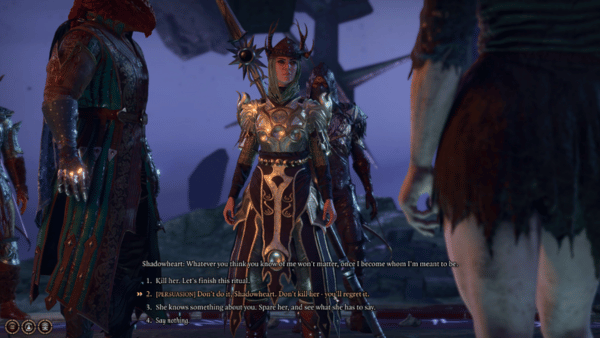
If you attempt the Persuasion check, you will need to pass a DC of 21, choosing the 3rd option will also get the same results and grant the approval of Karlach. When successful, she will procure the spear of Lady Shar and grips it tightly as if she's ready for anything that was to come, and yet, she throws away the spear, abandoning her lifelong quest. Shadowheart now fears that she will be disowned, and she fears what will happen next to her. Nightsong tells her that her fate is not fixed and to lay a friendly hand on her, to fight the battle that has been awaiting her, the one that will take your party to Ketheric Thorm, back to Moonrise Towers.
Upon doing so, she calls out to Moonmaiden Selune as power surges through her arm. She declares that the Nightsong is no more, and she transforms into an armored Dame Aylin. She spreads out her wings and swings her mighty sword. She addresses Shadowheart once again and urges that she was able to spurn her Dark Lady, and may start to feel a stirring of the truth after what she has done. Dame Aylin that there is a battle yet to be fought after being freed from her century-long prison. She will now ask Shadowheart, "Are you ready?"
- Ready for what?
- Dark Lady be merciful... What have I done?
- To get out of this place? Absolutely.
- For my weapon? Naturally.
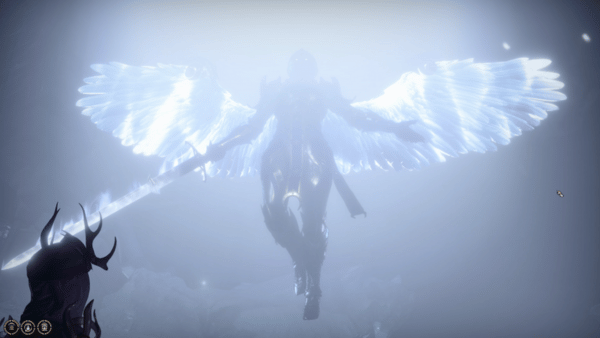
If you choose the first one, she responds with "To kill Ketheric Thorm" and she will fly away to lead the assault in Moonrise Towers against Thorm's army. Shadowheart asks that you leave Shadowfell already after what she has done, and she doesn't want to be in her domain when her rage falls upon her. Freeing the Nightsong will grant you Selune's blessing and a Moonlight Glaive. As you travel through the portal, Shadowheart goes out for a moment. She tells you that she heard Lady Shar's voice after she defied her. She has been abandoned by her goddess and allies. Powerless, she will now seek answers from Dame Aylin. Afterward, you now get the option to respond to Shadowheart as you please if you want to progress your romance with her.
BG3 Gauntlet of Shar Notes & Tips
- The Following quests will fail if you do this quest
 Anonymous
Was so scared that the Cheater's Folly debuff was permanent... I wasn't aware of it when I got Astarion to kill all the clones

 Anonymous
The faith trial path is invisible before I even use the altar. Wonderful puzzle /s

 Anonymous
The Faith Leap trial absolutely blows. The floor instructions are hard to translate to the physical space. Casting Light seems to be bugged as it lights up distant peripheral platforms sometimes, but not others. Jumping and movement abilities are instant fails but it doesn't tell you? This seriously sucks. It's not really a puzzle and it's really poorly implemented.

 Anonymous
self-same is a bit weird/buggy - it appears to always give up to 4 enemies based on who is in the sacrifical bowl room, and it can include summons but they have increased health (at least - >50 health raven). i think the 4 it selects is the first 4 people that entered the room. ish.
also all clones give equal xp each so its best to still fight 4 for most xp but it can be cheesed beyond just gear. even with everyone near the sacrifical bowl it gave me copies of my wizard, a zombie, quothe (raven) and an ice mephit..
 Anonymous
a lot of the guides on here for Baldur's gate 3 are from the early access,. a lot has changed since the full release,. fextra should go back thru and change stuff,. Larian has said as much that the early access and the full game are different,. but i doubt fextra will change or do anything and just leave the wrong guide up loll

 Anonymous
"depending on your choices, the state of the region could change and some active quests may become unavailable."
Some detail on what this actually means, would be welcome. In what way is the region changed by each choice? WHICH active quests may become unavailable?
Kind if important info for a guide, fingers crossed for an update...
 Anonymous
If you come out the Soft Step trial, and "continue heading North" as the guide suggests, the next trial you come to is the faith Leap trial. So I have found this guide a bit confusing to follow.

 Anonymous
For the Self-Same Sharran Trial only the party members inside the antechamber when the sacrifice is made are cloned and the doors get sealed with a simple DC10 lock to prevent anyone else from entering.
If you send Shadowheart in by herself and strip her of all her equipment before making the sacrifice the fight should be over very quickly, especially if you stealth in and stab the clone in the back before she can even react.
I can't initiate any dialogue with Yurgir. Doesn't matter from which way I approach and the result is always the same, instant battle.

 Anonymous
If you use Command: Drop, or Disarming Maneuver on some of the Justiciar Constructs, they will drop unique non magical variants of the weapons they are carrying. The unique weapons are Daggers, and Scimitar's. They function the exact same as versions you can buy or normally find at vendors or out in the wild. These are the only ways to get these weapons, as these enemies do not appear in Act 3, or at any point after. They only have 3 Spawn locations in the entire temple, so while you have chances, they are finite. If you are a collector, you now have notice.

 Anonymous
I feel like I'm not understanding something about the Faith-Leap Trial. I just cast Daylight on one of the big platforms, then use Enhance Leap to jump to it, and insta die. Are you not supposed to use the big platforms?

 Anonymous
Shadowheart died in the fight (fell into the void) and I let nightsong go. I revived shadowheart, and she left the party.

 Anonymous
lol'd at the dipshit who made that gauntlet map please l2 properly space names apart

If you don't kill the rats outright on the top floor - they will continue going all the way down to the effigy, and in my case completely blocked the cragged rocks.
If you reload the game while in leap trial - all the platforms disappear completely from the screen, but are still there. Casting light doesn't do anything, either.
If somebody is standing below the elevator when it goes down - they will die.
 Anonymous
In the self-same trial, banishing your clone seems to work, if it's the last one. My MC was going to be a problem to fight, but they didn't get a single turn.

 Anonymous
If you cast gaseous form you can walk through the entire maze without activating any traps or guardians. At the end you can use the fly function to get past the gate.

 Anonymous
Way to get past the Trial of Faith. Rocks. Or anything that does not take damage when thrown. If it hits the void, it goes back to the start point, if it doesn't. Safe to walk. Additionally. It's acts as a marker, and reminder.

 Anonymous
I did not receive Killer's Sweetheart ring from the trial of Self Same, and you cannot loot the clones after you kill them. The Umbral Gem is there on the floor where the last one died. I even killed Shadowheart with Shadowheart last and no ring to be found.

 Anonymous
All companions with the exception of Karlach and Asterion disapprove of licking the spider. Karlach as noted above approves, and Asterion has no reaction. Also of note you can lick the spider a second time if you interact with it again. Doing so results in the same approval changes as the first time.

 Anonymous
 Anonymous
Can someone explain to me why I could just jump from platform to platform on the Faith-Leap trial on my first char but on my second I get set back and killed jumping to the last with the gem?

For the Faith-Leap trial, if you have a druid in your party it works to use the enhanced leap from the Wild Shape: Panther form to leap across the platforms to the umbral gem.

 Anonymous
Chamber of Commands top right above the rat pit has 3 loose tiles you can find - at least that's all I got so far.

 Anonymous
"If you ever get the Cheater's Folly inflicted on one of your party members, simply killing the clone will remove that debuff."
False. I have the debuff right now on Karlach after finishing off all four. A short rest also didn't remove it. I'm not sure if this is a bug or if the conditions for removing it are more complicated (though it looks like a long rest will cure it in any case).
 Anonymous
Kill the rats, they'll reward your mercy with doodoo garbage

 Anonymous
You can approach Yurgir's room from below "falling" for his ambush, which will start a dialogue with him where you can try to persuade to work with him

 Anonymous
Is it possible to let Shadowheart kill Nightsong and become a Dark Justiciar?

 Anonymous
You can kill the Demon and Justicar for all 3 items its what i just tested and jackpot.

 Anonymous
For the Self-Same Trial, if you only send 1 character down, there will only be 1 enemy. I snuck through this entire zone with my Rogue without engaging the Dark Justiciars, the rats, or Balthazar's crew. The only person who saw me was Yurgir who immediately attacked as I was picking up the gem. I fled, but I'm not sure how that will impact him being my friend later.

 Anonymous
i licked some dead spider meat, and Gale looked like he regretted our relationship

 Anonymous
To get the orb when you first enter you can use the darkness spell and walk right up to it.

Does anubody know who to solve puzzle with three "Gift of XX" pedestals? Right before pond-entrance to Darkness Realm.

 Anonymous
OMG blood of lathander was stopping the umbral gem puzzle from showing me the floor pattern

 Anonymous
is it possible to tame the elusive beast?
as for me, the best pet, unlike the flea
 Anonymous
is it possible to tame the elusive beast? as for me, the best pet, unlike the flea

 Anonymous
The riddle of the night can be skipped if you succeed a perception check infront of the relief of Shar. If you do, you can just walk through it. Although it seems kinda buggy, your character gets a little bit stuck at times.

 Anonymous
In the northeast corner of the map, there's a room where the mirrors "devour" the light. Does anybody know what to do in there? The plaque on the ground says "chamber of command."

 Anonymous
There is a map on the floor by the blood bowl in softstep trial

 Anonymous
I just want to say, when I did the softstep trial, I just ungrouped one of my companions and lockpicked the first door to the maze, and had them go through the whole thing shadow free, and then when I got to the final room I interacted with the bowl, which activates the shadows and just picked up the gem!

 Anonymous

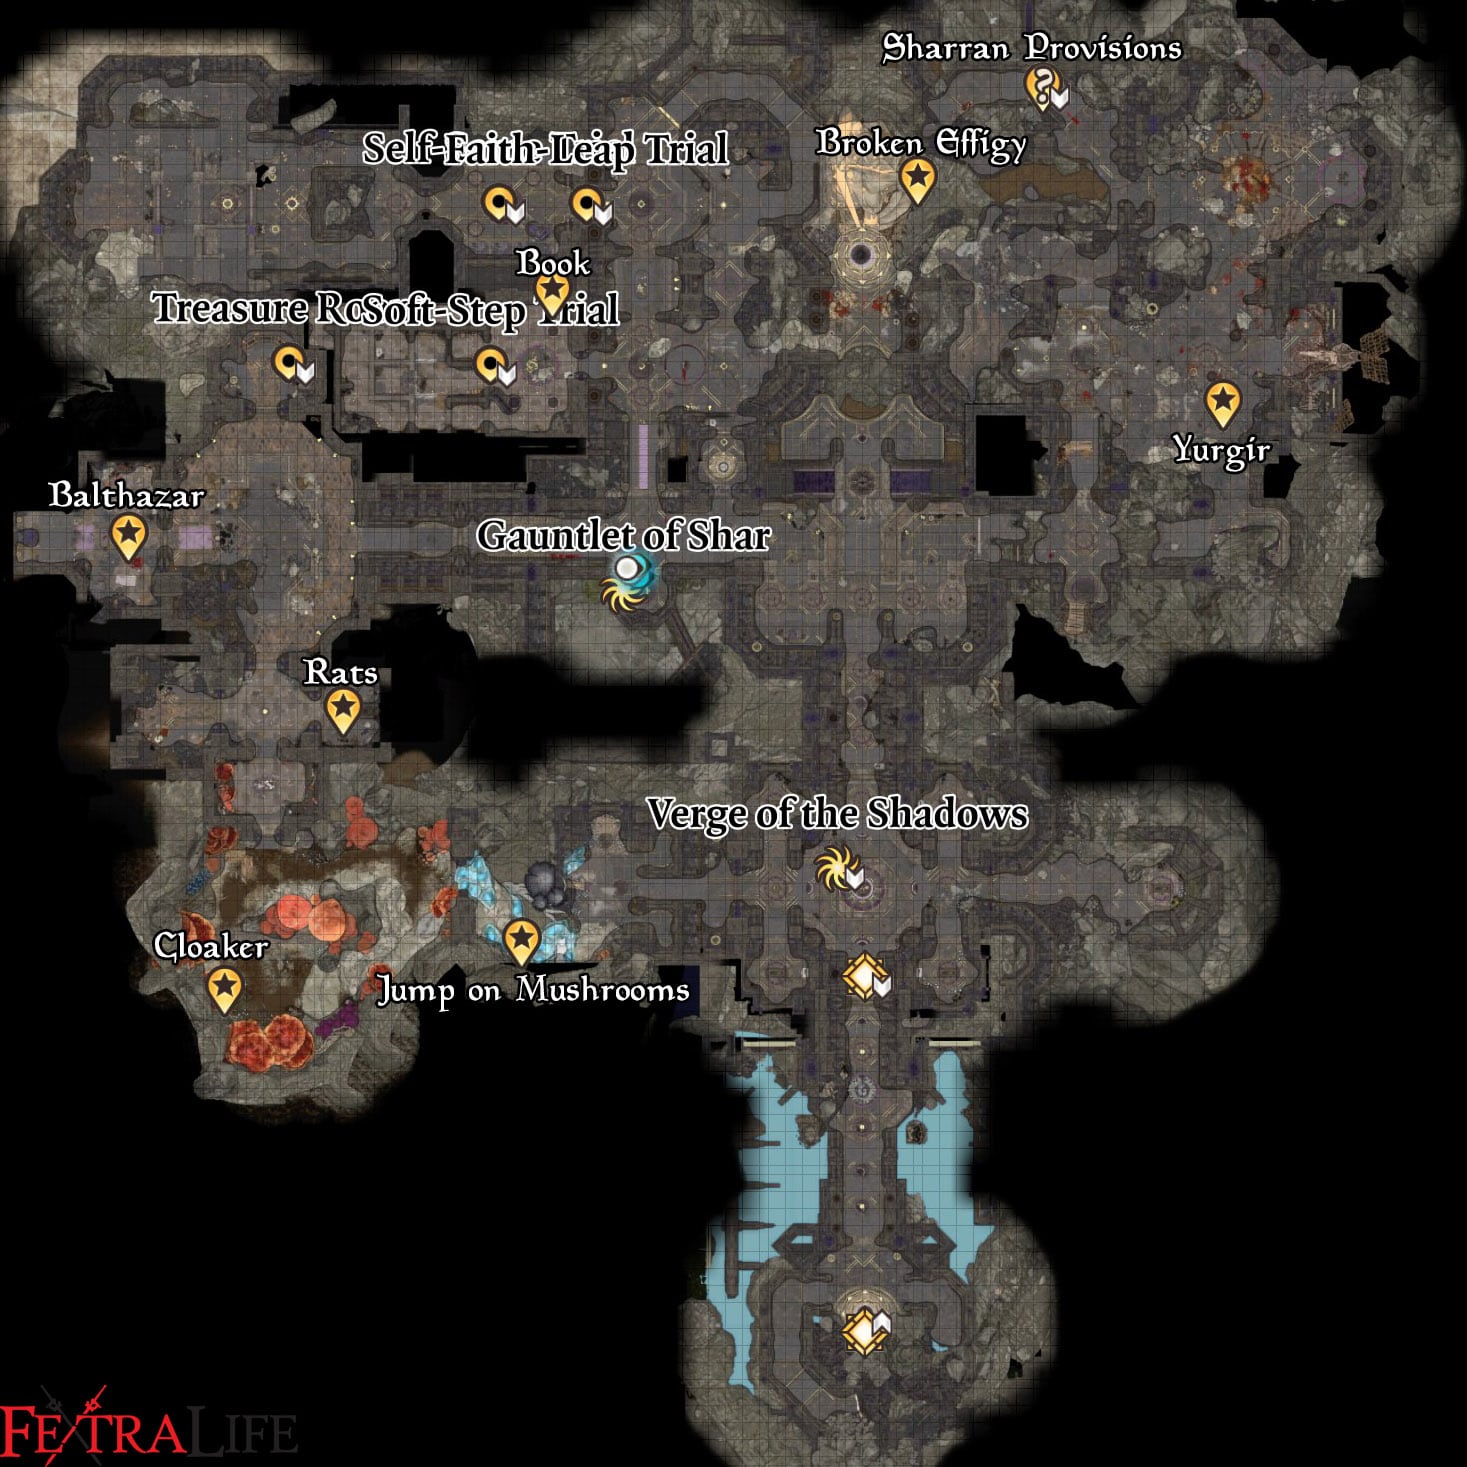




OrdoVT here, after tons of time wasted I found out there is a fourth orb with the demon guy. You can also just fly down near the lift that needs one Umbral Gem and use Knock on the door to open it without using the rest 3 Umbral Gems
0
+10
-1