Blighted Village |
|
|---|---|
| [IMG] | |
| Act | 1 |
| Suggest Level | 3-4 |
Blighted Village is a Location in Baldur's Gate 3 (BG3). On this page, you can find the information about the map, quests, enemies, notable items and other useful tips about Blighted Village.
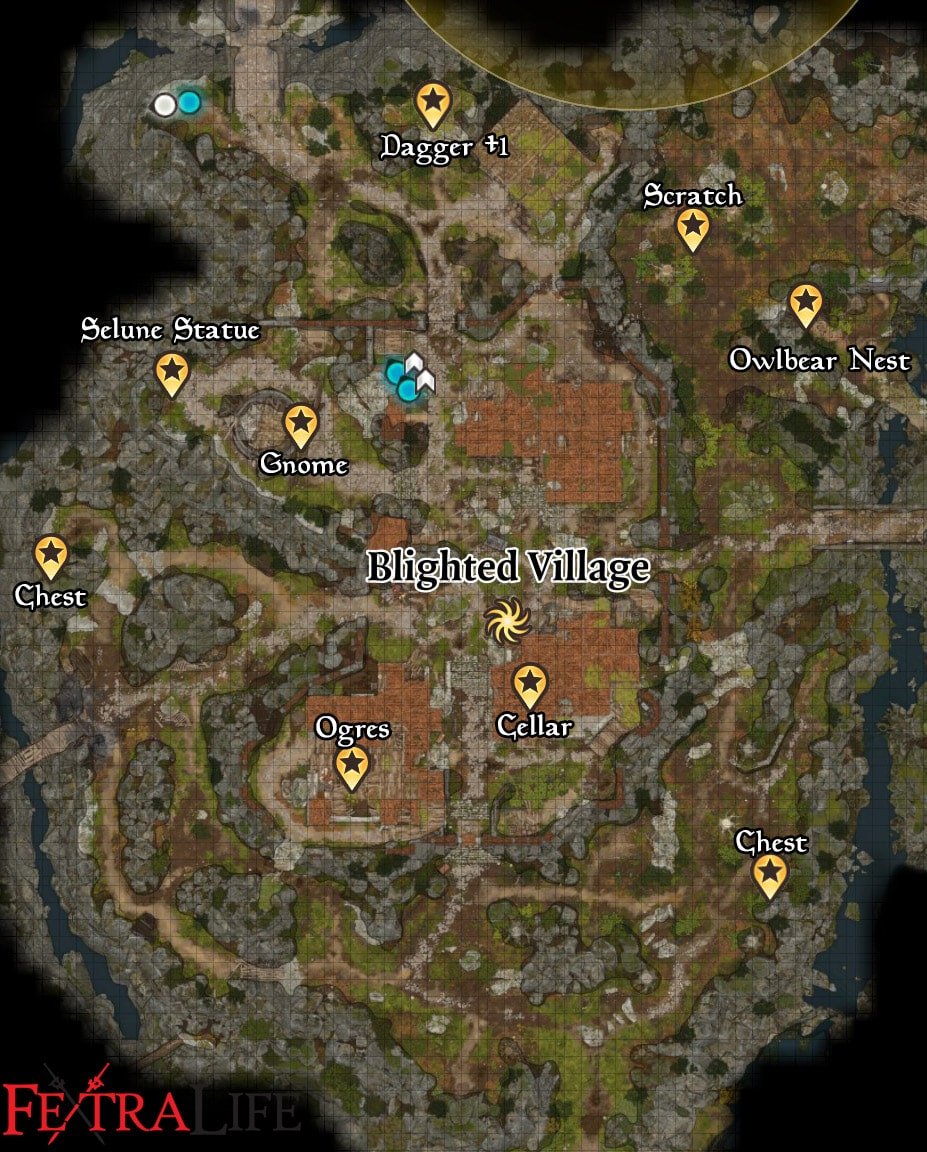
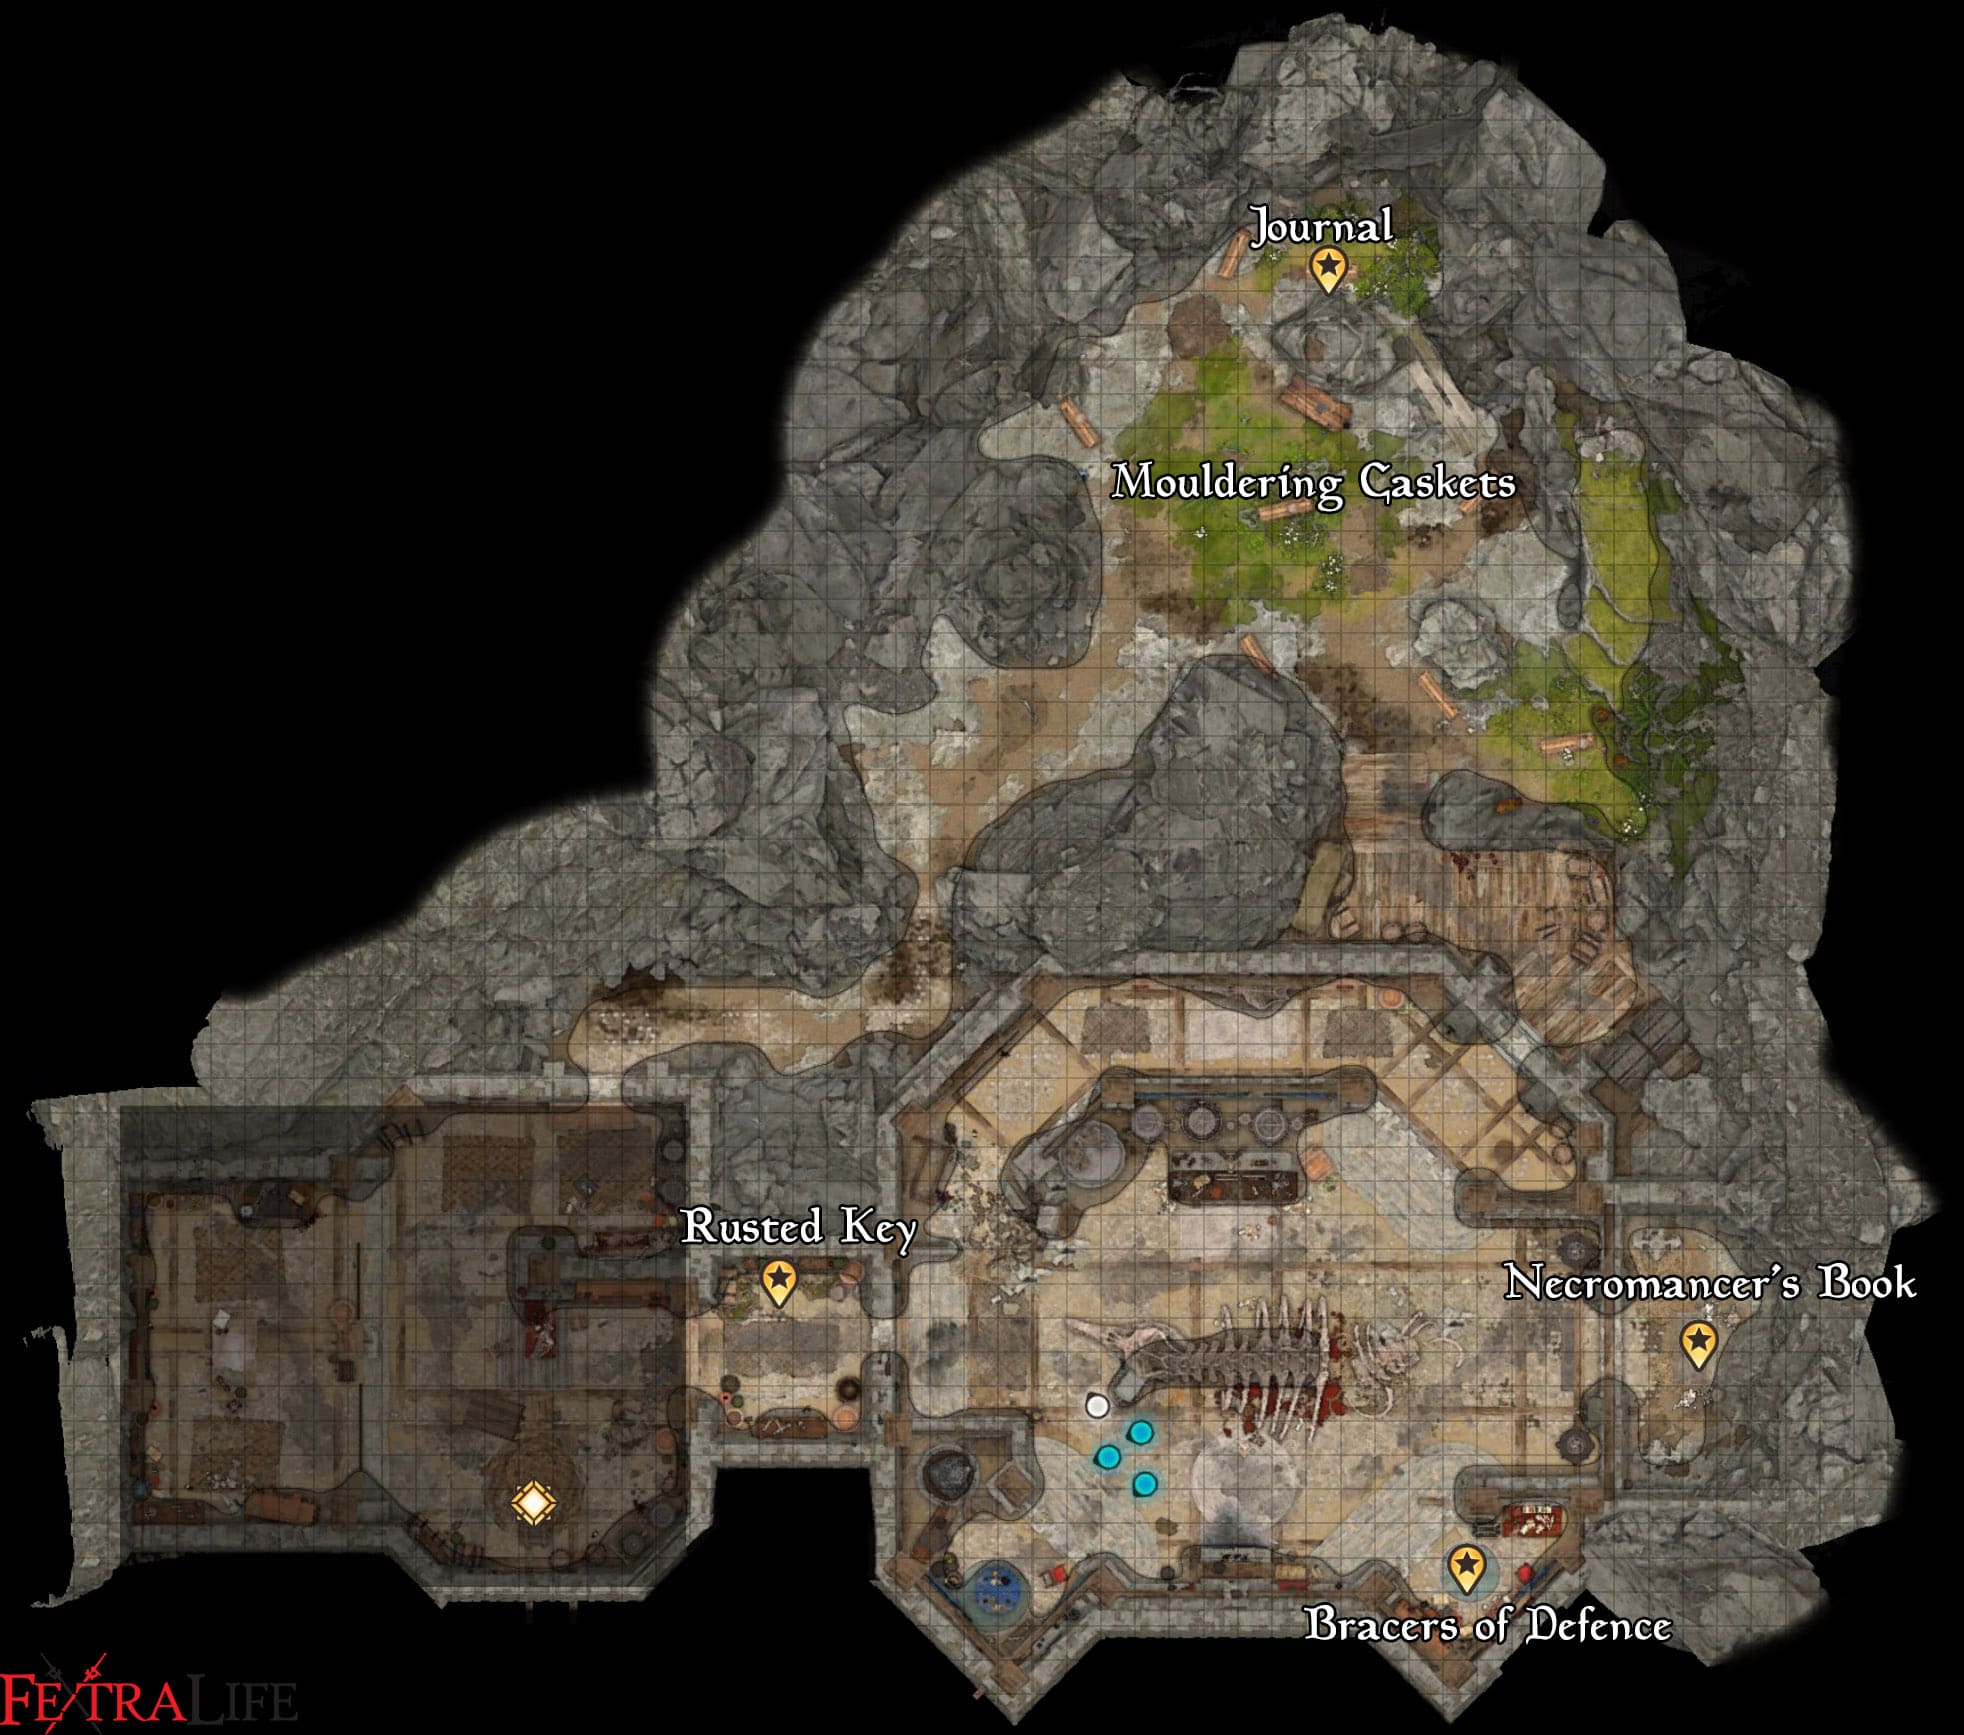
Baldur's Gate 3 Blighted Village Map
Blighted Village Sub-Areas in Baldur's Gate 3
- Apothecary's Cellar
- Whispering Depth
Baldur's Gate 3 Blighted Village Notable NPCs & Merchants
- Barcus Wroot
- Chock
- Fank
- Fezzerk
- Lump the Enlightened
Items in Baldur's Gate 3 Blighted Village
- Bracers of Defence
- Dagger +1
- Garnet Ring
- Haste Helm
- Highcliff's Blueprints
- Highcliff's Journal (Triggers Finish the Masterwork Weapon quest)
- Infernal Iron
- Lump's War Horn
- Smokepowder Satchel
- Steelforged Sword
- Sussur Weapons
- The Necromancy of Thay
- Warped Headband of Intellect
Baldur's Gate 3 Blighted Village Quests
Baldur's Gate 3 Blighted Village Walkthrough
The entrance to the Blighted Village can be found in the west side of the Forest at (X:65, Y:404). You can find a sign by the entrance that will say Moonhaven. As you approach it's entrance, your party will roll automatic Perception Checks. If anyone succeeds, you'll notice that there's trouble ahead in the Blighted Village. Head through the arch to enter the village and you'll be met with a cutscene. You may only get this cutscene if you passed the earlier Perception Check. If you want to avoid fighting, choose the first option - 'I know you're there. Show yourselves'. You next set of options will look like this:
- [INTIMIDATION] Out of my way, or I'll cut you down first.
- [PERSUASION] Just let me by and we'll pretend this never happened.
- [ILLITHID] [WISDOM] Stand down. Now.
- Attack.
If you choose the second option, you'll have to pass a DC 15 Persuasion Check. Succeed and the goblins will let you pass the village peacefully. Shadowheart approves of this action. Using the tadpole's psionic power or choosing the first option and passing the check can also help you avoid the fight with the goblins in this village. If this if proving to be a problem, try using the path on the left of the front gate to ambush them during the fight. You can stack crates to getup to the roof here. If you are a Drow, you may also have the option to pretend to be their boss.
Once inside, you'll unlock the Blighted Village Waypoint. North of the Waypoint is a Moss-Covered Chest you can lockpick for the Haste Helm. You'll need to pass a DC 15 Sleight of Hand Check to succeed. Head to the southwest, where you'll find a house occupied by three ogres - Fank, Chock, and Lump the Enlightened. Your first set of choices when you approach them will look like this:
- You're quite eloquent for an ogre.
- I bear no such brand.
- [DECEPTION] I'll do you one better - I'm one of the Absolute's chosen disciples.
- Attack.
If you choose the third option, you may recruit the ogres to help you in future battles through Lump's War Horn. If you tell the ogres that you do not possess the brand they're looking for however, they will immediately attack you. If you head into the center of the room, you'll automatically roll a Perception Check. Succeed and you'll find a Cracked Support Beam. If you destroy the beam, planks above it will be destroyed, creating secure spot to shoot ogres from. Planks may appear intact when you destroy the beam, but they are broken. Lump the Enlightened drops The Diary of Lump the Enlightened, the Warped Headband of Intellect, and a Scroll of Blur.
Exit the house out the hole in the southern wall and cross the planks found to the southwest to a lone island. You can find Volo's Guide to Baldur's Gate here next to a Backpack with a Potion of Healing. Head back and circle back to the back of the house (west side). As you enter back into the house, your party will roll automatic Perception Checks. If anyone succeeds, you'll find a Dirt Mound you can dig for Gold and an Onyx.
Exit the house out the front door and make your way back to the waypoint. Keep heading northwest until you encounter some goblins by a windmill. When you approach them the Quest Rescue the Gnome begins. If you want to save the gnome peacefully, you can ask the goblins what they're doing with the gnome. Afterwards, demand they release the gnome and you'll be met with four options:
- [INTIMIDATION] I won't let you harm a defenceless being - not without a fight.
- [PERSUASION] All of you lot against one deep gnome? You should find a better target.
- [DETECT THOUGHTS] Read the goblin's mind.
- [ILLITHID] [WISDOM] You will release the gnome. That's an order.
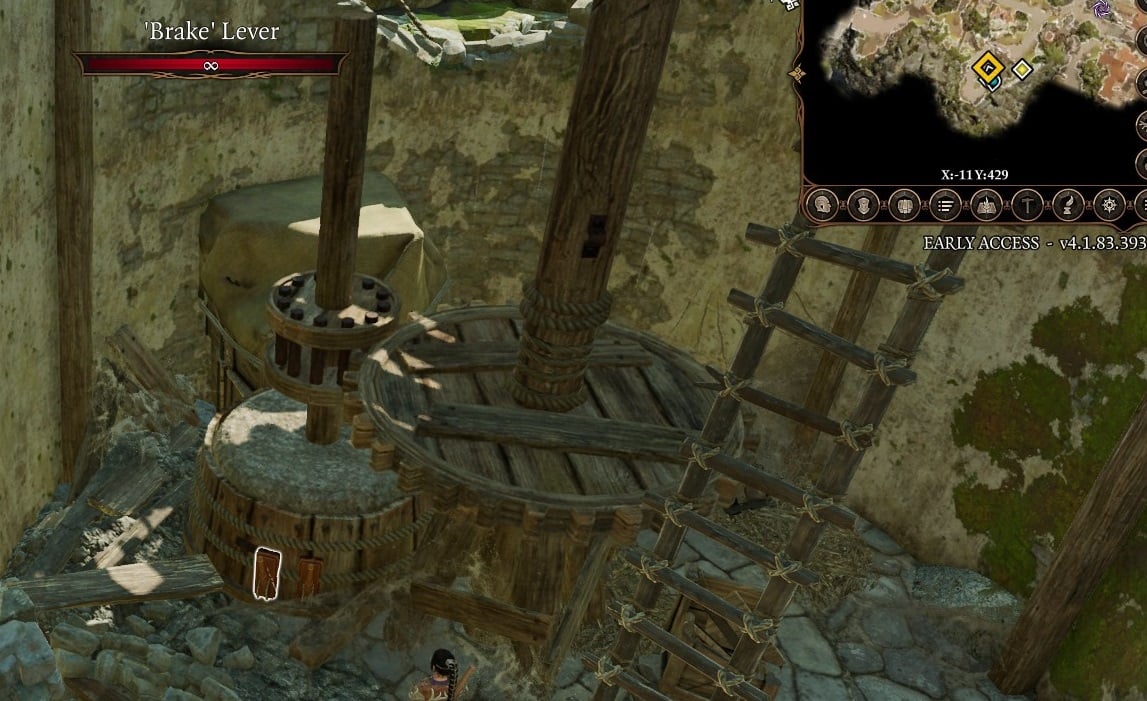
If you choose the second option, you'll have to pass a DC 15 Persuasion Check. Succeed, and the goblins will leave with Shadowheart's approval. The Gnome is still stuck to the windmill, so you'll have to find a way to get him down. Head around to the back of the windmill and enter through the hole in the wall. There are two levers here - the 'Release Brake' Lever and the 'Brake' Lever. Hit the Brake Lever to stop the windmill from spinning. If you stop it too quickly after the goblins leave, they'll notice the windmill stop spinning, so give it a bit of time before you hit the lever.
Back out the windmill, you'll find a broken altar nearby. If you approach it with Shadowheart in your party, you'll learn a bit more about your connection with Shar, though it does not contribute to Daughter of Darkness. Head back out to the windmill fan to let the gnome down. He's irritable, but if you ask him what happened he'll show you an amulet and be on his way.
Head back own the stairs leading to the windmill and turn left. You'll eventually reach some Shabby Wooden Doors. To the right of it is a sleeping Scrawny Bugbear you may choose to attack. Sneak Attacking it may kill the bugbear in one hit. Continue down this path and head into the house on your right. To the left of the fireplace here, you can find Highcliff's Journal. Reading it will start the Quest Finish the Masterwork Weapon. In the next room, you'll find a hole in the floor covered by some web. Burn the web away to be able to jump down.
As soon as you jump down, your party will roll automatic Perception Checks. If anyone succeeds, you can find a locked Wooden Chest just to your northeast. Lockpicking it requires you to pass a DC 10 Sleight of Hand Check, and if you succeed, you'll find Highcliff's Blueprints required for Finish the Masterwork Weapon. Up the ladder next to it is another locked Wooden Chest to the left. Succeed in a DC 15 Sleight of Hand Check to unlock it, and you'll find the Steelforged Sword and Infernal Iron.
Head back down the ladder go southwest into the forge. Approach the cracked wall and your party will roll an automatic Investigation Check. If anyone passes, you'll find that the Cracked Wall can be destroyed. Through this hole in the wall is the Whispering Depths. Please visit it's individual page for a walkthrough on the Whispering Depths.
After exploring the Whispering Depths, teleport back to the Blighted Village Waypoint. Head into the house right next to the waypoint. There are a few potions and ingredients in this house you might be interested in grabbing. Specifically, you can find a piece of Laculite on the shelf to the right of the entrance that unlocks the recipe for the Suspension of Laculite is it's your first time obtaining one.
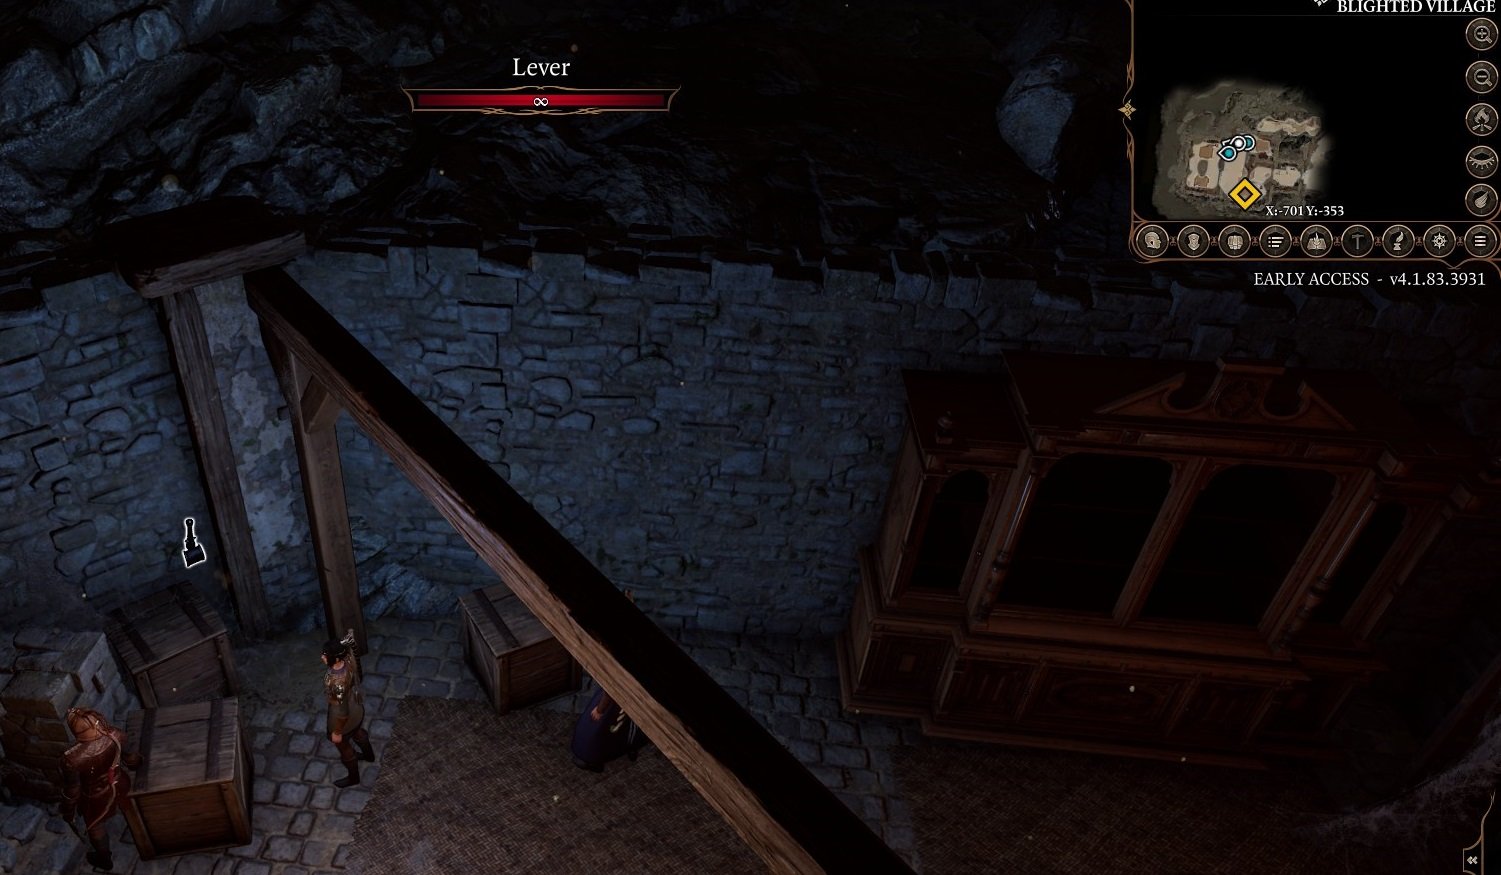
Read the Apothecary's Ledger on the bar to learn about the cellar of the house. The cellar can be accessed through a hatch on the floor underneath the window behind the bar. In the northwest side of the room, you can find an Elixir of Poison Resistance and a Healer's Log that you can take a look at to make a future dialogue choice easier to make. The Wooden Chest to the left of it also contain an Elixir of Fire Resistance, a Potion of Invisibility, and a Potion of Healing. When you approach this side of the cellar, your party will roll automatic Perception Checks. If anyone succeeds, you'll find a hidden lever nearby behind three Crates. Interact with it to reveal a hidden passage behind on of the bookshelves nearby.
Head through and follow the linear path to the next chamber. Here, you can open the Mouldering Casket directly to the right for a Scroll of Summon Quasit. If you approach the one in the middle, however, an undead Agile Guardian will pop out of the casket and ambush you. The rest of the guardians hiding in this chamber will come out to join the fight if you approach the casket this way. If you destroy the casket from range instead, you can fight the undead one by one. There are a few Fissured Stalactites on the ceiling you can destroy to deal extra damage.
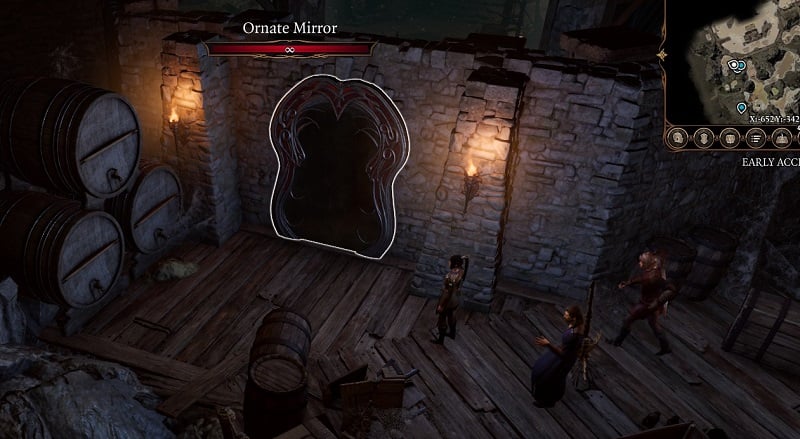
Once you're done, approach the north wall of this chamber and your party will roll automatic Survival Checks. If you succeed, you can find a Dirt Mound you can dig for a chest containing a Scroll of Witch Bolt and a Scroll of Darkness. In the crevice in the nearby wall, you'll find a Dark Journal you can read to progress Search the Cellar. Continue southeast, where you'll find an Ornate Mirror. This Mirror hides a secret and to reveal it, you need to make it believe you are an ally of its master. Interact with it, and your first set of dialogue choices will look like this (some choices may be dependent on your Race and Class):
- Repeat the name from the book you read: 'Ilyn Toth'.
- Tell it your name.
- [DRAGONBORN] I'm, eh - Svriit Hava.
- Examine your appearance.
- [WARLOCK] [ARCANA] Examine the mirror, trying to understand it's magic.
Thr fifth option is a DC 10 Arcana Check exclusive to Warlocks and will not progress the dialogue. You should avoid choosing the first option, as this is the name of it's master. If you choose the third option, you'll then have the option to declare that you are an ally. The mirror will then ask you about your opinion about Szass Tam. Your character will roll an automatic History Check, but whether you pass this check or not, your next dialogue choice should be saying that Szass Tam is a foul, wretched creature for the mirror to allow you to pass through.
You'll then be asked what balsam ointment is used for. If you read the Healer's Log from earlier, your character will remember having read it and you'll have the choice to answer to clean a wound. For his final question, you'll have the following choices:
- I'd see the ones I love.
- I'd look for whatever spells will rid me of this worm in my head.
- I'd see my enemies suffering.
To gain the mirror's approval, the second choice is a good one, showing that you seek survival and power. If you gave the wrong answer at any point in the conversation, the mirror will send an exploding construct to destroy you. Give the 'correct' answers and the mirror will open up, allowing you to pass through into a secret laboratory.
To the right of the stairs going down, you'll find a Basilisk Oil and a Scroll of Feather Fall. On the opposite side of the room, is an Antidote on top of the fireplace. To the right of the fireplace is a small alcove with a Wooden Chest containing a Scroll of Bone Chill, Scroll of Witch Bolt, Scroll of Crown of Madness, and two Scrolls of Detect Thoughts. If you interact with the Stuffed Bear here, your character will roll a Nature Check to determine how old it is. To the left of the fireplace is another alcove with a Gilded Chest with the Bracers of Defence.
Continue into the side room to the west to find a Rusted Key on one of the pot shelves. This key can be used to unlock the gate on the east side of the laboratory. As you approach it, your party will roll automatic Perception Checks. If anyone succeeds, they'll find a trap right in front of the gate that you can disarm through a DC 10 Sleight of Hand Check. Past the gates, your party will roll automatic Perception Checks, again discovering a trap that requires succeeding a DC 10 Sleight of Hand Check to disarm.
Within the small room, you'll find a tome named The Necromancy of Thay. Place the Dark Amethyst you found earlier in the Whispering Dark into the tome to start. At this point, you'll most likely want to put the book away and make a quick save here. Three people can be given the tome to read, but only one member of your party can read the tome in a single playthrough. Alternatively, this book can be destroyed through Radiant Damage, completing the Search the Cellar Quest prematurely. The three people who can read the book are the player character, Astarion, and Gale. If you give it to either Astarion or Gale, you'll gain their approval and can assume control of them to read the tome. Whoever reads from it will have to succeed in three Wisdom Saving Throws to finish reading from it at this point in the quest. If they fail any Saving Throw, the book will remain shut for the rest of the playthrough. The first Saving Throw requires a DC of 10, then the next a DC of 15. Your final set of choices will look like this:
- [SAVING THROW] Urge your hand to turn another page.
- [SAVING THROW] Force the book closed.
- [WISDOM] Drink in the darkness, embracing it, and turn the page.
If you choose the first option, you'll have to succeed in a DC 20 Wisdom Saving Throw. Succeed in all three Saving Throws, and you'll progress in the Unlock the Tome part of the Search the Cellar Quest. Head back into the side room to the west where you found the Rusted Key. Pulling the lever at the far end of the room will open up the wall next to it. This leads you back to the entrance of the cellar.
Exit the house and return to the gate next to the blacksmith's house at (X:23, Y: 442). Open the gates and immediately turn left to find a Mysterious Hole in the corner. There's a Curious Book inside that when read, gives you a bottle of Ithbank.
To the right of the gates is a barn. The Bird's Nest behind the building has a Garnet Ring in it. While you're near the barn, you'll hear some noises coming from inside. Unlike in the Early Access, you will not be warned against opening the barn doors. As soon as you interact with the door, your character will open it, disturbing the occupants within. When you do so, you will be forced into conversation with Buthir and Grukkoh, both of whom will turn hostile and attack you after the conversation ends. If you are playing a Bard, you may have a unique dialogue option to Persuade the two to leave peacefully instead. Otherwise, you may want to place your team members on the high ground nearby or on the roof before the fight. After you've defeated them, you can also find a Scroll of Bone Chill on the Mangled Body within the barn.
Continue north and you'll find a campfire up on a higher ledge. The Barrels here contain some more alcohol if you wish to grab them. More importantly, you'll find a Piece of Roasted Meat skewered into the campfire with a Dagger +1. Interact with the Roasted Meat to initiate a cutscene with the following options:
- [SLEIGHT OF HAND] Carefully wiggle the dagger until it slides free.
- [STRENGTH] Grasp the handle and pull the dagger with all your might.
- [INVESTIGATION] Examine the meat. Perhaps there is some trick to removing the dagger.
- Leave.
If you choose the third option, you'll be given a DC 15 Investigation Check. Succeed, and you'll be given the option to align the dagger with the meat's grain and pull. You'll then be able to pull and loot the dagger freely. Hop back down to the ground and follow the path northwest. At the end at (X:12, Y:482) is a broken bridge. You can Jump across to reach The Risen Road.
BG3 Blighted Village Notes & Tips
Backgrounds Objectives
The following Backgrounds have objectives related to this location:
- If you convince the ogres to work with you without giving them gold, you will complete one of the objectives of the Urchin background called Pyramid Scheme.
- If you recruit the ogres to protect you, you will complete one of the objectives of the Noble background called Bodyguards for Hire.
 Anonymous
one of the goblins says to wake the bugbear but he dosnt wake up even after throwing barrels and crates at him while sneaking and if you do attack he aggros immediately is there any point in waking him up

There's an interactable crate in the forge room, I KNOW it does something but I haven't been able to figure it out yet...

 Anonymous
For the mirror door puzzle, if you are a Sorcerer (possibly Wizard too), you can roll an Arcana check and learn that the mirror is made of living magic, bound to the mirror. This allows another option to make a "correct" answer to its final question by saying something to the effect of "I'm sorry you're bound to this mirror; I can shatter it and free you if you like." The mirror says it wants to stay because this is the only purpose it knows, but it is surprised and grateful for your caring offer, and it opens up. I can't remember if any party members approved or if any of us got inspiration, unfortunately.

 Anonymous
Speak with Dead has no effect on the mangled corpse inside the barn. HUGE missed opportunity.

 Anonymous
In the building with the ogres, you can get on top of the roof, where the beam that can collapse is supporting. There is a room in the tower part, and inside you can find a book, and a perception check. If you pass the check, there are wooden floorboards that you can open for a child's drawing and a handwritten note.

 Anonymous
 Anonymous
the hole isnt there for me i wonder if i did a quest too early or late or smth

 Anonymous
Shadowheart approves if you pass the DC 20 Persuasion check to get the ogres to fight for you for free

 Anonymous
MINOR SPOILER WARNING: Really cool interraction between spiders and this camp. I threw the eggs from the harper cache to have the 5 spiders following me, and it will cause all the npcs to follow them and try to chase them away. It seems like this might be an interraction with druids and wild form because I took them to the druid grove and everyone says "can't go 3 feet without bumping into a wild animal here", but they wont follow like the goblins. This probably doesn't have anything to do with it, but I am also a Drow and tricked the goblins beforehand.

 Anonymous
Re: the barn: I managed to get them to leave peacefully. There was a persuasion check I had available due to being a bard, something like "go on, people will pay a lot for smut of this". Not an exact quote, obviously. I passed the persuasion check and afterwards "the mood was ruined" and they left. I was able to loot the barn without having to attack them at all. Dunno if anyone finds this useful.

 Anonymous
 Anonymous
 Anonymous
the goblins thinking you're their boss seems to work with male drow as well

 Anonymous
Wyll just does not wanna talk to Feezerk. No matter what I do. Seriously, by the nine... what am I doing wrong? It's not bugged where they just go full aggro asap anymore. Is it linked to the changes that happened to Wyll's character? (Which was negligible, but that is neither here nor there.) If anyone has an answer, I would greatly appreciate it.

 Anonymous
There are perception checks for the boulder directly outside of structure where one finds the Ogres .. and for the support beam toward the front of the house ..
I finally got the crate under the boulder, but I cannot figure out what the perception check for the support beam was about .. any thoughts?
 Anonymous
If you can make Lump the Enlightened to your friend, he gives you a horn to call them (3 ogres) in any battle. They want money for this, but you can pay after the battle... so if they die, you wont have to pay :) Powerful help in Goblin village or against the Hag. After their death you still can obtain the Headband of Intelect.

 Anonymous
If you are a female drow, they will think you are their boss.


Whoever makes these guides for fextralife is always giving directions, e.g. "northwest" side of the room. There's not a compass, you ass. There's no way to know where "northwest" is.
3
+13
-1