Iron Throne |
|
|---|---|
| [IMG] | |
| ACT | Act 3 |
| Location | Lower City |
| Suggest Level | 12 |
Iron Throne is a location in Baldur's Gate 3. Iron Throne can only be accessed from Flymm Cargo by a sub. On this page, you can find related information about the map, quests, enemies, notable items and other useful tips about Iron Throne.
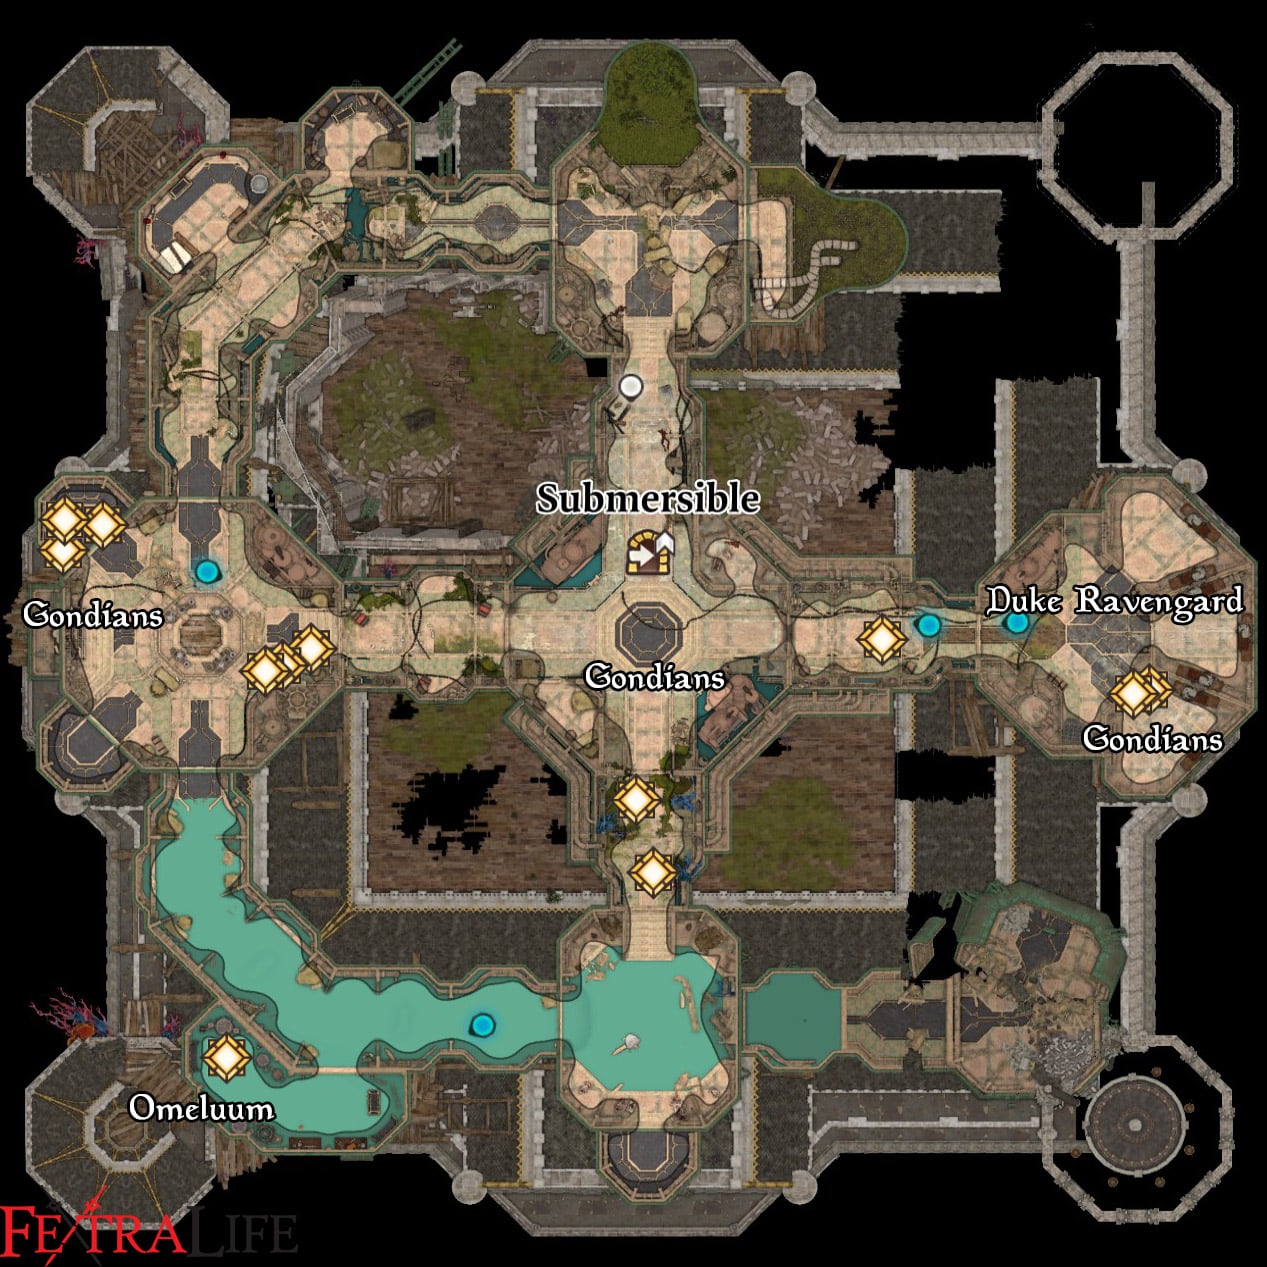
Iron Throne Map
Notes & Tips
- You can only reach this place from Flymm Cargo. (Quest Save the Gondians and Avenge the Drowned will lead you to this location.)

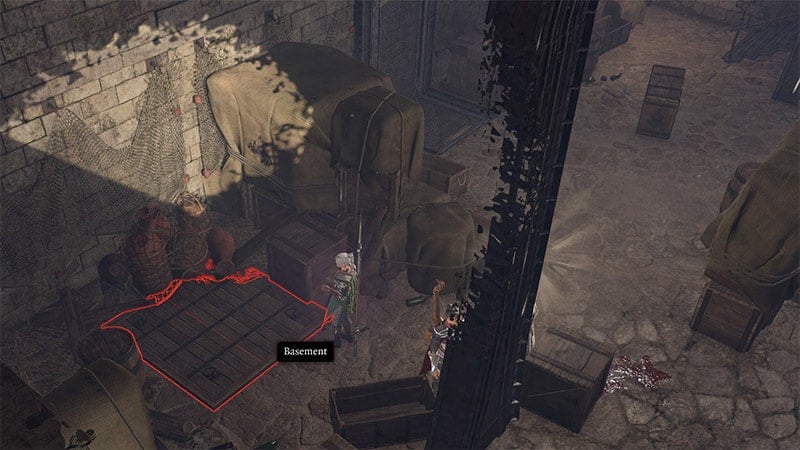
(Hatch to Flymm Cargo is hidden beneath some crates, at X-163, Y-143. Alternatively, you can reach Flymm Cargo basement through City Sewers.) - Killing Gortash makes this area impossible to enter, everyone inside will be dead, the submarine will dissappear and Redhammer, if still alive, will leave his resignation letter where he was found.
- You need to carefully select your team and spells for this location. Once you land on Iron Throne, you will have only 6 turns to extract as many prisoners as possible. Dimensional door, and Teleportation Circle spells are very helpful, as well as Potion of Speed.
- Omeluum is also kept here in the furthest corner. Send one of your tank teammate to rescue him, and draw the attention of Sahuagin. Omeluum has a special spell that can teleport himself and one extra back to the sub, so don't worry about the time.
- One tadpole specimen can be found on the table near Omeluum. (x-45, Y17)
- If you failed to save Gondians, and does not get Runepowder bomb from Ironhand Gnomes, you can use Speak with Dead on Zanner Toobin to learn how to disable the Neurocitor.
Quests:
Sub-Areas:
- --
Notable NPCs:
- Omeluum
- Duke Ravengard
Merchants:
- --
 Anonymous
One thing no one seems to mention is that to actually convince Redhammer to let you board the submersible you need to either pass multiple charisma checks or pay him 1000 gold to look the other way. Alternatively if you accepted the quest to avenge the dead Waveservant you can bypass the dialogue checks by saying you'll spare him from them in exchange for taking you to the Iron Throne, however if you do this for some quite frankly immersion breaking reason the Waveservants will find the secret dock and be waiting there when you return to immediately demand their justice, triggering a difficult fight if you choose not to betray Redhammer.

 Anonymous
With my Monk, I cheesed this pretty hard by just using Dash + Step of the Wind: Dash. SotW:D lets you Jump without using Bonus Actions, so with decent stats you can bound extremely quickly through the hallways of the Iron Throne. In my game I was able to reach every single prison cell within a single turn (with a couple lucky Stunning Strikes helping the prisoners in the west wing escape safely), as well as reaching Omeluum and escaping with him with 2 turns to spare.
If you chose to break Wyll's pact and the spiders appear when you go to rescue the Duke, you can use Sanctuary on him to let him escape scott-free. The spiders won't even target anything else if you do this; for me, they looked around aimlessly for 3 turns, and by the time they started moving the Duke had long been safe in the sub.
 Anonymous
Speed Potion or Haste Spell (Haste is better). Dash, Dash, Dash, use levers to open cells.
1) First companion to move open the central cells, then:
2) Weakest companion go left.
3) Stronger companion go right (to Duke).
4) Two "Medium power" companions go down (one stay in the central pool, high AC is good, and by the end he needs to run back to submarine, the other runs towards Omeluum, Omeluum can port himself and this companion to the submarine). Profit.
It is easy.
 Anonymous
In my playthrough, Karlach got Ensnared constantly and she was the last member of the mission. Shadowheart and Astarion were safe and i got my Wiz posterior saved by Omelunn.
During the last round, Karlach got the first turn but was ensnared near the exit ladder, but before the last turn, Omelunn managed to save her.
I managed to save everyone in the end thanks to Omelunn. I’m glad i decided to trust him.
 Anonymous
After knowing what to expect and what to do, this lvl isn't too hard. The key is to potion of speed on turn 1 (not before since that will leave you with just 2 turns) and dash through everything, do that and you can open all but 1 doors reliably. Having an action surge also means you can reliably help the one that's tied up. You'll be able to free everyone, kill some enemies and get back close to the center ladder before the lethargy kick in on turn 4.

 Anonymous
god this level sucked. there is like no alternate ways to do this one. you HAVE to go in loudly and do the 6 turn thing BEFORE you kill gortash. its so stupid for a level with such nice graphics

 Anonymous
Tried to be smart and talked to gortash after killing orin, so that he leaves for the elder brain. Sadly, the event is still triggered but instead of gortash telling you how you betrayed him it's one of his underlings telling you that destroying the iron throne were gortash's last orders.

 Anonymous
 Anonymous
Using "Arcane Lock" on the south gate, after sending someone to rescue Omeluum, makes this scenario much easier. Most of the enemies that spawn during the event are locked behind the door and wont be able to attack the survivors.

 Anonymous
Omeluum's ability to "teleport to submersible" (with one other ally) after use says "one more turn until this is usable". This is wrong, it will not be usable again after the first use. I sent him to rescue someone I had exploring NW of map and ability wasnt off cooldown and they both died.

 Anonymous
Is there something you can do in the bottom right? Theres an interactable door...

 Anonymous
Kickstart with the potion of flying then follow up with a potion of speed.

 Anonymous
Players face one encounter in the game where the solution isn't just faceroll through everything and they throw a hissy fit

 Anonymous
You stocked up on Potions of Speed, right? Between those and a few summons to distract the fish-folk this became a lot easier.

 Anonymous
I think what I didn't like about this area was that I never felt like I got the chance to make a choice or roleplay. Building up to this I had one stealthy sorcerer fly/sneak into the factory to scout it out and gain intel, and had them hide there while my other three found the sub dock. I figured there would be a way just to send them while the sorcerer stayed behind but nope, they got dragged along too... Oh and BTW Gortash found out without warning, and no you don't get any chances to experience Iron Throne any other way. It just feels incredibly railroaded for such an open-ended game.

 Anonymous
I had Redhammer literally body block the ladder, preventing anyone from leaving on one run, didn't realize until I noticed none of the captives were able to get past him, unlucky

 Anonymous
Good fun trying to get everyone out. Had a weird bug where one of the prisoners just refused to run for one turn so had to be dimension door'd. This page mentions Omeluum being in the bottom right but he wasn't there for me, though the parasite specimen was. Not sure if Early Access change or just a result from story decisions, though I've no idea why he would be here.

 Anonymous
For those without monk, rogue with cunning dash, haste, longstrider, storm sorc fly, misty step, dimension door, all that jazz :D It was a fun challenge to save them all. I finally felt like I had to actually micro manage on multiple fronts. That sort of complexity and stress was missing from much of the game for me so I'm glad I got to experience something like this.

 Anonymous
For anyone wondering what is in the chests in the NW (thanks monk step of the wind) its the counting house vault 6 key and some random loot, like maybe 500-700ish worth in gold.

 Anonymous
**** this place I just let them die and move on not worth the pain

 Anonymous
User monk, step of the wind: dash, get you infinite jumps then you can rescue everyone in one turn. let your teammate run mist step to each three sides of the prison, deal with adds asap

 Anonymous
 Anonymous
Rescued everyone first try, just barely. I used a 2 Sorcerers (1 hireling) to haste everyone, otherwise it would have been impossible

 Anonymous
Awesome area! It took me only 2 tries to save everyone! As other ppl have noted - feels like an action movie! :3

 Anonymous
Worst designed area of the game. This one made me just dont care about and skip.


Rescued Omeluum in the 4th turn, transported him back immediately. He has enough time to Dash back down and take another character back- I took him straight to Ravengard and was able to tele them back. I betrayed Mezora, so she spawned the exploding spiders in the Submersible. IDK if they actually aggro, because I just moved Ravengard down the ladder (the Dock?) and they didn't attack any of the other hostages that boarded, or other parts of the group that entered. They did however aggro after the escape cutscene, which is a little awkard because they can easily kill the rescued hostages when exploding..
1
+11
-1