Last Light Inn |
|
|---|---|
| [IMG] | |
| ACT | 2 |
| Location | RUINED BATTLEFIELD |
| Suggest Level | 6-7 |
Last Light Inn is a location in Baldur's Gate 3. On this page, you can find the information about the map, quests, enemies, notable items and other useful tips about Last Light Inn.
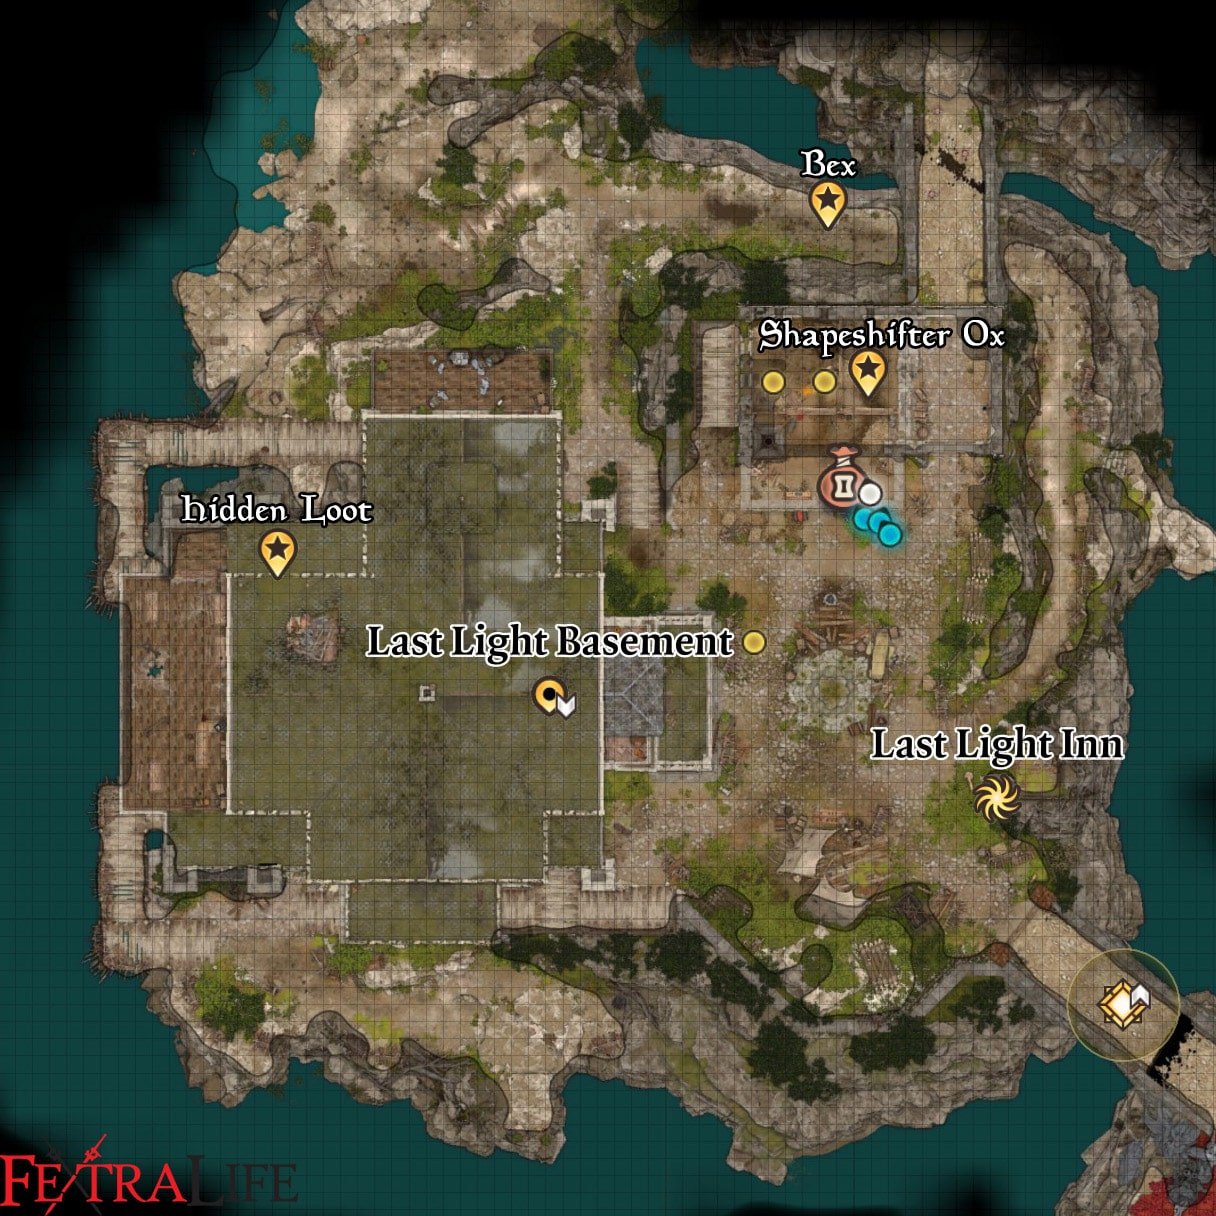
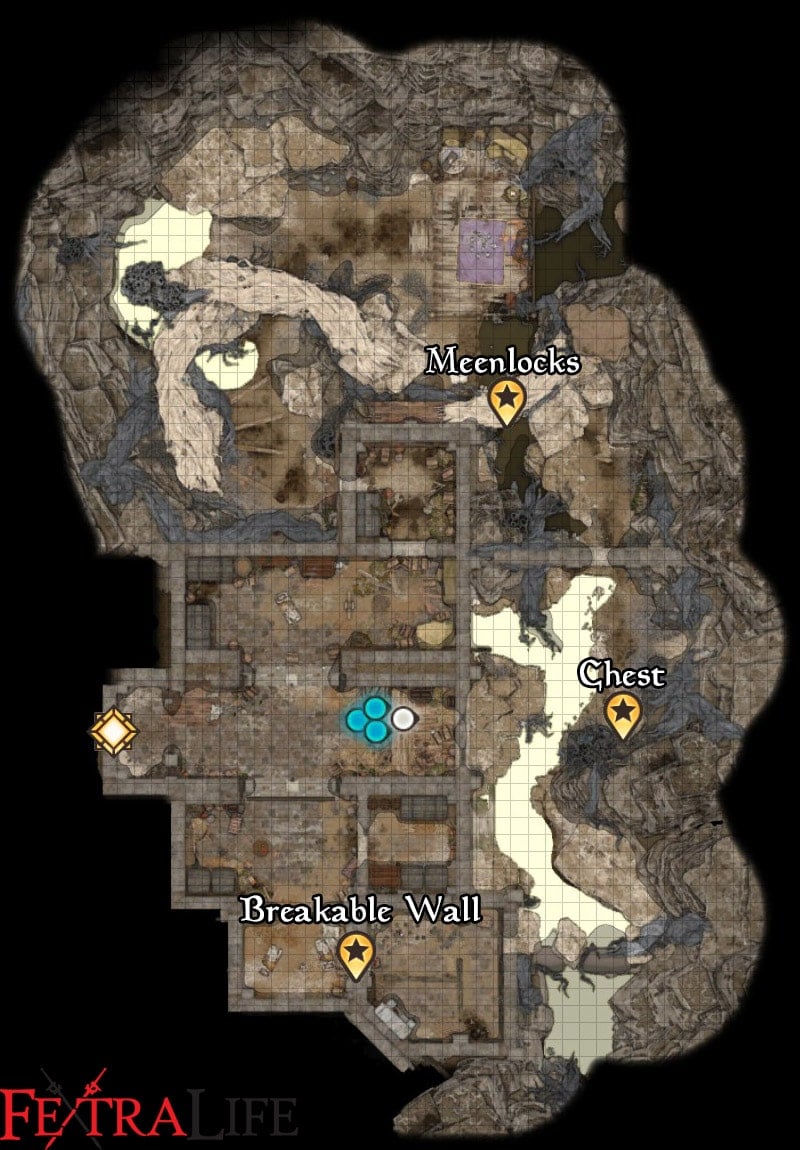
Last Light Inn Map
Last Light Inn Sub-Areas in BG3:
BG3 Last Light Inn Notable NPCs and Merchants:
- Alfira
- Barcus Wroot
- Cerys
- Fist Ulthred
- Harper Bor
- Harper Elindale
- Harper Essius
- Harper Manus
- Harper Mijah
- Harper Skywin
- Ide
- Isobel
- Jaheira
- Mattis
- Mol
- Quartermaster Talli
- Raphael
- Umi
Items in Baldur's Gate 3 Last Light Inn:
- The Way of the Wanderer
- Tower-Shaped Key
Baldur's Gate 3 Last Light Inn Quests:
- Find Mol
- Find Zevlor
- Infiltrate Moonrise Towers
- Investigate the Selûnite Resistance
- Rescue the Grand Duke
- Rescue the Tieflings
- Rescue Wulbren
- The Pale Elf
- Wake up Art Cullagh
Baldur's Gate 3 Last Light Inn Walkthrough
As you travel south in the Ruined Battlefield, you’ll eventually get to an intersection. The path on your right to the northwest will lead to the Last Light Inn that the Harpers pointed you toward. In fact, you’ll find them at the entrance to the place so move toward them for a cutscene. They’ll allow you in and you’ll be able to meet Jaheira for the first time. She’ll use some nature magic to root you in place, to which you have the following options to respond with:
- Just this once, I wish people would simply say hello.
- Jaheira, is it? I’m Tav, and I assure you none of this is necessary.
- You have to the count of five to let me go.
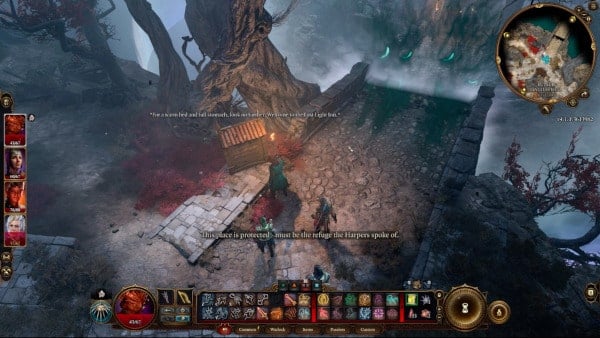
Choosing the second option will just make them push further. You’ll have the following options to respond with next:
- Easy. Give me a chance to earn your trust.
- I saved your soldiers and this is the thanks I get?
- Could you at least explain to me why you’re doing this?
- Back off. Now.
It seems she is mainly suspicious of you because she has a captured tadpole reacting to the tadpole in your brain, which makes them think you’re a True Soul. You’ll have the following options to respond with:
- I am not… a True Soul…
- Look to the Harpers you saved.
- Accept your fate.
- [STRENGTH] Rage against the vines.
- [WARLOCK] Beseech your patron to help you.
If you choose the fifth option, Mol will intervene and vouch for you. Jaheira will then question how you could have a tadpole but not be a thrall. You’ll have the following choices to answer the question:
- Because of this artefact. (Show Jaheira)
- I work in mysterious ways.
- You’ll just have to take my word for it.
- Attack
Karlach will approve of the first option. The tadpole she has will react negatively to the artefact as you take it out. Jaheira will question what exactly you are showing her, to which you’ll have the following choices to respond with:
- Tell Jaheira everything you know about the artefact.
- So far it’s been a life-saver. Here’s hoping you agree.
- Your guess is as good as mine.
If you choose the first option, they’ll finally ease up on you and ask why you’re there. You’ll have the following options to reply with:
- To destroy the Absolute in its lair: Moonrise Towers.
- I just want a cure for the parasite in my head. Moonrise Towers is my only lead.
- I’m here on holiday.
- My intentions are my own.
Choosing the second option will finally have them let you off to your own devices, before inviting you for a drink in the inn. Karlach will have an exclamation point over her here if you brought her along. If you talk to her she’ll fangirl over Jaheira. You’ll have an extra choice for dialogue here if you chose Background as a citizen of Baldur’s Gate. Choosing it or asking her if she knows her will have her explain to you the stories of Jaheira’s bravery.
NOTE: Some dialogue interactions will have additional options depending on the Background, Race or Class of your character.

Afterward, move forward and examine the runes on your right to activate the Waypoint for the Last Light Inn. Across the Waypoint, you’ll hear someone talking about their supplies, called Quartermaster Talli. Speak to her if you need to buy or sell anything. You can choose to ask her for any freebies with a Persuasion check. If you pass it, you’ll get a Supply Pack from her. She’ll have the following wares to sell:
- Shield of Devotion
- Incandescent Staff
- Arrow of Dragon Slaying
- Baby Blue and Gold Dye
- Mellow Fruit Dye
- Amulet of the Harpers
- Cindersnap Gloves
- Gloves of the Balanced Hands
- Obsidian Laced Robe
- The Mighty Cloth
- Yuan-ti Scale Mail
- Shadeclinger Armour
- Barkski Armour
- Hat of Uninhibited Kushigo
- Defender Greataxe
- Arrow of Arcane Interference
- Arrow of Many Targets
- Arrow of Salving
If you head back to the pavement and move further in, you can speak to Fist Ulthred and Harper Essius at (X:26, Y:139). It seems the locals are divided in their opinions of you and your crew. Choosing to glare at Ulthred will have him ask you your name. Giving your name cleanly will just end the conversation with Ulthred giving a last mean remark, and Essius telling you to move on. If you head to the west to a corner beside the stairs at (X:46, Y:133), you can speak to Harper Elindale who’ll just basically tell you to enjoy your time. The opening to his right leads to the actual inn. There will be a realistic bear statue on your left as you enter. Your character will do a Nature check as you enter to ascertain what it actually is. Past it will be Mattis, the little Tiefling from the grove. Talking to him while you have Karlach in your party will show you a cute exchange where the kid fanboys over Karlach, who gives her encouragement to scam the “greats,” as it were. You’ll have the following options to butt in with:
- ‘Scamming with the greats’? What kind of advice is that?
- Kid really looks up to you. That’s nice to see.
- You were too nice to that little runt.
- Leave.
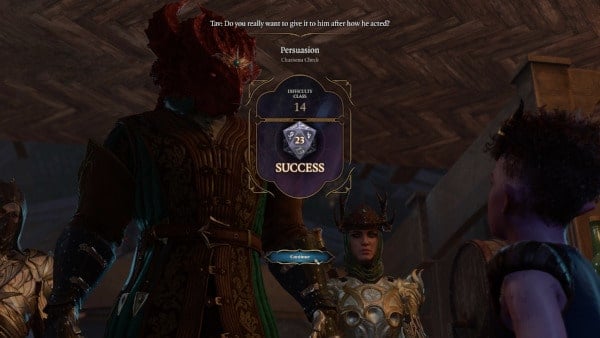
Choosing the second option will have Karlach mention she hopes the kid has a nice stable life in the city later on, like every kid deserves. If you talk to him again and ask if he has any special wares for you as a special customer, he’ll let you in on the fact that he has a key that Mol told him not to part with easily. From there you can either buy it from him, or get it from him through Persuasion or Deception. Choosing and passing the Persuasion route will give you the following options:
- [INTIMIDATION] Hand it over. Now.
- [PERSUASION] Mol knows it’ll be safer with me. And so do you.
- [INSIGHT] With all the other fabulous things you’ve found in this inn, why hold on to a dusty old key?
Choosing and passing the third choice will net you the Tower-Shaped Key. Move further in and into a little section on the south side of the building at (X:56, Y:134) to find Barcus Wroot. Talk to him and he’ll be glad to see you’ve made it to the inn. If you ask him what he’s doing here, he’ll say he went ahead and scouted and found a lot to take note of. If you ask him what those are, he’ll list them for you and then proceed to explain that he’s trying to reproduce a recipe that’ll help you out, and help you help Wubren and the others out. You’ll have the following options to reply with:
- Of course I am.
- Depends. What did you say you were making?
- We’ll see.
Choosing the first option will have him explain that he’s making a powerful smokepowder that’ll help you save the gnomes trapped in the Moonrise Towers. You’ll have the following options to reply with next:
- I thought that was your mission.
- How did deep gnomes get trapped in the Towers?
- I have more important things to do.
- Wubren who?
If you choose the first option, he’ll explain that he’ll do his part in accordance with his capabilities, while he hopes you will do yours. Asking him if you can help will have him answer with a no promptly end the conversation. Near Barcus will be Raphael and Mol playing lanceboard against each other. Interacting with them will have Mol ask if you’ve ever played and she’ll claim it’s her first time playing. An Insight check will be rolled for you here and if you pass, you’ll figure out that it is actually not her first time but she’s using this tactic to try to win. You can choose to try to seamlessly rig the game in favor of Mol with a Sleight of Hand check here. Successfully doing so will gain Astarion and Karlach’s approval. Mol will win against Raphael will reveal he’s made a bargain with the little Tiefling. Choosing the first dialogue option afterward will have him reveal that he finds Mol to be quite ambitious, which is to his liking. If you’ve brought Astarion along, he’ll try to ask Raphael about the runes that his previous owner had carved on his back. Depending on far along you are with Astarion’s approval, you’ll have the following options to voice out:
- What are you talking about, Astarion? What scars?
- Don’t play games, Raphael. Help him out.
- This is a bad idea, Astarion. We should find another way.
- I don’t think he knows.
Choosing the first option will have Raphael magically remove Astarion’s Equipment to show his scars. After a short dialogue, you’ll get on with the game. Astarion will be Inspired if you chose to shuffle the board.

Head back a little bit to talk to Jaheira at (X:67, Y:139). She’ll propose a toast to your health. You’ll have the following options to choose from in response, if you have Karlach with you:
- To your very good health.
- [MEDICINE] Smell the wine first.
- You’ll have to pardon my friend Karlach. She’s very excited to meet you.
- I’m not thirsty.
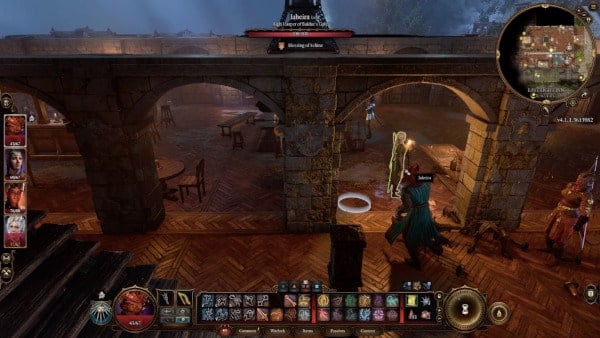
If you choose the second option and pass the Medicine check, you’ll discover that she’s laced the drink with an herb that acts like a truth serum. You’ll have the option to express your trust wavering as a result afterward, but then you’ll still have to choose whether you’ll drink it or not. Drinking it will gain disapproval from Astarion and Shadowheart, but will gain approval from fangirl Karlach, if you’ve brought any of them with you. Jaheira will then ask if the parasite is affecting you or not. You’ll have the following choices to answer the question with:
- I see now why you’ve spiked my wine.
- Yes. The parasite is giving me powers I never had before. It’s changing me for the better.
- It’s trying to change me, trying to win me over, but I’m resisting its temptations.
- [SAVING THROW] Despite knowing you’re under the effects of a drug, try to deny the tadpole has any influence over you.
The first option will just have her press you for a different answer. Choosing the fourth choice and being successful will have her be satisfied with your answer, but explain why she has to be cautious. She will say that tracking the parasites led her to someone who should’ve been dead for over a century. If you ask who it is, she’ll reveal it to be General Ketheric Thorn, the leader of the Absolutist cult. It seems that not only is he not dead, he’s also currently unkillable. They had an encounter with him as he and his army were marching to Baldur’s Gate. Suffice it to say, he defeated them and had them chased all the way to this inn. However, she seems to have some hope in you. You can respond to this with the following choices:
- What do you have in mind?
- You think I can kill him?
- I don’t think so.
Her plan is to have you infiltrate his base as a True Soul and find out how to deactivate his invincibility. You’ll have the following options to reply with:
- Ketheric’s days are numbered. I’ll make sure of it.
- You want to make use of my infection - I want to be cured of it.
- Seems like I’ll be doing most of the heavy lifting.
- I’m not doing this.
Choosing the second option will have her explain that you’ll probably find a means to cure yourself in the Moonrise Towers anyway. You can then ask her how to get there past the debilitating shadows. She’ll explain that Isobel, a Cleric of Selune, protects the inn with her light, and will be the key that’ll let you protect against the darkness. She bids you go upstairs at her recommendation.
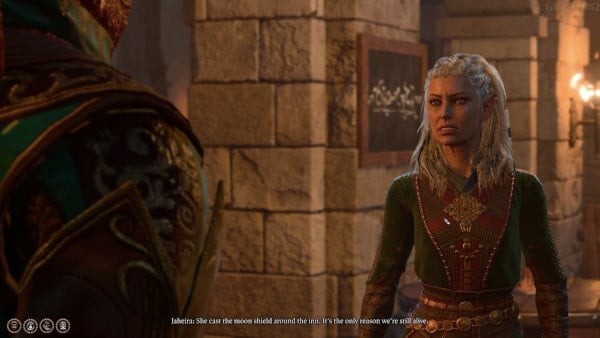
Before doing so, you’ll find Alfira close by at (X:64, Y:142). If you talk to her you’ll learn that apparently some cultists caught most of the Tieflings from the grove. Asharak was made an example of, but Rolan used himself as a distraction to let whoever could run get away. You can then choose to assure her that you’ll find the others who haven’t made it to the inn. On another side of the spitfire is Cerys. It seems she’s one of the scouts of the inn. Choosing to ask her about the cultist ambush will have her recount the events in better detail. It seems Zevlor was in favor of just surrendering while most of them were tired of the oppression. You’ll have the following options to continue the conversation with:
- Have hope. You survived - I’m sure the others did too.
- So you abandoned them.
- You did right. You do not want to be a prisoner of the Absolute.
- What are you doing out here to begin with? You were bound for Baldur’s Gate.
Choosing the first option will have her reveal that Zevlor seemed to think the cult wanted them alive, and then end the conversation. Further west will be the bar which is where Mol seems to have scurried off to after winning the board game against Raphael. If you talk to her she’ll commend you on your help in scamming the devil. You’ll have the following options in response:
- You need to stay away from Raphael. His deals are poison.
- If Raphael offered you a good trade, you should take it.
- [WARLOCK] He’s a devil, Mol. They are fickle patrons - ambition and treason lie before you.
Choosing the third option here will have her be defensive about dealing with a powerful devil. If you ask her what Raphael offered her, she’ll say it was just protection. A successful Insight check here will reveal that she’s lying. She’ll proceed to say that she hasn’t given her yes anyway and guesses right that you’ve struck a bigger bargain with the devil yourself. You can choose to do a Persuasion check here to get her to tell you what was actually at stake. It seems aside from protection, she’s been promised to before the new head of the Thieves' Guild at Baldur’s Gate. If you keep trying to dissuade her from pursuing this, she’ll put her foot down and say whatever she chooses, it’ll be her choice and hers alone. If you brought Karlach with you, you can talk to her and she’ll comment on how Mol seems to be set on the mistaken path she was set on when she was her age. She has hope though that Mol will make smarter decisions.
On the other side at (X:75, Y:144) is Rolan, the hero who kept the cultists distracted. You’ll see him being mean to Tiefling children who were tasked with manning the bar. You’ll have the following dialogue choices to intervene with:
- Alfira told me you’re the reason her and the kids escaped.
- I heard your siblings were taken by the cult.
- The kid’s right - you need to lay off the liquor.
- Want to talk about your sorrys instead of drowning them?
Choosing the first option will have him affirm that he did save the orphans, but at the cost of his siblings getting captured. Somehow it’s also your fault for inspiring them. If you ask him if he knows where they were taken, he’ll say they’re either dead or at the towers. If you tell him next that you’ll take responsibility and rescue them, he’ll fight it and say he’ll be the one to deal with it, and promptly end the conversation. Umi behind the bar will just say he’s also tried telling Rolan off. Ide, walking around him, will be upset. It seems he has a spell book that he’s planning to give Rolan. You can eventually either do a Deception, Intimidation, or Persuasion check to try and get the book for yourself. If successful, you’ll get The Way of the Wanderer.
Head up the stairs at (X:71,Y:134) to get to the second floor. Harper Mijah’s on the eastern side of the building patrolling along the balcony. Isobel’s room is to the north but she’s actually further along on another balcony, which you can reach through a door at (X:64, Y:168). You’ll see the shielding spell take its toll on her before she notices you. Choosing the first choice will have her express that she’s full glad to have you as their little miracle against the darkness. She’ll proceed to enchant you and your party with the same shield she’s cast around the inn but will warn you that it won’t be enough to protect you when you reach the depths of the Shadow-Cursed Lands, though it should be enough to reach Moonrise Towers. If you’ve brought Shadowheart along with you, she’ll get stung by the Spell, and ask her lady Shar for forgiveness. As she gives you advice on how to best Ketheric, you get interrupted by Flaming Fist Marcus, a former brave ally of theirs, now turned by the Enemy in exchange for a pair of wings. You’ll have the following options to react with:
- What are you?
- Isobel, do you know this man?
- I say we follow the winged freak.
After she introduces him to you, he’ll reveal himself as a True Soul and try to telepathically order you to take Isobel back to their home base. You’ll have the following options to respond with:
- [WISDOM] Probe his thoughts for more information.
- What does he want with her?
- Sounds like fun - I’m with you.
- I’m not like you - I don’t take orders from the Absolute’s cronies.
- Touch her and I’ll kill you.
Choosing the first option and passing the Wisdom check will allow you to see Ketheric give the order to Marcus. Isobel will question your telepathic interaction, to which you’ll have the following options to respond with:
- Marcus is trying to kidnap you, Isobel. We’re going to need to fight our way out of this one.
- Say nothing.
- You’re going to meet Ketheric - face-to-face.
If you’ve brought them along, Astarion will disapprove of the first option, while Shadowheart and Karlach will approve of it. Choosing it will reveal your allegiance. Marcus will let out a roar to call out more minions, and you’ll enter a combat engagement. If you brought Shadowheart along she’ll gain inspiration from having a Selunite spell cast on her. For this fight, you’ll have to attempt to defeat Flaming Fist Marcus and six Winged Horrors. All of them are going to do their best to go straight of Isobel. Your best bet for a small chance of winning here is to use a protection spell on Isobel, while you dish out as much damage as you can on Marcus before he knocks Isobel out. Chances are, however, you’ll lose this fight due to Marcus’ sheer bulk and power. After he knocks out Isobel, all hell will break loose in the inn, resulting in the death of most of its inhabitants.
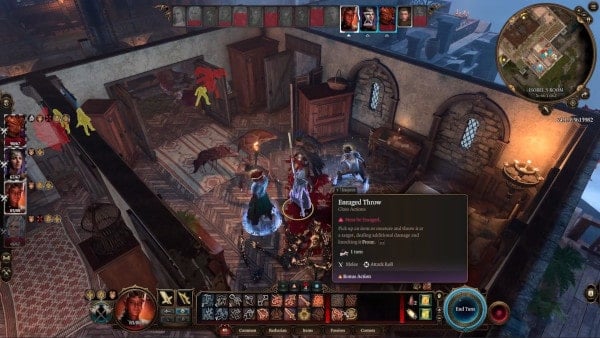
The shields will disappear, allowing the shadows to enter the inn and turn some into Enemies, while the others die to the horrors that enter. Outside, Jaheira will see the shields melt and ask you what happened. Choosing the first choice will have her restate your mission to figure out Ketheric’s invincibility. Before you get out of here to do that though, you’ll have to clear the area of allies turned to foes. This won’t be difficult by any means, other than the fact that they used to be innocents. There’ll be another group waiting for you on the bridge to the southeast, which is also bring in some Creepers.
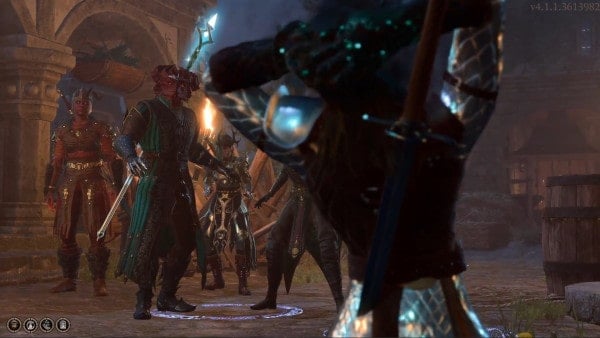
After the fight, head to a pathway at the side of the inn leading north, at (X:16, Y:149). Keep following the path down below the inn’s foundations, until you reach a stone bridge heading to the southeast, back to the Ruined Battlefield. There will be a house with double doors right as you enter, shrouded in thick darkness. There’s a Rustic Chest at the foot of the broken bed that may contain valuables and maybe some scrolls. The skeleton nearby might have a Gold Ring. Make sure to make your looting quick, as the protection granted by Isobel doesn’t do you any good when the darkness is this thick. The Opulent Chest at the end of the room has a lockpicking DC of 16 and contains the Penumbral Armour. There are roots in the middle of the room that will lead to a shadow-free place where you can take a breather so make your way out through there. If you brought Karlach along, she’ll gain inspiration from getting affected by the shadows.
BG 3 Last Light Inn - Cellar
Once you land, there will be a door to the southeast that leads to some water, and a trapped and locked Heavy Chest. It has a disarming and lockpicking DC of 10 and 14 respectively, and will contain a Coruscation Ring. Follow the path of the running shallow water to the south to get to a set of double metal doors, which will have a lockpicking DC of 14. You can grab the Thieves’ Tools on the platform inside. You can cast any fire Cantrip on the barrel to blow it up and open a hole in the wall. Head inside and open the cages and chests here for a couple of potions. Break the creates to the northeast, at (X:27, Y: -724) in front of some double doors. Open the doors and then hit the smokepowder barrel inside with another fire Cantrip. Head out of the hole you created and use the large branch as a bridge to cross to the other side. You’ll run into seven Meenlocks here so make quick work of them. You can let them come to you and funnel them through the bridge. Across the bridge will be a hidden Selunite shrine. You can loot the painting here and maybe profit from it later on. Head back inside the cellar and head out the door there to get back to the inn. Proceed to the bridge at (X:-11, Y: 120) to head back to the Ruined Battlefield.
BG3 Last Light Inn Notes & Tips:
- You can steal Orders from Jaheira from Harper Branthos.
Marcus is essentially a level 6 Lae'zel clone, with extra hit points (about 126HP in Tactician mode).
If the player is absolutely against any type of metagaming or cheating, then after the pre-combat conversation is over, the player party will be standing right next to both Isobel and Marcus, with nobody else nearby. As a result, the first 2 rounds of combat is equivalent to a party of 5 level 6+ characters vs a solo level 6 fighter (who is essentially just a Lae'zel clone).
How weak the player has to be in order for 5 of them to be beaten by a single Lae'zel clone?!
A no-cheating, no-rushing player party has more than enough power to precisely choose/determine the result of this fight - even on Tactician. They can choose to eitehr
1) kill both Isobel and Marcus, or
2) kill Marcus but let Isobel be killed, or
3) kill Marcus but let Isobel live, or
4) kill Isobel but let Marcus fly away alive carrying Isobel's dead body, or
5) kill neither of the two and let Marcus kidnap Isobel alive.
 Anonymous
At the dialog choice before the fight (i.e. What are you?/Isobel, do you know this man?) press the character select button in bottom right of your screen, and go to the rest of your team.
Have someone buff/protect Isobel (I used Greater Invisibility which works great, but can also try Feign Death, Warding Bond, Invisibility, Sanctuary, etc). Note the last two options dispel when Isobel attacks someone, while Feign Death should both protect her and stop her running around... Do any other last moment preparations for the fight.
Then go back to the character in dialog, resume the conversation and lol at their attempt to hit the invisible/protected Isobel.
Placing boxes against the doors is great for some privacy early in the fight.
 Anonymous
At the dialog options prior to the fight press the 'select character' button down the bottom right and go to the rest of you team.
Have someone buff Isobel (Greater Invisibility works great. Other options include Feign Death (protects AND stops her moving), Warding Bond, Invisibility, Sanctuary, etc.). Put your team in position for the fight.
Then resume dialog and lol as Marcus tries to hit the invisible Isobel...
 Anonymous
Irritatingly, you can't tell Jaheira that you're resisting the tadpole's influence (at least if you take the drug), even if you've never consumed any tadpoles and have no powers from it.

 Anonymous
Absolute nightmare of a fight if you're not prepared to cheese it with something like Banish or Sanctuary. Isobel refuses to cast mage armor, which would give her extra bonuses on top of the AC. She will run out of darkness, which would otherwise keep her safe and trigger a heal on her every turn. She also LOVES triggering opportunity attacks on herself. It took three tries before I succeeded the fight, only to find Jaheira had killed Alfira via icestorm collateral. It really showcases the worst aspects of this game's AI.

 Anonymous
How to win the Marcus fight ez: (1) Before talking to Isobel make sure you've leveled to lvl 7. (2) Invest in a rare Hold Monster scroll and give it to the person in your party with the highest initiative (the one that is 1st in a fight). (3) Start dialogue etc. side with Isobel when Marcus shows up etc. (4) When fight starts, Marcus will land 2-3 hits on Isobel, fair enough; if she survives, cast Hold Monster on Marcus and whack him like it's your job. If u r standing within 3 meters from him, all attacks will crit 'cause HM scroll effect. Killed him first try with Lae'zel in her very first round, 3 hits - as a fighter she has multiple attacks - all crits, he was a goner.

 Anonymous
His Majesty - No longer a hairless cat as of Patch 3. Still no quest to get him his Selune Blessed Milk bowl, on top of the countless bugs it introduced.

 Anonymous
any other walkthroughs that depict one where I SAVED Isobel and not assuming the barrier will fall?

 Anonymous
for an easy win of the fight.
before you speak to Isabel block the doors with the boxes on the balconey
cast sanctuary on Isabel...
speak with Isabel and Marcus alone will attack you and you can focus him down easily
clean up the rest
 Anonymous
Immediately threw healing at Isobel, then casted invisibility on her right after as soon as I could on the next turn, keeping my caster out of harms way to maintain concentration. Thankfully, she actually got out of the way while invisible so my fighters were able to put in work on Marcus. Then used my caster to erase the groups of Horrors.

 Anonymous
sanctuary is key,. cast on isobel,. then heal,. bring karlach to bash the crap out of marcus,. the winged horrors aren't to bad,. just keep attacking them,. or magic missile them,.

 Anonymous
This fight is actually "Way too hard" for how much it alters the game and reflects poorly on the Devs IMO. I'm all for consequences in a game, and choices/failures being drastic, but...
In two different games, (one solo and one with a friend):
(Game w/ Friend)
Turn 1: He walked up and knocks her out on his first turn.
*Reload game just because we wondered if she could be saved*
Turn 1: He almost downs her, minions finish her off right after.
(Game Solo)
Turn 1: He almost downs her, minions finish her off again almost immediately.
She should have been set to be downed a little slower if there was an obvious choice here. The fact that there's a cut-scene right after also made it seem like this was a fight that you were supposed to lose. The only way to win here is to have prior knowledge, your party damage being fully optimized, or to do some coordination prior to the fight.
All things which are likely not the case on a first go around...
 Anonymous
Why is the Harper at the door, Tumeril, wearing a dog collar?

I like how the walkthrough assumes you won't be able to beat Marcus even though it's super easy, barely an inconvenience.

 Anonymous
banish Marcus and use shadowheart to heal Isobel while everyone finish the devils off

 Anonymous
there is a cat near the devil Raphael, you can interact with the cat and get Astarion approval X2

 Anonymous
It's funny that if you cast Banishment on Isobel, the protection sphere on the Inn will be lost immediately and everyone dies, even Isobel come back from Banishment.

 Anonymous
There's a real easy way to beat Marcus. If you side with goblins/Minthara in act 1 when arriving to last light inn instead of having Mol vouch for you, Marcus will appear and say he knows you while telepatically signalling to follow his lead as one true soul to another. You can just ask Jaheira at this point if she ever tested Marcus for the tadpole, after which he outs himself and all of last light in groups on him in his wingless form.
This might work without sidding with Minthara if you don't ever interact with Mol and the thiefling kids, but I haven't tested it.
 Anonymous
We use wood box, chairs and basket (3x3) to block the side door and (4x4) on the double front door so the minion devil couldn't enter Isobela. Then we cast Hold Person on Marcus and smash the heck out of him.

 Anonymous
 Anonymous
For a second I thought the fight was scripted to be lost because at the start of the second turn Marcus ran up to Isobel and insta killed her with three crits in a row.
Reloaded it to check and managed to beat him quite handily.
Due to me starting my conversation with Isobel while only my two tanks where near her I could use a pretty nice trick.
I killed the winged horror on the side balcony using my ranged attacks, then I ran onto the balcony where my other tank (Shadowheart) already was.
Using Shadowheart I cast sanctuary on Isobel, forcing the enemies onto the balcony, after which I could close the door and place my two tanks in front of it.
The enemy didn't have the damage to kill my characters but also couldn't open the door, giving me a very relaxed time while my other two characters cleared out the rest of the building together with the defenders.
 Anonymous
By sheer luck and mostly luck - or reload enough until you got that luck, Marcus will miss all the 'Knock Unconscious' on Isobel, then you will win.


I got here by taking the boat together with the prisoners after I helped them escape. Is there a mandatory fight with the harpers? All I'm seeing in the comments are strategies to fight them.
1
+10
-1