House Of Grief |
|
|---|---|
| [IMG] | |
| ACT | 3 |
| Location | Lower City |
| Suggest Level | ?? |
House Of Grief is a location in Baldur's Gate 3. House Of Grief can be accessed from northwest part of Lower City, Baldur's Gate. On this page, you can find related information about the map, quests, enemies, notable items and other useful tips about House Of Grief.
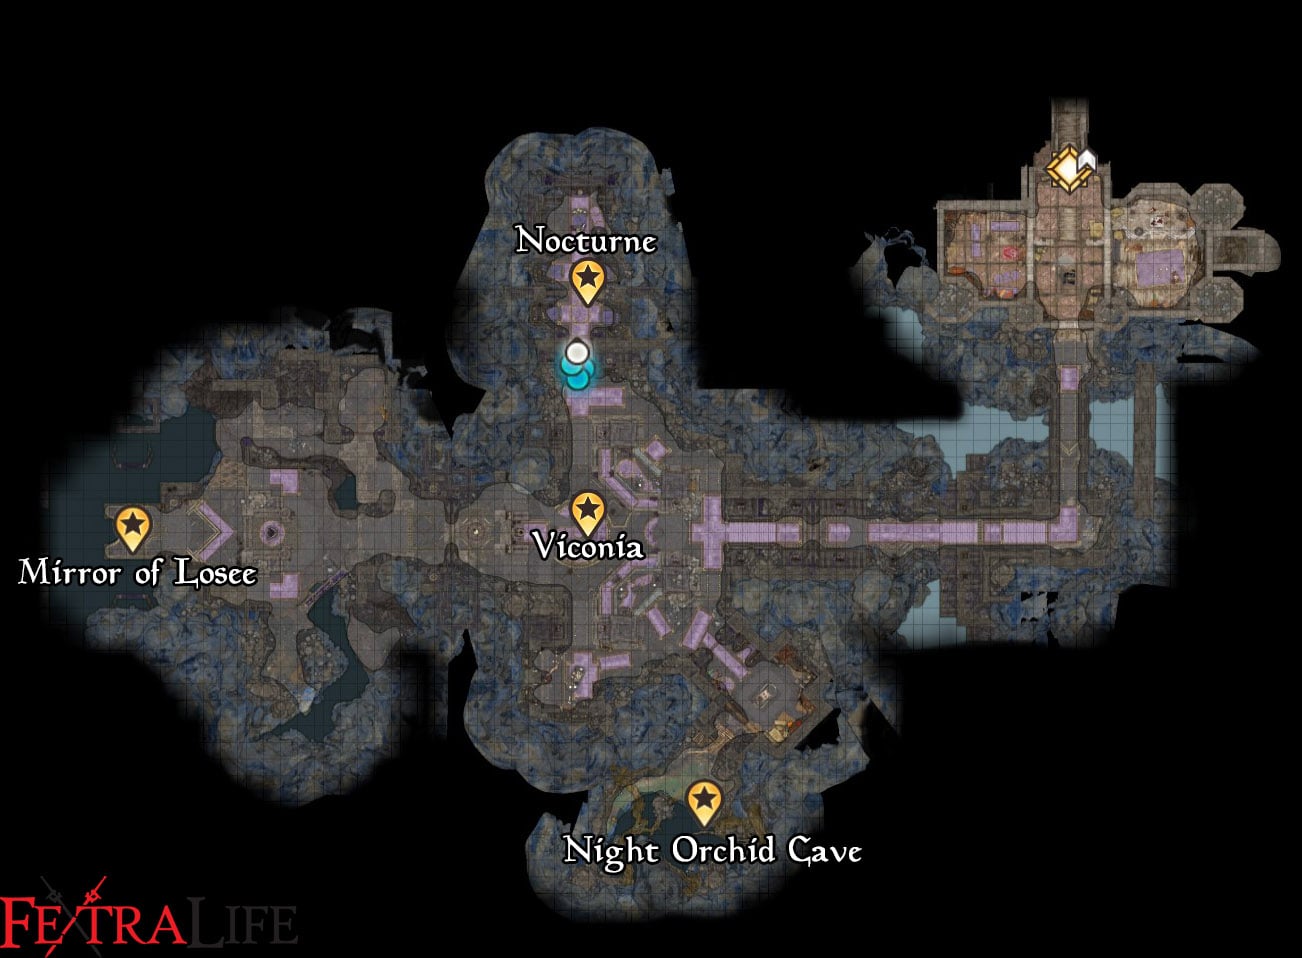
House Of Grief Map

Baldurs Gate 3 House of Grief Sub-Areas
- Cloister of Sombre Embrace
- Interrogation Training
- Infiltration Training
- Chamber of Loss
- Mirror of Loss
Baldurs Gate 3 House of Grief Notable NPCs
- Emmeline Hallowleaf
- Arnell Hallowleaf
- Viconia DeVir
- Mirie
- Morann
- Griefguard Afara
- Griefguard Wilbur
Merchants:
Baldurs Gate 3 House of Grief Quests
Baldurs Gate 3 House of Grief Walkthrough
The House of Grief is located in the Lower City. When you reach this location, enter the House of Grief through the double doors. Inside the house, your will be greeted by Mirie. Your interactions here will also update: Investigate the House of Grief and the Daughter of Darkness Head further in and your journals will continue to update for both quests.
- Journal Update: We arrived at the House of Grief, where the Sharran cloister is said to be hidden. Shadowheart was greeted by an attendant, Mirie, who told her she was expected. We must continue farther inside until we reach the innermost depths of the Sharran presence in the city. Only there can Shadowheart carry out her goddess' will.
Head in through the next set of double doors and there will be an Expost Secret Stairway. Interact with it to head down. This will take you to the Cloister of Sombre Embrace. As you explore, Shadowheart will begin to voice out some things she remembered. When you are done exploring Head through the next set of doors and take the stairs. if you interact with other NPCs, they will continue to say that Mother Superior is expecting Shadowheart. Head through the large circle Stone Door. Make your way to the center of the room to trigger a cutscene with Mother Superior, Viconia DeVir. (Viconia DeVir is a companion of BG1 and BG2. If you bring Jaheira and Minsc with you, there will be additional interactions.)
- Daughter of Darkness Journal: We met the Mother Superior of the Sharran cloister, who turned out to be Viconia DeVir. She challenged Shadowheart to descend farther into the cloister for a final confrontation.
During this interaction, you need to choose between Shadowheart or Sharran followers. Defending Shadowheart leads to a fight with Viconia and Sharran disciples. Surrender Shadowheart and Lady Shar's faithful will join you in Gather Your Allies quest.
![]()
Your dialogue will be the following:
- She's all yours
- Never.
Your choice here will affect your progress updates for this quest and Surrender Shadowheart to Viconia.
- Daughter of Darkness Journal: We attempted to sway as many Shar worshippers as possible to Shadowheart's cause, but now we must get rid of Viconia and her most die-hard zealots.
If you side with Shadowheart, you will need to undergo a battle against the Viconia and the other Sharrans in the room. This battle will also complete: Investigate the House of Grief. After the fight, you will be given another option to allow Shadowheart to interrogate her.
- Make it quick.
- No, Shadowheart. We've won. you don't need anything from her.
- Let's kill her.
Allow her to make it quick and she will ask about her parents. She will tell Shadowheart that they are through the door in the Chamber of Loss. As you converse with her, you will be given additional chances to end the conversation and kill her. If you don't choose to kill her she will be spared. If you killed Viconia, you get Viconia's Walking Fortress, Viconia's Priestess Robe and Handmaiden's Mace.
A Familiar Face Shadowheart Subquest
Before you proceed. look for Nocturne. There is a priestess named Nocturne who used to be Shadowheart's friend, you can trade with her even after you fight Viconia. Her interaction will be recorded for one of Shadowheart's other subquests: A Familiar Face.

- Daughter of Darkness Journal: We must gain entry to the Chamber of Loss, where Shadowheart's parents are being held captive.
- Daughter of Darkness Journal: Shadowheart's final test awaits in the Chamber of Loss. If she succeeds, she will become the new head of the Church of Shar.
Viconia said her parents are through the next doors, in the Chamber of Loss. After the fight, you can place valuable items onto the altar in the room to unlock the gate to the Chamber of Loss. You can altrernatively lockpick the door.
If Shadowheart continues to align with Shar, this is also the final trial and the objective will appear as: Help Shadowheart with Shar's final test.
- Help Shadowheart save her parents: Shadowheart's parents are close. We must do what we can to help her save them from Shar's clutches.
- Help Shadowheart with Shar's final test: We found two prisoners inside the Chamber of Loss. They must have something to do with Shar's final test for Shadowheart.
Enter the Chamber of Loss. Here, you will find Shadowheart's parents, Arnell Hallowleaf and Emmeline Hallowleaf. Approach them and a cutscene will begin.

After a cutscene of Shadowheart's parents, Shar, the goddess of Night and Darkness give her two choices. Let her parents die, or let them live but continue to suffer from the wound. You will be given the following dialogue:
- You have to choose, Shadowheart. Free your parents, or rid yourself of Shar's curse.
- She wants to kill your parents. Her idea of a parting gift.
- Talk to your mother and father. See what they wish.
Shadowheart will be torn. Her parents will ask that she let them go so she will be free.
- You should end their suffering, and yours.
- Do not lose your parents, not again. This pain can be handled.
- This is your choice, Shadowheart. you don't need me to tell you what is right.
- Remain silent.
If you choose the second option, she will bring up the curse again.
- [RELIGION] You have great fatiha and great resolve - all of you. Trust in that. You need not say goodbye here.
- [PERSUASION] You can endure it together, as a family. This is what you've been looking for - don't deny yourself.
Make your decision and complete the Daughter of Darkness.
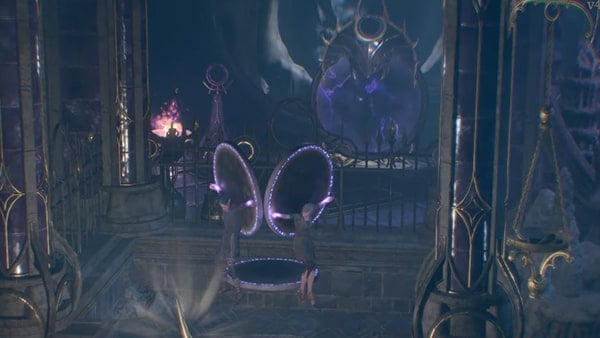
Before you exit the area, check out the Mirror of Loss in the inner sanctum.
The Mirror of Loss
When you first encounter a Mirror of Loss, either in the Gauntlet of Shar or the House of Grief, you will be presented with the option of either a DC 25 Arcana Check ("Study the mirror...") or a DC 20 Religion check ("An object of Faith..."). Succeeding on either of these checks will permanently reveal the purpose of the Mirror of Loss to the party, and is required in order to benefit from it.
Then, characters will be presented with two options:
1. Gaze into the mirror, intent on offering it one of your memories.
2. [Religion] Offer a prayer to the mirror.
The order in which you perform these dialog options matters greatly. To help ensure you receive the full benefits of the mirror, be sure NOT to perform the DC 25 Religion check ("Offer a prayer...") on any character until AFTER that character has received the Patriar's Memory (+1 CHA). Once you succeed the Religion check, the +2 buff becomes a very common outcome when offering a memory, after which you can no longer offer memories, an thus cannot receive the +1 CHA buff.
When offering a memory, you can choose to "sacrifice" 2 points of any Ability (Strength, Dexterity, etc.), which will result in the mirror granting you another memory. These memories can be from:
- A member of the city guard
- A heartbroken heiress
- A corrupt alderman
- A recently widowed merchant
- A jumble of memories not belonging to you
- A patriar (grants a permanent +1 CHA via a hidden buff called Patriar's Memory)
- Something ancient and unknowable (grants a permanent +2 buff to an Ability of your choice)
Attempting to deceive the mirror will present you with a DC 20 Deception check, which will let you avoid sacrificing anything, but it will also never give you a buff. A successful check always results in the "jumble of memories not belonging to you" dialog.
All of your "sacrificed" Ability points can be restored by a single cast of Remove Curse, or performing a Long Rest (as of v4.1.1.4251417).
Sacrificing Forbidden Knowledge from the Necromancy of Thay is guaranteed to give you the +2 buff, even if you haven't succeeded on the DC 25 Religion check ("Offer a prayer..."). Oddly, you don't lose the Forbidden Knowledge feature if you do this (bug?).
If you give away all six primary attributes, the mirror will no longer let you sacrifice anything, even if you still have Forbidden Knowledge available to give up, and even if you remove all the Stolen Vigour curses.
The game only acknowledges these Ability Score buffs within the respective ability score tooltips for that character. The +2 bonuses are called:
- Strength: "General's Memory"
- Dexterity: "Thief's Memory"
- Constitution: "Barbarian's Memory"
- Intelligence: "Wizard's Memory"
- Wisdom: "Mother-Superior's Memory"
- Charisma: "Bard's Memory"
Each character can get the +1 CHA buff (Patriar's Memory) and the +2 buff, but the chance of getting either buff from an individual sacrifice is low. Saving beforehand is recommended.
Notes & Tips
- When you first arrive at Rivington, you can find a Shar's follower called Ferg Dogher (X:45; Y:-102), Shadowheart can learn that her parents are kept prisoners at House of Grief.
- The House of Grief is located northwestern corner of the Lower City (X:-246; Y:-9). Inside the house, let Shadowheart sit on the granite bench will lead to a cutscene of Mother Superior, Viconia DeVir. (Viconia DeVir is a companion of BG1 and BG2. If you bring Jaheira and Minsc with you, there will be more interactions.)
- Inside the House Of Grief, you need to choose between Shadowheart or the Sharran followers. Defending Shadowheart leads to a fight with Viconia and her Sharran disciples. Surrender Shadowheart, and Lady Shar's faithful will join you in the Gather Your Allies quest.
- Viconia has access to Divine Intervention, and will likely use it for heavy AoE damage.
- If you kill Viconia, she drops Viconia's Walking Fortress, Viconia's Priestess Robe, and Handmaiden's Mace.
- There is a priestess named Nocturne who used to be Shadowheart's friend; you can trade with her even after you fight Viconia.
- After the fight, you can place valuable items on the the altar in that room to unlock the gate to the Chamber of Loss. Or just lockpick it.
 Anonymous
Tip : during shadowheart engage dialog with viconia, you can press to change other member party and go to kill viconia without any fighting. You have to kill viconia to loot her mace, sometime she doesn't die but daze that cannot be loot, you have to kill her again. At mirror of loss - you can come back to camp to reset class to be monk, make sure set religion +5 and int +17 then level up and get int +20 then go back to mirror again, you will have safty 9-12 on hand when roll with guifance. If you have ring +religion, get more safty roll. Do it with all member party to get free buff +2 except shadowheart if you select her away from shar. She's nearly impossible to get this buff.

 Anonymous
In the upper floors of the House, where they greet visitors, you can loot/steal self help books (the wanderng heart, and so on) on the cashier, each sells for 300+ gp, and there's about 10 of them.

 Anonymous
The Arcana check is DC 25 and the Religion check (not the prayer) is DC 20, but with the religion check I never got the +1 cha bonus (tried 18 times), with the arcana check I got it twice on first try after reloading.

 Anonymous
Shadowheart was in party, no longer sharran, so the whole room attacked instantly. retreated slightly up stairs and ran a wall of fire straight down the stairs with a cloudkill spell on top, between that and the illithid passive cull the weak, all the adds basically died before reaching the top of the stairs. you cant kill Viconia until the dialog so go ham with the AOE

 Anonymous
You can sacrifice Forbidden Knowledge and get a +2 of your choice. You don't even lose the Forbidden Knowledge buff apparently. It still shows as being active in the character summary window.

 Anonymous
I tried fighting the entire army but couldn't win. So instead tried to gain advantage by dropping smokepwoder barrels near Viconia while she was engaged in conversation. Then used Wyll to drop a fireball on her. It killed her but to my surprise didn't aggro the other Sharrans.

 Anonymous
For the Viconia battle, if you have shadowheart in team and if shadowheart is no longer Sharran, then battle will start immediately. However, if shawdowheart is no in team, Viconia will ask you to surrender shadowheart and then you can freely roam around Viconia. Then if you want, you can pile explosive.

 Anonymous
couldn't use mirror of loss. accepted sacrifice but refused to give me anything. came here with shadowheart who saved nightsong and returned to selune. and let the parents die. maybe that influences if the mirror gives oyu a bonus

 Anonymous
Mirror of Loss
Offer a prayer (DC 25 Religion Check) to the Mirror of Loss in the House of Grief, then sacrifice one of the following:
Constitution, Wisdom, Charisma, or your knowledge of the Necromancy of Thay.
You'll receive the option to choose a +2 bonus to any ability.If you sacrificed an ability, you'll receive the Stolen Vigour curse (-2 to that Ability). This can be cured via Remove Curse.
Occasionally, when sacrificing an ability to the mirror, you may receive the Patriar's Memory buff (+1 CHA). If this happens, interact with the mirror again, sacrifice your knowledge of Necromancy of Thay, and choose an ability to receive a +2 bonus. After ***h interactions, the mirror is sated. Cast Remove Curse and you are left with +1 to Charisma and +2 to an ability of your choice.
 Anonymous
Basically, you can get +3 stat bonus overall from this +1 being Charisma. If you start the dialogue, leave the option to offer a prayer(The one with the DC check) alone for now. Go straight to the option to make an offering. You'll have 7 options to choose from(8 if you read the necromancy of Thay book). Ignore the forbidden knowledge and the forbidden knowledge and the deception check options .You can choose to sacrifice a stat and you will get a variety of responses after you select the one you want to sacrifice.(it is entirely random which one you get, not based on the stat you choose) The ideal response you are after is "Disappointment floods your mind. You were sure to succeed Stelmane, but Lord Enver Gortash has Stolen your support. All that charming and cajoling in the parlours of the Upper City wasted." This response is the one that "sacrifices" whatever stat you picked to sacrifice, but it then gives you +1 charisma. Again, it is entirely random that you get these responses and you may need to reload. You can then talk to the Mirror AGAIN and this time do the offer a prayer - DC Check option. Pass this check and then go back to make an offering as you did the first time. Pick a stat to "sacrifice" and then pick the stat you want. if you want Charisma, you can choose that bringing your net total to +3 charisma gained. Simply remove curse and you have gained +3 stats.

 Anonymous
For the Mirror of Loss you can choose to surrender all your attributes and a single cast of Remove Curse will take off all debuffs. Great for fishing for a +2

 Anonymous
You can knock Viconia out, still get the loot, and keep her alive.


As of Patch 6, lost Forbidden Knowledge (and the spell) if I chose this option
0
+10
-1