Daughter of Darkness |
|
|---|---|
| Type | Companion Quest |
| Act | Act 1 Chapter One |
| Companion | Shadowheart |
| Reward | Spear of Night (obtained as an objective) Selune's blessing (Free Nightsong) Moonlight Glaive (Free Nightsong) Viconia's Walking Fortress (Loot Viconia) Viconia's Priestess Robe (Loot Viconia) Handmaiden's Mace (Loot Viconia) |
Daughter of Darkness is a Companion Quest in Baldur's Gate 3. Daughter of Darkness can be acquired from Shadowheart during Chapter One of the first Act. Completing Daughter of Darkness will progress Shadowheart story forward. This page includes all possible journal updates listed in the objectives followed by the Walkthrough below including the related Companion Quests, The Chosen of Shar and A Familiar Face.
Daughter of Darkness Objectives & Journals
Continue travelling with Shadowheart.
- We recruited a Half-Elf named Shadowheart. She was also aboard the Nautiloid - and infected with a parasite.
- We learned that Shadowheart needs to reach Baldur's Gate to fulfill a mission for her goddess - though the details of that mission are a mystery.
- We witnessed Shadowheart become stricken by an unusual surge of pain, emanating from a tiny, unhealed wound on her hand.
- We spoke to Shadowheart about the pain that her mysterious wound inflicted on her. She pleaded ignorance, though she may be witholding something.
- Although Shadowheart tried to hide it, we discovered that she worships the goddess Shar. We need to ensure she doesn't keep anything else from us.
- We learned that Shadowheart needs to reach Baldur's Gate to fulfil her mission to Shar - though the details of that mission are a mystery.
- We learned that Shadowheart needs to reach Baldur's Gate to fulfil a mission for her goddess - though the details of that mission are a mystery.
- We learned that Shadowheart is on a mission for Shar: she needs to bring that strange githyanki artefact to Baldur's Gate.
- We learned that Shadowheart is on a mission for her goddess: she needs to bring that strange githyanki artefact to Baldur's Gate.
- As a strange voice assailed us, we were saved by a half-elf named Shadowheart - another survivor of the nautiloid. We accepted her into our party.
- We witnessed Shadowheart become stricken by an unusual surge of pain, emanating from a tiny, unhealed wound on her hand.
- Shadowheart spoke of the Mother Superior - her mentor, and leader of a cloister of Shar worshippers. This mysterious figure raised and trained Shadowheart.
- We spoke to Shadowheart about the pain that her mysterious wound inflicted on her. She believes it may be part of her training - punishing her whenever she strays from Shar's teachings.
- We promised to help Shadowheart find a way to alleviate her pain if we could. She appreciated this considerably.
- Shadowheart has been gripped with intense pain from her wound on many occasions now. This could prove to become a liability if we cannot help her.
- We encouraged Shadowheart to find a way to prevent her wound from tormenting her. Though she feels the suffering is part of her faith, she conceded that she would rather live without it.
- We encouraged Shadowheart to find a way to prevent her wound from tormenting her. She was unconvinced however - believing that it would be a betrayal of her goddess to not endure the pain.
- We learned that it was the Mother Superior herself who inflicted Shadowheart with the mysterious wound that does not heal.
- We witnessed Shadowheart react with alarm on encountering a wolf. She seems to have a deep-seated fear of them; we should see if she's willing to talk about it.
- Shadowheart opened up to us about her fear of wolves - she believes it stems from a childhood memory of being hunted by such a creature.
- Shadowheart decided to share an old memory with us - one of a few spared from her amnesia. We saw her as a lost child, being pursued by a wolf through a dark forest. Some Shar worshippers, led by the masked Mother Superior, came to her rescue and took her into their care. Though Shadowheart reflected on the memory with gratitude towards her saviours, we couldn't help but point out that it seemed manipulative to ensnare a child in such a way.
- We pointed out to Shadowheart that her memory of wandering a dark forest bore some resemblance to traditional Selûnite coming-of-age rites, where young children would have to navigate their way home with the aid of Selûne's moon glow. Shadowheart was troubled by the comparison.
- Shadowheart revealed to us that she has long-dreamed of becoming a Dark Justiciar. Her Mother Superior always thwarted her ambitions, however.
- We convinced Shadowheart to eat the Noblestalk, suspecting that its curative properties may help her amnesia. The effects of the mushroom briefly restored a fragmented memory from her youth that suggested she may have a friend out there somewhere. Perhaps a reunion beckons.
- We discovered that Shadowheart possesses a certain amount of resistance to the ill effects of the shadow curse. It seems that this must be due to Shar's patronage - but given the mercurial nature of the dark goddess, the extent of her protection remains to be seen.
- We gifted Shadowheart a Night Orchid - her favourite flower. She was greatly appreciative of the gesture.
- Shadowheart confessed to us that she is experiencing a crisis of faith. She feels like aspects of her own character are at odds with the tenets of her Shar worship, and she is having difficulty in reconciling the two.
Investigate the Gauntlet of Shar.
- We discovered the Gauntlet of Shar - a huge, ancient temple dedicated to the dark goddess. Shadowheart will surely want to investigate further.
Defeat Ketheric Thorm.
- Shadowheart has slain the Nightsong, and has risen as the last Dark Justiciar conferred by the Gauntlet of Shar. Her goddess commanded her to carry out a purge of disloyal elements amongst her worshippers, starting with the traitor, Ketheric Thorm.
Leave the Shadowfell.
- Shadowheart spared the Nightsong, in spite of Shar's demands that she be sacrificed. Shar will no doubt be furious, but the Nightsong seems to know something about Shadowheart's past. Whatever secrets she can reveal may be worth risking the wrath of a goddess.
Learn about Shadowheart's past from Dame Aylin.
- Shar has punished Shadowheart by stripping her of all favours and exiling her from her church. Now all Sharrans will view Shadowheart as a pariah and an enemy. All she can do now is seek out the counsel of Nightsong - or Dame Aylin, as she is known - and see what answers she can provide.
Journey to Baldur's Gate.
- Dame Aylin revealed the truth to Shadowheart. She was not saved by Sharrans as a child, but abducted and indoctrinated by them. Furthermore, her parents still live in Sharran captivity, and are bound to their daughter by a curse - the source of the pain that emanates from Shadowheart's wound. Shadowheart must make for Baldur's Gate in order to rescue her parents and free herself from Shar's influence.
- We have defeated Ketheric Thorm, just as Shadowheart was commanded to do by her goddess. Now she must continue to purge the Church of Shar of those deemed to be disloyal or failures. Shadowheart's old cloister in Baldur's Gate is to be her next target.
Find a Sharran Lookout.
- We have arrived in Wyrm's Crossing. Shadowheart believes that Sharran lookouts will be present in the vicinity, awaiting her return. She must find one such lookout in order to learn where the Sharran cloister is hidden. She expects to find such a lookout hiding amongst the desperate new arrivals flooding into Wyrm's Crossing.
Journey to the House of Grief.
- We have found a Sharran lookout called Ferg Drogher. He revealed that the cloister is hidden in a place called the House of Grief, in the Lower City of Baldur's Gate.
Find a way into the Cloister.
- We discovered that a place known as the House of Grief is a front for the Sharran presence in Baldur's Gate. Shadowheart was greeted by an attendant, Mirie, who told her she was expected. We must continue farther inside until we reach the innermost depths of the Sharran presence in the city. Only there can Shadowheart carry out her goddess's will.
- We arrived at the House of Grief, where the Sharran cloister is said to be hidden. Shadowheart was greeted by an attendant, Mirie, who told her she was expected. We must continue farther inside until we reach the innermost depths of the Sharran presence in the city. Only there can Shadowheart carry out her goddess' will.
Confront Viconia.
- We met the Mother Superior of the Sharran cloister, who turned out to be Viconia DeVir. She challenged Shadowheart to descend farther into the cloister for a final confrontation.
Defeat Viconia and her followers.
- We met the Mother Superior of the Sharran cloister, who turned out to be Viconia DeVir. She challenged Shadowheart to descend farther into the cloister for a final confrontation.
- We confronted Viconia and her entire cadre of Shar worshippers. Now we must defeat them before Shadowheart can find her parents.
Enter the Chamber of Loss.
- We must gain entry to the Chamber of Loss, where Shadowheart's parents are being held captive.
- Shadowheart's final test awaits in the Chamber of Loss. If she succeeds, she will become the new head of the Church of Shar.
Help Shadowheart with Shar's final test.
- We found two prisoners inside the Chamber of Loss. They must have something to do with Shar's final test for Shadowheart.
Help Shadowheart save her parents.
- Shadowheart's parents are close. We must do what we can to help her save them from Shar's clutches.
Daughter of Darkness Walkthrough
Walkthrough Navigation Guide:
- Daughter of Darkness Act 2
- Daughter of Darkness Act 3
- The Chosen of Shar
- A Familiar Face
- All Endings
Act 1
As you begin the first Main Quest, Find a Cure, you'll find yourself at the Ravaged Beach. Continue following the path ahead and you'll find Shadowheart unconscious on the ground( X:271 Y:217). Interact with her and you will have three options to choose from:
- Wake her.
- Reach for the artefact.
- Leave.
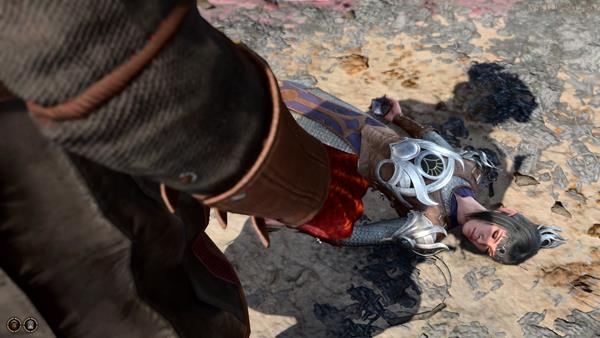
Choosing the first option will wake her up, she'll then ask how it's possible you're both alive. From here, you have two options to choose from:
- I was hoping you might know that.
- Doesn't matter - we made it.
Choosing the first option will prompt her to say that she only remembers the ship and falling down from the ship, and then nothing. You will then have to choose among three responses:
- Now what?
- Do you have any idea where we are?
- What happened to our gith friend?
If you choose the second option, she'll say that she doesn't recognize the place. She'll then go on to say that you first need to find supplies, shelter, and most important of all, a healer, for the monsters living inside your head. This will prompt 3 more dialogue options:
- 'We'? You want to stay together?
- What happened to our gith friend?
- Indeed, I'd better get moving then. Farewell.
Choosing the first option will make her say that you both need each other and she can't think of a better company. And then you will have the option to go together or part ways with the dialogue options that will appear:
- All right, let's get moving.
- No. This is where we part ways.
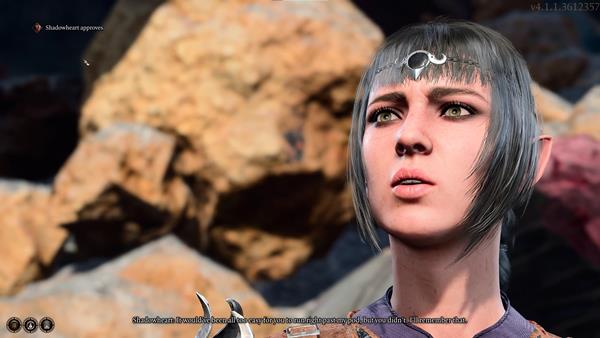
Choosing the first option will allow you to have Shadowheart accompany you, thus beginning to record your progress for her Companion Quest, but before you continue with your journey, she thanks you for freeing her from the pod back in Nautiloid. You'll then get an approval up from her.
When you approached a broken statue near the blighted village windmill, Shadowheart experienced some strange magical flare-up. This will update your journal.
During travel with Shadowheart, there are a lot of opportunities you find her comment about Selune. Succeed in the Persuasion check (17), and she will reveal her true identity - a worshiper of Shar. You will continue to have a few options on how you wish to respond. You can even choose to journey separately. When speaking with Shadowheart at the camp, you will be presented with these dialogue options. There will be more than one opportunity to separate from her.
Once you interact with Shadowheart, she'll start the conversation by bringing up that we managed to recruit an interesting wizard. Your journal records will periodically update as you continue to interaction Shadowheart. Your next set of choices will look like this:
- What's the story with that odd little artefact you have?
- What do you think of all that's happened to us so far?
- We should get to know each other a little more.
- We should journey separately for now. I'll look for you here if I need you again.
- Leave.
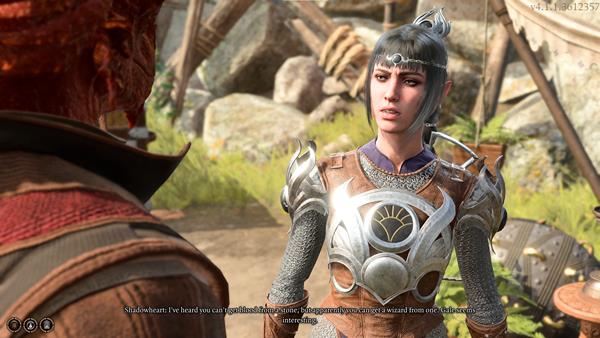
Choosing the first option will make her a bit irritated, saying that you're not entitled to hear anything about it, she also asks that you forget you ever saw it. Your next set of choices will be similar to the previous one, but the first option is now removed:
- What do you think of all that's happened to us so far?
- We should get to know each other a little more.
- We should journey separately for now. I'll look for you here if I need you again.
- Leave
Choosing the first option will make her say that we haven't even gotten that far yet, and she asks what exactly are you referring to. Your next set of choices will look like this:
- You must have thoughts about our little stowaways.
- What will you do, if we actually manage to remove the tadpoles?
- How am I holding up in your estimations?
- Turn to other matters.
Choosing the second option will reveal that we'd go our separate ways once we get rid of the parasite infecting our brains. You will have two dialogue options to choose from here:
- No reason for us not to stay together if we get on well.
- Where would you go?
Choosing the first option will make her say that she needs to get to Baldur's Gate because someone's waiting for her there and she needs to reach them as soon as possible. You will have two dialogue options to choose from here:
- Family? A friend? A lover?
- Seems personal. I won't pry, if it's not something you want to talk about.
Choosing the second option will make her appreciate your decision not meddling with personal matters. Now this will give you the same dialogue options from before but one being removed:
- You must have thoughts about our little stowaways.
- How am I holding up in your estimations?
- Turn to other matters.
Choosing the second option will reveal that you're not the type of company that she'd keep willingly but all things considered, you'll do for now. She also reminds you that she hasn't forgotten about you saving her life from the Nautiloid and hopes she can return the favor at some point. Now you will have two options to choose from:
- You must have thoughts about our little stowaways.
- Turn to other matters.
Choosing the second option will give you the same dialogue options from the first interaction, except for the first one:
- I want to talk about all that's happened to us.
- We should get to know each other a little more.
- We should journey separately for now. I'll look for you here if I need you again.
- Leave.
Choosing the second option will make here say that we don't necessarily need to, and there's no harm in a little mystery. This will open up four new dialogue options:
- You don't want to talk about yourself?
- We have to rely on each other. Easier if we knew each other as well.
- Just looking to make conversation.
- If you're not comfortable, I won't press you.
Choosing the second option will make her say that easier is less interesting and we already have plenty of reason to rely on each other. She also says you can't just confide in anyone about the parasite living inside your brain. This will give you three dialogue options to choose from:
- Maybe I'd like to get to know you better.
- You're deflecting - are you hiding something from me?
- If you're not comfortable, I won't press you.
Choosing the second option will make her irritated again, and asks if you think your blunt approach would make her confess. Two new dialogue options will be available for you to choose from here:
- I suppose not. We can let the matter rest for now, if you'd rather.
- Blunt's all I have if you keep being so evasive.
Choosing the first option will make you both drop the conversation about personal matters. She also says she likes you since you saved her life and wouldn't want to sour things between you while you still both need each other. Now you'll have three dialogue options to choose from here:
- I want to talk about all that's happened to us.
- We should journey separately for now. I'll look for you here if I need you again.
- Leave.
You can extend the conversation by choosing the first option. Options 2 and 3 will make you leave the conversation. As you progress through your Main Quests, small interactions with Shadowheart will continue to update.
You will find Shadowheart reacts to something causing her pain which could happen in the Druid Grove. This could give you the following journals:
- We witnessed Shadowheart become stricken by an unusual surge of pain, emanating from a tiny, unhealed wound on her hand.
After getting to know Shadowheart, you there will be certain interactions that will be recorded and will affect your relationship with Shadowheart.
The Chosen of Shar
As you continue to progress through the main quests, a subquest will be activated after reducing the Druid, Halsin. From this point, after activating this quest, you can follow the objectives listed from The Chosen of Shar. To skip this section and go to the next objective, click here. As you interact with different items and continue to converse with Shadowheart, your journals for the Daughter of Darkness will continue to update. The next objective is activated once you reach the Gauntlet of Shar. To find this location, follow the objectives from The Chosen of Shar. For a thorough location guide, view: Gauntlet of Shar.
The Chosen of Shar: Find the Dark Justciar's lair
- Shadowheart has shown interest in finding the lair of the Dark Justiciar - an elite force dedicated to her goddess Shar.
After you saved Druid Halsin and killed all the goblin leaders, Halsin will suggest you travel to Moonrise Towers through the Underdark. He also mentions there's a group of Shar's Chosen in Underdark, which interests Shadowheart and updates the Journals for The Chosen of Shar. You will need to reach the Underdark which has more than one route. If you are following the Main Storyline, the Underdark will be the next location you can head to after rescuing Halsin for Rescue the Druid Halsin, one of your Main Subquests related to Find a Cure. To find Halsin, you can follow the steps here.
Reach the Underdark using one of the multiple routes. You can reach this location from the overgrown tunnel or Goblin Camp, Shattered Sanctum. In the Shattered Sanctum, there is a Door to the west to the Defiled Temple (X:392 Y:27), where there will be a puzzle room that you can get through. You may encounter Polma, the Bodyguard of the High Priestess. The dialog shows that a theft has been reported, and you are the only suspect. You are given the following choices:
- Hand over the stolen items.
- Try to talk your way out of the situation.
- Perhaps a little gold could smooth this over? (652)
- Attack.
Next, you will get another set of choices. Attempting the Intimidation check (Charisma) will require you to pass a DC of 15. Failing this will result in a battle against the Ogre.
There will be discs on the floor that will need to be aligned so that the black dots are collected on the lower circle. Solving this will open a passage ahead to the Underdark. Complete the area and when you move on, you'll be able to travel to Grymforge via the Underdark Duergar Boat at the Underdark Beach pier.
Underdark Camp
When you Camp and rest in the Underdark, Shadowheart will continue to share her thoughts. Shadowheart will approach you and asks if it's a good time to share something. She will ask you to use the tadpole and communicate with her to come into her mind. You will now get the following options:
- Are you sure?
- What am I going to see?
- Use the parasite to explore her mind.
Upon using the tadpole's power, Shadowheart begins to share a piece of her past, at the time that she was fleeing. A vision of a young Shadowheart came face-to-face with a Wolf as Lady Shar saved her and gave her a new home. Shadowheart tells you that she can't remember anything before that vision. With your knowledge, you recall a familiar Selunite rites of passage, about how they would send their children out into the wilds, to navigate their way home. You will get the following options to respond to Shadowheart:
- No wonder you're so dedicated to Shar- you feel like you owe your life to her.
- You looked like you were wearing a Moonstone... isn't that commonly worn by Selunites?
- Thank you for sharing that with me. I know it can't have been easy.
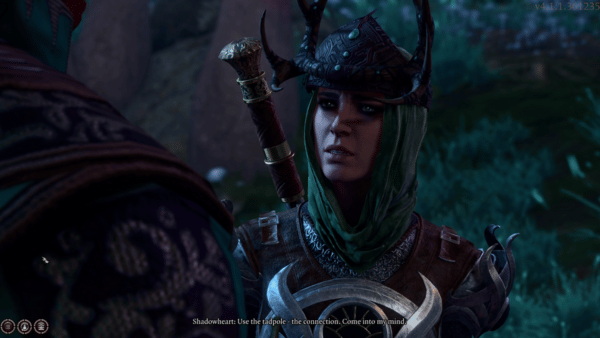
Back to the present time, and if you choose the 2nd option, Shadowheart dismisses this and tells you that you're reading too much into things. You can continue your conversation with Shadowheart to progress with the Daughter of Darkness quest, and you discover that Shadowheart was sent on a mission by her Mother Superior. This will also make progress in your relationship with Shadowheart if you choose to do so. Then, you get the next options:
- You seemed intrigued when Halsin mentioned Dark Justicians before.
- I want to talk about your Shar worship.
- You and I... we share something special, I think. I want to talk about it.
- I want to talk about all that's happened to us.
- We should journey separately for now. I'll see you whenever we camp.
- Leave.
You can decide if you want to keep her in your party or have someone else take over. When you're done with your companion dialogues and quests in the Underdark, you will now continue to travel to Grymforge on the boat.
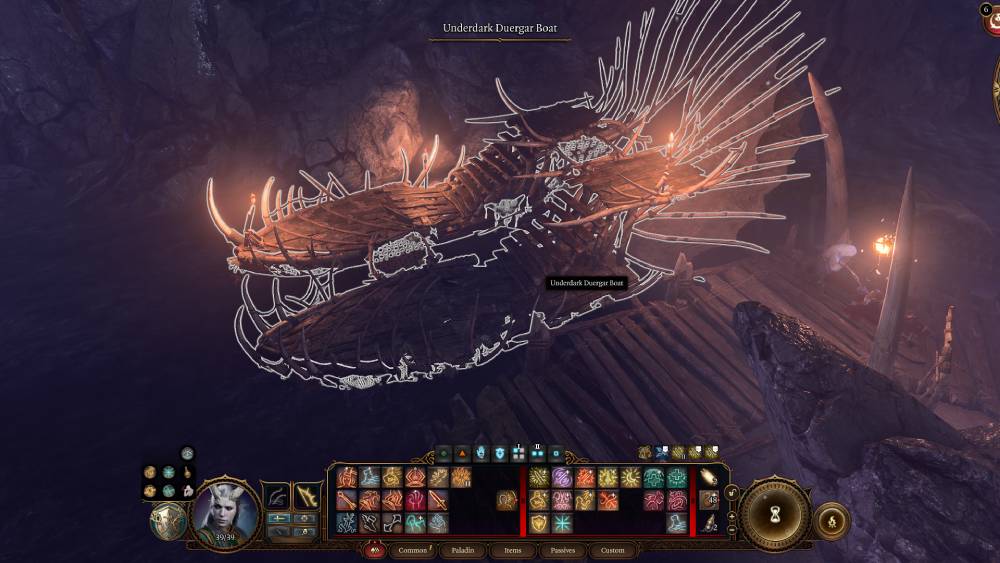
The Chosen of Shar: Explore Grymforge
- Note: In order to fend off the Shadow Curse, ensure you have go through Seek Protection from the Shadow Curse in the Ruined Battlefield before you venture to the Grand Mausoleum. Once you have completed the ambush, you will be able to obtain the Moonlantern.The Moonlantern can also be inspected to obtain the Filigreed Feywild Bell which can grant part members the Pixie Blessing. Pixie Blessing Condition: The Shadow Curse cannot affect this creature thanks to a pixie's protective magic.
There are a few areas, Items and Locations that will trigger updates for the quest, The Chosen of Shar
- Travel to Grymforge, Shadowheart notices some there are bodies belonging to Shar's justiciars.
- While exploring Grymforge you will find many skeletons clad in the same dark armor, which leads to Shadowheart comment that they were Dark Justiciars.
- You can find a small Shar statuette at Grymforge (X:-648, Y:362 ) and gift it to Shadowheart.
- You can find Night Orchid at Ruined Battlefield (X:54, Y:175) and gift it to Shadowheart.
- As you stumble on a Metallic Mask, the Quest will be updated, as the group will reach the conclusion that some hellish fiends could have killed the Shar worshipers.
- Upon opening the doors past where Nere was trapped, you discover the bridge to the ancient temple has been destroyed - there must be another way in.
These interactions throughout the Grymforge will record the following journals:
- We found a finely sculpted idol of the goddess Shar, and decided to gift it to Shadowheart. She was greatly pleased; the discovery of such a piece bolstered her hopes of uncovering further signs of a Dark Justiciar presence.
- We entered the ruins of what may have been a fortress dedicated to the goddess Shar. We could be close to the Dark Justiciar's lair.
- We found the corpses of several Dark Justiciars - Shar must have been worshipped here. Shadowheart suggested we search for answers.
- We found traces of Hellish fiends. Could they have killed the Dark Justiciars? If so, where is their temple of Shar?
- We gifted Shadowheart a Night Orchid - her favourite flower. She was greatly appreciative of the gesture.
You will eventually be presented with the objective to Investigate the Gauntlet of Shar once you reach the location in Act 2.
Act 2
The Chosen of Shar: Reach the ancient temple.
- We discovered the Gauntlet of Shar - a huge, ancient temple dedicated to the dark goddess. Shadowheart will surely want to investigate further.
The Gauntlet of Shar is a Location in BG3 encountered in Act 2. Your actions here will be recorded for a related Companion Quest: The Chosen of Shar. To reach the Gauntlet of Shar, you have to be within the Reithwin Graveyard in Grand Mausoleum.
Grand Mausoleum
The Mausoleum’s entrance can be found in the northwestern area of the Reithwin Masons’ Guild, at the graveyard. Raphael will be waiting for you near the entrance if you have the Quest Kill Raphael’s Old Enemy active, along with its corresponding part of the Companion Quest The Pale Elf. When you go through the iron fence, you’ll hear a talking skull telling you to beat it, but it won’t do anything else if you interact with it. A part of Ketheric Thorm’s diary sits near his diseased wife’s coffin. Other parts as scattered around this area if you want to look into his past. In the eastern area of this first area, you can find a locked Traveller’s Chest at (X:-259, Y:-882). It has a lockpicking DC of 14 and contains the Vivacious Cloak, some alchemy materials, some valuables, and possibly a potion or two.
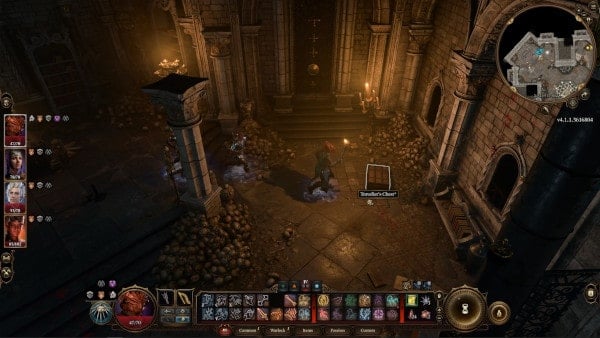
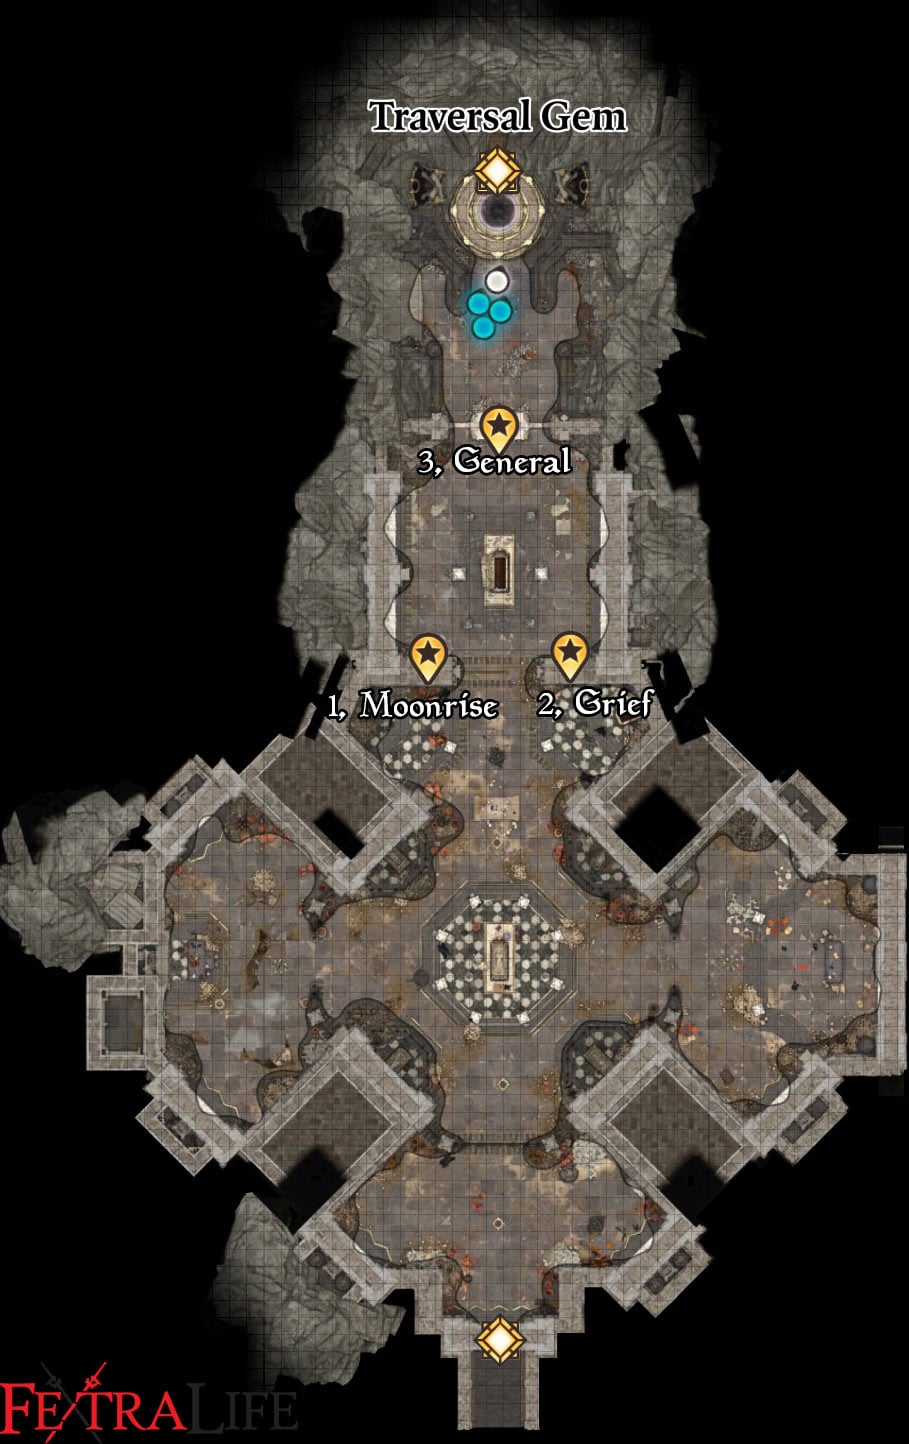
Loot the rest of the area as much as you’d like, and then head over to the northern section. The plaque here reveals that Isobel is Ketheric’s daughter and that the tomb here belonged to her. Successful Perception checks here will reveal traps on the vents and various tiles on the floor, as well as gargoyle heads on the walls, all around the room. In order to reveal the path, you need to press the buttons under the 3 paintings in a specific order. This order is listed below but can be obtained from a book in the area:
- Start with the button below the Moonrise Towers (X:-248 Y:-848) painting first
- Then the Grief (X:-278 Y:-842) painting beside it,
- Finally, the last button under Ketheric Thorm’s (X:-280 Y:-830) painting.
After pressing the corresponding buttons, the walls beside the last painting will open up and allow you to pass through. You'll find a platform there with a Traversal Gem, interact with it to travel down the Gauntlet of Shar. There are 4 Umbral Gems in Gauntlet of Shar, you need to collect all of them in order to progress Shadowheart's personal quest, Daughter of Darkness: The Chosen of Shar.
Investigate the Gauntlet of Shar (The Chosen of Shar)
- We discovered the Gauntlet of Shar - a huge, ancient temple dedicated to the dark goddess. Shadowheart will surely want to investigate further.
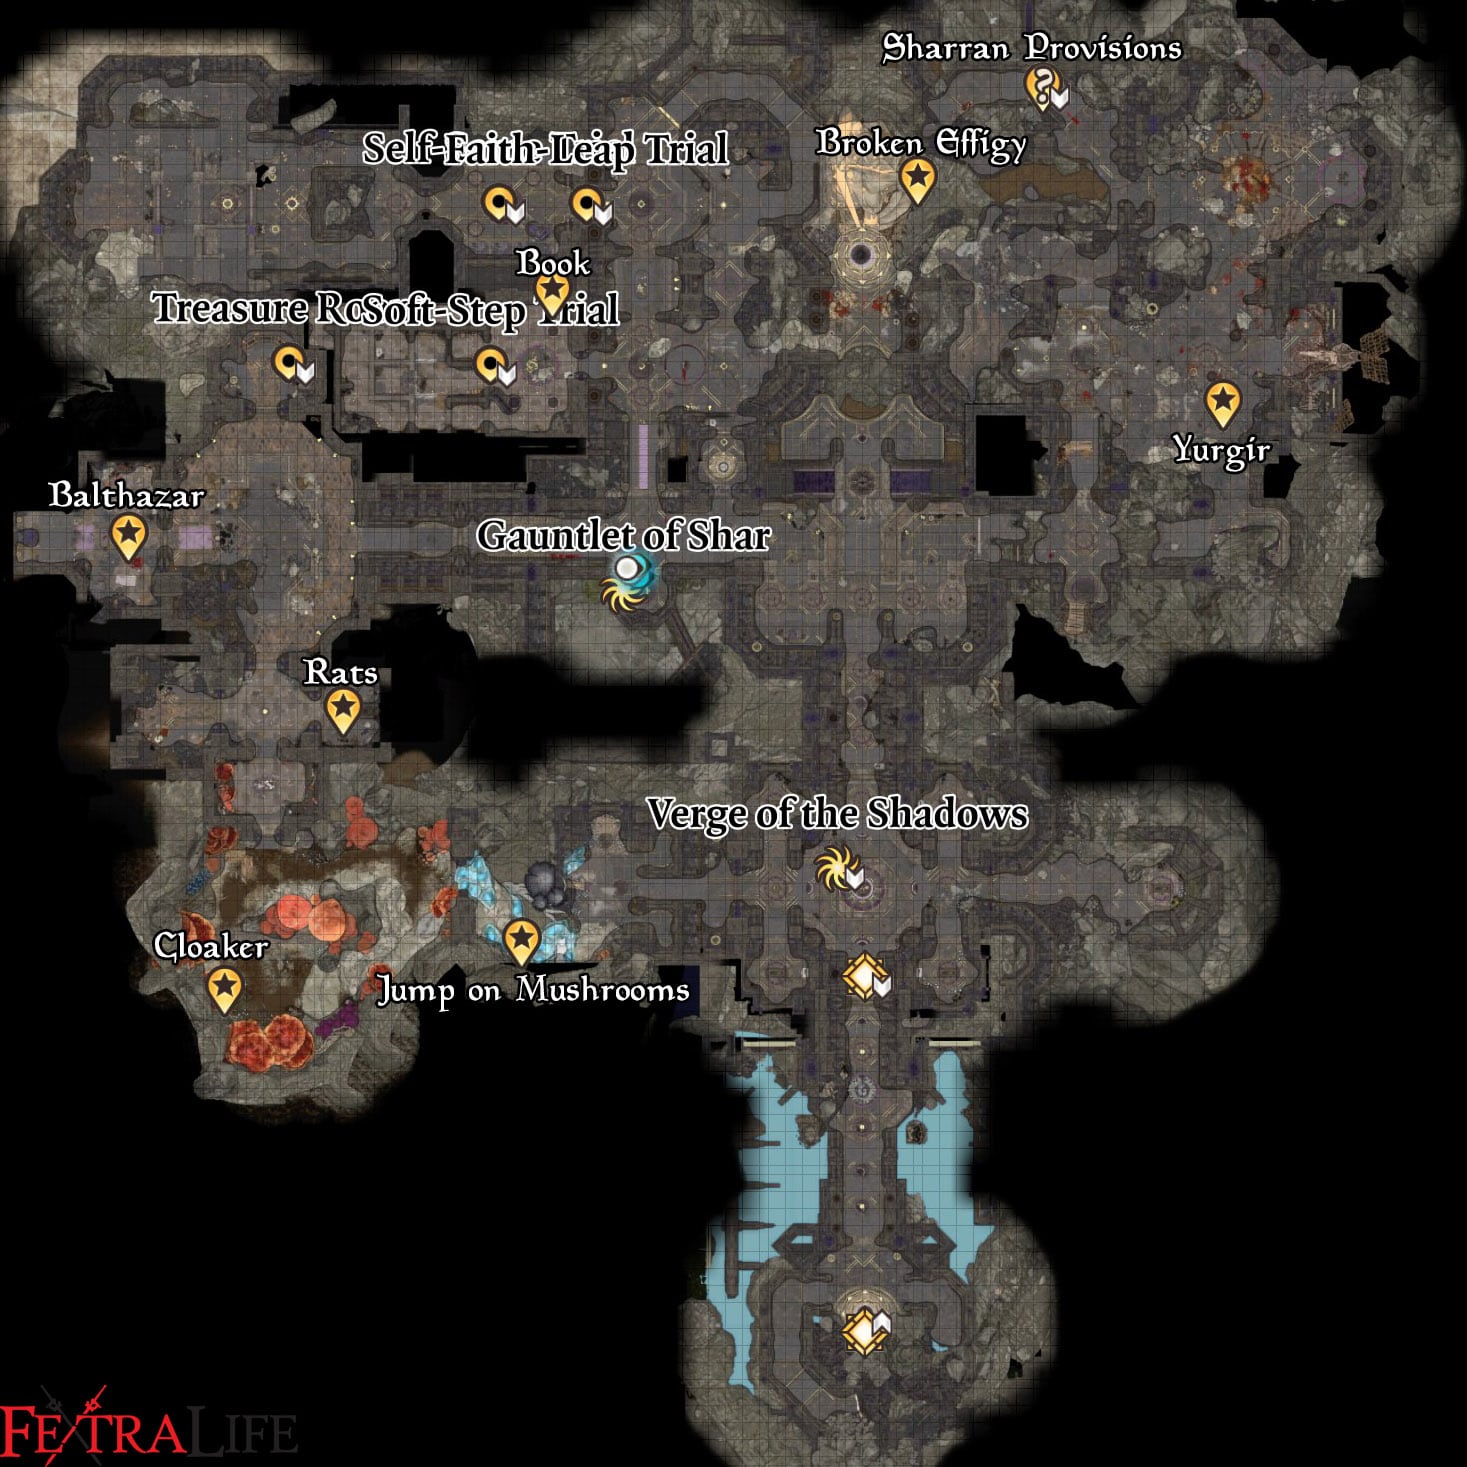
In the initial chamber of Gauntlet of Shar, there is a small statue holding an orb. You'll get pushed back if you attempt to approach it. In order to solve this puzzle, you need to explore the side rooms and pull the levers to lower all the lanterns. Then interact with them to extinguish the light. When the room is completely shrouded in darkness, you'll see the pattern on the floor. Use only one character to crouch-walk and avoid the glowing lines. This lets you touch the orb to unlock the doorway.
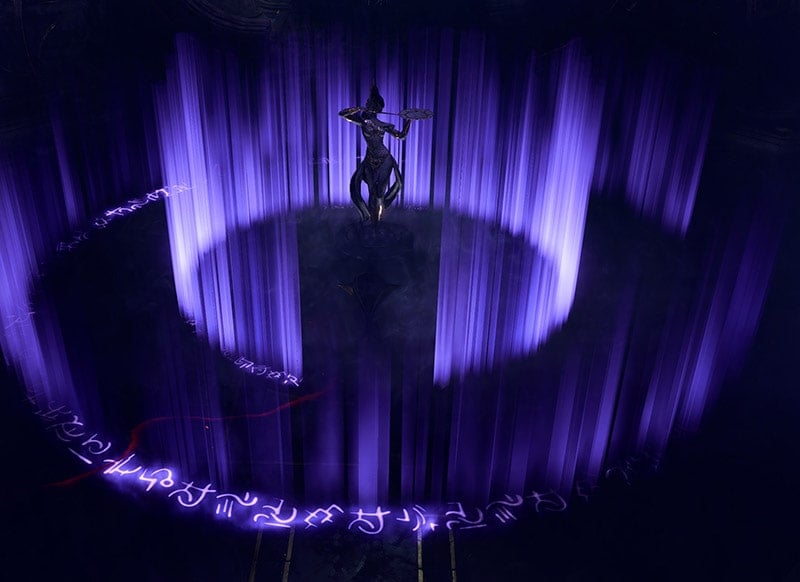
In order to complete the Gauntlet of Shar, you need to collect 4 Umbral Gems and reach the inner Sanctum.
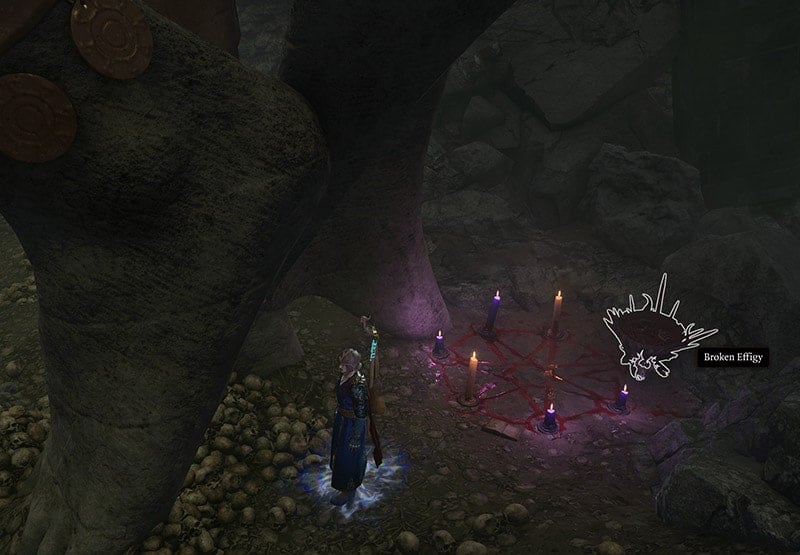
- One Umbral Gem can be acquired by defeating Yurgir (Quest Kill Raphael's Old Enemy). He can be found in the east part of the temple. You can ask him to recite his contract and find the loophole in it, and deceive him into killing his own minions, even himself. (If you want to side with Yurgir, you need to find the last alive Justiciar. Who has been turned into rats by Raphael. You need to find the Broken Effigy at Shar Statue's feet. Read the book and learn the Rats' story. Doing so can avoid the fight with Yurgir. And later easier to get his help when you sneak into Rapheal's House of Hope and confront the archdevil. Yurgir is also a potential ally in Gather Your Allies. But you can still persuade Yurgir to join you even if you killed him here.)
The Chosen of Shar: Complete the trials of Shar
- Shadowheart realised that this temple is the legendary Gauntlet of Shar - a proving ground where initiates would seek to become Dark Justiciars. After investigating an altar, she learned that a series of trials must be overcome in order to be anointed a warrior of Shar. Shadowheart wishes to complete the trials and become a Dark Justiciar herself.
The Other 3 Umbral Gems can be Acquired by completing Sharran trials:
- Soft-step Trial: You need to skulk to the end of the maze without being spotted by the shadows. Using an invisibility spell and turn base mode works well. But be careful of the traps. You need to find Soft-Step Key (on the table of a hidden room) or use lockpick to open the final gate. Alternatively, you can use Dimension Door to bypass this trial.
- Self-Same Trial: This trial forces you to fight a clone of your parties. To make the battle a lot easier, get naked before you offer blood to the ritual bowl, and reequip your team before the battle starts. The clone team has the ability to dip in and out of the shadows. Each time a party member hits a clone that is not their own, that member will suffer a debuff reducing all ability scores. Killing the clone will not remove that debuff, it lasts until the next long rest. After the fight, you can pick Killer's Sweetheart ring on the floor.
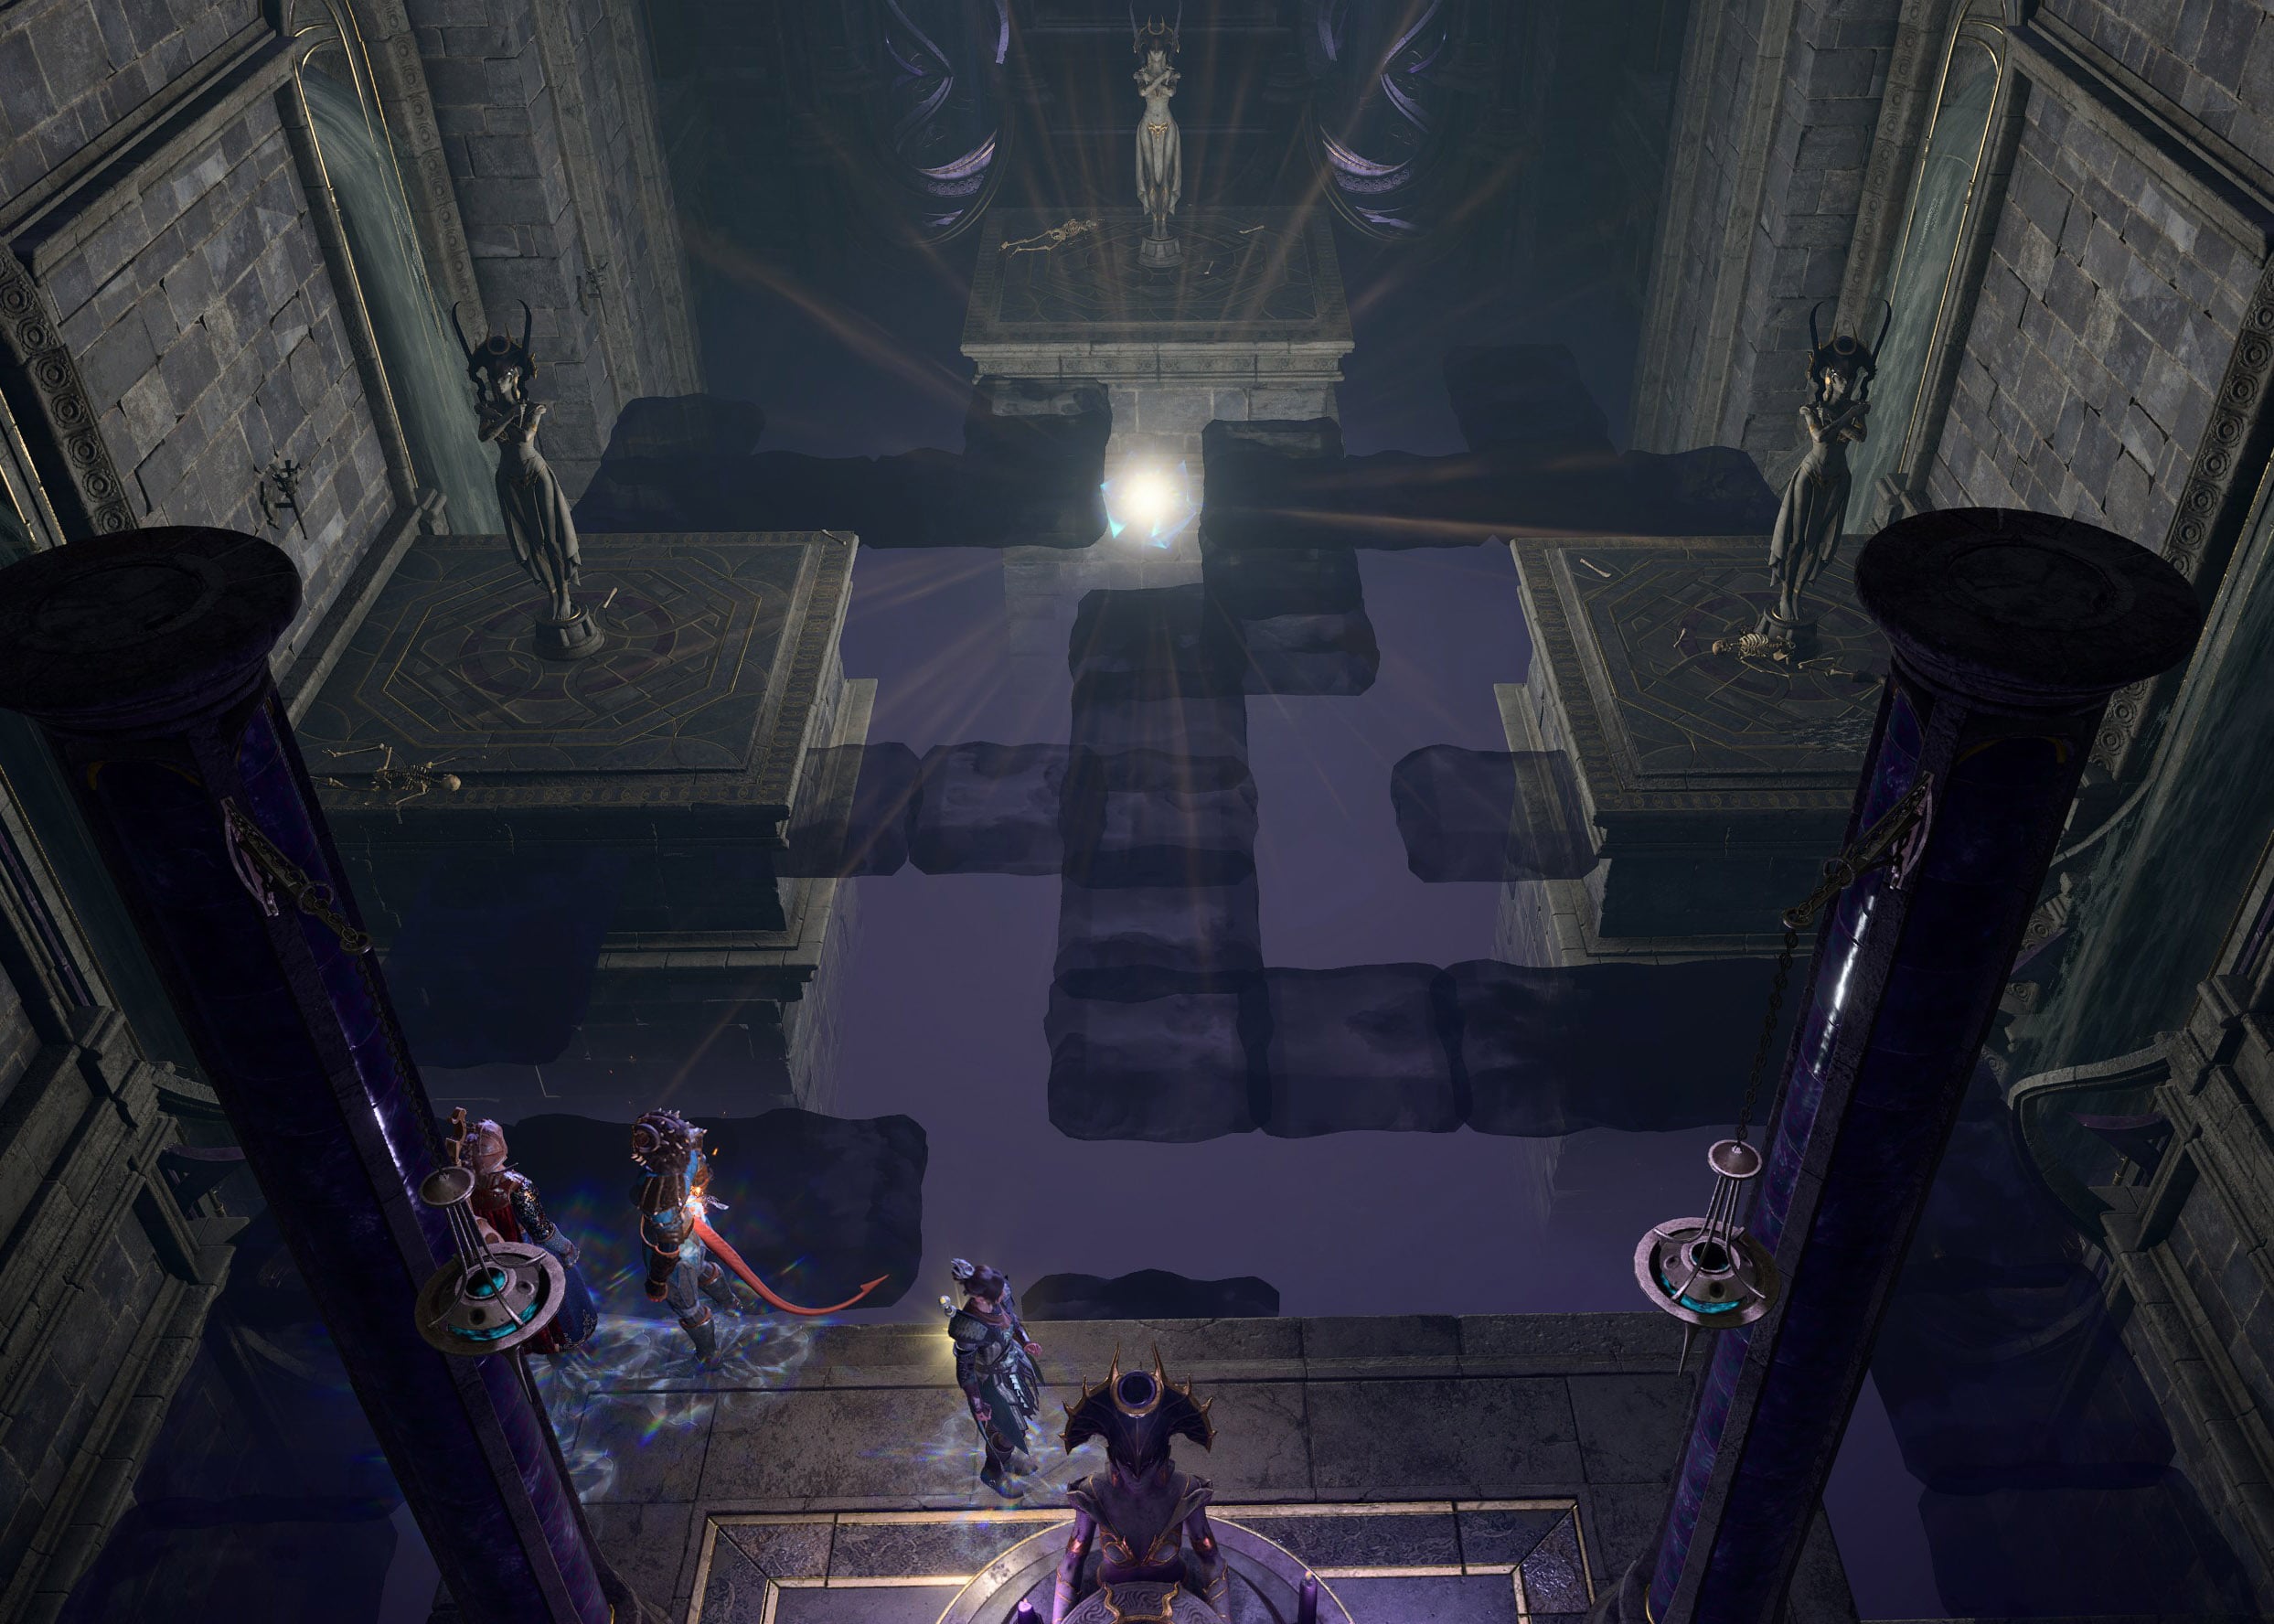
- Faith-Step trial: The room will be plunged into darkness after you offered the blood, and you need to remember the location of platforms to reach the Umbral Gem. However, you can use the Daylight spell to light the entire room, or use Fly or Dimension Door spell to reach the final platform.
Silent Library
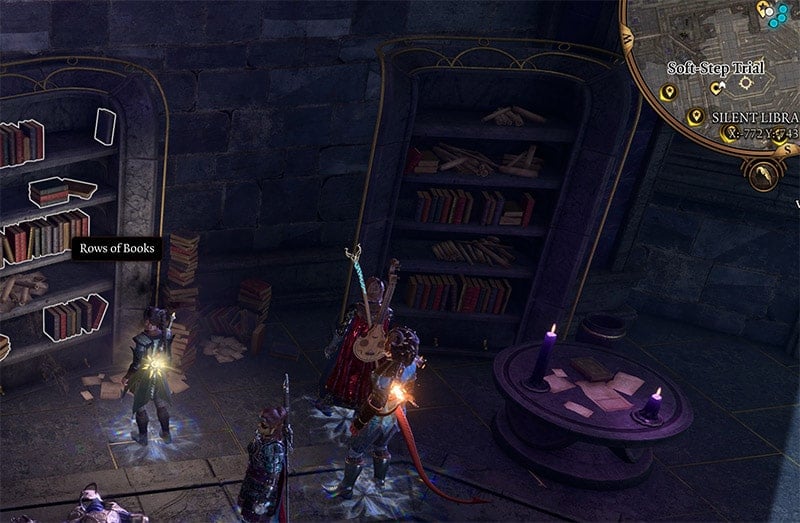
Once you've completed the trials, continue heading south and at this location (X:-756 Y:-753) is the Silent Library. You'll notice there's a white barrier at the entrance, you can go through but you will be Silenced and you'll be unable to cast any spells. There will be several Justiciar enemies in the area, if you want to avoid combat, you can try to sneak attack them with ranged attacks. They don't seem to get triggered by getting damaged, which will make this section easier. Once you've slain all the enemies in the area, press the button on the far right corner of the room (X:-778 Y:-751) to unlock the gate to the Treasure Room. Once you enter the room, disarm all of the traps first, then look for the book called Teachings of Loss: The Nightsinger, then interact with the plinth and place the book. After placing the book, the door to Treasure Room will be opened.
The Chosen of Shar: Find the Spear of Night
- Shadowheart revealed to us that in order to become a Dark Justiciar, she must first acquire a weapon called the Spear of Night, hidden somewhere in the Silent Library.
-
After you complete all 3 trials, keep venturing until you reached the Silent Library. After defeating the enemies, press the buttons to unlock the gate to Treasure Room. Interact with the plinth and put the book Teachings of Loss: The Nightsinger on it. That book is the answer to "What can silence the Nightsong?”
-
(Disarm the trap before taking the book.)
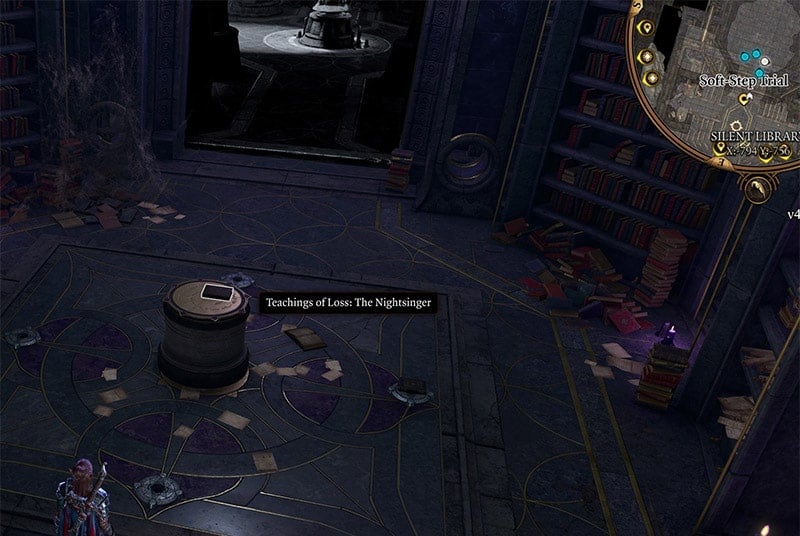
Once you Placed the right book, the door to Treasure Room will be open. Inside there are Dark Justiciar Helmet, Dark Justiciar Half-Plate, and the weapon to kill the Nightsong -- Spear of Night. Once you collect all 4 Umbral Gems, Insert them into the Ancient Altar.
- We have found the Spear of Night. Now we only need to clear the way to the Inner Sanctum of the Gauntlet of Shar, where Shadowheart seeks to be anointed as a Dark Justiciar.
Once you activate the floating platform, Shadowheart will interrupt and tell you to wait.
- What's wrong?
- This isn't another of your episodes, is it?
- Glance around.
If you ask her whats wrong, she will say nothing, but if you insist, she will say that she finally feels she's on the right track under Lady Shar's gaze.
The Chosen of Shar: Venture into the Inner Sanctum.
- We have cleared the way to the Inner Sanctum. Shadowheart is now very close to proving herself to Shar and becoming a Dark Justiciar. We should accompany her downwards.
- We have surmounted all the trials and cleared the way to the Inner Sanctum. Shadowheart is now very close to proving herself to Shar and becoming a Dark Justiciar. We should accompany her downwards.
When you are ready, step on the newly activated platform ahead. Enter the Inner Sanctum to reach your next objective.
The Chosen of Shar: Complete the trials of Shar
- Shadowheart realised that this temple is the legendary Gauntlet of Shar - a proving ground where initiates would seek to become Dark Justiciars. After investigating an altar, she learned that a series of trials must be overcome in order to be anointed a warrior of Shar. Shadowheart wishes to complete the trials and become a Dark Justiciar herself.
If you didn't previously complete the rest of the trials, your objective here will be to complete the rest of the trails to obtains the next 3 gems and insert them in this Ancient Altar which requires 3 Umbral Gems. If you have the gems ready, insert them into the Ancient altar to open the Stone Doors ahead.
Head in and you will discover a new Waypoint and you will have three platforms ahead representing the Gift of Mercy, the Gift of Darkness, and the Gift of Secrets. Go ahead. and interact with the Shadowfell Entrance to begin the next cutscene and introduce the final test. Shadowheart will need to Descend to the Nightsong, Make a sacrifice, and Rise again a Dark Justiciar.
Shadowheart will need to pray. You can respond with:
- Shadowheart...?
- There'll be time to pray later - let's move.
- [WISDOM] Use the power of the parasite. Feel inside Shadowheart's mind.
- Leave her to her prayers.
If you use Wisdom and succeed you will feel the presence of Shar and you'll start to hear her communicate with Shadowheart. She will tell her to take the spear, step forward and strike down the Selunite. Shadowheart will disapprove of your choice to read her mind since that wasn't for you to hear.
The Chosen of Shar: Help Shadowheart finally become a Dark Justiciar.
- After praying to Shar, Shadowheart told us that she needs to proceed to where a final test awaits her. If she succeeds, she shall be anointed as a Dark Justiciar.
Before you proceed, a warning will pop up. Depending on your choices, the state of the region could change andsome active quests may become unavailable. Your actions here will also be recorded for the Journals of Find Ketheric Thorm's Relic.
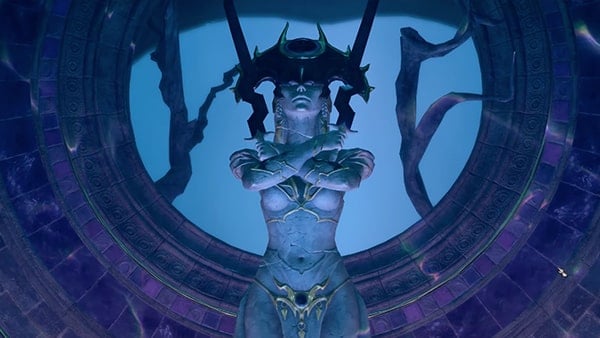
Step in through the Shadowfell Entrance to continue and a cutscene will begin. This will take you into the Shadowfell. You will also be greeted by Balthazar. You can confront him and respond from the following choices:
- I was hoping for something more substantial than 'thanks.'
- How did you get here?
- What is this place?
- I cleared the way to this place, not you. W Why shouldn't I just kill you instead of letting you interfere?
- Lead on, then.
- Attack.
If you choose option 1, he will eventually end the conversation and you can proceed through the Nightsong's Prison. Continue to descend. You should be able to use Jump to get to the lower platforms. Continue down following the Justiciar Soulhunter. Head all the way down and you will find Nightsong. When you can finally respond, you have the following options:
- Wait - the Nightson is a person?
- What are you going to do to her?
- I can't let you take her, Balthazar.
- Attack him.
Your choices here will decide the ending for the quest. The events that occur here will also update the journals for: Find Ketheric Thorm's Relic and Infiltrate Moonrise Towers. Refer to the endings to decide your next steps.
The Chosen of Shar Endings.
- Allow Shadowheart to become Dark Justiciar. You will need to have obtained the Spear of Night for this to be possible and you will need to defeat Balthazar.
- Shadowheart spares Nightsong. This will require your to attack Balthazar. This will lead Nightson to head for Moonrise Towers to kill Ketheric Thorm.
- Spare Balthazar and allow him to take Nightsong to Ketheric Thorm. He will explain that Aylin is an aasimar, bound to a soul cage of his creation to lend her power to General Thorm.
View the steps below on how to achieve each ending.
Defeat Balthazar - Ending 1 & 2
The first two endings will require you to defeat Balthazar. Face Nightsong without Balthazar by attacking him. When you face Nightsong, you will have the following options:
- Trust Shadowheart - do not interfere.
- Do as you must.
- Is this truly what you want?
- Choose your own way, Shadowheart. You cannot allow your goddess to control you.
- Please Shadowheart. Don't do this.
Choose to trust her with the first option and Shadowheart will approve. You can follow up with the next options:
- Kill her. Let's finish this ritual,
- [persuasion] Don't do it, Shadowheart. Don't kill her- you'll regret it.
- She knows something about you. Spare her, and see what she has to say.
- Say nothing.
Continue with the ritual and encourage Shadowheart with the first response. Karlach will disapprove. This will result in Ending 1. Say nothing or tell Shadowheart to spare her during this interaction to get Ending 2 (Spare Nightsong). Telling Shadowheart to spare her will gain the approval of Karlach.
Ending 1: Help Shadowheart finally become a Dark Justiciar.
Allow Shadowheart to kill Nightsong with the Spear of Night and she will become a Dark Justiciar. Your next objective as part of the Daughter of Darkness will be to Defeat Ketheric Thorm.
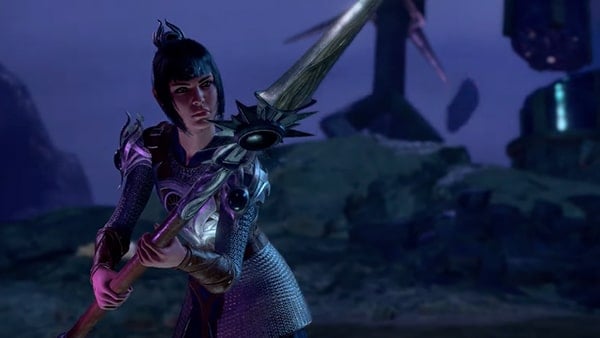
Shadowheart wielded the Spear of Night and killed Nightsong. Greatly pleased, Shar rewarded Shadowheart, and gave her a new mission to pursue.
Ending 2: Spare Nightsong
If you say nothing or tell her to Spare Nightsong during the dialogue, Shadowheart will decide herself to ultimately spare Nightsong leading to Ending 3. Shadowheart will ready her spear, but she will start to hesitate, and then throw away the spear. She'll then say Lady Shar will disown her. Shadowheart will then touch Nightsong to release her from her prison. Nightsong will then receive all her powers and armour back. She says Shadowheart has great power, but she will also need a powerful weapon. She then asks if she is ready. Nightsong will be headed toward the Moonlight Towers to go after Ketheric Thorm.
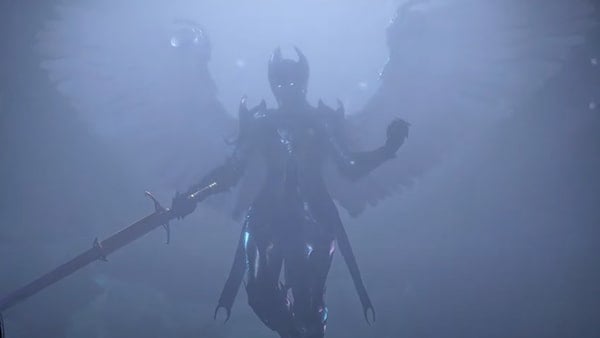
We convinced Shadowheart to turn her back on Shar's wishes, and instead free Nightsong. Rather than become a Dark Justiciar, Shadowheart will instead likely face dire consequences for her actions.
Freeing the Nightsong will grant you Selune's blessing and a Moonlight Glaive. As you travel through the portal, Shadowheart goes out for a moment. She tells you that she heard Lady Shar's voice after she defied her. She has been abandoned by her goddess and allies. Powerless, she will now seek answers from Dame Aylin. Afterward, you now get the option to respond to Shadowheart as you please if you want to progress your romance with her.
The Chosen of Shar Ending 3: Surrender Nightsong to Balthazar
If you decide to go see Nightsong without attacking Balthazar, you have the following dialogue options:
- If she's the reason Ketheric is invulnerable, you're not taking her. Leave, or you're a dead man.
- Go on, then. Take the Nightsong to Ketheric. Get it over with.
- Attack him.
If you choose option two and ask him to take the Nightsong to Ketheric, Wyll and Karlach will disapprove. Allow the next scene to play out and she will be released. This will inspire Shadowheart (Acolyte: Cerimonia Compedum) and complete the quest.
- We decided Nightsong's fate for ourselves, ignoring Shadowheart's wishes. This is bound to anger her greatly.
If you choose this ending, Shadowheart will tell you off for denying her a chance to make a choice and she will no longer want to travel with you.
- Wait - I'm sorry. We can fix this.
- I did what's best for us. Trust me.
- Go on then. Leave.
Even if you tell her you can fix it, she will continue to leave the party.
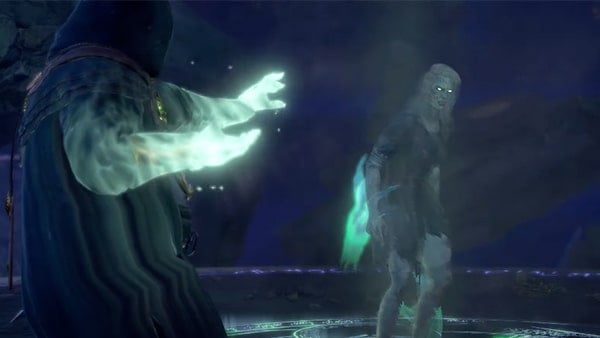
We surrendered Nightsong to Balthazar, who took her away to Moonrise Towers. Enraged, Shadowheart turned on us.
Defeat Ketheric Thorm.
If you proceeded with the first Ending and Shadowheart killed the Nightsong, your next objective will be to defeat Ketheric Thorm yourself.
- Shadowheart has slain the Nightsong, and has risen as the last Dark Justiciar conferred by the Gauntlet of Shar. Her goddess commanded her to carry out a purge of disloyal elements amongst her worshippers, starting with the traitor, Ketheric Thorm.
The battle will take place in Moonrise Towers. Engage in combat and defeat him to continue.
Leave the Shadowfell
If you chose ending two, and Shadowheart spared the Nightsong, Nightsong will go after Ketheric Thorm. You need to leave Shadowfell to continue.
- Shadowheart spared the Nightsong, in spite of Shar's demands that she be sacrificed. Shar will no doubt be furious, but the Nightsong seems to know something about Shadowheart's past. Whatever secrets she can reveal may be worth risking the wrath of a goddess.
Nightsong will head straight for Ketheric Thorm. Find them again at the Moonrise Towers to engage in combat.
Learn about Shadowheart's past from Dame Aylin.
- Shar has punished Shadowheart by stripping her of all favours and exiling her from her church. Now all Sharrans will view Shadowheart as a pariah and an enemy. All she can do now is seek out the counsel of Nightsong - or Dame Aylin, as she is known - and see what answers she can provide.
Dame Aylin is also known as Nightsong. You can speak to her after your battle against Ketheric Thorm at Moonrise Towers. You will have a chance to invite her to the Campsite and converse with her further there. When you interact with her, your options will be the following:
Dame Alyline: You have defeated Ketheric Thorm, yet you who were content to leave Dame Aylin in his thrall until it served you best. How do you account for it?
- I apologize. It was wrong of me to leave you in Ketheric's clutches.
- It was strategy - not personal.
- I'd do it again, if the whim struck me
Say it was not personal and if you have Minthara with you, she will approve. However, Dame Aylin will state she will not forget her actions, but will continue to consider you an ally. She will further introduce herself and state that she will join your camp.
- See you there.
- I don't think so. Our journey together ends here.
- No need to wait. I freed you so I could kill Ketheric, but I have no interest in an alliance.
Here, you can choose whether you want to proceed with her as an ally. If you agree, you will see her at Camp.

Campsite
Speak to her again and she will ask her mother for forgiveness for you.
- I am grateful for your understanding.
- Where's the silver light, the moon-magic?
- I'd have taken gold over a prayer.
- Your mother is wrong, I'd send you to Ketheric again, if given the chance.
Eventually, you can ask her to tell Shadowheart about her history to further the Daughter of Darkness journals. You can also ask her to permanently join your camp. She will eventually open up about Shadowheart and your journal will be updated.
Act 3
Journey to Baldur's Gate.
- Dame Aylin revealed the truth to Shadowheart. She was not saved by Sharrans as a child, but abducted and indoctrinated by them. Furthermore, her parents still live in Sharran captivity, and are bound to their daughter by a curse - the source of the pain that emanates from Shadowheart's wound. Shadowheart must make for Baldur's Gate in order to rescue her parents and free herself from Shar's influence.
- We have defeated Ketheric Thorm, just as Shadowheart was commanded to do by her goddess. Now she must continue to purge the Church of Shar of those deemed to be disloyal or failures. Shadowheart's old cloister in Baldur's Gate is to be her next target.
Follow the Main Quests storyline until you reach Act 3 to continue Shadowheart's Companion Quest. Your journal will be updated when you reach Baldur's Gate. You will then be tasked to look for a Sharran Lookout one you reach Wyrm's Crossing. You will also reach this location as part of the natural Main Quest progression.
Find a Sharran Lookout.
- We have arrived in Wyrm's Crossing. Shadowheart believes that Sharran lookouts will be present in the vicinity, awaiting her return. She must find one such lookout in order to learn where the Sharran cloister is hidden. She expects to find such a lookout hiding amongst the desperate new arrivals flooding into Wyrm's Crossing.

To find a Sharran Lookout, head to Rivington. When you first arrive at Rivington, look for Shar's follower called Ferg Drogher (X:45; Y:-102). He will be just southeast of Arfur's Mansion standing by a stall. Speak to him so Shadowheart can learn that her parents are kept prisoners at House of Grief.
If Shadowheart turned away from Shar, he will mention he has lost a bet seeing Shadowheart there.
- Our hearts bleed for you. Get to the point.
- You're a Sharran, aren't you? From Shadowheart's cloister.
- Remain Silent.
He will proceed to express his disgust for Shadowheart upon learning about her loyalty.
- Use your shared connection. Urge Shadowheart to lie
- Reach out to her psionically. She should plead contrition, for now.
- She has turned her back on your wretched goddess.
- Let Shadowheart handle it.
If you let Shadowheart handle it, she will mention her parents and urge him to reveal their location. Ferg will continue to say that he will report her, but will give you a heading: House of Grief in the Lower City.
Journey to the House of Grief.
- We have found a Sharran lookout called Ferg Drogher. He revealed that the cloister is hidden in a place called the House of Grief, in the Lower City of Baldur's Gate.
The House of Grief is located northwestern corner of the Lower City (X:-246; Y:-9). You may need to progress through a few quests in the area to access the Lower City. Players will get a chance to visit this location once you activate Get Orin's Netherstone and Investigate the Murders.
Find a way into the Cloister.
Enter the House of Grief through the double doors. Inside the house, your will be greeted by Mirie. Your interactions here will also update: Investigate the House of Grief. Head further in and your journals will continue to update for both quests.
- Journal Update: We arrived at the House of Grief, where the Sharran cloister is said to be hidden. Shadowheart was greeted by an attendant, Mirie, who told her she was expected. We must continue farther inside until we reach the innermost depths of the Sharran presence in the city. Only there can Shadowheart carry out her goddess' will.
Head in through the next set of double doors and there will be an Expost Secret Stairway. Interact with it to head down. This will take you to the Cloister of Sombre Embrace. As you explore, Shadowheart will begin to voice out some things she remembered. When you are done exploring Head through the next set of doors and take the stairs. if you interact with other NPCs, they will continue to say that Mother Superior is expecting Shadowheart. Head through the large circle Stone Door. Make your way to the center of the room to trigger a cutscene with Mother Superior, Viconia DeVir. (Viconia DeVir is a companion of BG1 and BG2. If you bring Jaheira and Minsc with you, there will be additional interactions.)
Confront Viconia.
- We met the Mother Superior of the Sharran cloister, who turned out to be Viconia DeVir. She challenged Shadowheart to descend farther into the cloister for a final confrontation.
During this interaction, you need to choose between Shadowheart or Sharran followers. Defending Shadowheart leads to a fight with Viconia and Sharran disciples. Surrender Shadowheart and Lady Shar's faithful will join you in Gather Your Allies quest.
![]()
Your dialogue will be the following:
- She's all yours
- Never.
Your choice here will affect your progress updates for this quest and Surrender Shadowheart to Viconia. If you surrender Shadowheart here, your quest will conclude and your final journal update will be the following:
- We betrayed Shadowheart to Viconia in exchange for an alliance with the Sharrans in the fight against the Absolute.
Defeat Viconia and her followers.
- We attempted to sway as many Shar worshippers as possible to Shadowheart's cause, but now we must get rid of Viconia and her most die-hard zealots.
If you side with Shadowheart, you will need to undergo a battle against the Viconia and the other Sharrans in the room. This battle will also complete: Investigate the House of Grief. After the fight, you will be given another option to allow Shadowheart to interrogate her.
- Make it quick.
- No, Shadowheart. We've won. you don't need anything from her.
- Let's kill her.
Allow her to make it quick and she will ask about her parents. She will tell Shadowheart that they are through the door in the Chamber of Loss. As you converse with her, you will be given additional chances to end the conversation and kill her. If you don't choose to kill her she will be spared. If you kill or loot Viconia, you get Viconia's Walking Fortress, Viconia's Priestess Robe and Handmaiden's Mace.
A Familiar Face Subquest
Before you proceed. look for Nocturne. There is a priestess named Nocturne who used to be Shadowheart's friend, you can trade with her even after you fight Viconia. Her interaction will be recorded for one of Shadowheart's other subquests: A Familiar Face.
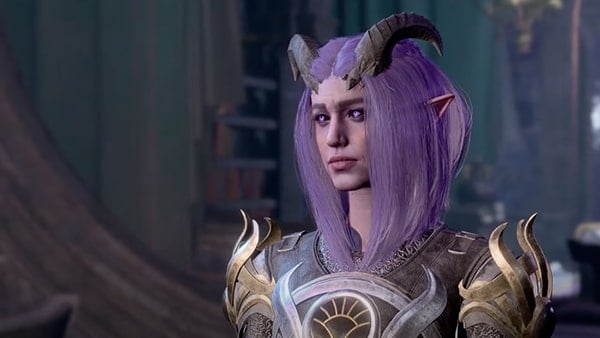
Enter the Chamber of Loss.
- We must gain entry to the Chamber of Loss, where Shadowheart's parents are being held captive.
- Shadowheart's final test awaits in the Chamber of Loss. If she succeeds, she will become the new head of the Church of Shar.
Viconia said her parents are through the next doors, in the Chamber of Loss. After the fight, you can pick up the silver key and take the Back Diamond in front of the altar to unlock the gate to the inner sanctum. You can use Thieve's Tools to get through the Threshold of Loss to enter the Chamber of Loss.
Help Shadowheart with Shar's final test.
If Shadowheart continues to align with Shar, this is also the final trial and the objective will appear as: Help Shadowheart with Shar's final test. If you rejected Shar previously, follow the next objective in the walkthrough: Help Shadowheart Save her Parents.
- We found two prisoners inside the Chamber of Loss. They must have something to do with Shar's final test for Shadowheart.
If you continue, Shar will command Shadowheart to sacrifice the prisoners, revealed to be her parents.
- The two prisoners were revealed to be Shadowheart's parents. Shar commanded her to sacrifice them as a final show of loyalty. Shadowheart obeyed, killing both her mother and father, then assuming the mantle of Shar's Chosen and leader of her church. Shar's faithful will be Shadowheart's to command in the fight against the Absolute.
Help Shadowheart save her parents.
This is the final objective.
- Help Shadowheart save her parents: Shadowheart's parents are close. We must do what we can to help her save them from Shar's clutches.
- Help Shadowheart with Shar's final test: We found two prisoners inside the Chamber of Loss. They must have something to do with Shar's final test for Shadowheart.
Enter the Chamber of Loss. Here, you will find Shadowheart's parents, Arnell Hallowleaf and Emmeline Hallowleaf. Approach them and a cutscene will begin.
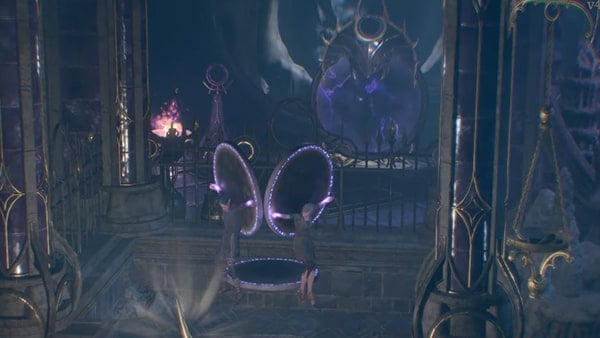
After a cutscene of Shadowheart's parents, Shar, the goddess of Night and Darkness give her two choices. Let her parents die, or let them live but continue to suffer from the wound. You will be given the following dialogue:
- You have to choose, Shadowheart. Free your parents, or rid yourself of Shar's curse.
- She wants to kill your parents. Her idea of a parting gift.
- Talk to your mother and father. See what they wish.
Shadowheart will be torn. Her parents will ask that she let them go so she will be free.
- You should end their suffering, and yours.
- Do not lose your parents, not again. This pain can be handled.
- This is your choice, Shadowheart. you don't need me to tell you what is right.
- Remain silent.
If you choose the second option, she will bring up the curse again.
- [RELIGION] You have great fatiha and great resolve - all of you. Trust in that. You need not say goodbye here.
- [PERSUASION] You can endure it together, as a family. This is what you've been looking for - don't deny yourself.
Make your decision and complete the Daughter of Darkness.
If you decide to end her parents' suffering the final journal will be the following:
- Shadowheart decided to end her parents' suffering by putting them to rest and entrusting their spirits to the care of Selûne. Now they are at peace, and she is free of Shar's influence. Free of her past, she can choose her own path at last.
If you decide to allow Shadowheart to life with the curse and save her parents, you can find both her parents back at the Campsite and the quest will conclude with the following journal:
- Shadowheart managed to rescue her parents from Shar's clutches. Years of imprisonment and torture have left them weakened however. For now, they will recuperate at our camp, and Shadowheart can reconnect with the family that was stolen from her.
Before you exit the area, There's a Mirror of Lost in the inner sanctum. Offer a piece of memory to Mirror of Loss has a small chance of increasing your CHA by 1. If you passed the Religion check and pray to Shar, then offer another piece of Memory (or the Knowledge you learned from Thay Necromancy book), you have a small chance of increasing an attribute of your choice by 2. You can pass a deception check (20) to offer a fake memory of 20. Any attributes you lose can be cured by the Remove Curse spell.
Daughter of Darkness all Outcomes & Endings
If Shadowheart died:
- Shadowheart died. We won't be able to bring her back.
If Shadowheart left the party or turned against you:
- Shadowheart left our party and won't return.
- Shadowheart turned against us.
If you surrendered Shadowheart to Viconia in the House of Grief.
- We betrayed Shadowheart to Viconia in exchange for an alliance with the Sharrans in the fight against the Absolute.
If Shadowheart continues to be a follower of Shar and continues to sacrifice her parents:
- The two prisoners were revealed to be Shadowheart's parents. Shar commanded her to sacrifice them as a final show of loyalty. Shadowheart obeyed, killing both her mother and father, then assuming the mantle of Shar's Chosen and leader of her church. Shar's faithful will be Shadowheart's to command in the fight against the Absolute.
If Shadowheart continues to be a follower of Shar and could not sacrifice her parents:
- The two prisoners were revealed to be Shadowheart's mother and father. Shar commanded her to sacrifice them as a final show of loyalty, but Shadowheart chose to turn her back on her goddess and instead free her parents. Reunited with her family, but with her faith and purpose shattered, Shadowheart's future looks uncertain. She will have a lot to process, as her newfound family recuperates at our camp.
If Shadowheart previously tuned away from Shar and chose to kill parents to free them:
- Shadowheart decided to end her parents' suffering by putting them to rest and entrusting their spirits to the care of Selûne. Now they are at peace, and she is free of Shar's influence. Free of her past, she can choose her own path at last.
If Shadowheart previously tuned away from Shar and chose to save her parents and live with the curse:
- Shadowheart managed to rescue her parents from Shar's clutches. Years of imprisonment and torture have left them weakened however. For now, they will recuperate at our camp, and Shadowheart can reconnect with the family that was stolen from her.
If you intervene during her final test for Shar:
- Shadowheart was thwarted in her chance to pass Shar's final test. Enraged, she turned on us.
- Shadowheart's parents were killed. Deciding she could no longer trust us, Shadowheart left for good.
All other outcomes:
- We decided to focus on other matters at the expense of helping Shadowheart save her parents. What will happen next for her is unclear.
- We decided to focus on other matters at the expense of helping Shadowheart save her parents. What will happen next for her is unclear.
- We deprived Shadowheart of the opportunity to prove herself in the Gauntlet of Shar. Enraged, she parted ways from us for good.
How to unlock Daughter of Darkness
- Auto acquired when you recruited Shadowheart.
Daughter of Darkness Rewards
- Spear of Night (obtained as an objective)
- Selune's blessing (Free Nightsong)
- Moonlight Glaive (Free Nightsong)
- Viconia's Walking Fortress (Loot Viconia)
- Viconia's Priestess Robe (Loot Viconia)
- Handmaiden's Mace (Loot Viconia)
Daughter of Darkness Notes & Tips
- Notes & tips go here
 Anonymous
for the mirror: take gale. make the check. and leave. talk to the mirror with you character and choose your stat. +24 CHA is possible with the +2 hat

 Anonymous
 Anonymous
probably a bug but if you have a ranger you can repeatedly snipe Viconia from the stairs before you initiate conversation with her until she's dead and the rest of her followers won't attack you after. They'll even mock her after she's dead saying things like maybe she wasn't worthy or that they were misled

 Anonymous
"If you killed Viconia, you get Viconia's Walking Fortress, Viconia's Priestess Robe and Handmaiden's Mace." You don't have to kill her. If you right click on her before speaking you can loot her before you choose to kill or spare her life.


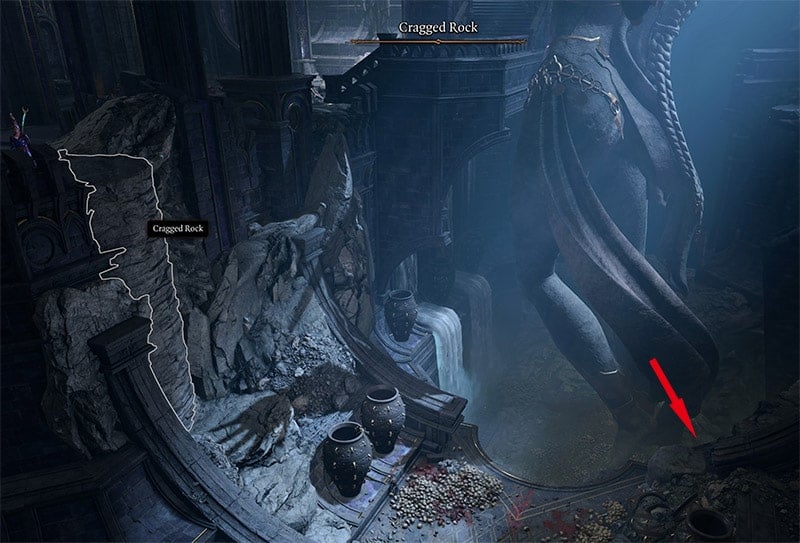
If you have completed the Thayan Necromancy Tome questline you can sacrifice the "Forbidden Knowledge" to the mirror.
0
+10
-1