Grymforge |
|
|---|---|
 |
|
| ACT | 1 |
| Suggested Level | 5 |
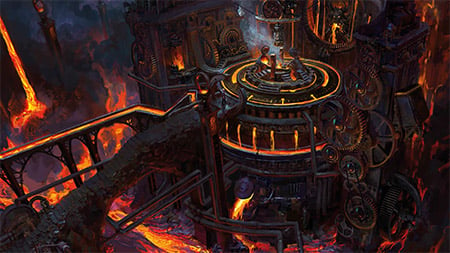
Grymforge is a location in Baldur's Gate 3 (BG3). On this page, you can find the information about the map, quests, enemies, notable items and other useful tips about Grymforge. Grymforge was previously named Duergar Camp, and can only be accessed by performing a number of specific steps.
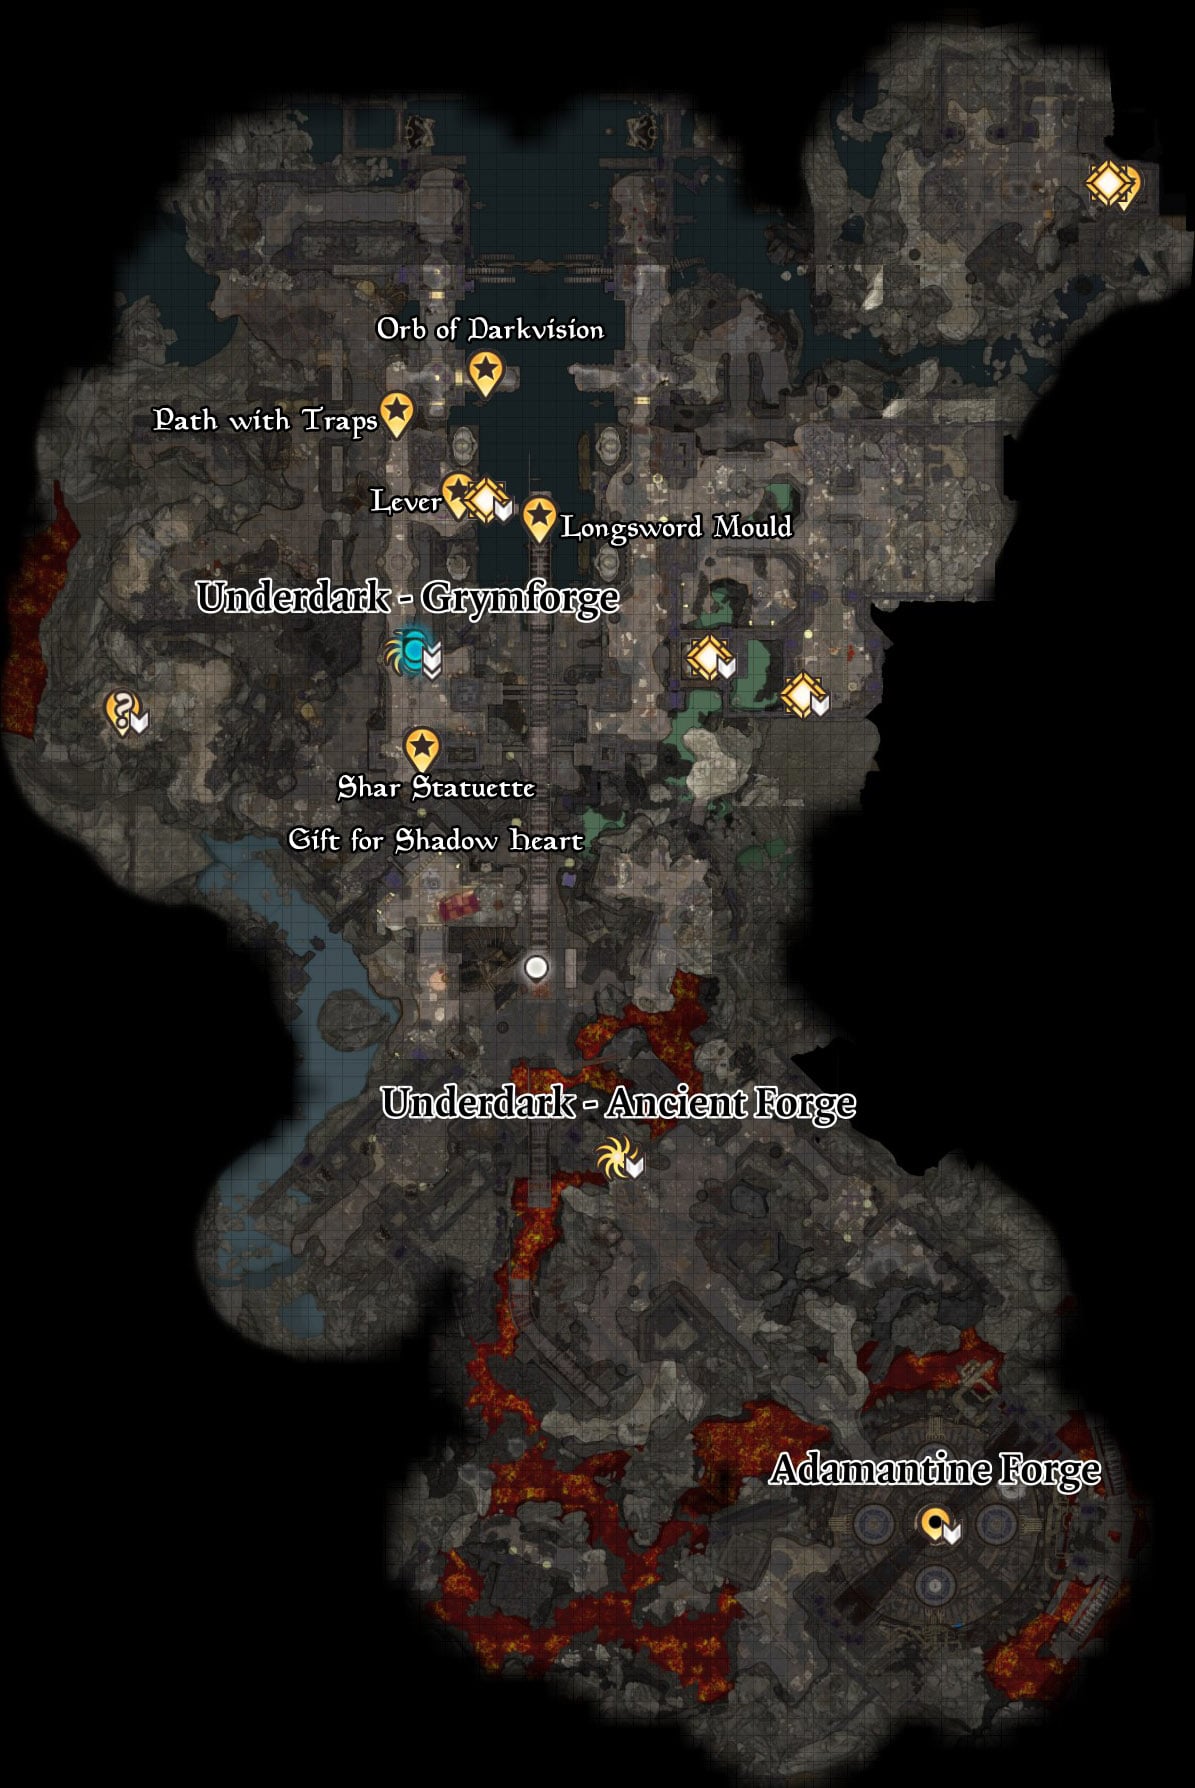
Grymforge Map
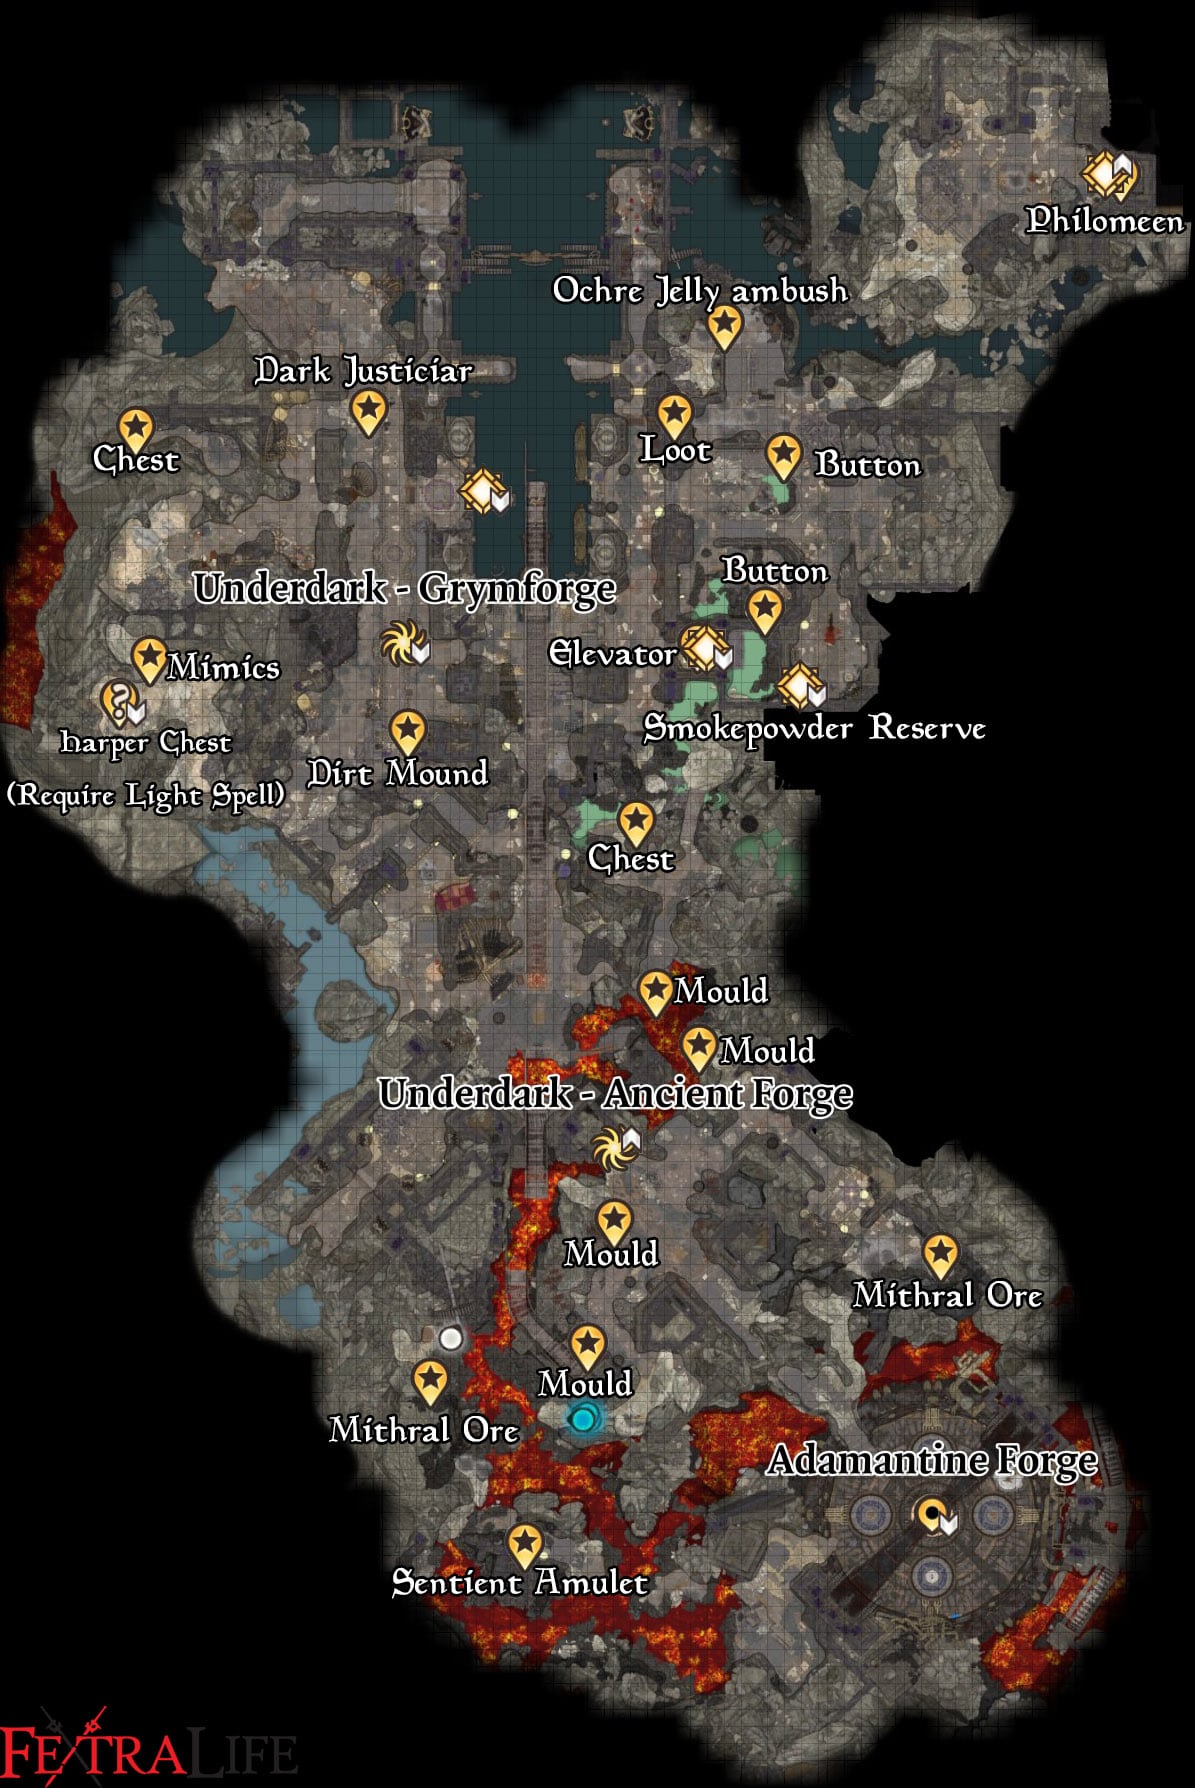
Grymforge Upper Map:
Grymforge Sub-Areas in Baldur's Gate 3
Baldur's Gate 3 Grymforge Notable NPCs and Merchants
Items in Baldur's Gate 3 Grymforge
- You can find a small Shar statuette at Grymforge (X:-648, Y:362 ) and gift it to Shadowheart.
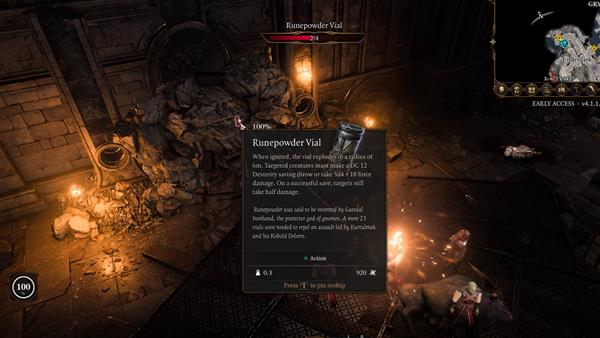
- Runepowder Vial.
- Broken Moonlantern
- Nere's Head
Baldur's Gate 3 Grymforge Quests
Grymforge Walkthrough
Reaching Grymforge
While exploring the Underdark, you can find a charmed drow with some hooked horrors, and some petrified drows near a Spetator. After defeat them you can learn that they are searching for the Gryforge, and a potential weakness of Grymforge's guardian. (you can also get a legendary weapon MOURNING FROST by combining three icy items.)
To reach this location, you can take the boats in the Decrepit Village, located at x: 19 Y: -208. You will be received by a Duergar, who asks you what happened to Gekh.
On your way to Grymforge, a Duergar boat will stop you, you can fool them by showing them the mark of Absolute, or pass persuasion checks. Otherwise, you need to fight them (you can push Duergars out of the boat to kill them, but be careful, they can do the same to you). Here are the available dialogue options:
- I seek the sergeant - I believe she's keen to get these boots back
- [Intimidation] In the name of the absolute - you will let me pass.
- [Deception] I'm afraid Gekh is dead - he fell fighting the myconids
- Reach out to the duerger's parasite
- [Athletics] Push the duerger into the water
Once you reach Grymforge by boat, you will meet, you will find two Duergar there (Fight them or persuade them you are with the absolute. No need to pay them 100 gold). Just near you, you can find the Battered Note and a Grubby Map. Take the stairs up to discover the Underdark - Grymforge Waypoint (X: -465 Y:385).
Once up, you can take the left stairs down to meet a Duergar torturer who has been killing a Drows. There's a small boat nearby, in which you can sail to the previous Underdark area. At X:-627 Y: 367. You can find a group of spiders “arguing”.
You can discover this by passing a Wisdom check (10) or Speak with Animals spell, if you pass the check, you learn that the larger spider is in conflict with the other three spiders. You can tell them to knock it off, don't do anything to see how it plays out, or attack the nearest spider. (If you pass the Religion/Persuasion checks, you can tell them to abandon the Duergar, so they won't join Duergar's fight.). They don't drop any loot if you decide to kill them and they give the same amount of exp as peacful options.
Past the Duergar torturer, you will find two Duergar, throwing Deep Gnome corpses to the water (X: -610 y: 409). Ask for loot on the corpses, and If you pass a Perception check (10), you can find something valuable on the bodies (includes a very rare ring Fetish of Callarduran Smoothhands). The Duergar will ask you to lend them a hand or leave.
The Dig Site First Visit
You can find Sergeant Thrinn in a room with a Scrying Eye (X: -627, Y:319 ), she is working a group of Deep Gnomes to free True Soul Nere, who is trapped under rubble. This will give you Free True Soul Nere. If you have the Boots of Speed from Thulla you can give them to her, to receive a reward. Here are the dialogue options for Sergeant Thrinn:
- Give her the gnome's boots.
- How did Nere get trapped?
- Clearing that rubble will be no easy feat. Any ideas?
- I'll take care of it
- I've got some explosive powder. That should do the trick.
- Sound like you have a tough job ahead of you. Better hurry.
Choose the third option to hear from the sergeant that she doesn't have any idea. Then, pick the second option to learn that the place is very old and previous occupants set up a trap. She explains that if you can rescue Nere, you'll earn Absolute's favor. An extra dialogue option appears: "What are you hoping to find at this dig?" The sergeant mentions it leads to an entrance of an ancient temple. This updates the "The Chosen of Shar" quest. Next, go for the first option, and she'll express gratitude and offer a bounty reward, finishing the "Find the Missing Boots" quest. Finally, choose the second option to conclude the conversation with the sergeant.
Just in front of the sergeant, Gnomes are trying to clear the rubble. You can talk to one named Barcus Wroot, who your character mentions needing rescue again. Barcus Wroot doubts your capability, and you can respond with these options:
- That sounds like a challenge. I'll handle your captors and get you out of here.
- I could, but I probably won't.
- Leave.
If you choose the first option, Barcus Wroot gets excited, updating the "Save the Grymforge Gnomes" quest. Next, you can listen to a conversation among the Gnomes. Options are:
- [Perception] Listen to the conversation.
- Clear your throat.
- Leave.
Opt for the first choice to learn that one Gnome wants to use smoke powder to clear the rubble, while another opposes it to protect someone named Phil. You can intervene with:
- I'm a friend - Thulla sent me.
- What's happening here?
- [Intimidation] About the smoke powder - give me details now.
- [Persuasion] Listen - I can help. Act frightened, or you'll draw attention.
- Leave.
If you select the first option, Laridda will be surprised. Lunkbug mentions their trapped friends in the cave and how he can help them escape, but Larrida tries to stop him due to her fear of Nere. You can reply with:
- That sounds like quite the drama. I can't wait to watch.
- Leave the True Soul to me. Now tell me what you know.
- A terrible situation. I'm sure you'll pay handsomely if I help.
Choose the first option, and Larrida will try to stop Lunkbug from talking. He insists and reveals information about someone named Philomeen who set the blasts. Lunkbug marks her hideout on your map. This updates quests "Save the Grymforge Gnomes" and "Find Explosives". Respond with:
- I'll do what I can.
- I have explosive powder. I can use it to free them.
- My hands are full. Ask someone else.
- Excellent. I can add Philomeen's head to my collection.
If you select the first option, Larrida will beg you not to harm Philomeen. Now, head North East until you reach 2 Duerger at (X:-626 Y:351) and listen to their conversation. They'll approach you, suspecting you're a True Soul, and demand repayment. Respond with:
- Why would you think I'm a True Soul?
- You want my gold? Fight me for it.
- I don't support those True Soul cultists.
- I want Nere out - you have a lead.
- Leave.
Select the third option, and Birthvar will threaten you for lying. Respond with:
- A stench? Absurd. I'm no True Soul.
- Go ahead, try. I'm ready for a fight.
- I overheard you. I want Nere out - you have a lead.
- Leave.
If you choose the first option, Brithvar remains suspicious. Respond with:
- Fine - I'm a True Soul. What's your plan?
- [Deception] You're mistaken. I'd never bow to the Absolute.
- [Deception] I was a True Soul, but the cult lied - seeking revenge now.
- [Detect Thoughts] Cast Detect Thoughts.
- Leave.
Opt for the second choice. With enough Charisma, convince him you're not a True Soul. He'll ask if you want to earn gold and join their plan against Nere once freed. Respond with:
- I'm in.
- Count me out.
- Good plan. Sergeant Thrinn should know.
- [Persuasion] Sounds good. I expect half the spoils.
If you choose the fourth option, he agrees, mentioning an orb-eye that needs knifing as it's used for cult surveillance. This triggers the "Blind the Absolute" quest. Attack the orb-eye to complete the quest.
Find Explosives
Behind two Duergar throwing gnomes into the water, there is a big double iron door. You have to unlock it in order to enter.
If you pass a Perception check at the end of the room, you will find a secret door, activate the button on its side, to open it and take the set of stairs up.
Before the stairs, you will find a chest on your right, you can loot an Arrow of Ice among other things, and head to your left. At the end of the hallway, there is another Perception check. By passing it, you will notice the loose stone.
Head up and you will have take another Perception check, if you pass it, you will notice that an ambush is incoming.
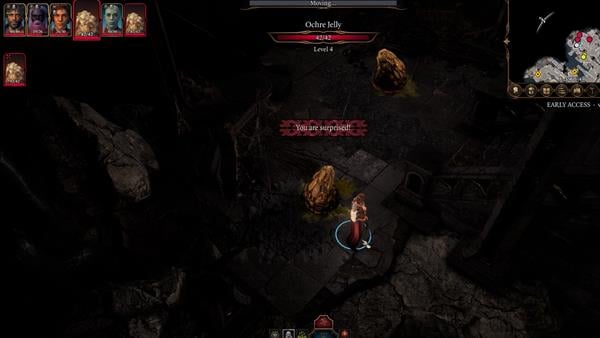
Three Ochre Jelly will come from the ceiling. Once defeated, keep going up through the stairs. Upstairs you can find a Trap Disarm Toolkit, an Arrow of Ice and an Arrow of Lightning.
Turn left and continue along the catwalk, when you reach the end, jump through the gap to the otherside, you will reach a locked intricate door. Unlock it (DC: 10) to reach the Contemplation Chamber. You can loot a Hand-drawn Map from a nearby backpack, to update the Quest Find the Explosives.
Move deeper into the chamber to find Philomeen (X: -539, Y: 468), standing near a smokepowder barrel. She threatens you as you get near because she doesn't trust you. There are a few options to attempt to convince her otherwise.
- Philomeen, I presume. What's going on here?
- Calm down. Let's talk this through.
- You wouldn't dare - you don't have the courage.
- Holy hells. Have you gone mad?
When you choose the first option, Philomeen remains doubtful. You must then select a dialogue option to persuade her:
- [Persuasion] Laridda sent me. The gnomes need your help.
- [Intimidation] If I was a true soul, you'd be dead. Stand down before you hurt yourself.
- [Persuasion] Smile sincerely and hold out your hand.
- [Persuasion] Are you sure about this? Once you're dead, that's it. It's over.
- [Detect Thoughts] Use Detect Thoughts.
- I don't care. Go ahead, blow us up.
Opt for the first choice, and Philomeen will still be cautious, but she won't trigger the explosion. She'll show vulnerability, and you can reply with:
- Calm down. Beldron's trapped in a cave-in, and I need the smokepowder.
- I'm not taking you anywhere. You're free to go.
- I'd rather have the pleasure of killing you with my own hands.
Choose the first option, and Philomeen will be shocked that you want to use runepowder for something else. She mentions that any true Ironhand would sacrifice their life for the powder. You can respond with:
- [History] Ironhand and Runepowder - Where have you heard these terms before?
- What use is a single vial?
- Deal.
- No deal.
If you choose the first option, the narrator explains the background of Runepowder. Your reply can be:
- Runepowder? I thought that was a children's story.
- What use is a single vial?
- Deal.
- No deal.
Select the first option, and Philomeen confirms that it's real, but she can only spare one vial for you. An additional dialogue option appears, "I'll need to know a little more about your so-called 'mission' before I let you go." Philomeen explains they're freedom fighters who need the powder to make a point. She mentions that one vial should be enough. Now decide if you accept the deal:
- Deal.
- No deal.
When you choose the first option, your quest "Find Explosives" updates in your journal. Philomeen gives you the vial and asks you to inform Larrida of her fate. You can reply with:
- You'd abandon your beloved? That's quite heartless.
- Where will you go now?
- I'll pass on the word - right after I kill you.
- [DRAGONBORN] So you'll just leave your clan behind?
- Leave.
Select the first option, and she asks you to leave. She plans to take the barrel to Baldur's Gate alone.
If you fail to convince her, she will blow up the barrel dealing massive damage and probably wiping your entire party out. But if you manage to convince her, she offers you Runepowder Vial, or you can simply attack her to attempt to take the whole barrel. If you kill her, you have to pass a Dexterity check (DC:20) when you interact with the barrel.
There's a skeleton over a stone bed that can be looted to obtain a Pitted Key. (X:-534 Y: 476). If you head all the way to the opossite direction of where Philomeen was, you can find a Chasm Creeper (X: -566 Y: 468)
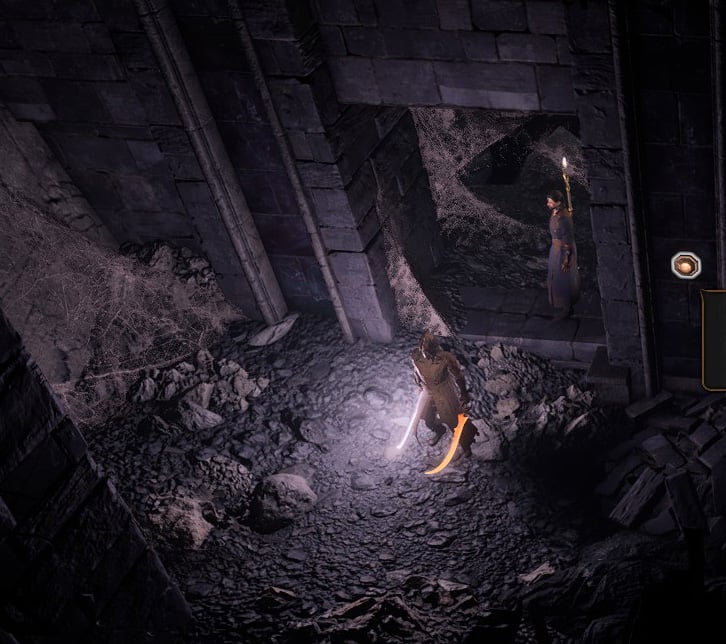
There are other explosives at (X: -587 Y: 390), behind a secret door.
Once you have the needed explosives. Return all the way back to the two Duergar throwing gnomes corpses into the water.
Past them, you can find a heavy chest that contains an Arrow of Darkness and an Arrow of Lightning. (X: -611 Y: 425).
Return to where the Duergar Torturer is, but this time take the first stairs you find, to your left. You will find two Duergar annoying a Deep Gnome (X -607: Y: 380), and asking for a drink refill. He tells you he won't be working to free True Soul Nere, and if you want to do that, you can do it yourself.
If you interact with the iron fence past the Duergar, the male will tell you that you won't last a second if you don't have one of Nere's Moonlanterns. Apparently, you will choke almost immediately if you attempt to go without one of Nere's Moonlanterns.
However, you can decide to don't pay attention to the warning and head through the door. The Mysterious Artefact will save you if you attempt to do so withouth the Moonlantern.
If you decide to help the Deep Gnome, you can actually fight both these Duergar. You will earn a Wyvern Poison from the Gnome once you kill them.
Return to the waypoint, and take the stairs up, on your right there is a chest that contains some gold and an Arrow of Ice. (X: -650 Y: 367). Past it, turn right on the next corner, and meet two duergar interacting with what seems to be some crumbled statue. (X: -660 Y: 366).
Return to the Dig Site
Once you have the Runepowder Vial you can return to the Dig Site to free Nere (Alternatively, you can use black powder bag from the windmill and hands grenades) and this will complete the quest "Find Explosives". Throw the vial at the rubble and blow it off with a spell. Nere will come out and threaten the slaves. You can intervene, which leads to him doubting you and your reasons for doing that. Or you can encourage him to kill them. If you do, he will taunt Sergeant Thrinn, and proceed to kill her if you don't support her. Here are the Dialogue options:
- Stop! No more innocent will die today, Nere.
- Finish the Slaves, True Soul. For the Absolute.
- Say Nothing.
Select option 1 and Nere will be surprised that you care for the weak. You can respond with the following:
- I came on the myconid sovereign's behalf. It demands revenge.
- I act on orders of the Absolute.
- Of course I care. I can't let these gnomes suffer.
- This isn't about them. I just can't stand your face.
Select option 1 and Nere will order Sergeant Thrinn to kill you. You can respond with the following:
- You wouldn't dare. I'm faithful to the Absolute.
- That's your cue, Brithvar. It's time you got paid.
- You so much as touch me, and I'll tear you from limb to limb
- Say nothing.
- [DRAGONBORN] This battle will make a good story. Come, then.
Select the 5th option and Nere will simply say that you chose a battle that you cannot win. Afterward, Brithvar will intervene and will ask nere to pay up while threatening him with a dagger. He will reveal that he has a deal with you and continue to threaten Nere. Nere will ask you to put your faith in him and earn his trust again by striking down Brithvar. you can choose one of the following:
- Side with Nere.
- Side with Brithvar and the rebels.
- Do nothing.
Choose option 2 and the quest "Save the Grymforge Gnomes" will update in your quest journal. This will also start a battle.
If you talked to Brithvar previously, and made a deal with him, he will interrupt your conversation demanding to get paid. After this, True Soul Nere will ask you if you side with him or against him.
Siding with Nere
- By siding with Nere, you will have to fight Brithvar and five Duergar. Nere and the Sergeant are your allies during this fight if she wasn't killed in the previous interaction.
- After the fight, Nere will attempt to kill the Deep Gnomes, you can do nothing, attack him, or attempt to enter his head to prevent him from killing the Gnomes (DC: 15). If you fail you will have to fight him.
- After killing him you get 120 XP.
Siding with Brithvar
- If you side with Brithvar, it is the other way around. You have to fight True Soul Nere, Sergeant Thrinn, and her Duergar crew. After the fight, you can persuade him to free gnomes (DC: 10)
- Quest Deliver Nere's Head will update
- Quest Travel through the underdark will update
- Quest Save the Grymforge gnomes will update
Afterwards, head to the corpse of Nere and remove his head. Before you do, loot his corpse first to obtain the Broken Moonlantern which will trigger a cutscene where you can inspect it. Choose from the following:
- [Investigation] Inspect the lantern in more detail
- [ARCANA] Examine the dust within the lantern
- Leave.
Select the 2nd option and you will come to the conclusion that the dust is pixie dust. Start looting again and you'll also find Disintegrating Night Walkers and Mind Flayer Parasite Specimen. Afterward, speak with Lunkbug and you'll see him excited to see that Beldron is okay. Beldron will notice you and will thank you for your actions. He will also question why you helped them despite being a True Soul. You can respond with:
- It would seem not.
- Are you always so suspicious of those who save you?
- The cult thinks it owns me. I beg to differ.
- You say you're grateful - but my coinpurse is still light,
- Thank Tulla - she's the one who set me on your trail.
Select the 5th option and Beldron will start to talk about Wulbren. You'll find out that Wulbren has been taken and the gnomes will wonder what he has gotten himself into now. This will also update a new quest called"Rescue Wulbren". You can respond with:
- Would this have anything to do with Runepowder?
- Spare the secrecy. Philomeen already escaped with the Runepowder
- Before you ask, no - I'm not going to stage a rescue
- Whatever the cult wants, I want the opposite. We need to free your friend.
Select the first one and Beldron will be surprised of your knowledge. You'll learn that Wulbren discovered the runepowder formula first and the Absolutists have taken him to interrogate his knowledge of it. If they manage to get the formula knowledge, Sword Coast may fall. you can reply with:
- Then we'll just have to free him first.
- How long do you think he can hold out?
- I don't plan on being anywhere nearby when they do.
- If it's truly that powerful, then we can't let the cult have it.
Select the 2nd option and Beldron will mention that there is not enough time. They have other arrangements to deal with. Barcus Wroot will violently react and accuse Beldron of being cruel for considering leaving Wulbren behind. you can reply with:
- Enough. Bickering won't save your friend.
- You're just abandoning your leader? That's cold.
- Run away then. I have my own business to be about
- If my path takes me to Moonrise, I'll see about freeing Wulbren myself.
Select the first option and this will mark the completion of the quest "Save the Grymforge Gnomes". Head back to the corpse of Nere and retrieve his head.
Stonemason Kith
Stonemason Kith, asks for your help. He asks you what you see in the rock and rubble surrounding the place. There are three possibilities to choose from, each one tied to a different check that need to be passed. They are History (DC: 10), Investigation (DC: 10) and Perception DC: 10).
After passing all three checks, you are ready to report your observati(ons. After Stonemason Kith's speech, he gives you Infernal Iron. You can also trade with him after the conversation. Keep going past the the Stonemason and along a corridor you will find a few skeletons on the floor, clad in the same dark armour. You can attempt a History check (DC: 10) to learn more about them. If you manage to do so, you learn that they once were Shar worshippers.
Turn left and up the stairs, where there's a lone skeleton, turn left again, and walk through the catwalk to find a locked chest behind two archery targets. (X: -666 Y: 401). Keep advancing and take the path to the right, you will find an abandoned camp. You can go down slowly through the rift, and can loot Chasm Creeper. (X: -694 y: 410).
Get back again to the place where you can find the skeletons. Turn left, to find three Duergar lashing at some beasts to clear some rubble. If you pass Charisma Check (DC: 15), he will tell you that there is Adamantine behind the rubble.
You can decide to fight the Duergar and his two henchmen, alongside the two Deep Rothe, if you want. To clear the rubble behind them you will need to use an explosive. To do so throw the Runepowder Vial at it and then ignite it with a Fire Spell.
Head past the archway, you will immediately find a Metallic Mask (X:-672, Y: 459). Take the stairs up and continue among the bunch of skeletons, turn right, and keep heading up the ladders.
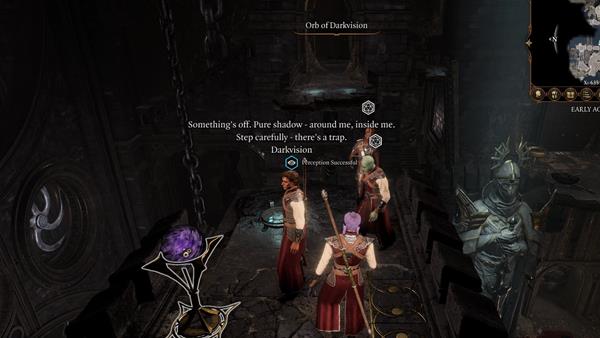
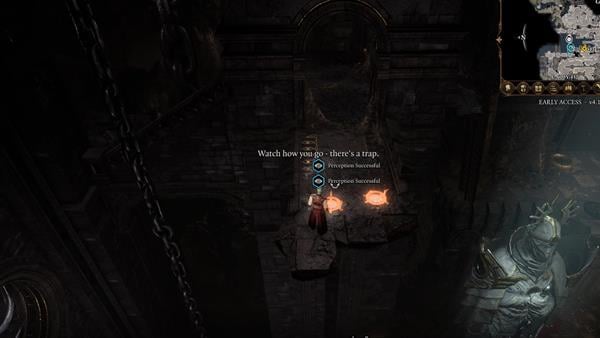
You will eventually find a broken bridge on your left, beware there's a trap near the edge, you have to pass a Perception check to find it. There's also an Orb of Darkvision on the bridge. You can use Misty Step to reach the other side, note that the other edge is also filled with traps.
To the right there's a long corridor filled with fire traps, midway through it you can take a ladder down, and interact with two levers that move a platform in the middle. There's also a chest containing gold. You can use the controls and the platform to move part of your team to the middle section of the level. You can find a Longsword Mould (X:-629, Y: 407).
Continue along the platform to find a skeleton that has a Dark Justiciar Mask (X:-625, Y:352), when you reach the end you will realize that if you don't have the means, you won't be able to reach the other side (Misty Step or improving Jump magically).
If you decided or were able to send a character to the other side, walk alongside the corridor, jumping when necessary.
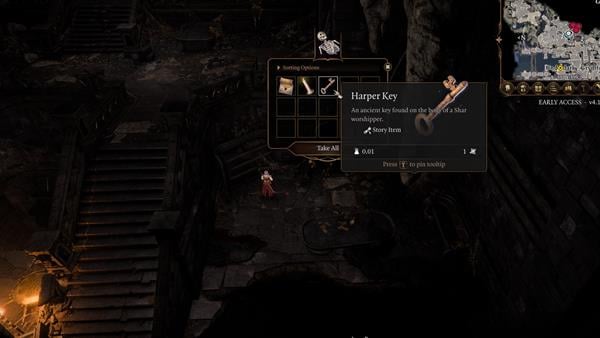
There is a big locked door, that once opened leads to a hall. Jump to the right of the stairs to reach the little room to loot a Skeleton (X: -592; Y:395). You can obtain a Harper Key from it and an Undelivered Letter. Jump back to the stairs and keep exploring.
Upstairs and to the right, you will find a large door, behind it there are Enemies, but it is locked.
On a hanging skeleton (X:-566 Y:407), you can loot a Rusted Silver Key and on another skeleton, at the top of the stairs, besides the rubble, you can loot a Shield Mould (X: -559; Y: 410).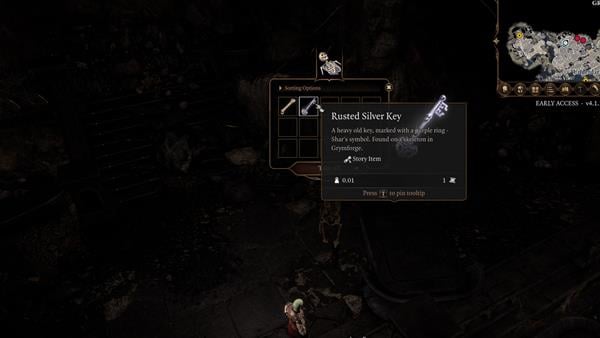
With the Rusted Silver Key, you can open the locked door. A Merregon Legionnaire and 3 Hellsboar will be waiting for you at the other side.
Once you defeat them, you can loot the chest at the side of the room to find Firestoker. (X: -579 Y: 382). On the altar at the back of the room, you can find a Rusted Key and an Old Letter among other stuff. But there's nothing else to do here.
There is another skeleton here that contains a Dark Justiciar Mail (X:-604 Y: 347). You can find a Map of Moonhaven near the skeleton. (X: -611 Y: 344).
Continuing alongside the stairs, there is another skeleton at the end. You can loot a Scimitar Mould from it. (X: -607, Y: 322). Next to it, there are two levers. Use it to take the other part of the party forward. Use the right lever to elevate or lower the platform and the left one to move the platform back and forth. Once you are in position, make the platform party jump.
Move forward to the edge, and jump towards the rocks on your left. You will find the Mace Mould (x: -613, Y: 285). You can also find a Waypoint near the wall. (X: -609, Y: 284). There is again, a few skeletons lying on the ground.
Head all the way left, and past the small staircase, turn left and jump towards the edge to find Splint Mould (X: -597, Y: 309). Now turn back and head to the right, you will be attacked by 4 Animated Armour.
Once they are defeated, you can calmly loot the Scale Mail Mould at (X:-621, Y: 260), and climb the ropes behind it to loot a skeleton to obtain a Dark Justiciar Helm (X: -622, Y: 258). Head back down, and take the small path that goes downward, behind the previous location of the Animated Armours.
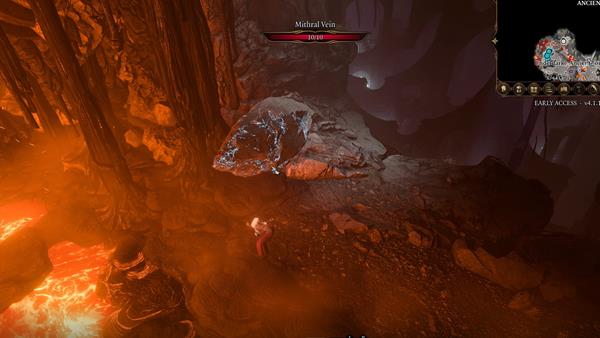
Climb down, preferably with a single character, to avoid the molten lava. Jump through the gap. You will enter the Ancient Temple area. There is a giant Mithral Vein that can be found at the edge, get near and attack it. You will obtain Mithral Ore when you manage to destroy it. There is not much else to do, here, turn back to the entrance of the forge.
Alternate Way to enter the Forge
You can find a defaced statue of Shar at the Dig site that can be interacted with (X: -614, Y: 314). From there, if you have it available, you can use Misty Step over the edge, to reach the other side. This leads directly to the Forge. You can find a Waypoint close by to relocate your group.
Heading to the Adamantine Forge
This time, go down the middle set of stairs. Halfway there, you can Jump to the left, to a rocky platform. Many Magma Mephit will attack you. At the end of the fight, there's another giant Mithral Vein.
Return to the main stairs, and head down to enter the Forge itself. Jump to it, before touching anything, head to the circle located directly on your right, and jump to the other edge. Continue along the path to reach a lava-filled room.
Lava erupts and deals damage to your characters if they are near the edge. There is also a powerful Lava Elemental patrolling the zone.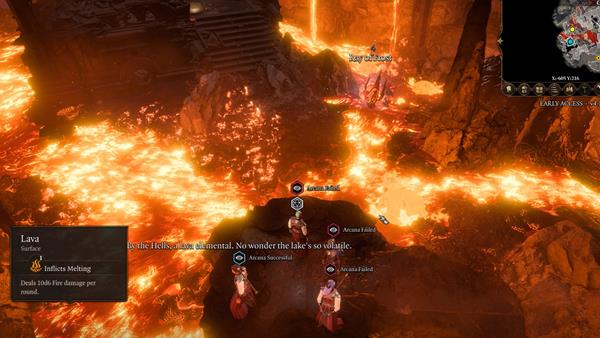
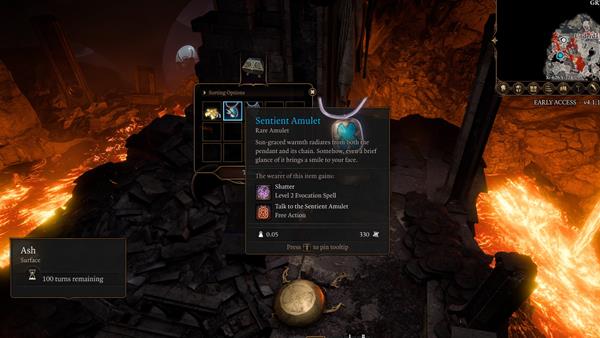
On the "island" ahead, you can find a chest (X: -626, Y: 224), that contains a Sentient Amulet. When you grab the Amulet, it will talk to you. You will gain the quest Help the Cursed Monk. Return to the Forge
The Adamantine Forge can be used to create the following equipment:
- Adamantine Scale Mail
- Adamantine Mace
- Adamantine Shield
- Adamantine Scimitar
- Adamantine Splint Armour
- Adamantine Longsword
How to use the Forge to create Items
The Adamantine Forge can move between two different levels: High Level and Low Level. You'll need to move the Forge into the Lower level to be able to pour magma. To do so, place a mold into the chamber and a Mithral Ore into the Crucible. Interact with the Forge Lever and the anvil will hit, taking the Forge to the lower level. Once you are in the lower level follow these steps to forge an item
- Interact with the Crucible and insert a Mithral Ore. This will allow you to use the Forge Lever to lower the Forge and start crafting. The Mithral Ore will be consumed when the process is complete.
- Interact with the Mould Chamber, and insert one of the Moulds you have: Scimitar Mould, Shield Mould, Mace Mould, Splint Mould, Longsword Mould, and Scale Mail Mould. The mold won't be consumed when you craft the item. You can extract the mold by interacting with the lever located next to the Mould Chamber, this will allow you to insert a new mold.
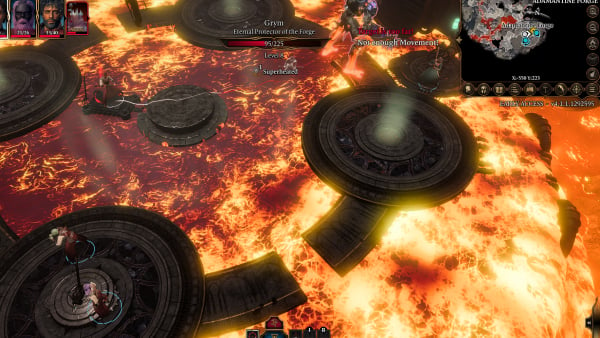
- Pull the Lava Valve. This will cause the Forge to be surrounded by lava. Evade at all costs being caught up by the lava. Try to position your characters on the big surrounding circles to avoid suffering an immense amount of damage. Also notice that the first time you do this, you will summon a Golem called Grym
- Pull the Forge Lever, this will make a giant column to impact the mould chamber, forging the item you have put into the Mould Chamber in the process.
- Once the item is created, use the button located next to the Forge Lever, this will take the Forge back to the High-Level area.
- You can repeat the process from step 1 by inserting a new Mithral Ore. Remember to swap the Mould if you want to create a different Item.
Fighting Grym
As mentioned before, Grym, a massive Level 8 golem will emerge once you pull the lava valve. It has a whopping 300 HP and can deal enormous amounts of damage. Your party earns 875 XP once you manage to defeat it, and you can loot the Grymskull Helm from its body.
You have to take into account a few things when fighting it:
- When you activate the lava and Grym appears, your terrain will be limited to the Circles surrounding the "anvil" part of the forge. Avoid passing through the lava at all costs!
- When Grym is standing on lava, it gains a status effect called Superheated. Only when this status effect is active you can damage the golem. This will cause Grym to become vulnerable to Bludgeoning damage, lower his Armour Class and make him resistant to Thunder, Cold, and Force. He will remain immune to all other elements.
- Grym will attempt to attack the character that attacks it, (and hits it), first at each turn and set it as "Prime Target". This can be exploited to use the anvil to deal massive damage to Grym
- Position a character near the Forge Lever and, another one near the anvil's strike position. Lure Grym thereby attacking it with that character and, once the golem is in position, pull the Forge Lever. The anvil strikes down, dealing 100 points of damage approx and leaving the golem Prone.
- If the Lava is removed, interact with the Lava Valve to refill the chamber and force Grym to walk over it.
- Grym won't take damage from the Anvil if he doesn't have the Superheated status effect.
Return to where you found Stonemason Kith, and take the path behind him. Turn right to the cliff, and descend the cragged rock. If you succeed at a History check, you will notice that it is a Harper rune there. Keep heading towards the cliff and you will find three chests. One of them, the one on the right is labeled as a Toy Chest (X: -699 Y: 375). Grab it, and a Harper Stash appears in between the three chests. If you interact with it. You will be ambushed by three Mimics.
Once defeated, you will find Gold inside the Harper Chest, as well as a Scroll of Evidence. Head back and climb the Cragged rock up again. This time take the stairs up next to you, and past a camp, you will reach a large wide area.
Visiting the Dig Site after the Forge
If you took too long doing other tasks, like for example finding and working at the Forge. Eventually, the path will be cleared.
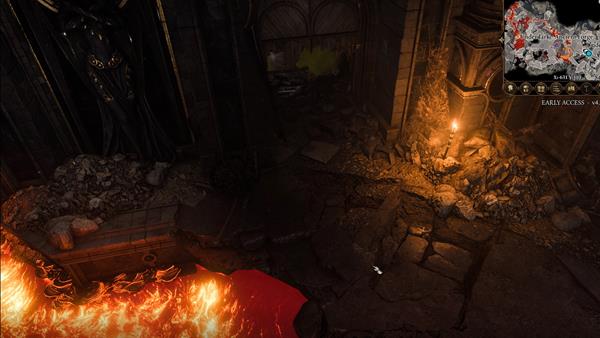
If this was the case and you took too long, you will find Nere dead, alongside two deep gnomes slaves. Among some important items, such as the Disintegrating Night Walkers and the Sword of Screams, you can find a Broken Moonlantern.
When you grab the latern, you realize it has no flicker. you can investigate the Lantern to learn that the lamp doesn't use fuel, but magic.
Behind the poison fumes, you can find a big locked door. When you manage to open, you will reach the Ancient Temple, but you won't be able to reach any other place from there.
Return to the elevator (X:-600 Y:382), and interact with it. This leads to the end of patch #6
 Anonymous
Beware that once you enter the elevator, you will begin Act 2. So visit all places by going back with the boat instead if you need.

 Anonymous
On PS5 If you side with Briskmar against Neren and then try to use Intimidation to get him to leave the gnome slaves he has dialogue that recognizes the Intimidation success but the dialogue tree just pops back up as if you didn't succeed. So then the only possibilities are to Persuade or let him keep the gnomes.

 Anonymous
If you can manage it, it's worth killing the lava elemental near the talking amulet, because there are 2x more Merregon Halberds (got one earlier from the Merregon Legionnaire; one is west of amulet, one southeast) stabbed into the skeletons on the little lava islands surrounding the plateau where the talking amulet's chest is. One skeleton draped over a table (north of the amulet plateau) has an adamantine key. Not sure what it's for (possibly the amulet chest itself?).
There is one more skeleton that I can't get to (not even with misty step), directly underneath the plateau that the amulet chest sits on. Exploding it out might be an option, but I didn't bother.
The lava elemental is HARD to kill, as his magma regeneration means he regenerates ALL of his hitpoints every single turn, so you either have to end his regen, or kill him in a single turn. He can create magma on stone (likely to enable his regen) also. Ice arrows are effective against him.
 Anonymous
I'm wondering if my game is bugged. II defeated grym, but even before that, there are no other living souls in the entire grymforge area, just Nere's body laying on the ground near the exploded door. I'm not sure where to go now, as I've got Grym's helmet and some forged items. I tried going back to the Mushroom overseer guy to see if it registers as some sort of progress, but nothing.

 Anonymous
Why my tiefling's action wheel is whirling in the underdark and the forge?
(I mean that I can act three time within the same round).
How is it?
 Anonymous
BE WARY: If you play Grymforge on Vulcan instead of DirectX 11, then the game will start crashing every few minutes if you enter any of the areas related to Shar. That means the fire-trapped long pathway, or even opening the door behind the toxic fumes behind Neer after releasing him. As long as you avoid these areas you won't have to worry about the maddening crash issue of Grymforge.

 Anonymous
3 Mimic Chest at X:-691 Y:380 Two of them contain like 20 gold and one contains (Rare) Wondrous Gloves & a +1 Hand Axe. Just incase one falls off map and you have fomo.

 Anonymous
I got to level 6 during the magma mephit fight. So that will be a sort of progress marker for me, going forward. That way you can be level 6 for the Grym fight, the Githyanki patrol fight, and all of the Mountain Overpass, making it all quite easy, and getting you well on the way to level 7 to begin the Shadowlands.

 Anonymous
There's a skeleton under the island with he sentient amulet. Is it possible to reach it? Anything good in it?

 Anonymous
".... to find Philomeen (X: -539, Y: 468), standing near a smokepowder barrel...."
With Shadowheart you have a very nice dialogue option here:
[Cleric of Shar] Do it. I could do with a show.
 Anonymous
What about those infernals we kill in it? It says "its captain" should be nearby. Couldnt find it so far, just those masks,

 Anonymous
For the debris, you should be able to use 2 smokepowder satchels instead of the special one if you want to do it that way. Satchels will land on the ground when thrown and you have to ignite it afterwards. You can probably place both at once, or do them in succession like I did. (They will return after the first blast, then run away again after the second is placed/thrown).

 Anonymous
Grym had 300 HP in my game. Not "225". Also I had no idea where this "hammer" was even from the clues, and didn't look it up, so took him on without it... it was a fun fight! Had to use stuff that had been lying around "just in case" even. That's the kind of fights I like.

 Anonymous
Deep Rothe can be persuaded to keep working if you have Animal Speak. They destroy the rubble and will then help you fight.

 Anonymous
Grym had 300HP for me in full release. Ich killed him by alternating aggro between my melees with opportunity attacks and healing them with Life Domain Shadowheart. When he had less than 100 HP I lured him under the stompy and Misty stepped out of there. (I didn't know you could pull that move multiple times)

 Anonymous
For some reason all the duergar that you do NOT kill if you fight alongside Nere, disappear after the fight. You have to move all the way to the docks, while still being in the initial combat to kill them, ie before Nere initiates dialogue. Where do they even go? They just vanish ...

 Anonymous
I am surprised at you in this thread and so many others in this string, heck this forum. There is a simple lesson here. Save, save, save and if there is any question as to if you saved after a particular scenario, save again. SAVE or don't whine. Multiple saves, multiple locations in every scene. Because, let's face it, we all make mistakes. Yes, even you! If you are goofy enough to run a whole map piece with no saves, you're pretty dumb! I admit that I have been dumb before running too big a chunk of game, especially in a game that gives you multiple choices. Guess what, I replay that chunk if I am not happy with results. Yep, I go back to an appropriate SAVE that makes the difference and load it. Basically, the problem is not in the designers and developers hands, it is in yours. And you failed if you have to go a long ways back to get the ending you wanted. You could've SAVED more frequently. They would be pulling their hair out running around changing game design, because all of you don't want to SAVE!! Sorry for my rant on idiots not saving and complaining because their story is messed up when they could have simply SAVED!

 Anonymous
When the gnomes say drop the powder, satchel, barrel, or otherwise. They mean literally. Or else they will not move, and get caught in the blast, triggering everyone in the area. Drag it out of your inventory, or go through the menu and click drop. You only need one to trigger them to back off. Additionally, if you couple it with a thrown or arrow, it will take out the blockage in one shot, or near one shot.

 Anonymous
There is a skeleton under the area with the Sentient amulet. I have not been able to get to it. Tried jumping, flying, walking threw the lava, using a mage hand and Gyth hand spell.
You can click on it to loot but obviously says unable to reach.
 Anonymous
If you go around the area with nere not interacting with the dwarves you can take your time exploring the forge before going to find Nere, I think the timer starts when you talk to the sergeant about what happened, but not sure.

 Anonymous
Welp, that's the only thing I hate about this game. How can it be THAT easy to mess this whole area up and all NPCs are just gone?? And all that just bc you had the audacity to go to your camp and rest?? Huge oversight and annoying as hell! How much XP do you lose by that(assuming you do all the quests first and then kill all the Duergar afterwards), 2 whole level or what? And a buttload of content, such sh*tty gamedesign Larian!!

 Anonymous
Devs should include a warning here about long rest or going to camp.
-If you long rest before saving Nere, he will die.
-If you completed saving Nere quest but did not complete the other Duergar side quests there, and you go to camp or long rest, the base will clear out, all NPCs and slaves will leave and you will miss those side quests.(I sided with the Duergar rebels, not sure if this is applicable to people who sided with Nere as these side quest NPCs are rebels)
So basically don't rest, do all the Duergar side quests then go save Nere. Might want to save on the spellslots and abilities for harder fights since you can't rest. After that, you can then proceed with the Forge and exploration.
 Anonymous
Spoiler warning... not sure what I did, but all the slavers and slaves vanished after I found the location of the special powder keg. I ended up killing her to take the whole keg. When I got back into the main chambers anyone I hadn't killed was gone and all the ones I did kill vanished as well. Neres dead body was in the proper location so I was able to proceed. I did the full mission during early acess. So I guess I don't mind skipping it. But the exp would had been nice.

 Anonymous
You also can sneak around Philomene while shes busy talking and snatch that barrel of hers, and then let her try to blow it up. she'll comment about it and concede

 Anonymous
you can also smash nere's wall with a maul ... i did it with a maul+1

 Anonymous
You can use the black powder bag from the windmill and hands grenades to blow up Nere's wall instead of the philomeen's runepowder vial. (So you can keep the super-nuke for playing later hehe )

 Anonymous
Just tiried it on March 10th, Druid Playthrough and when returning from Camp to Underdark Beach, the boat didnt appeared again. Boat didnt return or just bugged out since trying to do this Glitch bypassing Videosequence.

 Anonymous
 Anonymous
my 2nd time trying to get here, first time i followed instruction and got there, now i trying the same thing, but the boat is not comming back ?? think the might have change this /sad, i kill em all on the boat ex 2 of em.. what to do ?
Bzter out!
 Anonymous
When you arrive there's an agro'ed Duergar standing underwater. You can't hit him with spells, ranged or most melee weapons. This forces turn based mode forever but I found if you have a weapon with 2.5 meter reach (a few 2Hers) you can hit and kill him.

 Anonymous
I finally got to here..in the battle on the boat you have to lose... one should try to kill everyone but one makes it easier...as there will be less agro on the beach

 Anonymous
I was wrong!!! This is still in the game and not super easy to pull off 10/19/2020

 Anonymous
 Anonymous

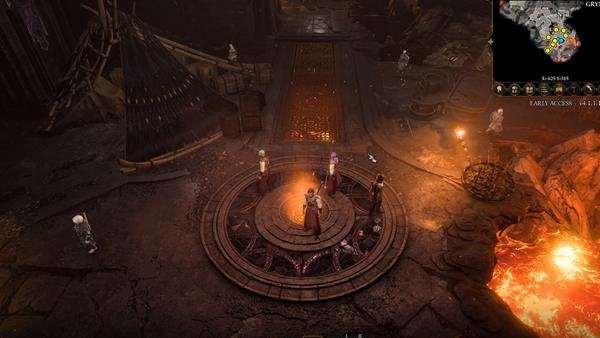
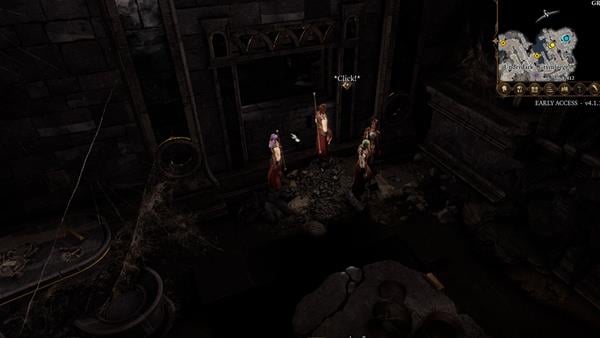

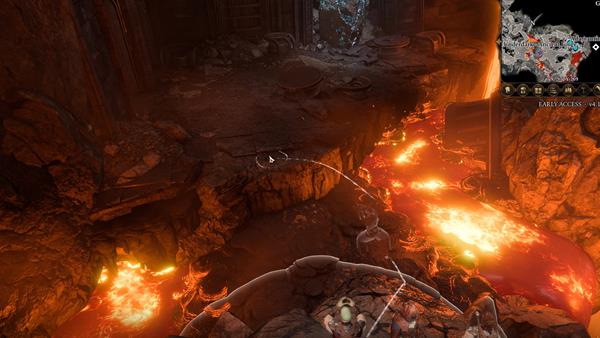

There was a bug when I used astarion to get to the ancient forge area from using the platforms above, it wouldn’t let me fast travel at all, and the fix (after many hours and having to reload) was to reload and used laezel to Misty step on the left side of Nere/rubble over the lava…so all of that and I couldn’t rest, although I found a bed you can maybe rest at where you get the explosives.
0
+10
-1